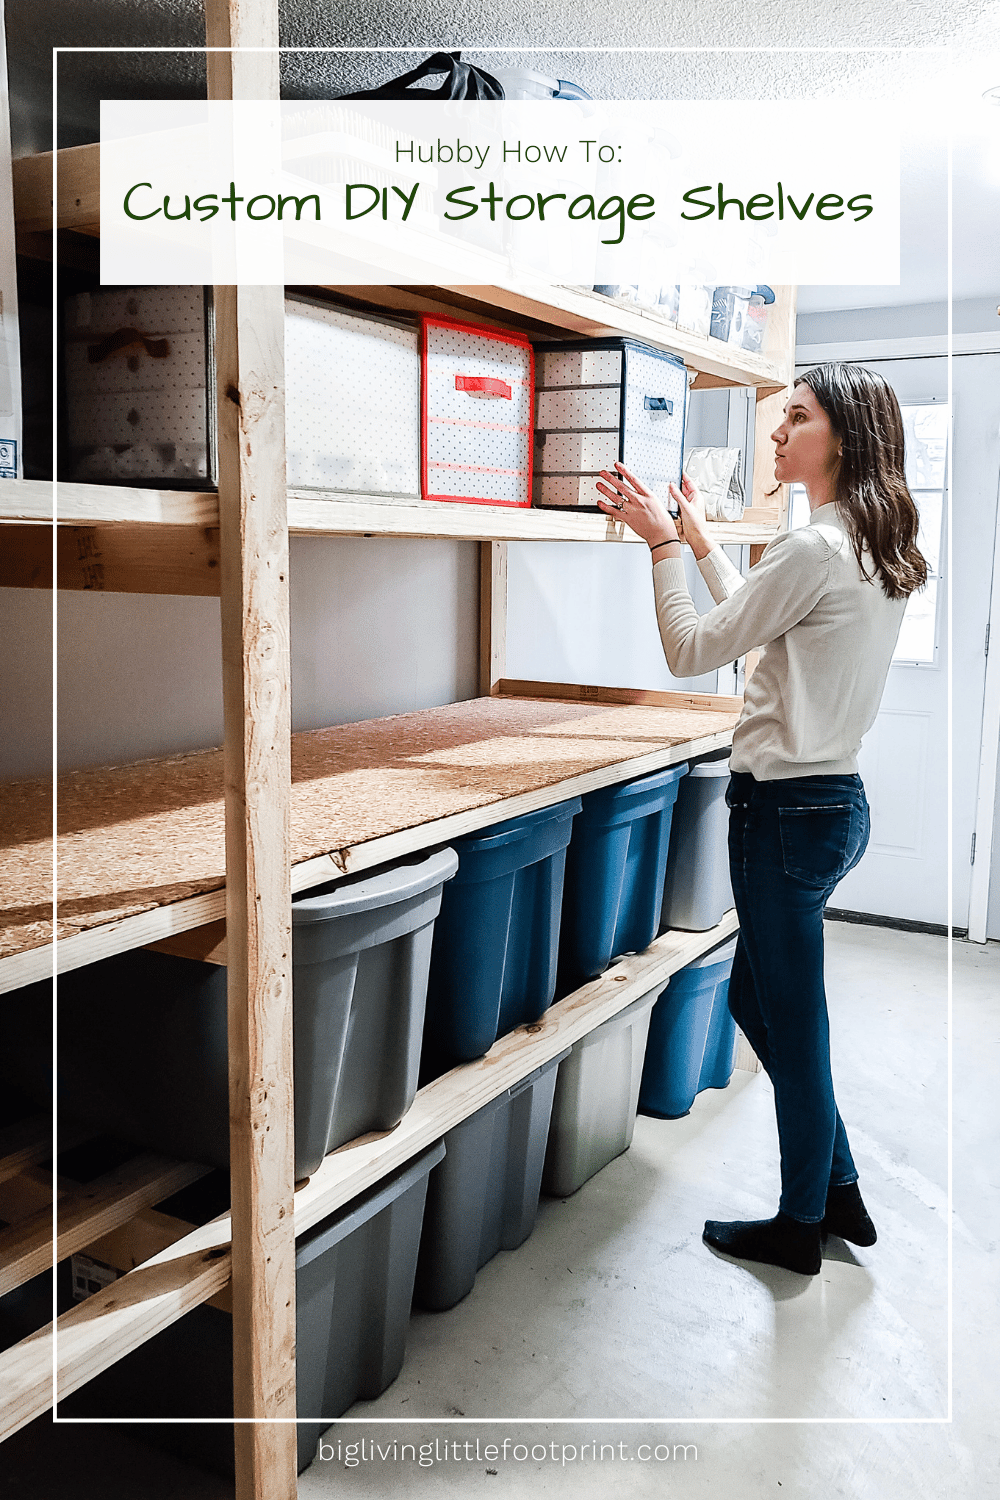
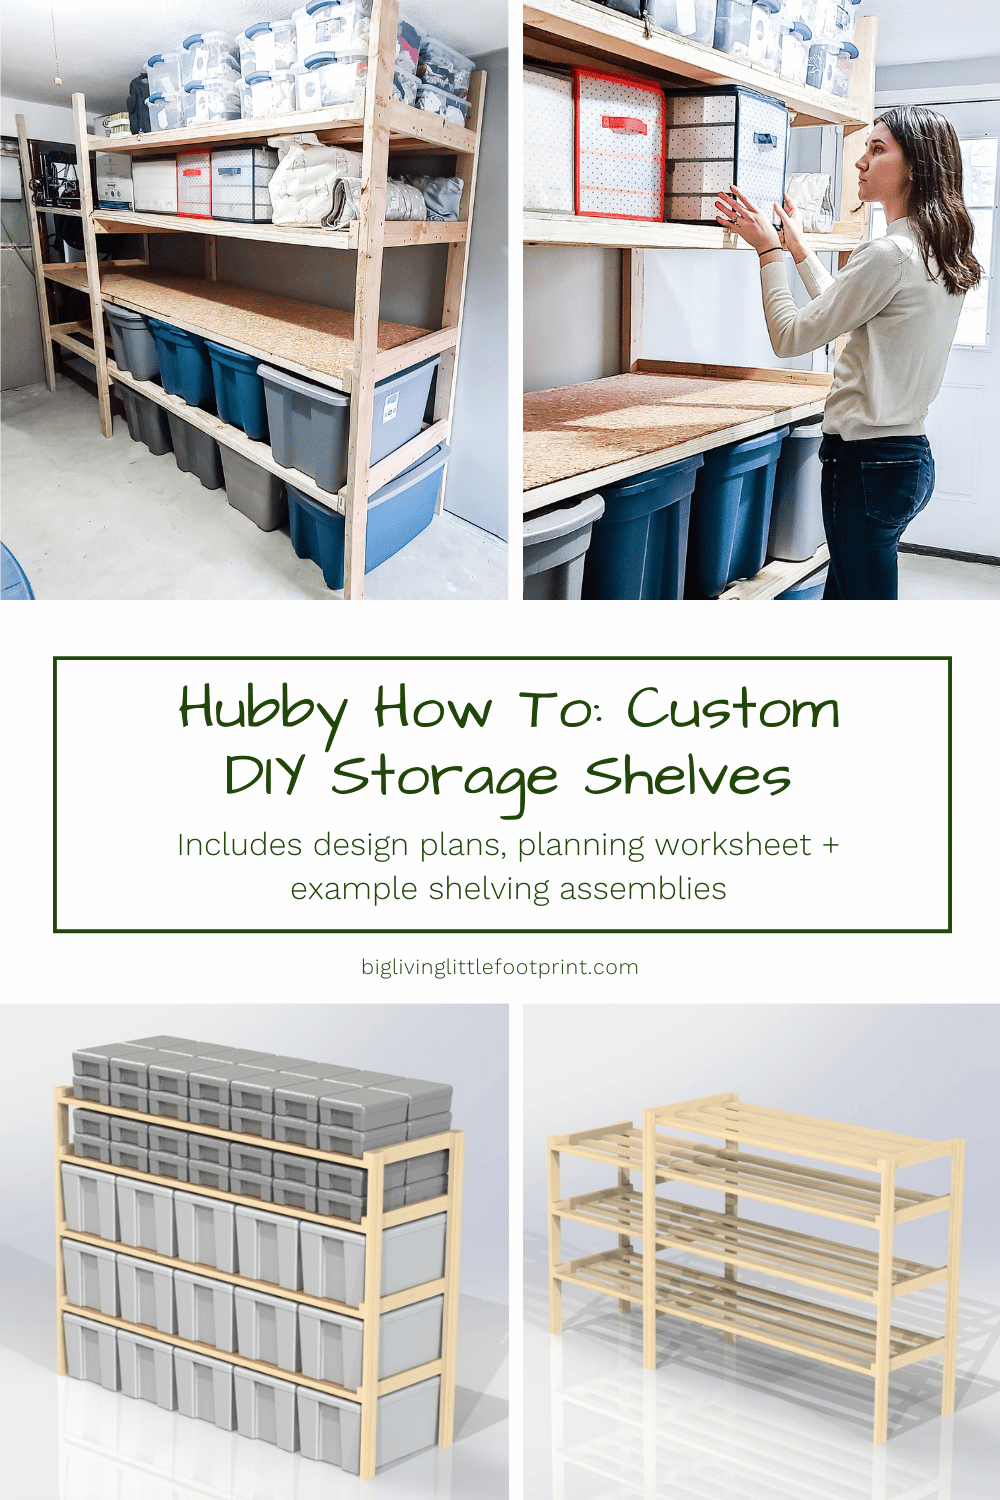
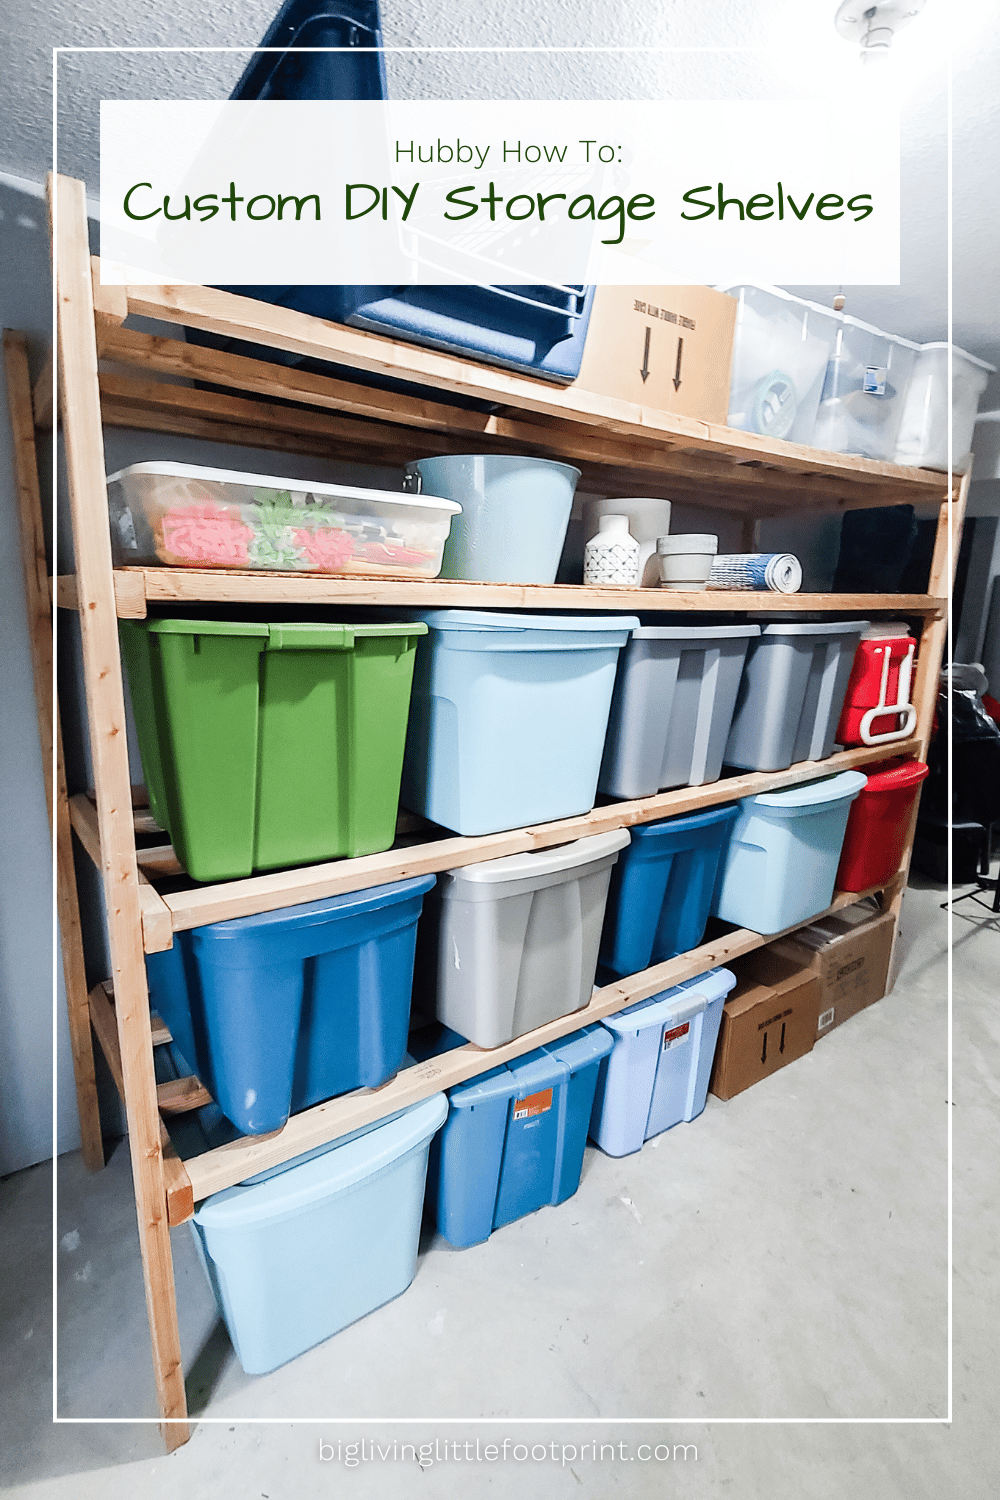
Hubby How To: Custom DIY Storage Shelves
Most of us always have some storage totes or seasonal decor stuffed away somewhere. Well, the best way to organize items like this in an efficient manner is by building some storage shelves for the totes and bins. This post will cover how to measure your space, create a custom material list, and assemble your custom DIY storage shelves using our plans.
Updated 9/26/2023
This post may contain affiliate links. Read about our privacy policy.
In this Hubby How To, we’re showing you how to make some super simple and cheap custom storage shelves. Sure you can always buy storage shelves and then assemble them, but then you are stuck with their specific length and depth and you usually end up spending considerably more by the time you’re done.
When it came time to build shelves for our storage hallway, I wanted to minimize our cost and maximize the efficiency of our space. To do this, I worked out the cheapest way to build our shelves and put together a handy worksheet and design plan set to help keep track of the cuts I needed to make. It will take a little time to prepare, but this is definitely a project that you can complete in a day. Come follow along and we’ll help guide you through it.
Tools You Will Need:
- Tape Measure
- Drill or Impact Driver
- Framing Square (Preferred)
- Miter Saw (Preferred for cutting boards to length)
- Table Saw Or Jigsaw Or A Circular Saw (For cutting plywood if you decide to line your shelves)
That’s it. This entire project really only requires something to measure wood, something to cut wood and something to screw it back together! If you have those three things then let’s dive in!
Materials You Will Need:
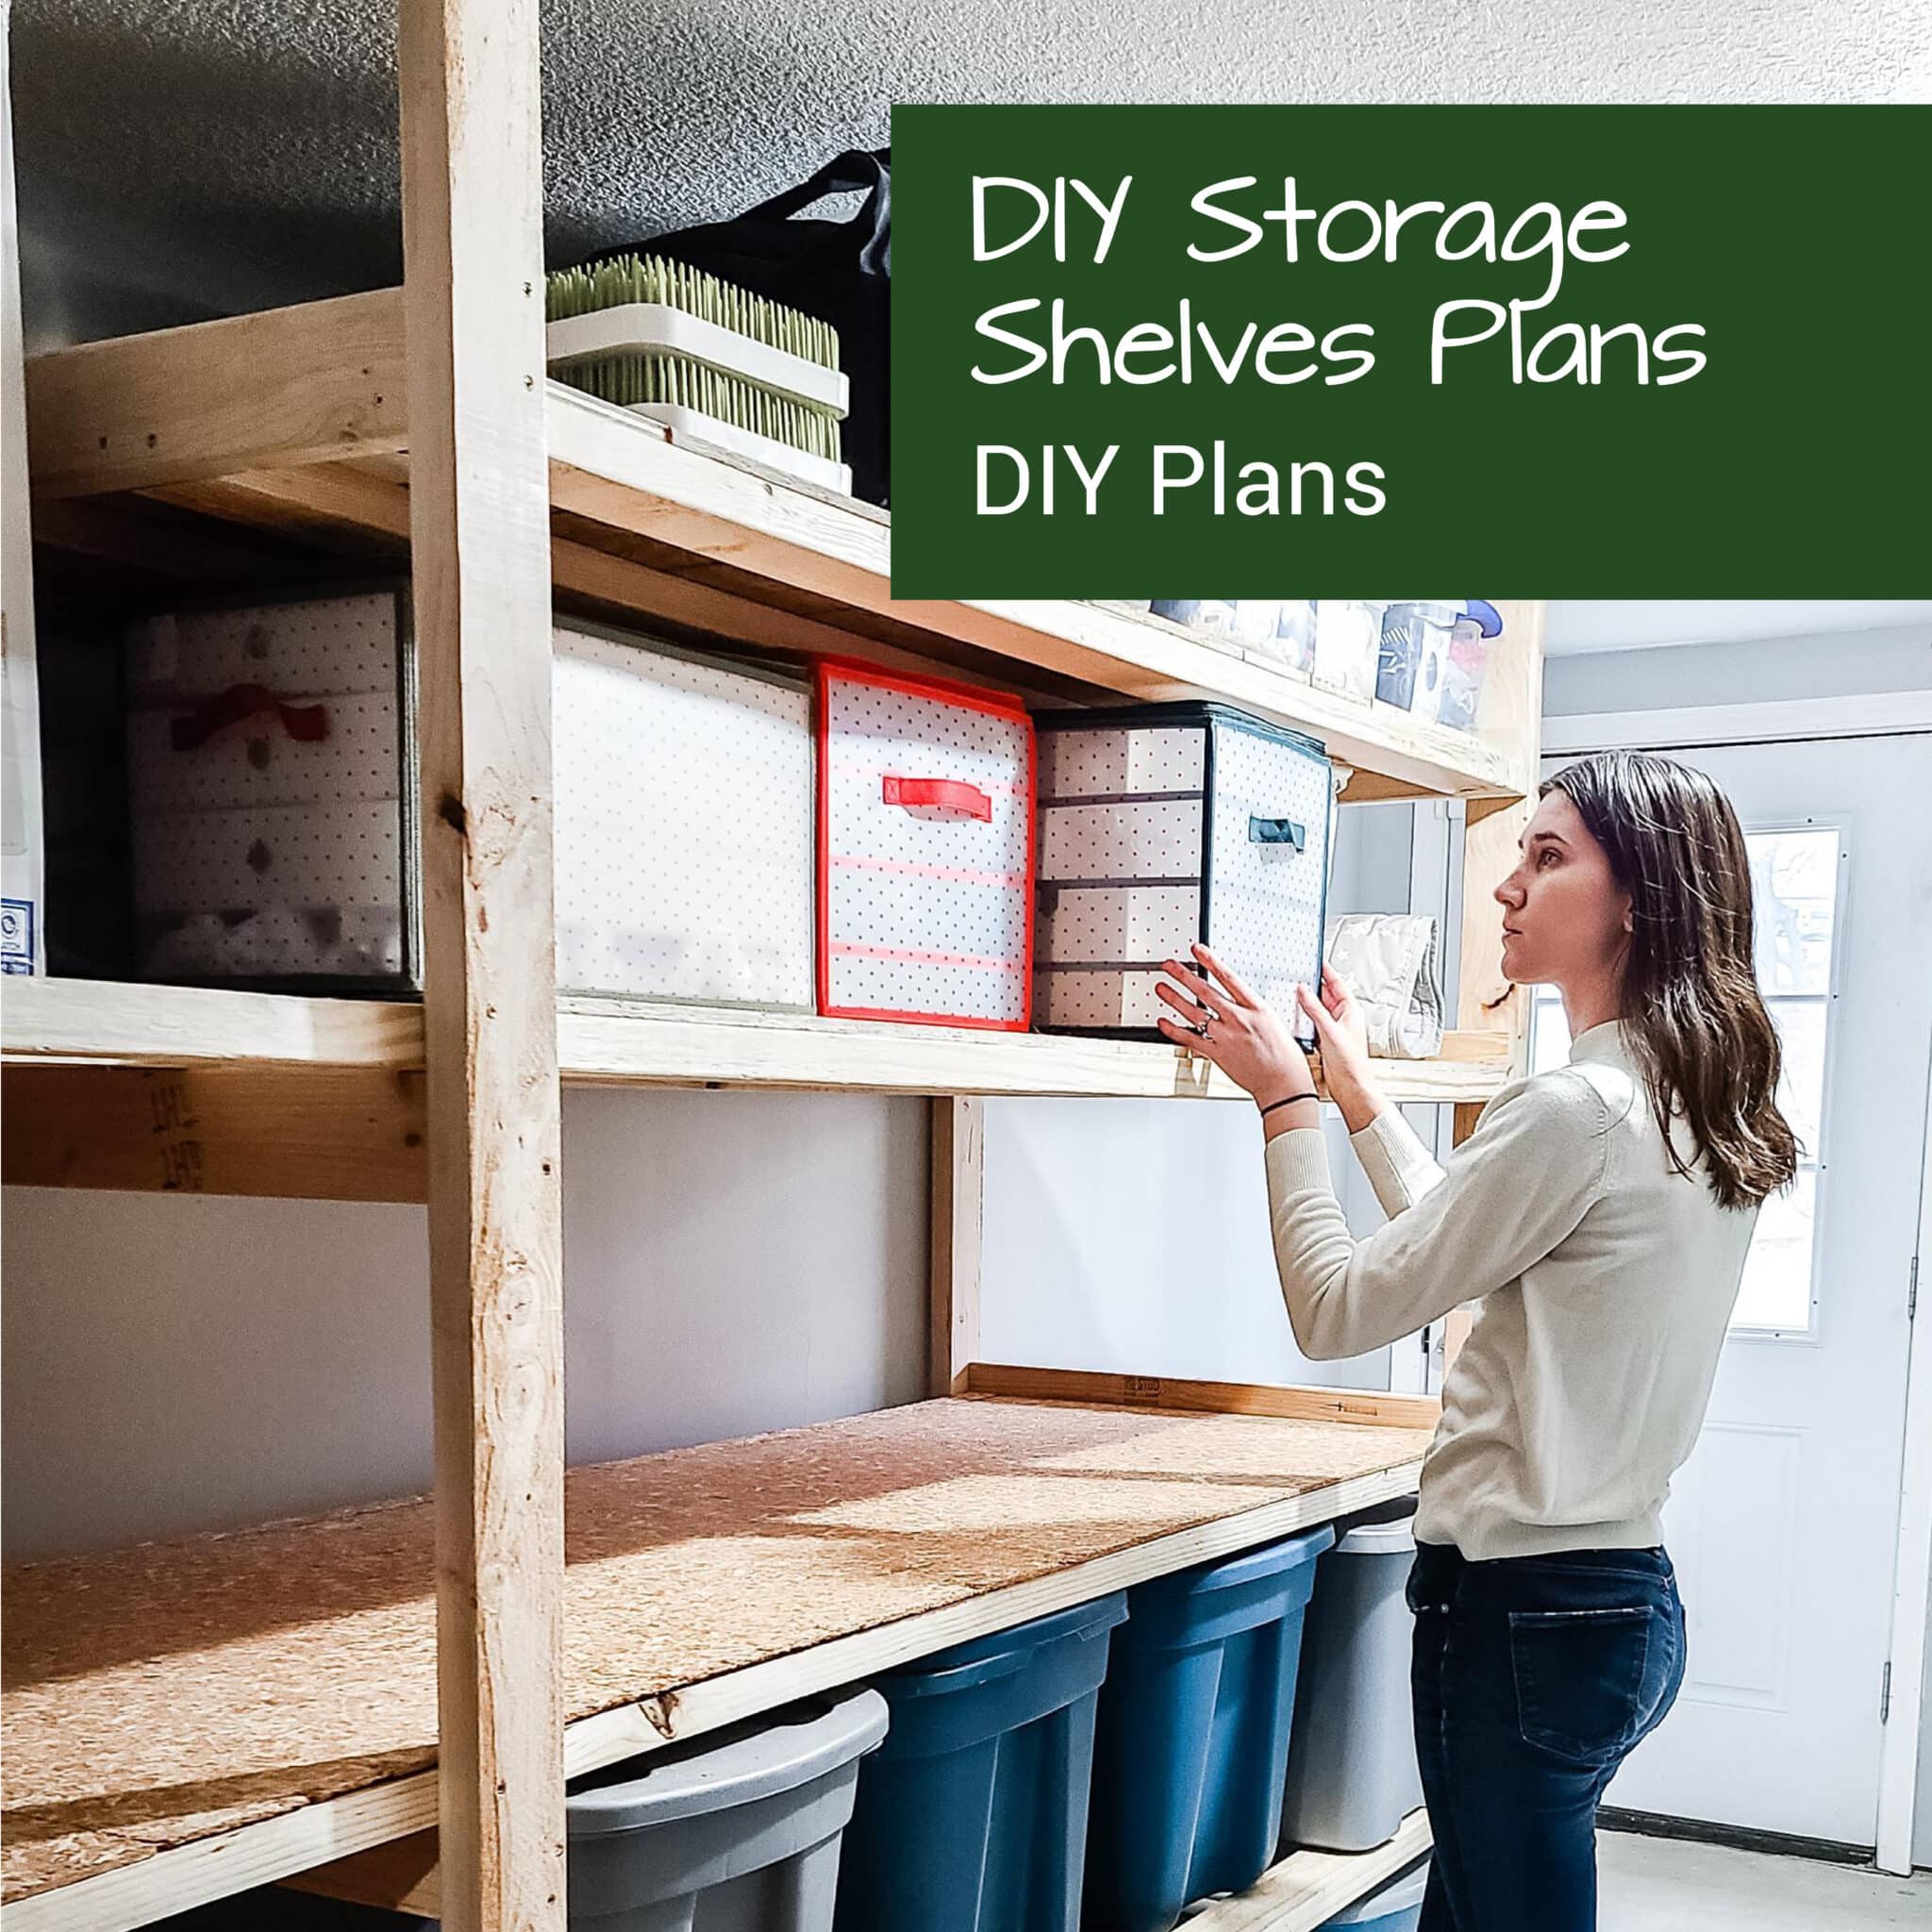
Firstly, hop over to our Shop or our Etsy Shop to grab yourself our handy DIY storage shelves plans and worksheet. They’ll help you through the process and make sure you have all you need to build these storage shelves for totes or boxes.
Now, here is where things start to get complicated. I can’t simply give you a materials list because these are your own custom shelves. They are made exactly to fit your space so your material needs may be a little different than mine. Don’t worry though, we are going to figure out your numbers together!
How To: Custom DIY Storage Shelves Plans
Step 1: Figure Out Overall Custom Shelf Dimensions
To figure out the needed dimensions, start by measuring your space. Grab your tape measure and figure out how much room you want to dedicate to storage. If space is tight, then it often helps if you place boxes in the zone that you plan to use. This way you can make sure that you can still get around in the space, open doors, etc. Once you have your general area decided upon, let’s see if we can standardize it a little bit to maximize our material usage.
Use Standard Wood Board Lengths, If Possible
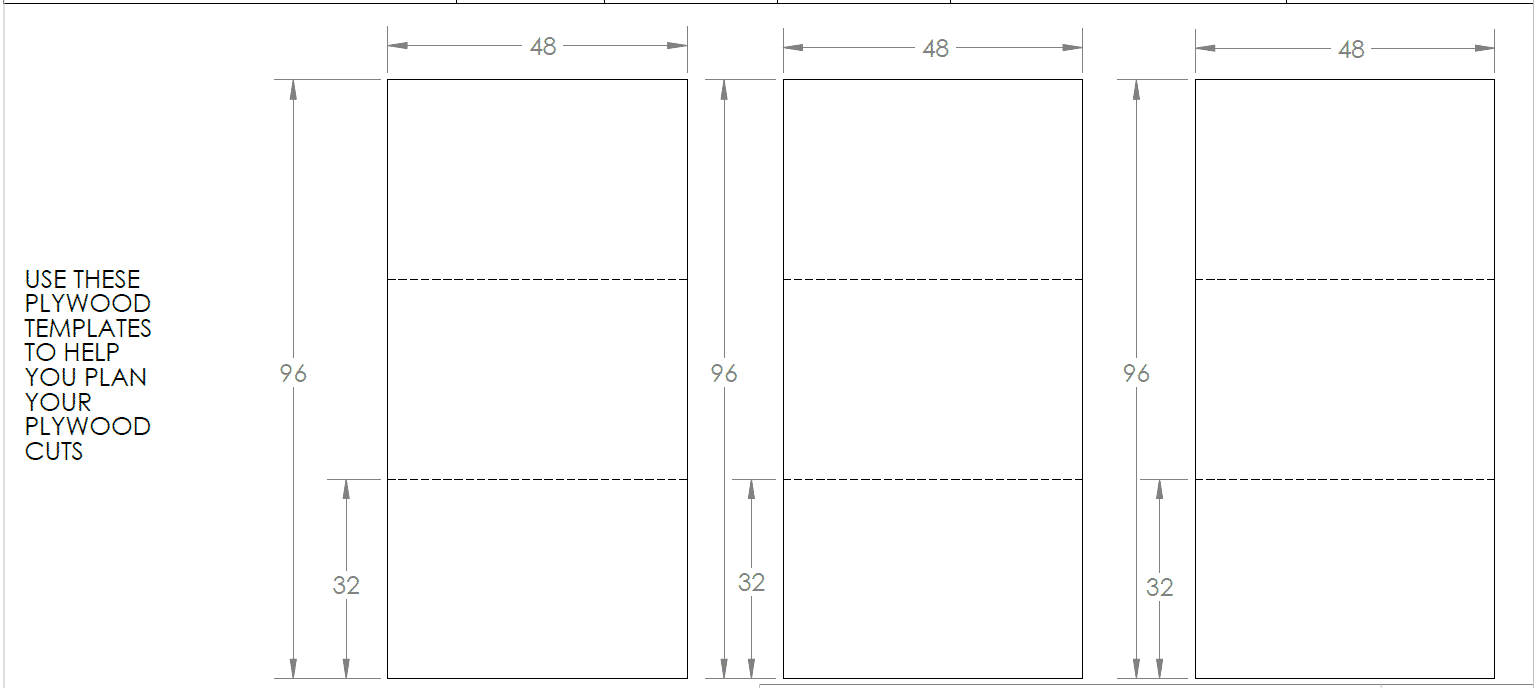
To make full use of a standard 120” or 96” board’s length, you will need 126” or 102” of length in your space. If you have much more room than either of those two lengths, then you’ll want to consider splitting it to make two separate shelving units instead. If you have less room, then you can either make the shelf to maximize the space used, or to maximize the number of bins it can fit and remove any extra board length.
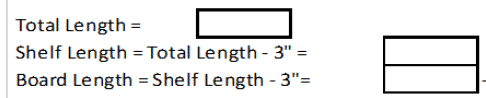
Once you have your total length measurement, write it down on our worksheet. Then subtract 3” and write down your shelf length and subtract 3” more and write down your board length. This is the length you will be cutting your boards to for your shelves.
Account for Any Large Items
If you plan to have any large items on the DIY storage shelves, then you may make some of the shelves shorter to fit it. This way you don’t have to make your entire shelf spaced really far apart. If you are going to do this, then you’ll need to figure out how short your shorter shelves will be.
First, measure your large item and round up to the nearest inch or so to make the math simpler. Write this down on our worksheet. Your short shelf length will be your total length minus 4.5” minus the width of your large item. Go ahead and write this down on our worksheet, then subtract 3” and record your short board length as well.

Now we need to find our depth. The ideal depth is 32”. It cuts an 8’ board in thirds and fits a 30 gallon storage tote. If this works for your space, then use 32″ for depth. Otherwise, choose whatever depth works best for you and the items for storing.
Determine Shelf Heights
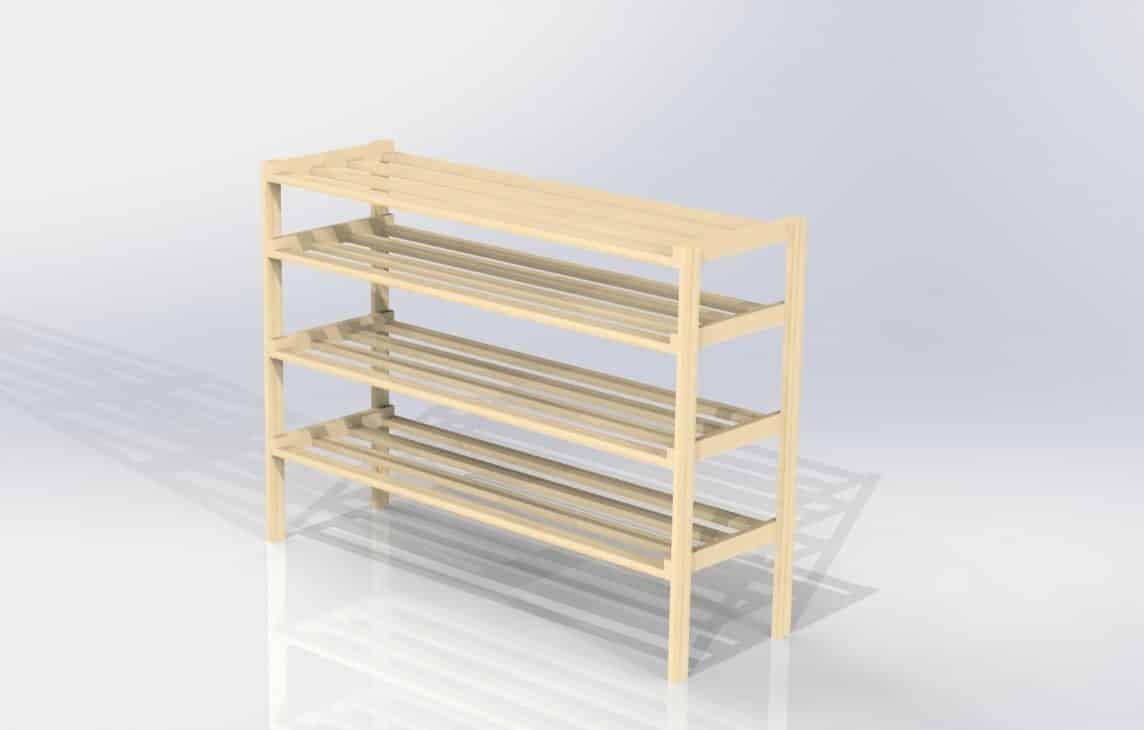
Next, determine the shelf heights. If you already know what size bins you are going to use, measure the bin’s height and then add 0.75”. This gives the boards room to flex without causing problems, and it lets you add a ¼” plywood lining, if you choose. Record all of the shelf heights. You can have as many or as few shelves as you’d like, just make sure they will fit without hitting your ceiling. For our examples, we chose 4 shelves and the “height” of the top shelf is from the shelf to the ceiling.

Calculate Post Heights
Finally, we are going to calculate our post heights. These post heights are simply a combination of all of the shelf heights plus 1.5” per shelf plus 2”. Go ahead and record that on our worksheet.

If you have a large item area, two of your posts will be shorter. This shorter post height will be equal to your tall post height minus the height below whichever shelves are being shortened minus 1.5” per short shelf.
For example, if I have 4 shelves and I am making the top most shelf short, then my short post height is my tall post height – shelf height 4 – 1.5” Record this short post height onto our worksheet.

Step 2: Figuring Out Your Material List
With those dimensions in hand, we are now ready to figure out how much material we will need!
Using the drawing sets and worksheet, go through and determine how many boards you will need and the lengths of those boards.
For example, for our Small Shelving Assembly Example we need:
- (16x) Shelving Long Boards at 96” Long
- (8x) Shelving Depth Boards at 32” Long
- These can be cut from 3x 96” Boards
- (4x) Posts at 75” Long
- These can be cut from 4x 96” Boards or shorter Stud Length Boards, if they are available and cheaper for you
Once you have your number of boards counted out and their dimensions copied over from your worksheet, you can quickly determine just how many boards you will need to buy.
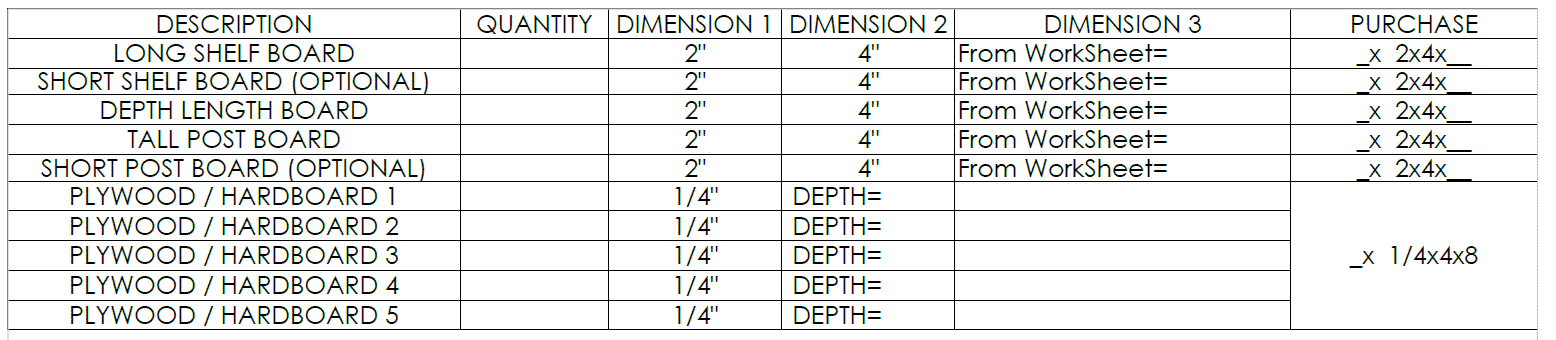
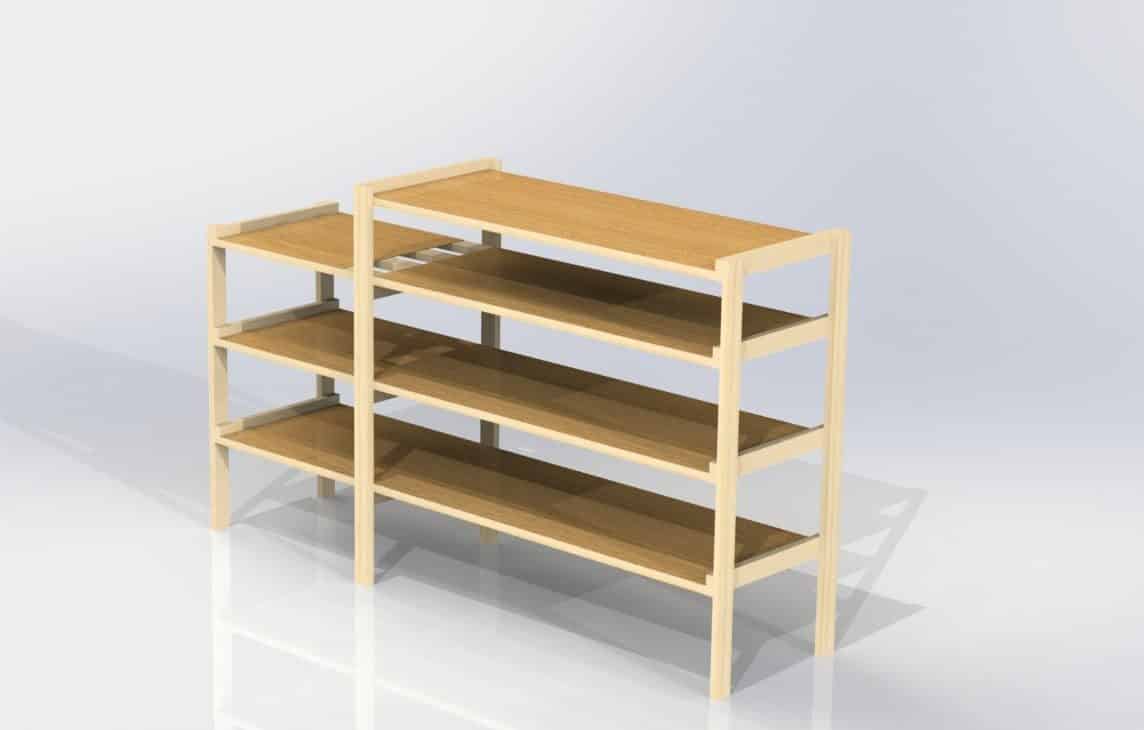
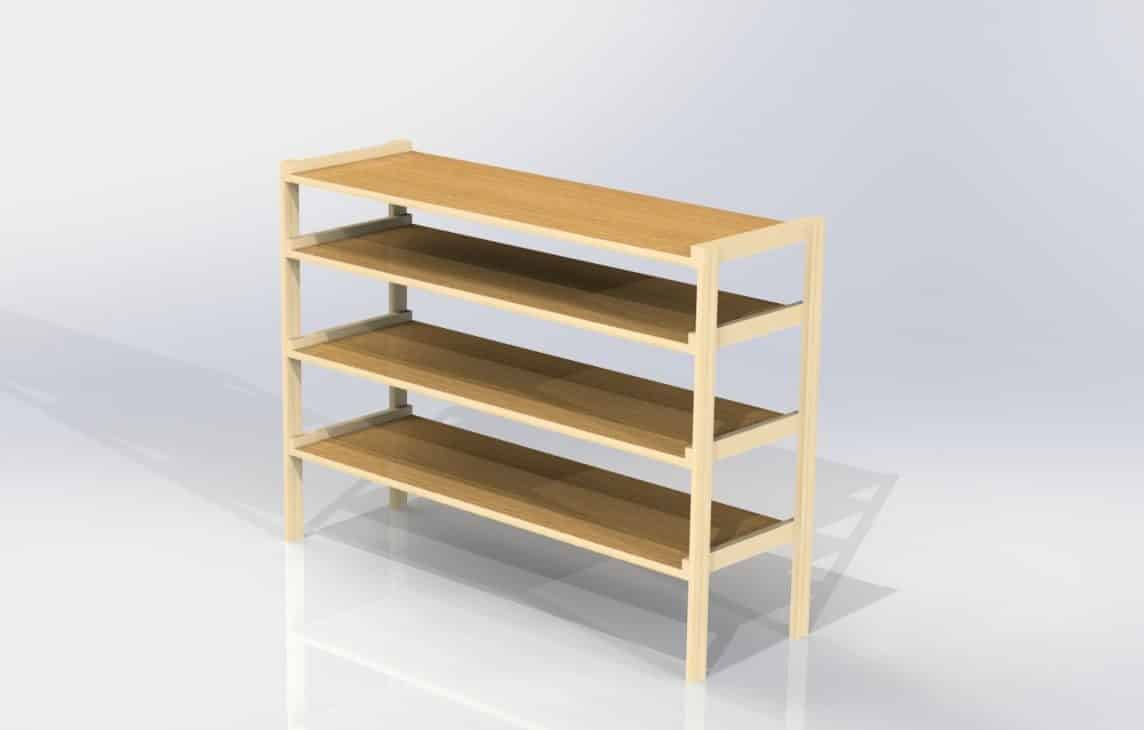
Finally, determine if you want to line the DIY storage shelves. Since we designed these shelves with long slats, they will hold bins without any lining required. However, if you have lots of small items (like my wife’s decorations), you will need to line the shelves. This can be done by cutting down a ¼” sheet of plywood, hardboard, or other particulate board. If your items aren’t heavy, you could even use cardboard! Cardboard is a great way to reuse items and not cost anything!
Determine Amount of Lining Material
If your shelves are 32” long, then you can cut one 4’ x 8’ sheet into (3x) 32” x 48” small sheets. These sheets will fit on the shelf boards, so you can use that measurement to determine how much lining you need. Simply add up one shelf board length for each shelf you wish to line, then divide by 48” to get the number of panels you need. Then divide that by 3 and round up to determine the number of sheets you need to buy.
For example, I want to line two storage shelves on my Small Shelving Assembly Example. The boards are 96” long, so we add 96” + 96” = 192”. Then divide 192” by 48” to get 4. So I need 4 small sheets of plywood. We can get 3 small sheets per 4’x8′ sheet, so 4/3 = 1.33. Round up to 2. I need 2 big sheets of plywood. Based on this, maybe I only line 1 and a half shelves in order to save a little money. Don’t be afraid to pull together scraps to maximize your coverage either.
Go through this exercise and determine how much material you need. Once you have your list, it is time to go shopping. Common 2×4’s are all you need for this project. Nothing fancy is required here. Just be careful to make sure your boards don’t have massive knots or are bowed or warped too much. A little is fine for this project as the construction is very forgiving.
Step 3: Cutting the Boards
Alright! Considering that you made it through all of the planning, this next part will seem like a cake walk to build these DIY storage shelves!
We already know the length and number of boards we need from our materials list earlier. Simply mark each board with their required dimensions and then throw them up on your miter saw, table saw, or whatever it is you intend to use and start cutting! Just be sure to double check your measurements and counts before you start. Always double check!
Once all the boards are cut, you’ll need to cut the plywood if you intend to line the DIY storage shelves. I highly recommend using a table saw for this task, if you have one. Any handheld saw can do the job as well, especially since the cuts don’t need to be perfectly straight for this project. Just draw your lines and do your best to stick to them. If you have specific boards being used in specific places, consider writing their location on them as you go to help you piece them back together later.

Assembling the DIY Storage Shelves
Step 4: Preassemble The Shelves
We are going to start by making each shelf and then attaching them to the posts in place. This way we aren’t trying to move the whole storage shelving assembly after it’s built. To do this, find an open space that is mostly level and grab your drill, framing square, and construction screws. I recommend 2 ½” long, self-drilling Torx head construction screws.
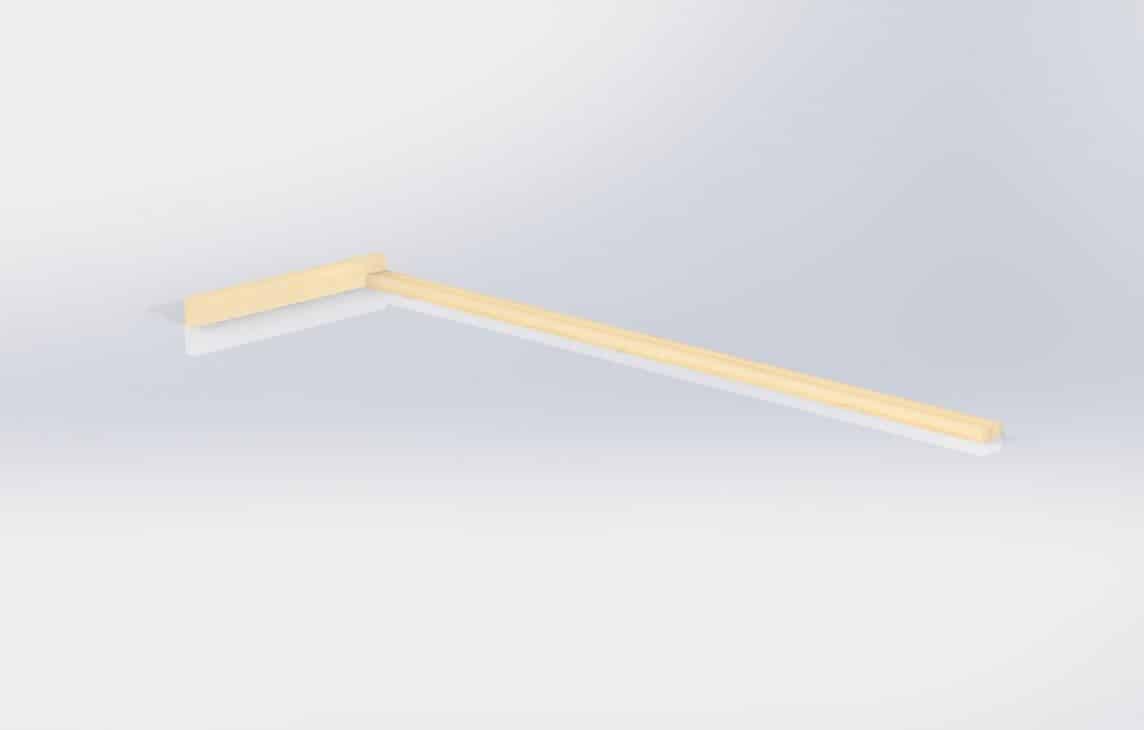
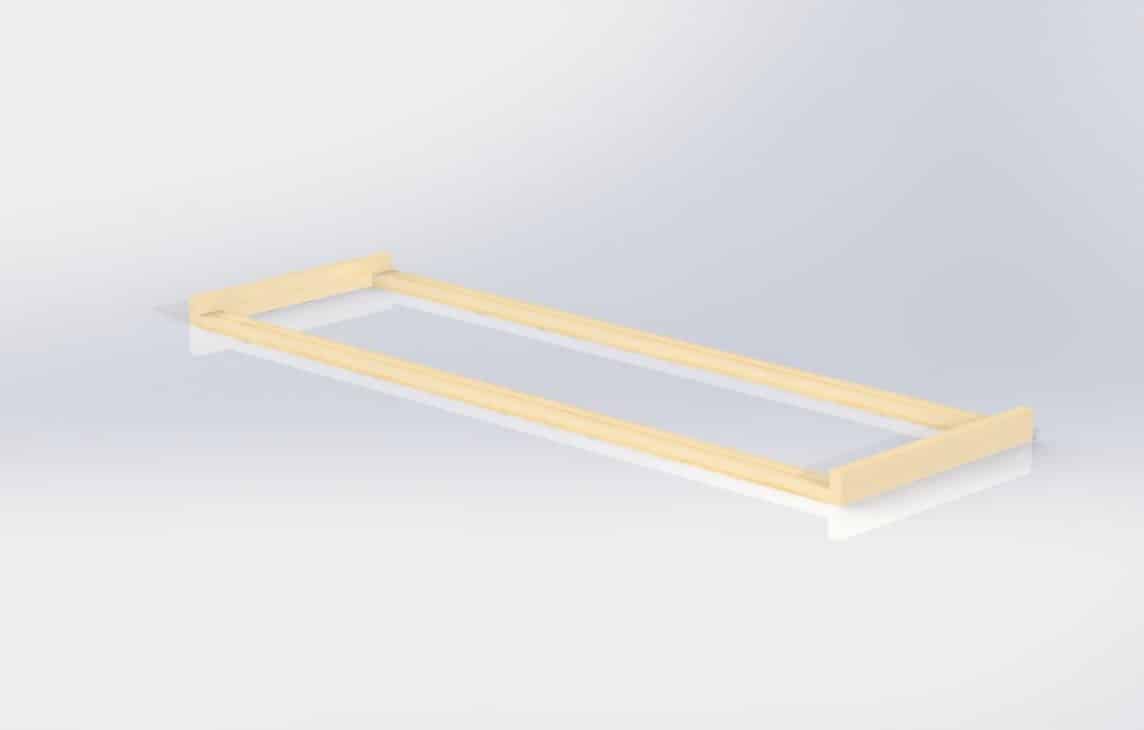
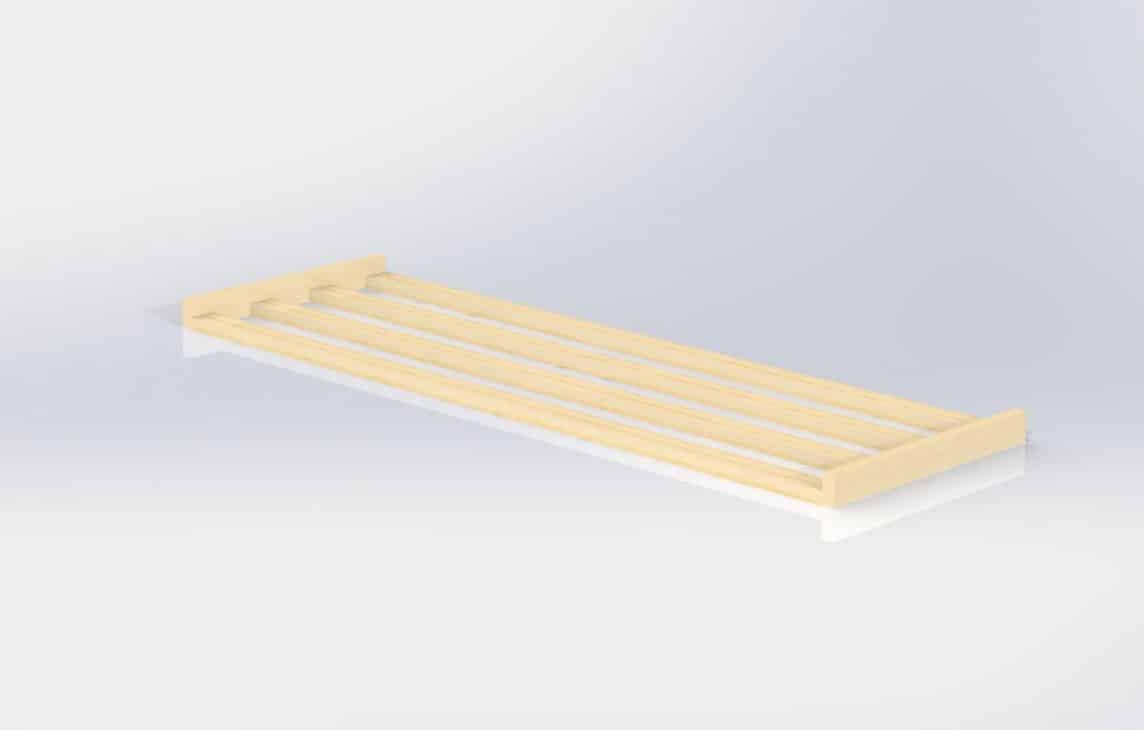
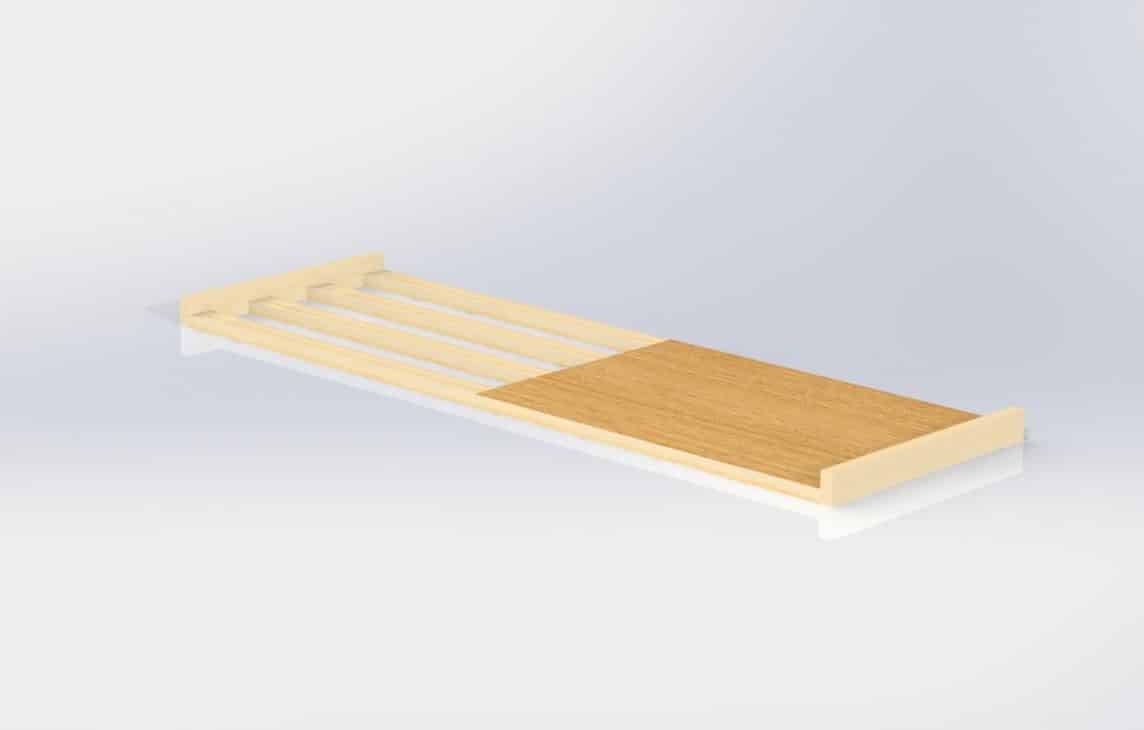
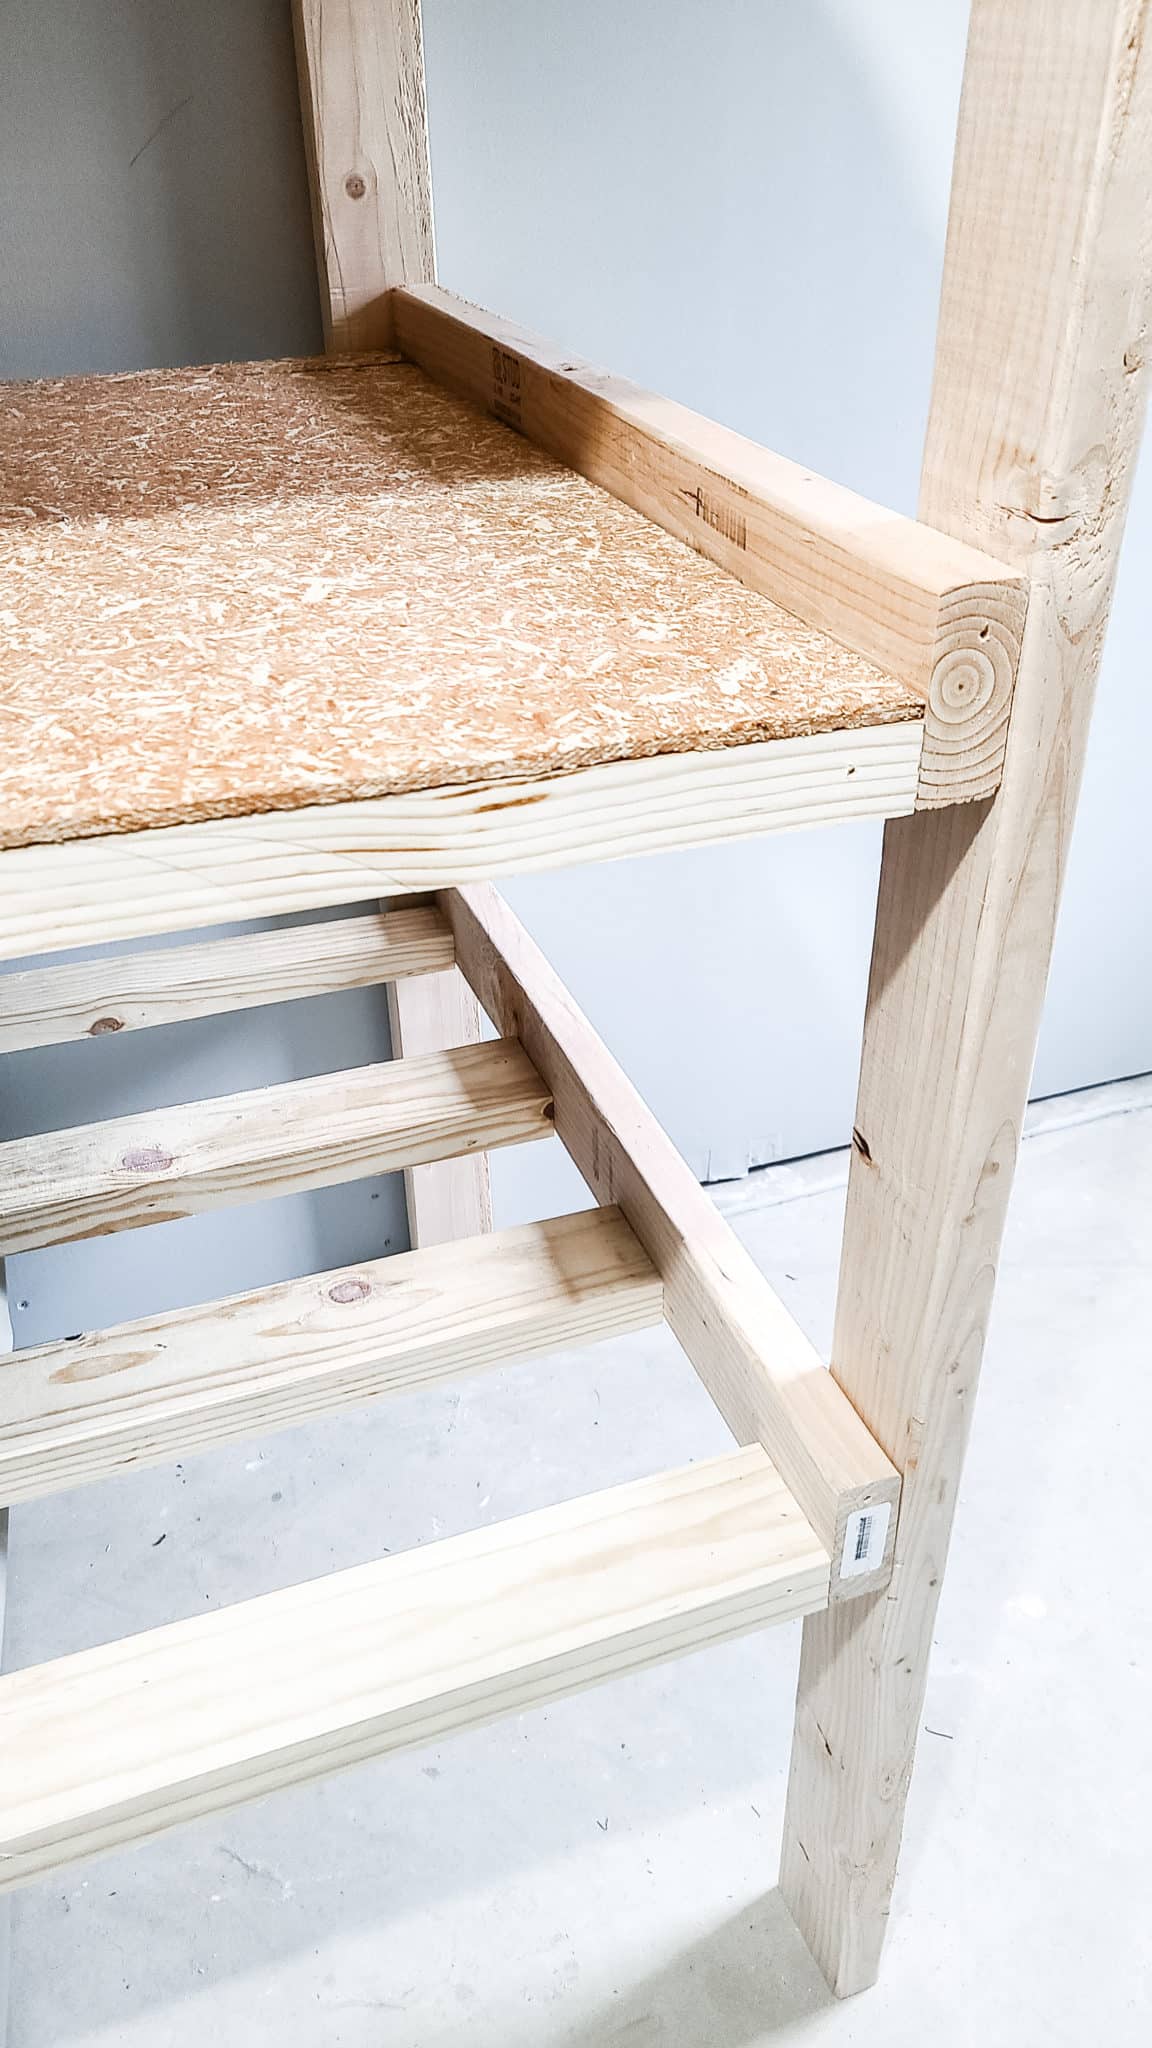
Start by laying out the four long shelf boards and cap them with the two depth boards. Space the two long boards in the center so they approximately split the depth into even thirds. Use a framing square to double check that your assembly is square and adjust if needed. If you don’t have a framing square, you can always use a piece of paper to get close.
Run two screws through the face of the depth board and into the long boards at each end. Resquare the assembly if things move during this process, but everything should mostly pull itself square since it’s just butt joints with square cut lumber. The only thing to watch out for is if you have any bow or twist to the boards that could pull the rest of the assembly out of square. If a board is bowed, then adjust the fastening of that board to try and keep everything as flat and square as possible.
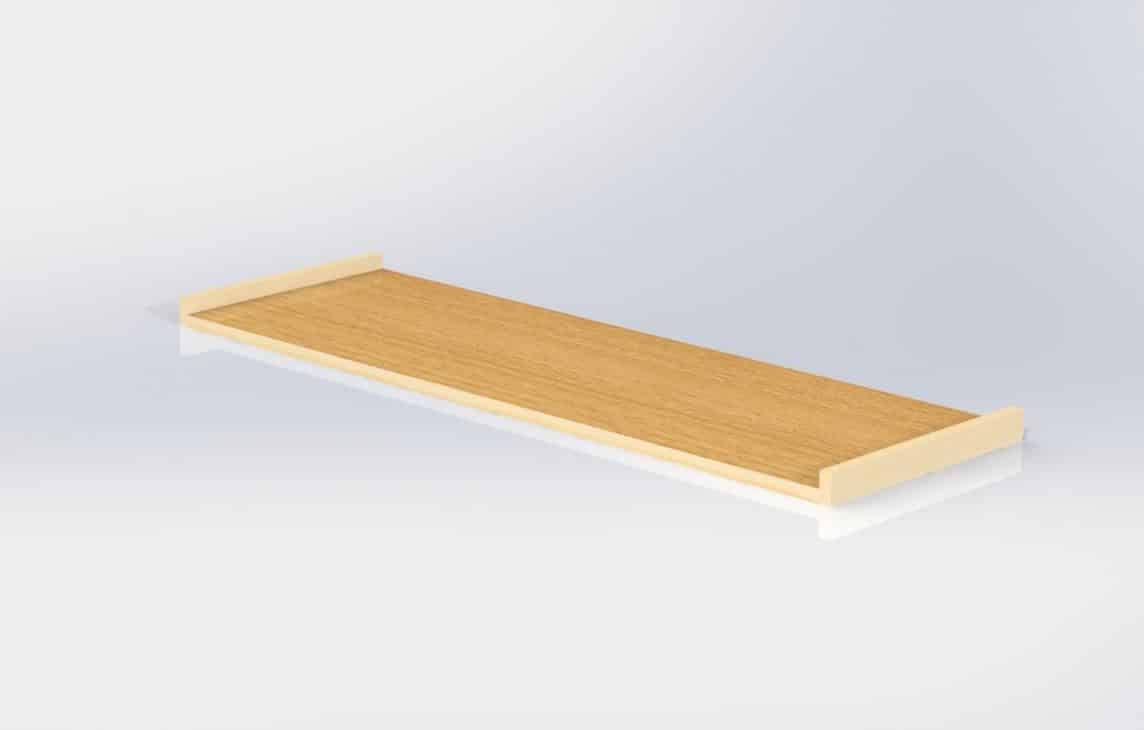
Once you have one shelf done, repeat this process for the rest of your shelves. If you intend to line your shelves, you can do that now after you have the shelves assembled. Just lay out your plywood and the nail or screw it down to the long boards.
Step 5: Assemble the Shelving Assembly
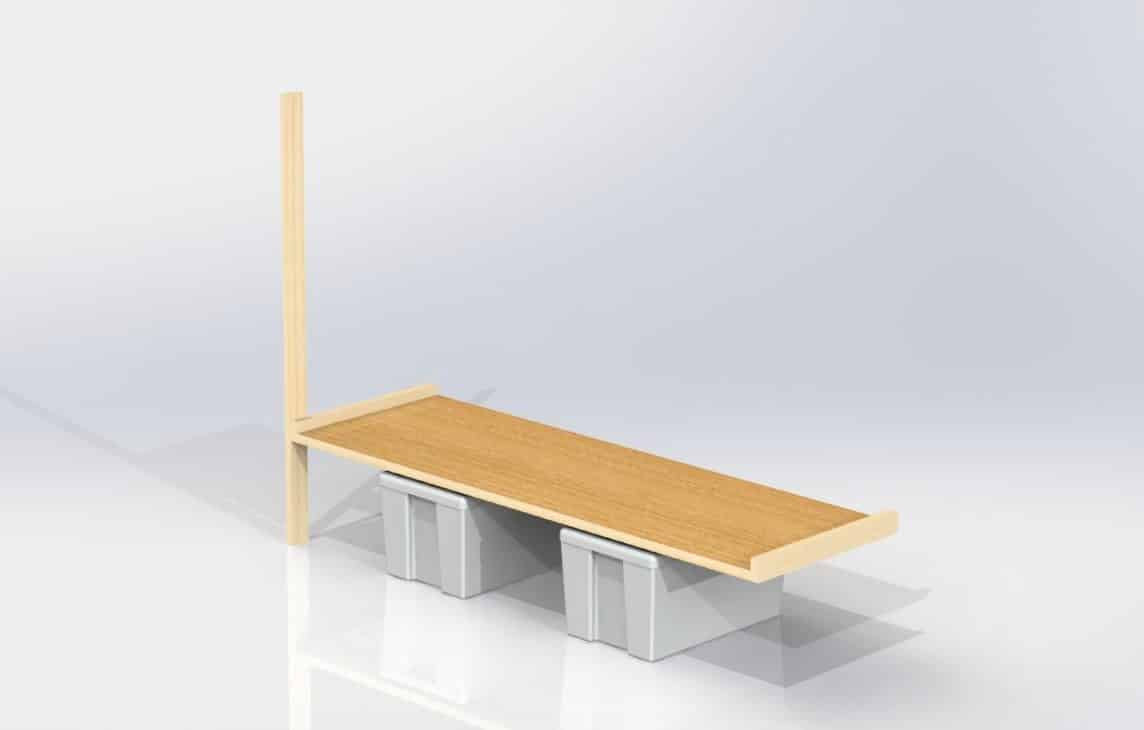
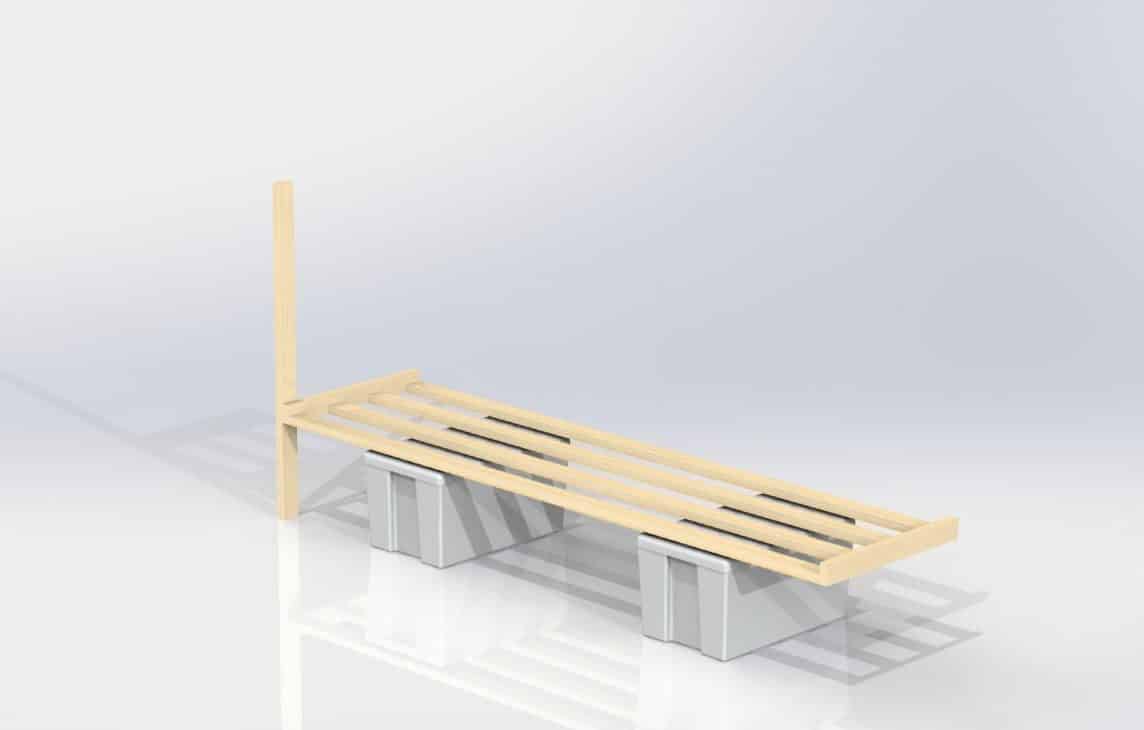
The easiest way to assemble is to use your bins as spacers. Set two bins out on the ground where you intend to put the shelving assembly, then place some pieces of 1″ thick boards on top of them. Typical 1″ lumber boards are actually 0.75” thick, so they will act as our spacers. Just make sure the spacer boards are long enough to reach the edges of the bins, so they aren’t being supported purely by the lid of the bin.
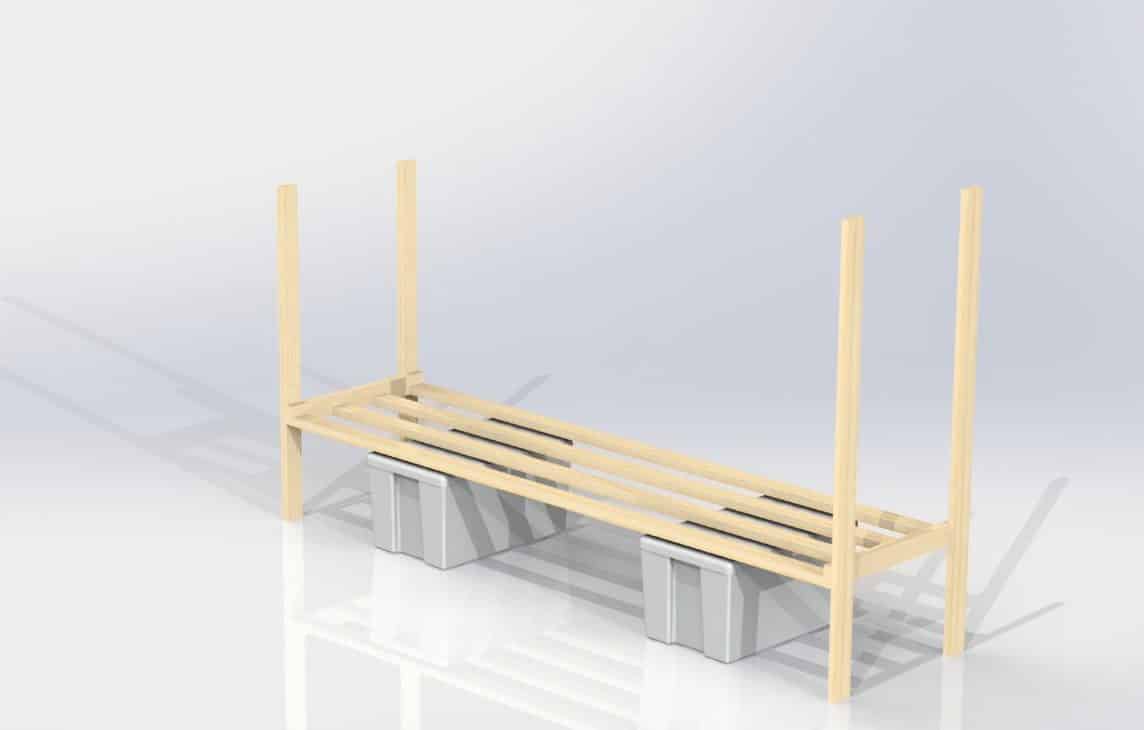
Assemble first shelf and post
Carry over your shelf and set it on top of the bins and spacer boards. Pull everything far enough away from the wall that you can get behind it if you need to. Bring in your first post and run a single screw through the face of the post and into your shelf.
If you have a level, use it to make sure the post is perfectly vertical and then run a second screw through it to hold it in position. If you don’t have a level, then leave a single screw in it for now. Come back after the rest of the shelves in position and level to add the second screw.
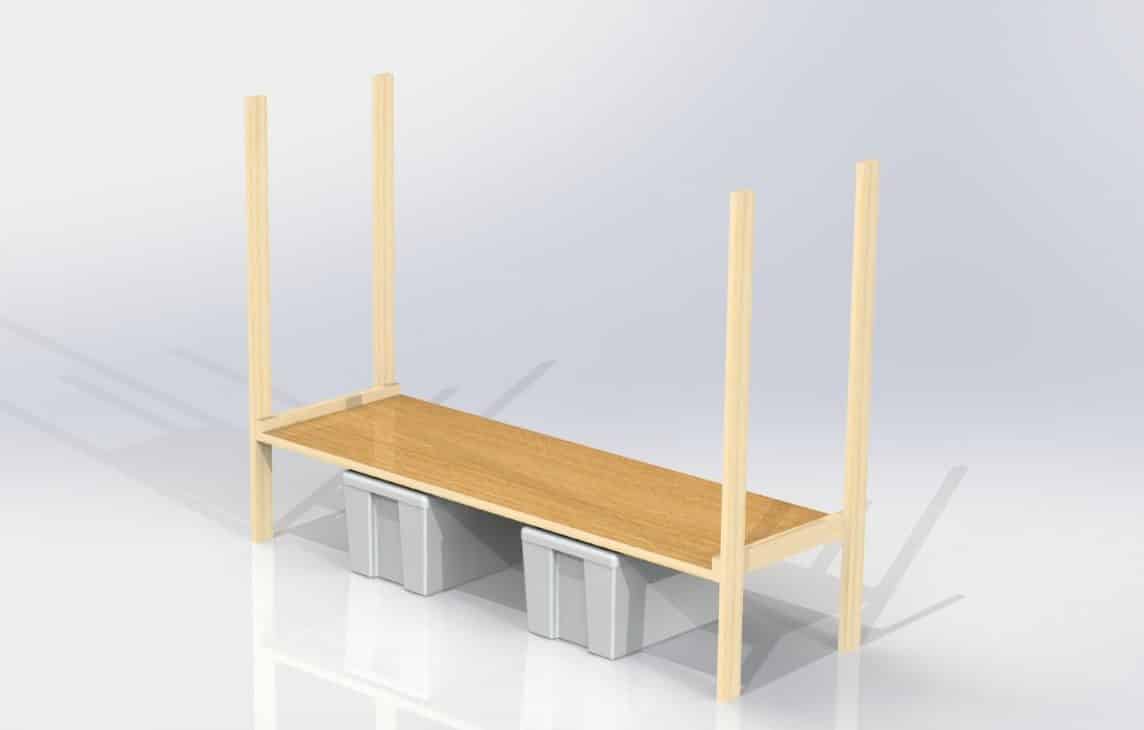
Repeat assembly process for each shelf
Repeat this step for the remaining posts. Keep in mind that if you have a large item area, you will need to use two short posts for one side of the assembly. If you were able to put two screws into each post then you should have a free standing structure. If not, then I recommend leaving the bins and spacers in place for stability while finishing building.
Now, it is just a matter of repeating the process. Place two bins and some spacer boards on the first shelf, carry in the second and put it up on the bins, and then screw it in place. If your posts were level, then everything should align well, if not then you may want to remove one of the screws from the first shelf and adjust your post.
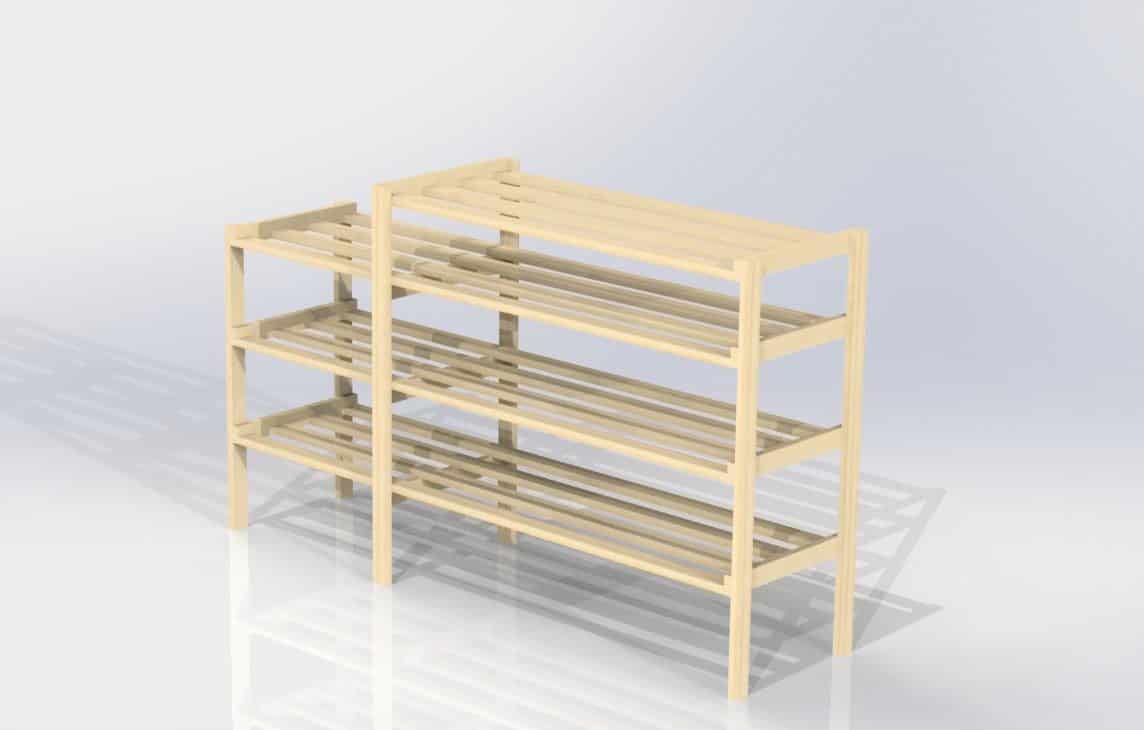
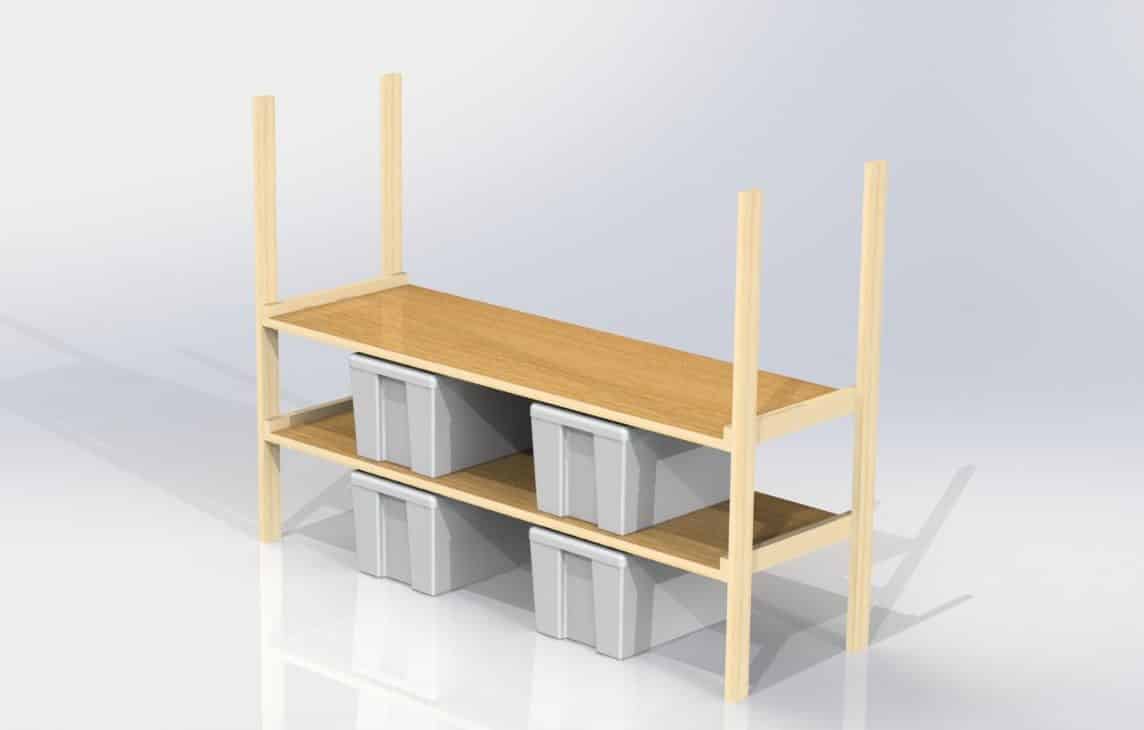
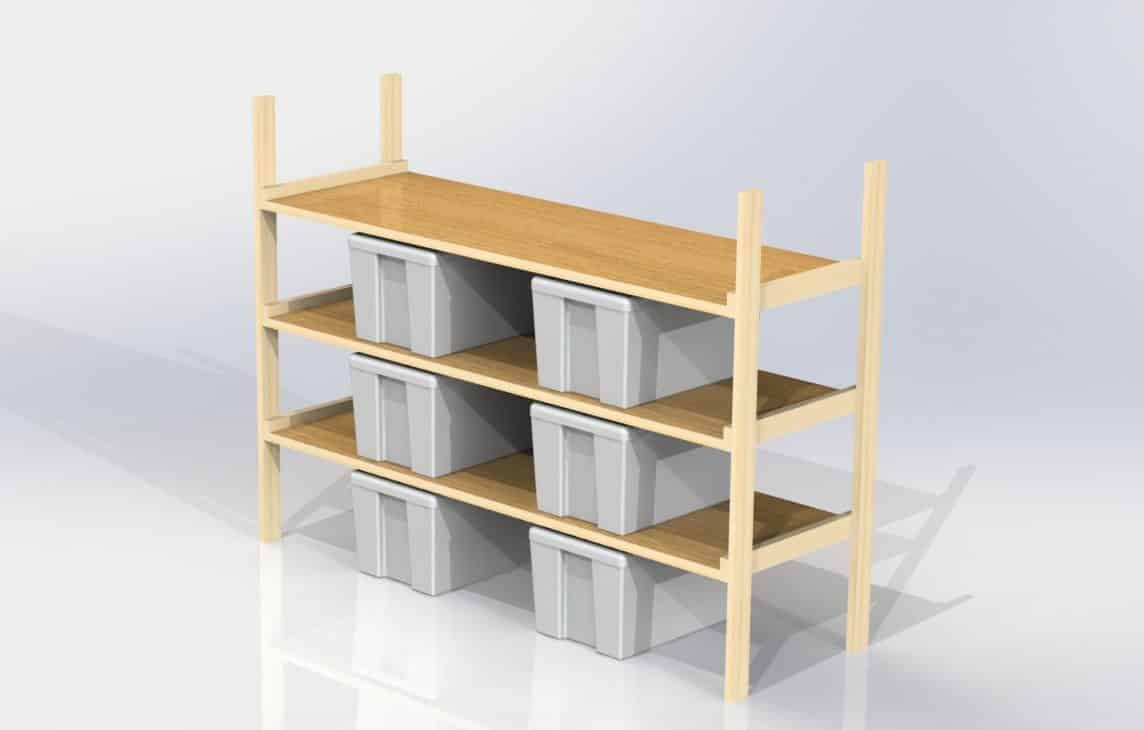
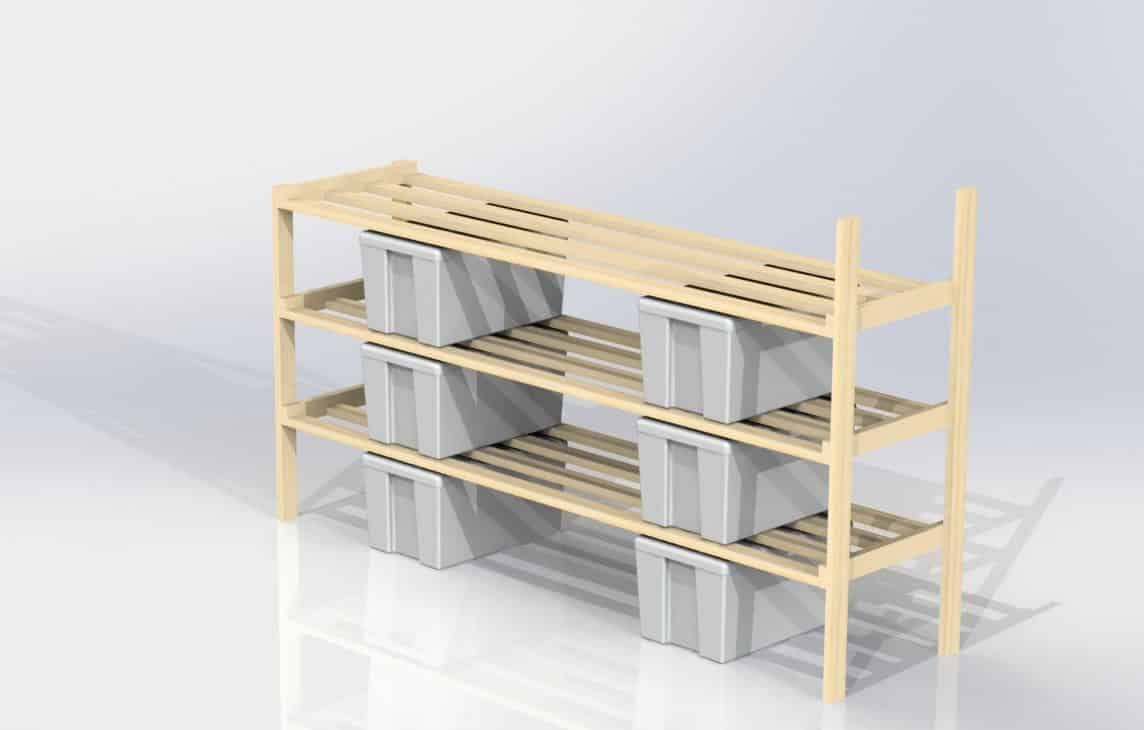
Small Style Assembly
If you are making the small style shelving assembly or don’t have a large item area, then just repeat this stacking process until all the shelves are in place and each post is fully secured with two screws into each shelf.
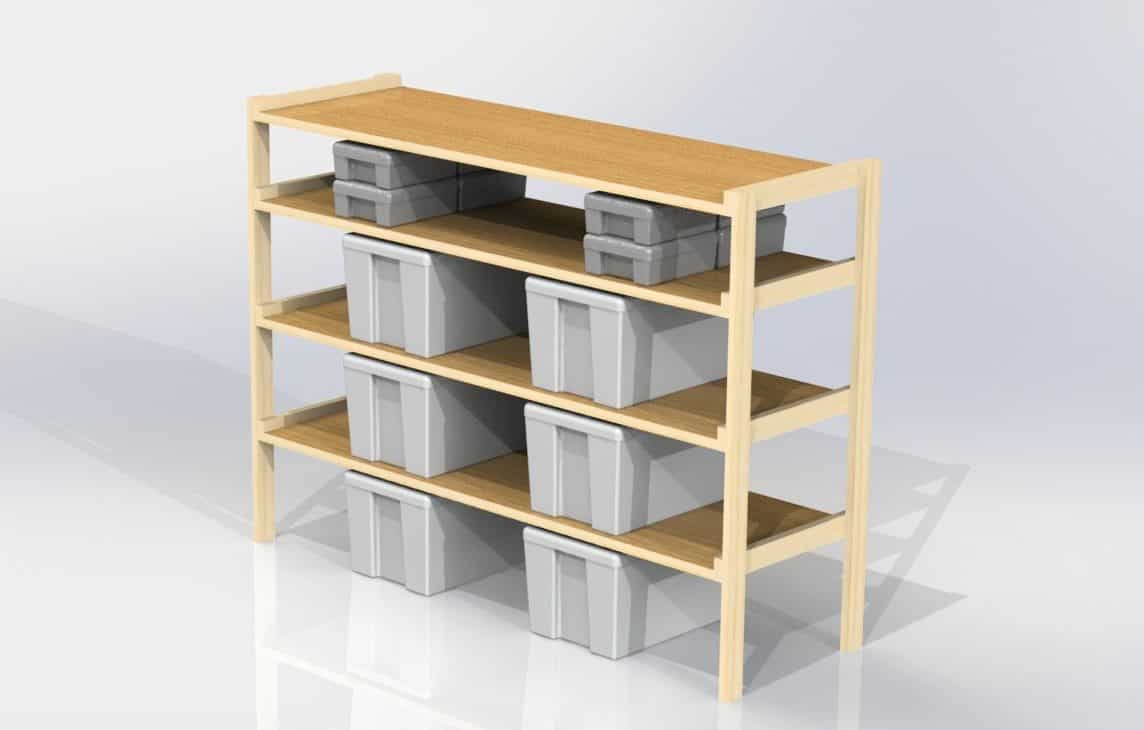

Large Style Assembly
If you are making the large style shelving assembly, then you’ll have slightly more work ahead of you. We are going to differentiate here between large shelving assemblies with and without a large item area.
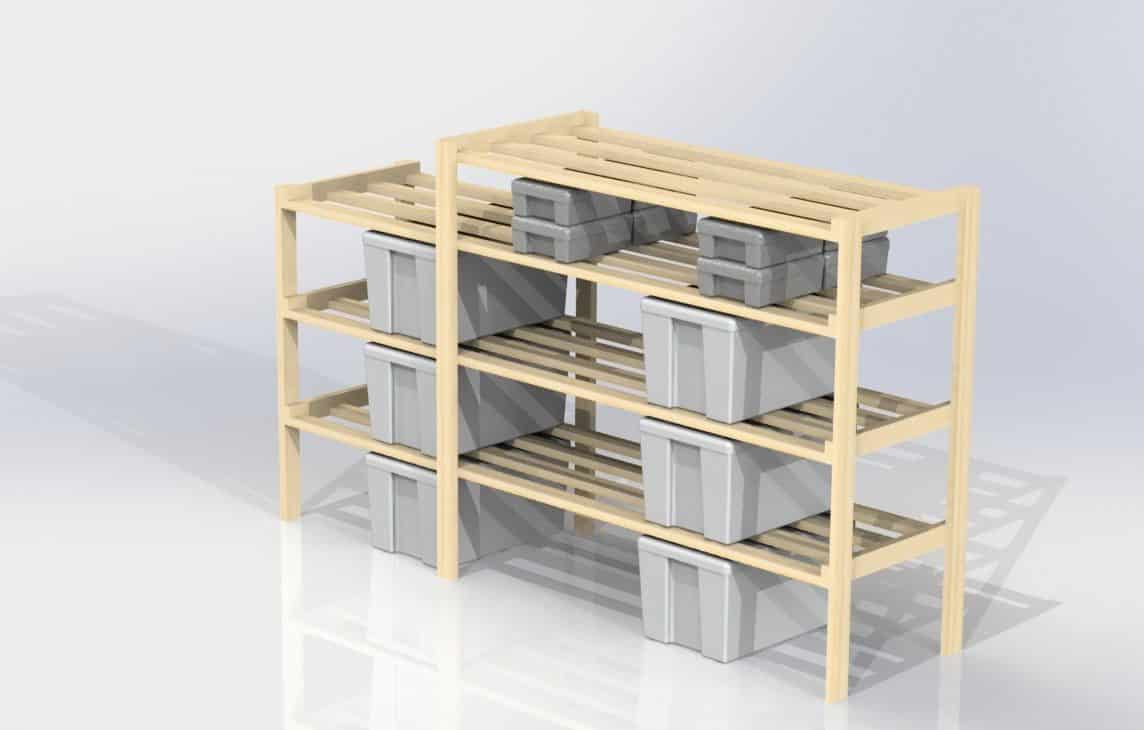
If you don’t have a large item area, then just keep repeating the stacking and screwing process until you get all of your shelves in place. Now, because you have such a large span, you’ll have some sag in the boards if you don’t support them near the middle. Grab a few of your largest bins and place them along the ground one at each end. Then place another at each end and keep repeating until they come together in the middle.
There should be a gap here in the middle between the two bins. You’ll want to place your support post here so that it doesn’t interfere with you pulling out the bins. Assuming you don’t have any weight on the shelves, the amount of bowing will be minimal, so we can simply align our post with the gap, ensure it’s vertical, and then drive a screw through its face and into each shelf. Repeat this for the post on the back side.
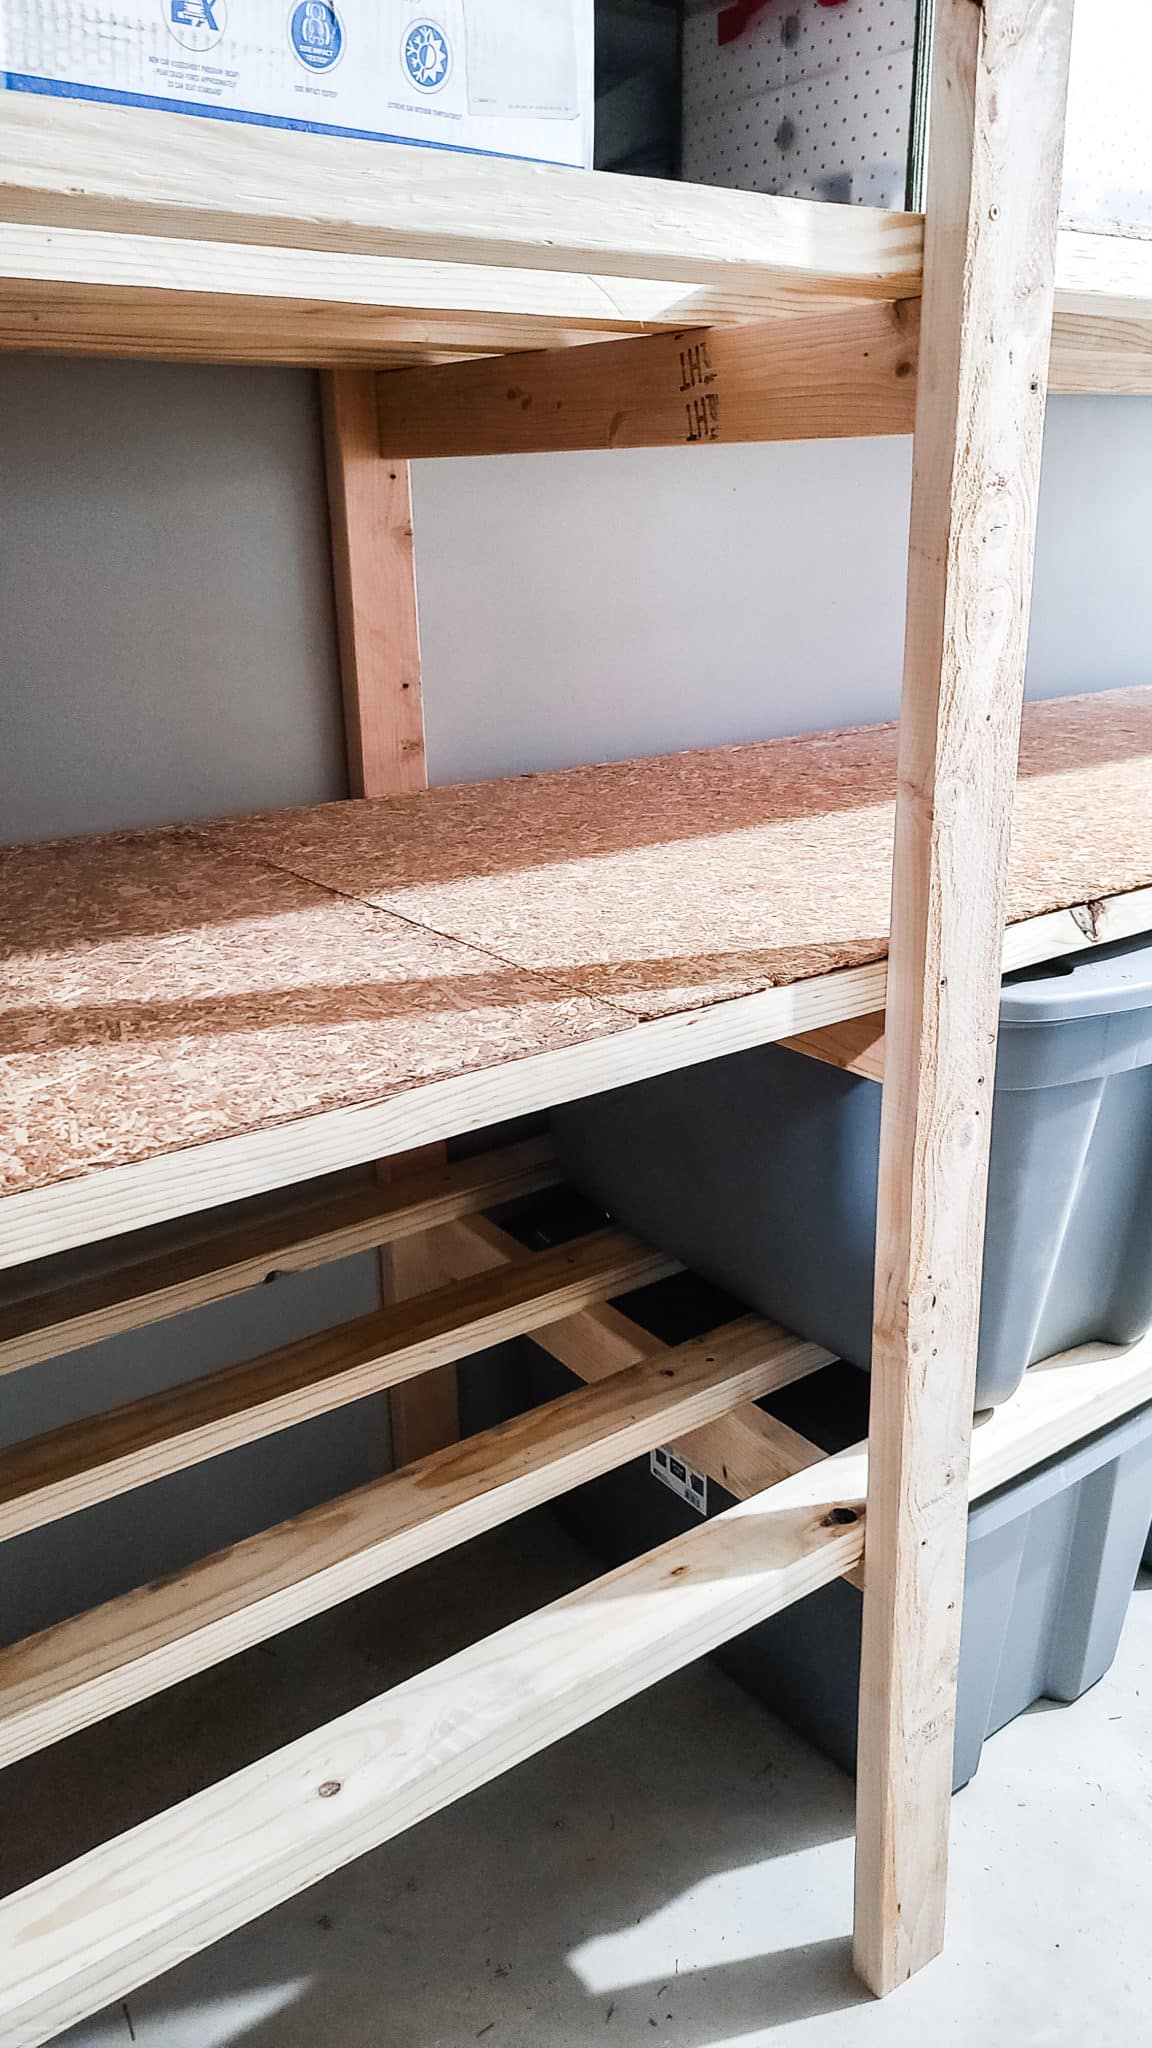
This will keep the posts in place, but it won’t do anything to support the inner two boards. To solve that, we are going to place a depth length board between the two posts on the underside of each shelf. Run a screw or two through the face of each post and into each depth board. This allows the posts to carry the load from the middle two boards as well. With that, you’re done! Congratulations!

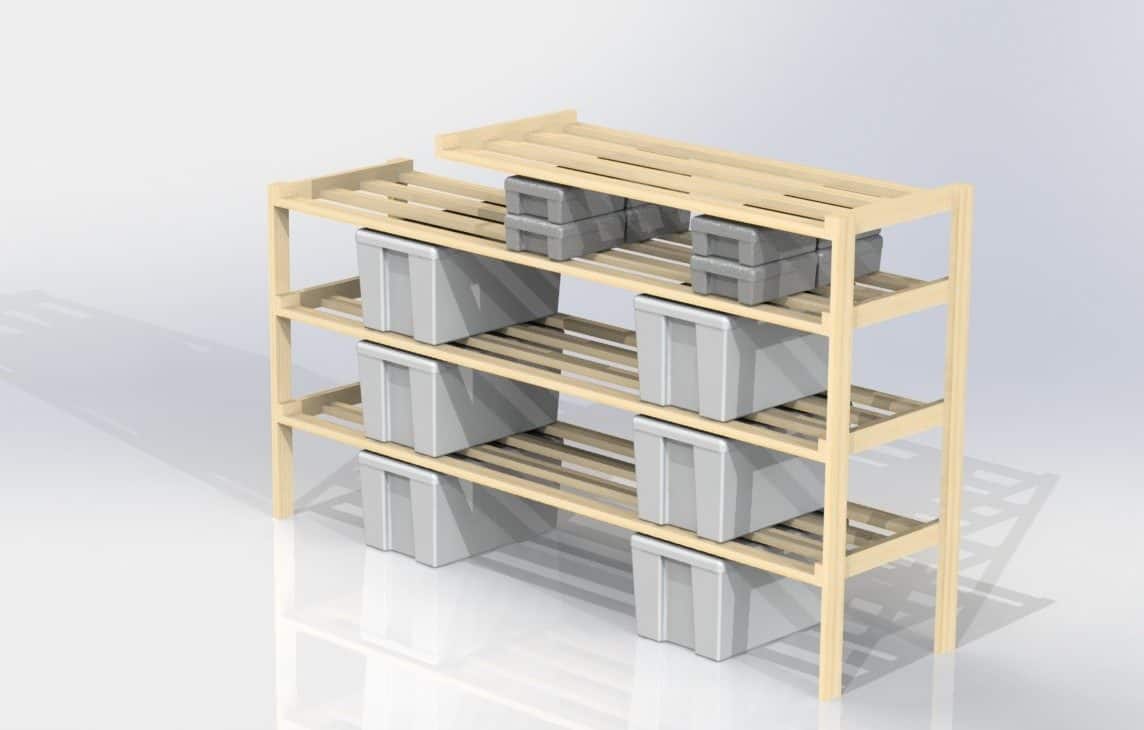

Process for large item areas assembly
If you do have a large item area, then the only difference is that your post location is dictated by the length of your short shelves. Build up your assembly until you get your last full length shelf in place. This should have maxed out your short post’s height on one side.
To continue your assembly, you’ll use your two remaining tall posts to secure the two inner corners of your short shelf or shelves. Make sure to check this post is vertical as you secure it in place and then go back down and run a screw through each post and into each shelf. Once the post is secure and your short shelf or shelves are installed, all that’s left is adding the depth length boards under the long shelves just like mentioned above.
Now all that’s left is to press it back up against the wall and then start loading it up with all of your storage totes, decorations and bins of baby clothes!
Congratulations! You built your very own custom storage shelving assembly!
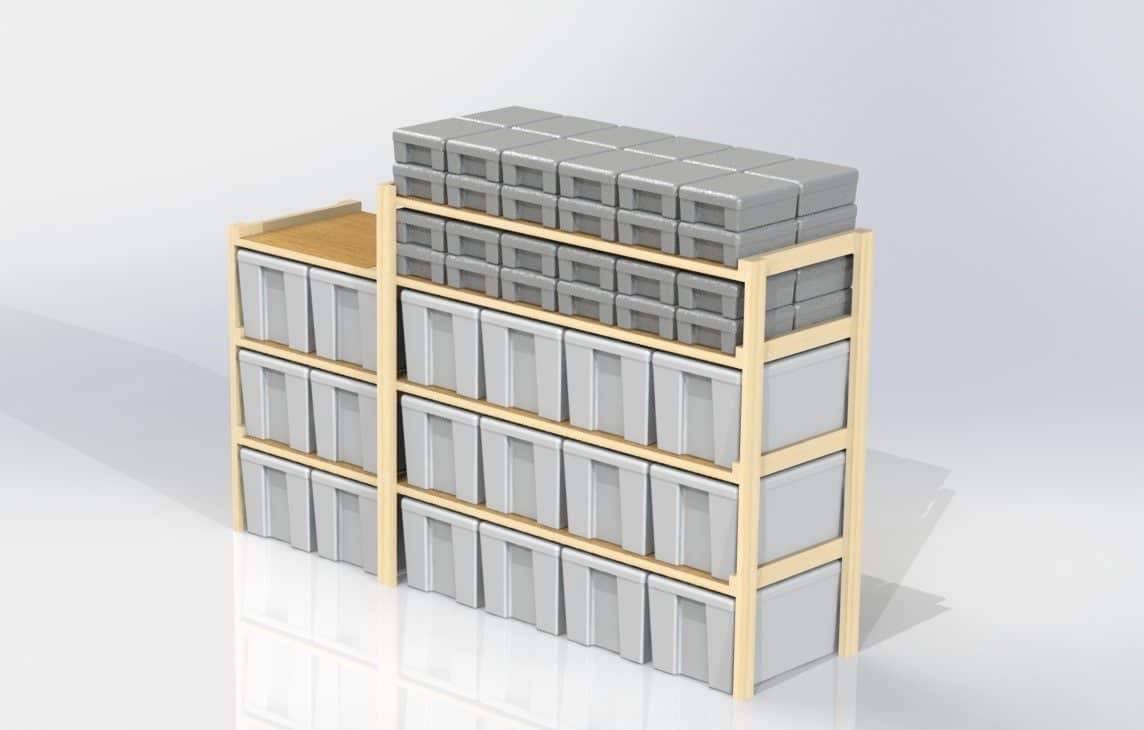
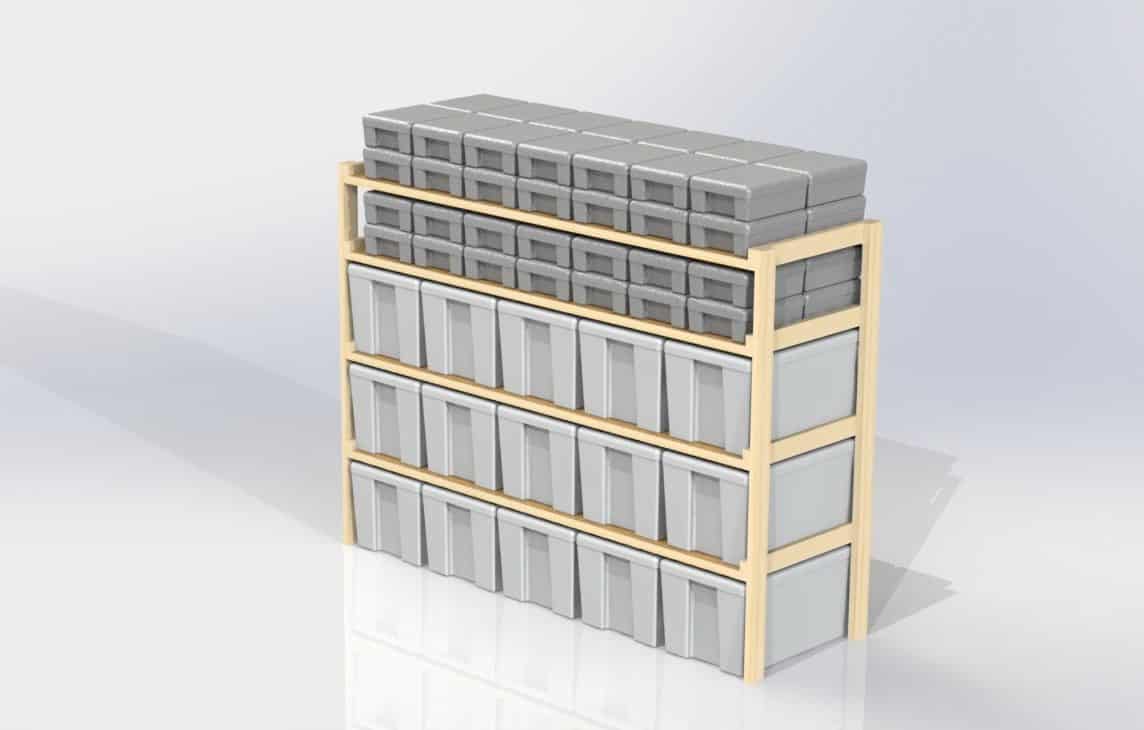
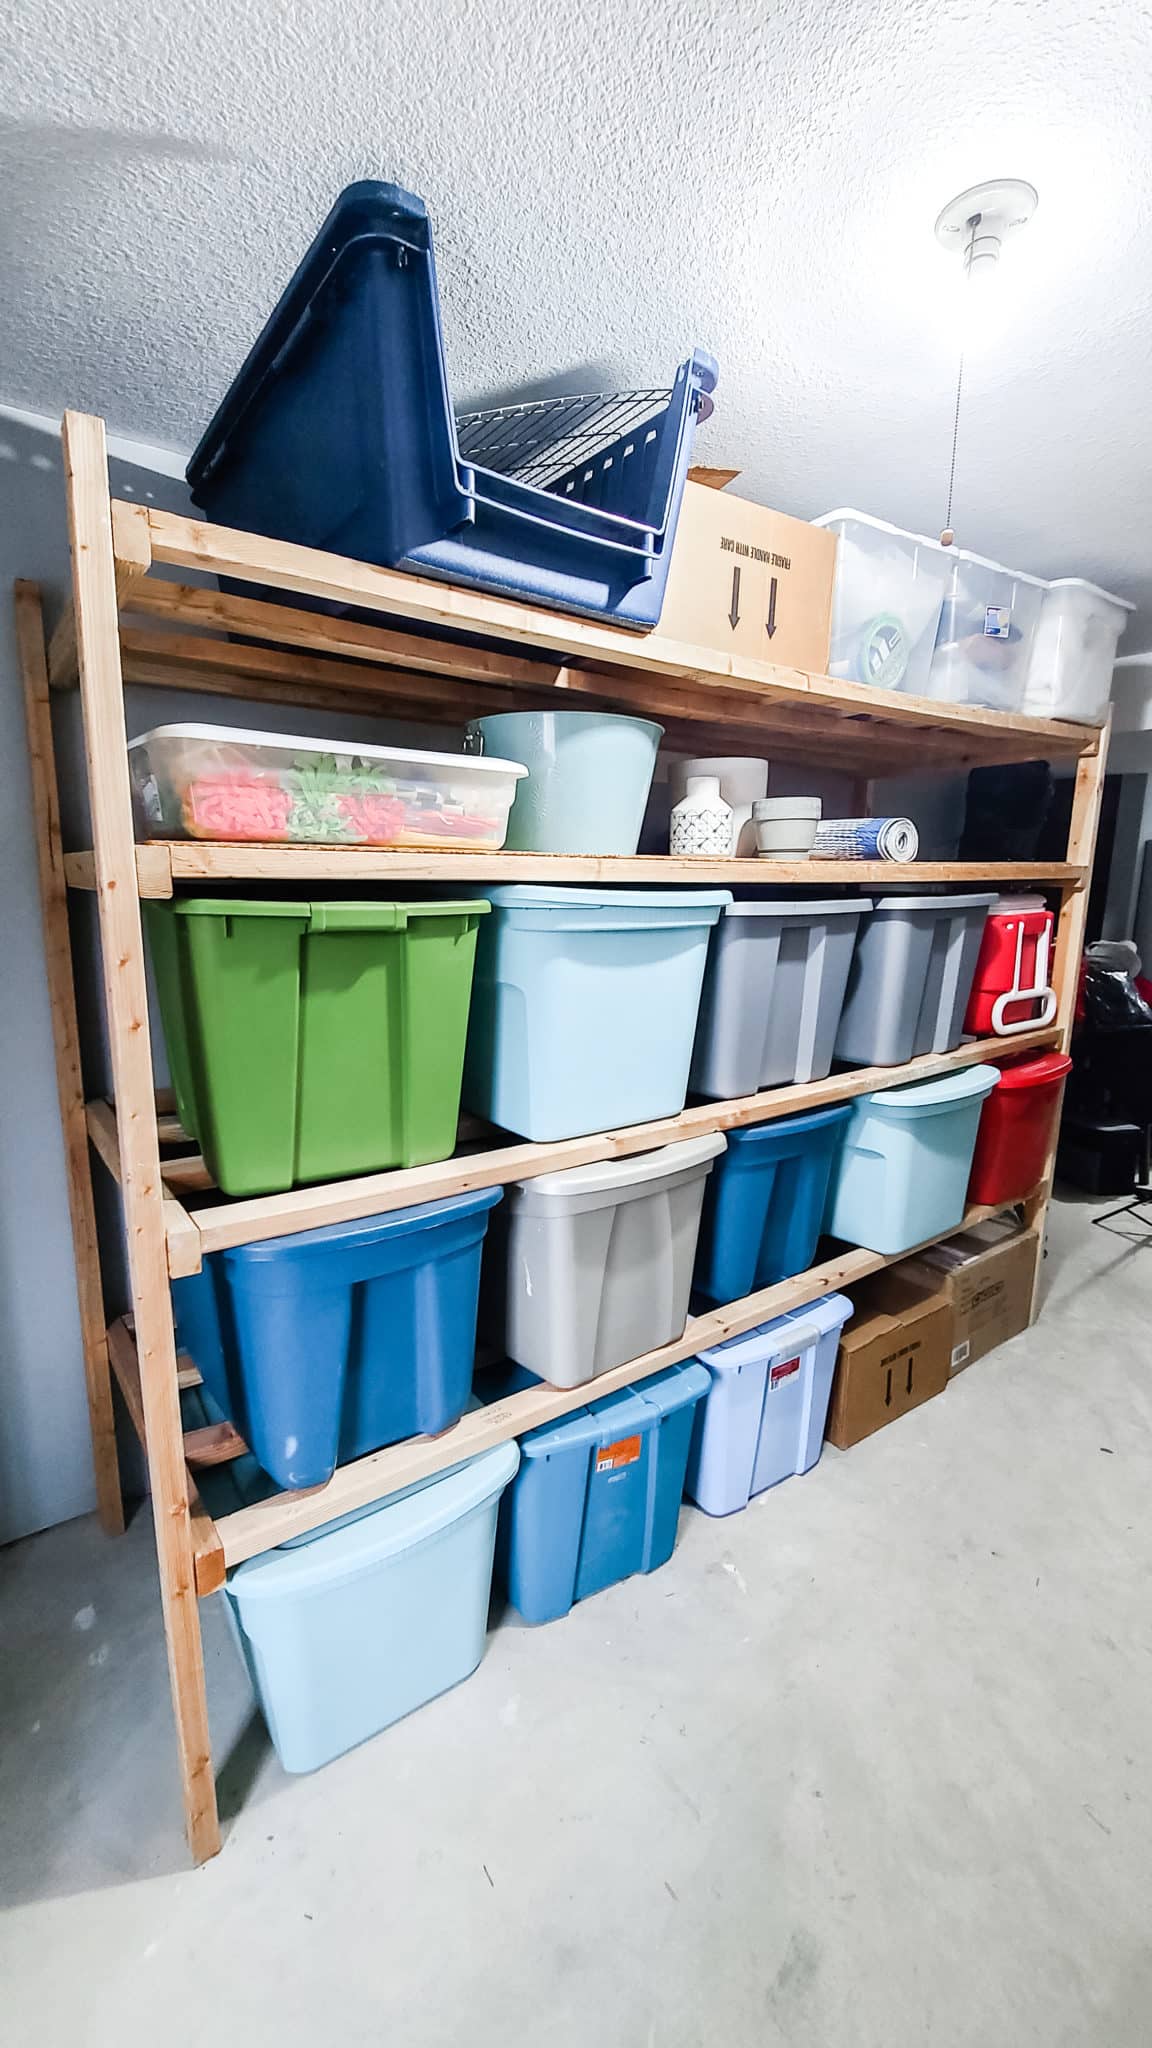
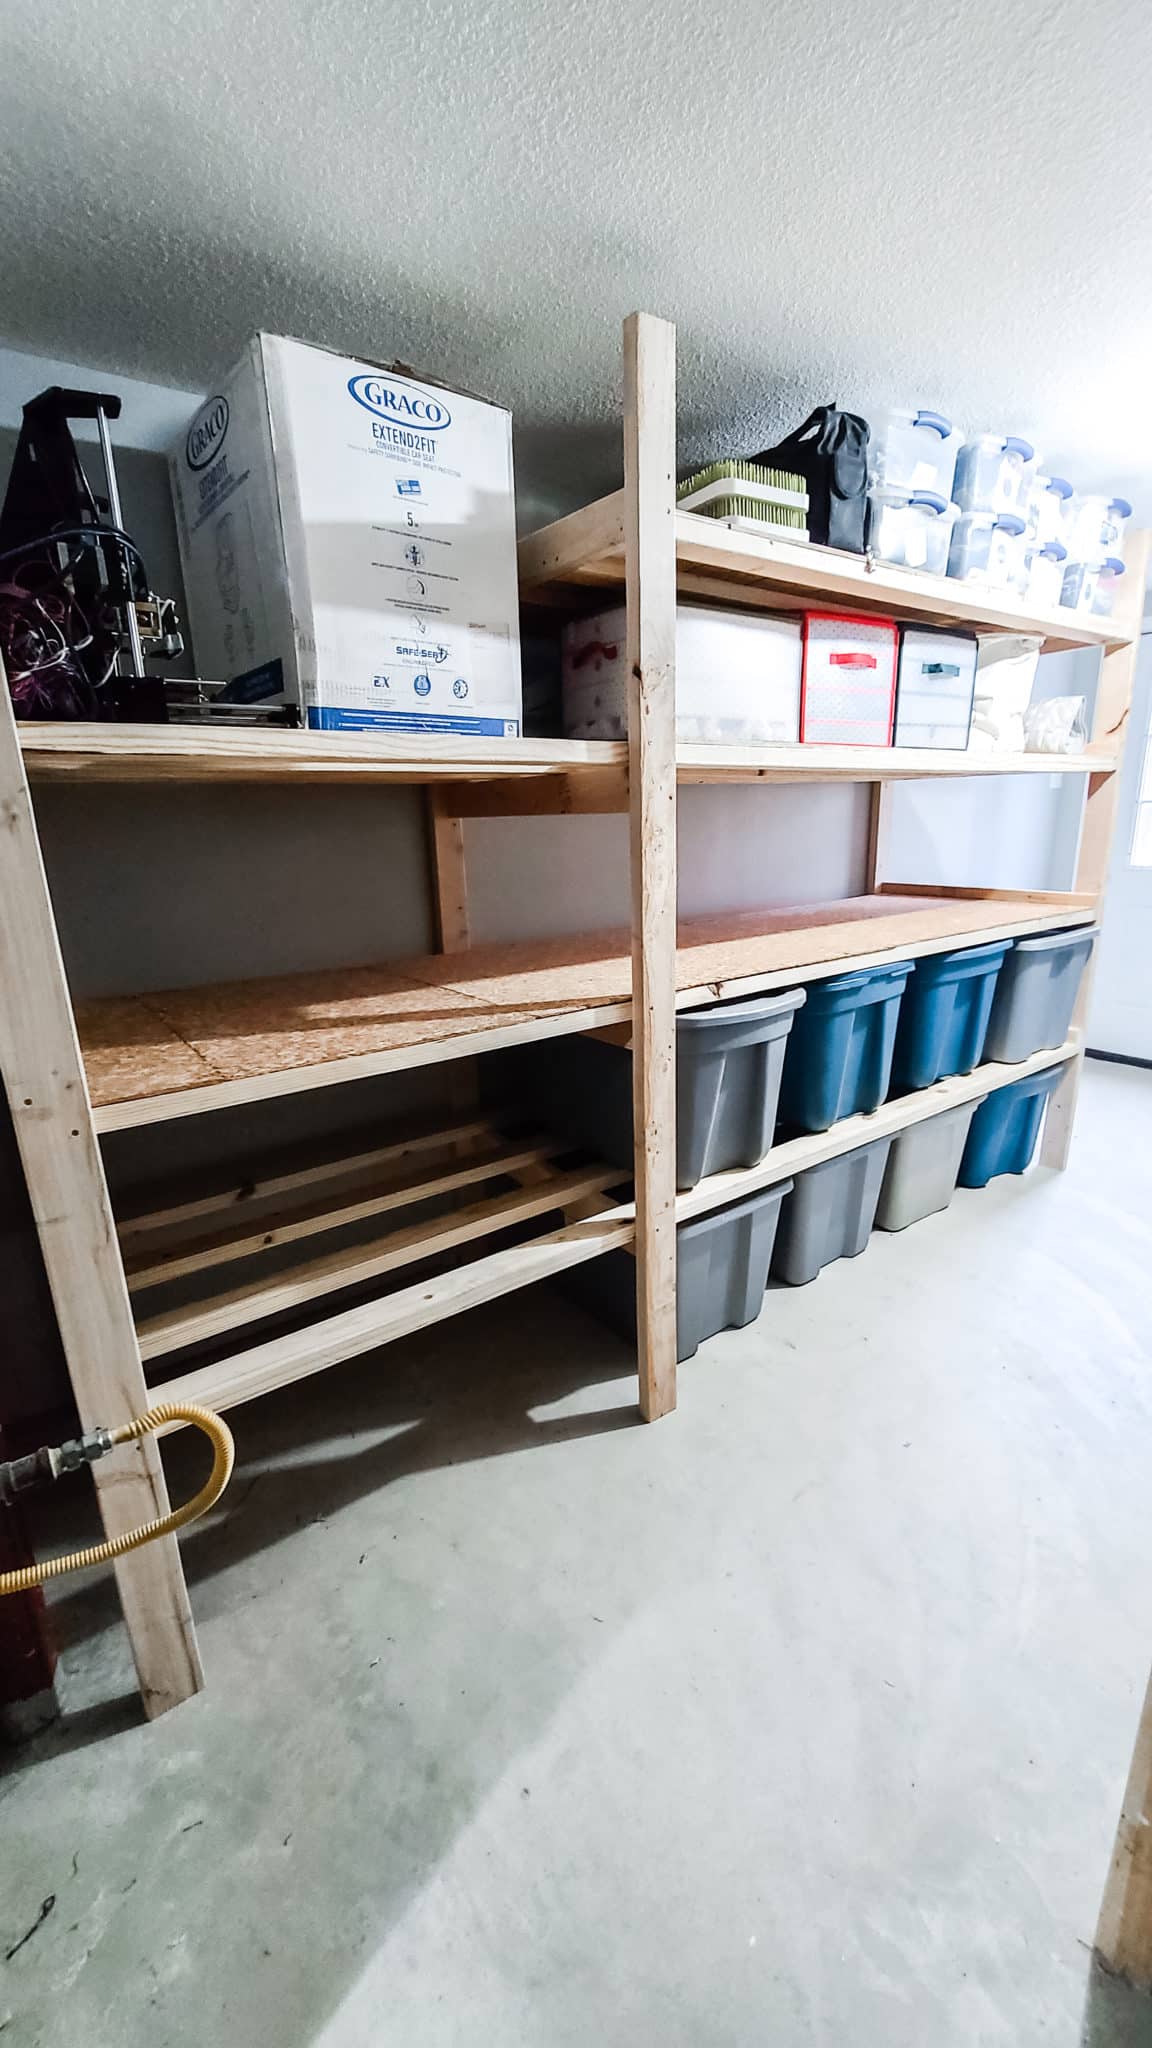
Final Assembled DIY Storage Shelves
Here’s a quick gallery of our two custom DIY storage shelves. These are the built versions of both the Large and Small example assemblies in our drawing package. Sadly, the plastic bins aren’t really eco-friendly. However, we use them to protect and store our items due to water issues we’ve had in the past and will be using them for a long time.
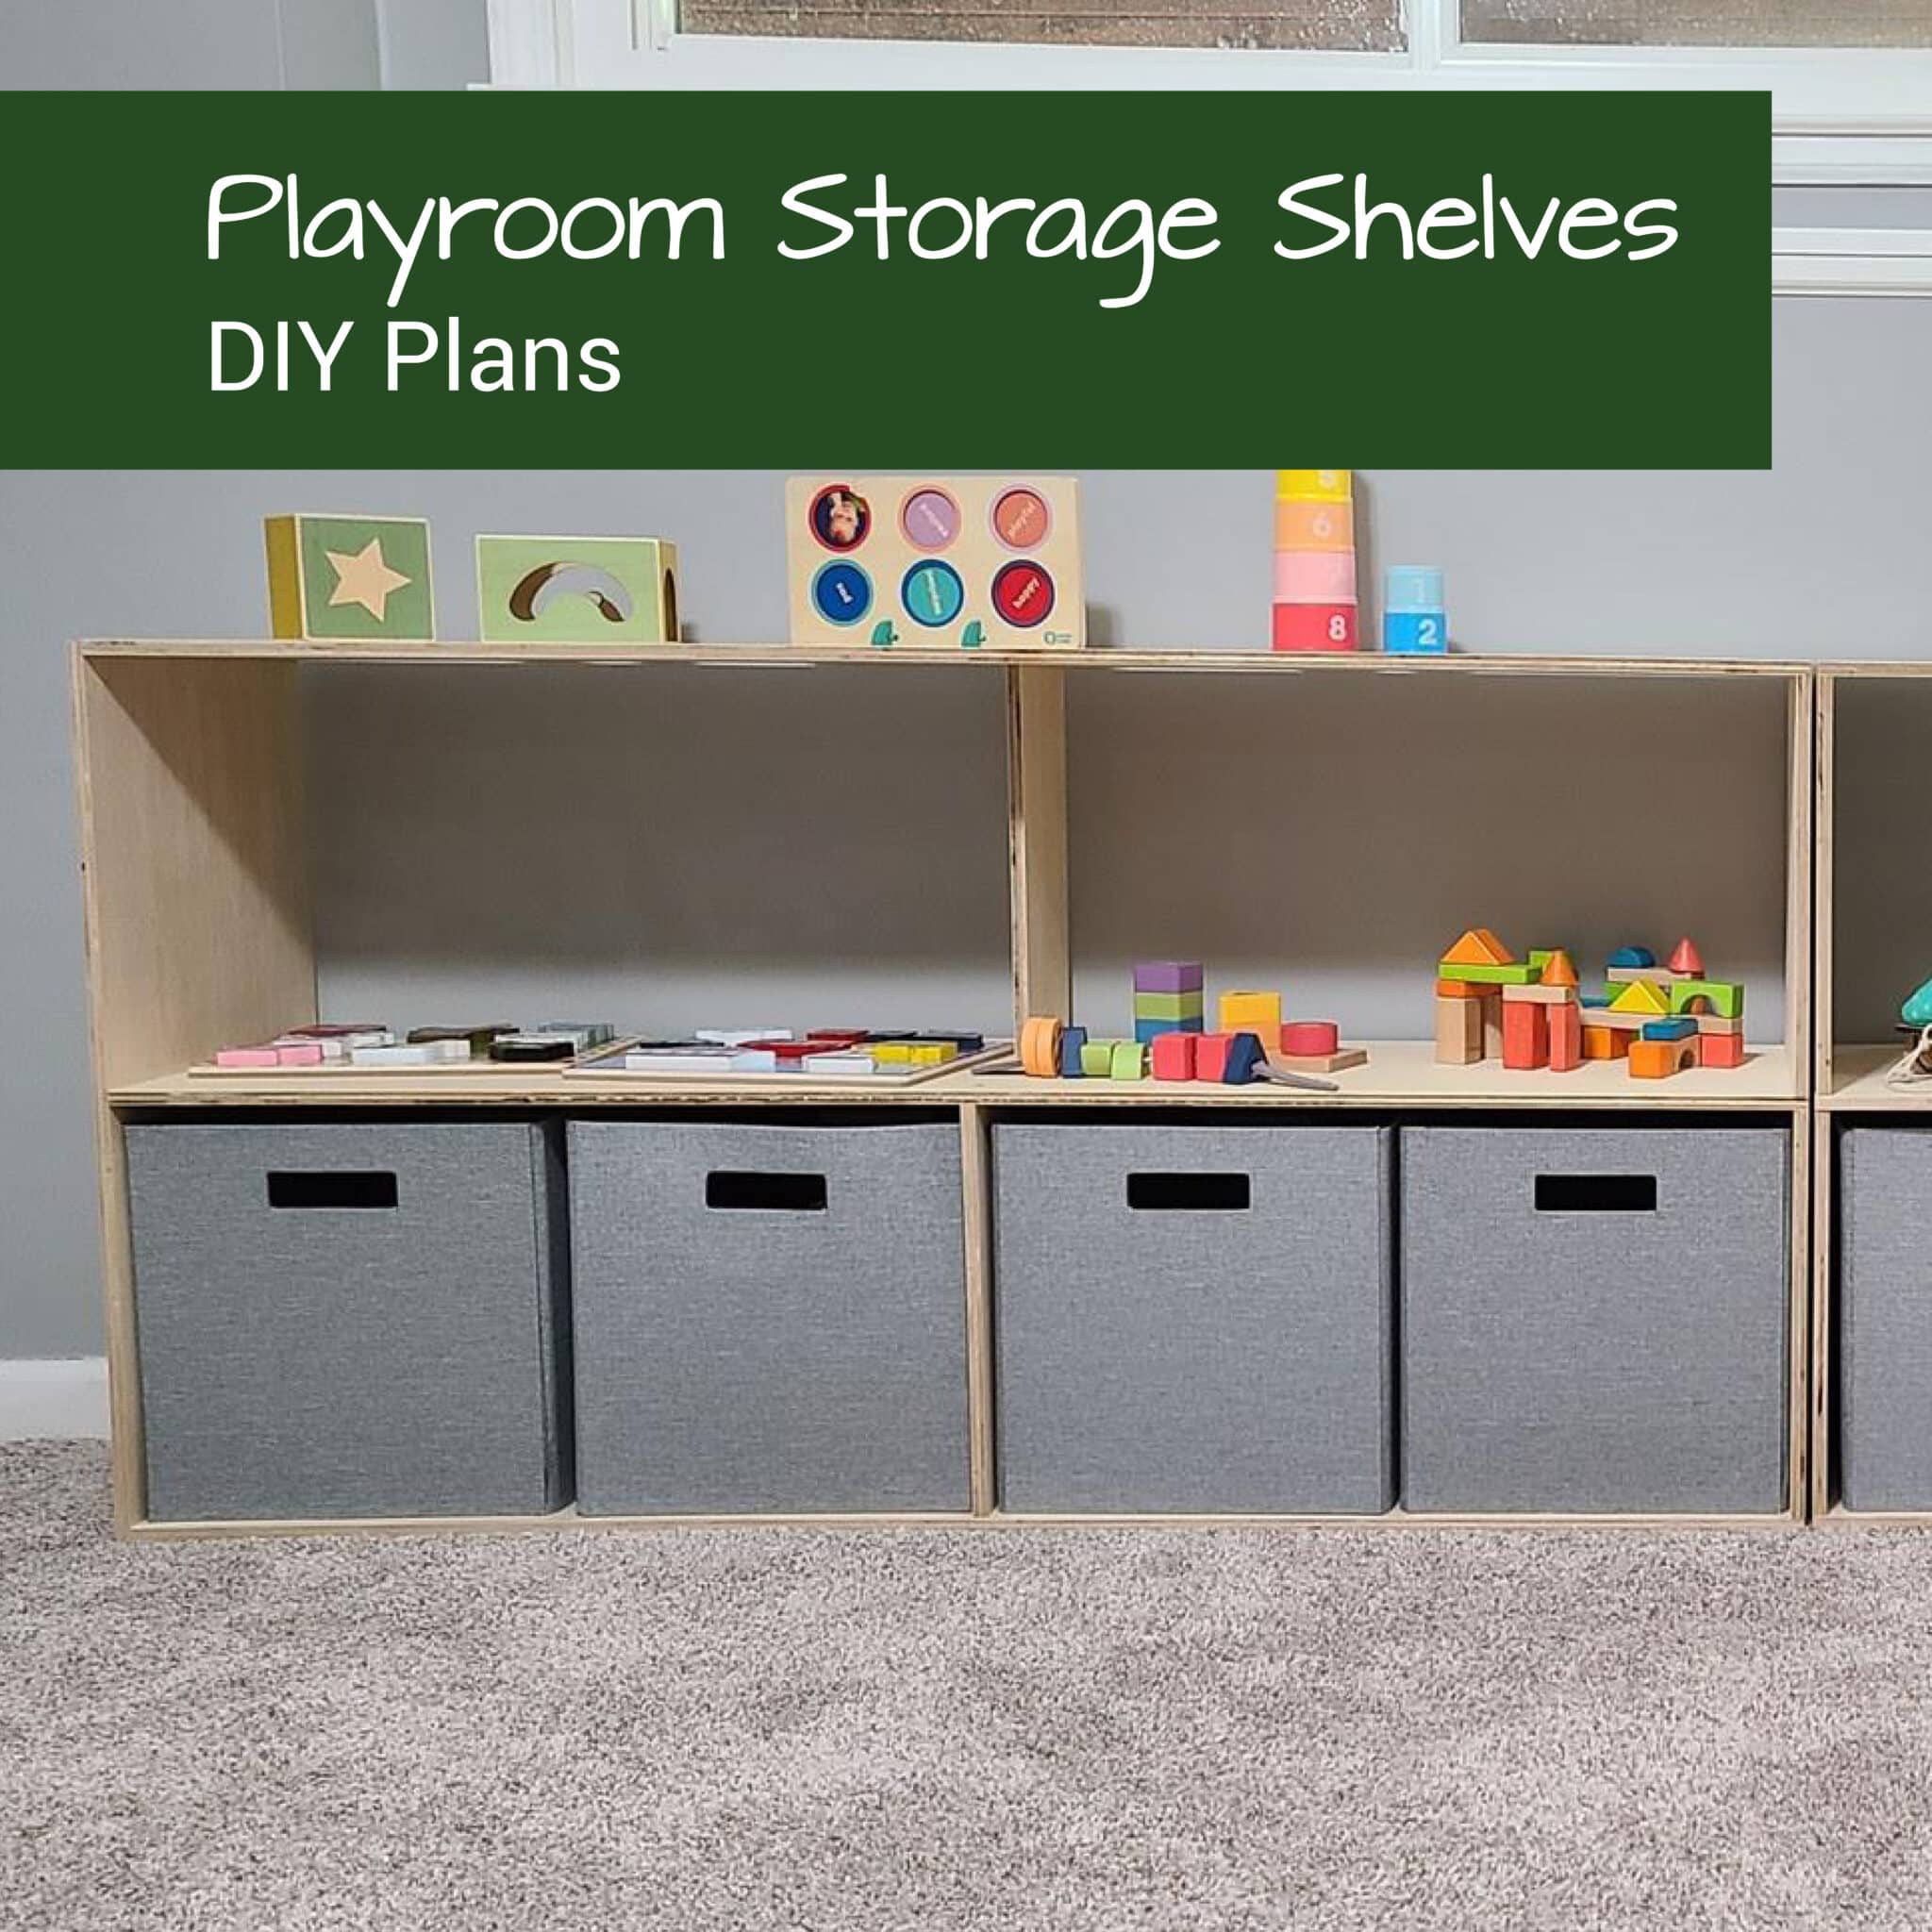
Make sure to check out some of our other storage projects like our Playroom Storage Shelves. Or take a look at some of our other Hubby How To’s and our DIY Projects.

Hope this helps you do the math and create some awesome, custom shelves for storage totes, decorations, or anything you want to store! Let us know what you think of these custom DIY storage shelves in the comments below!
Disclaimer:
1. As detailed, this project produces a storage shelf that will occupy a large amount of floor space. You are responsible for ensuring that the storage shelves fits your space and for securing it, if needed.
2. Safety: You are responsible for your own workplace safety. You are responsible for following the manufacturers safety protocols and recommendations for the tools you use to build this project.
Disclaimer: This post includes affiliate links, and I will earn a commission if you purchase through these links. Please note that I’ve linked to these products purely because I recommend them and they are from companies I trust. There is no additional cost to you.
