Interior Door Makeover: Easy DIY Project At Home
Sometimes doors can be just so flat and plain with no details. Well, there’s an easy way to upgrade your door using wood strips. In this post, we’ll cover the materials and steps for an easy interior door makeover!
Updated 1/08/2024

Disclaimer: This post includes affiliate links, and I will earn a commission if you purchase through these links. Read about our privacy policy.
Accent walls using geometric and linear patterns are quite popular right now. But a full wall might not be to everyone’s aesthetic or budget. There are many ideas out there for accent walls right now that could be applied to a smaller scale transformation like an accent door.
A door makeover is a great simple DIY project that you can do for a low budget. It can truly transform a space or view with just some small upgrades. Because let’s be real. Sometimes doors in the house are just plain old boring and flat! A simple door makeover can be like doing an accent wall, but on a smaller more affordable scale.
Our master bedroom door is highly visible from the dining and kitchen. It needed something to give it a little more life, but in a subtle way. We weren’t looking to add a pop of color (However, you definitely can!)
This is one of those fairly easy DIY projects at home that you can get done quickly. Read on to get a list of materials, how to find inspiration, make a plan, and the steps to completing your makeover.
Time to get to our interior door makeover!


Door Makeover Materials
- Paint of Choice – Ours was Behr “White” with Eggshell finish
- 3/4” wide by 3/16″ thick pine strips
- Option 1: Purchase 1/4” x 3/4″ pine trim pieces
- Option 2: Purchase 1×4 8ft. pine board and cut into 3/16″ thin strips
- Option 3: Use leftover scrap wood pieces like we did. Yay reuse!
- 1/2″ nap Paint Roller or Paint Sprayer
- Sandpaper or Handheld Sander
- Wood Glue
- Painter’s Tape
- Speed Square
- Tape Measure
- Miter Saw OR Jigsaw OR Handsaw
- Table Saw (optional if splitting boards)
Additions
- Upgraded handle
- New hinges
DIY Interior Door Makeover Steps
Step 1: Find Inspiration & Create A Plan
As I mentioned, there are a ton of ideas out there for accent wall ideas. Pinterest is a great place to get some design inspiration! So type in some keywords about what pattern you’d like to make: geometric, linear, etc. You’ll find something to inspire you for sure!
Follow us on Pinterest too to see our latest projects and sustainable living ideas!

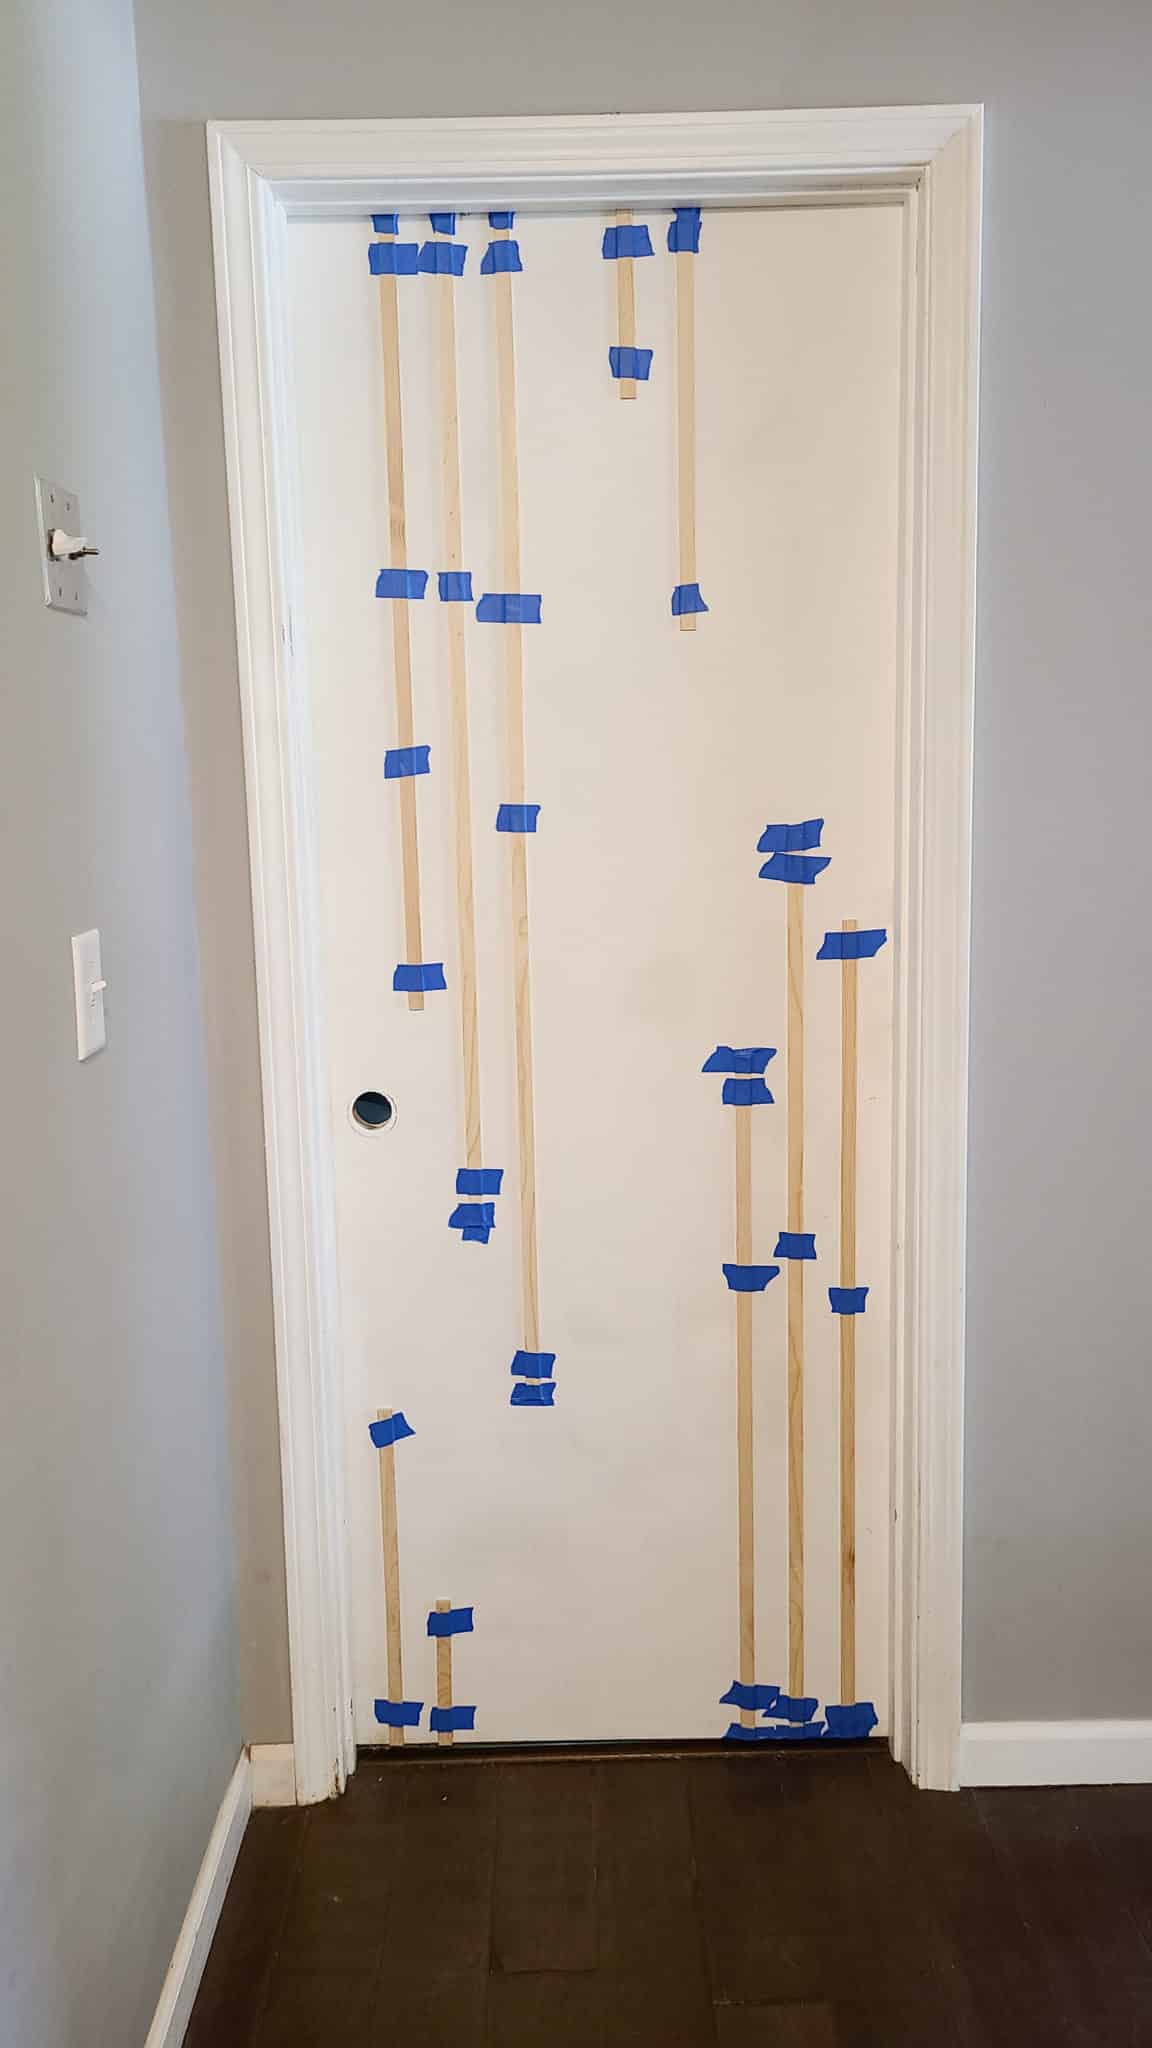
I’m a highly visual person, so I needed to do a quick mockup of the accent door design idea prior to implementing it. Since I’m using wood scraps for the door makeover, I took a few cut pieces and used painter’s tape to iterate some design ideas. As you can see I had only five pieces of varying lengths, so I couldn’t always put up my full idea. But it works for a quick visioning session.


After that, I took it a step further as I’m a planner and want a detailed idea of what I’m doing. Additionally, I’m a heavy user of Photoshop with my design background. It’s great for quick visualizations on top of a photo you took. So even with the quick mockups, I had to take it further and fully realize what this DIY door makeover might look like when painted. Below are a couple final options.
We were looking for a subtle accent that was more about the shadow lines. However, you could totally paint it a fun color like many of the accent wall examples.


If you don’t have Photoshop or some editing software, then just sketch it out with pen and paper or use the draw function in your phone editing app! Having a plan to follow as a guide will help tremendously before you start the DIY project and save you from wasting time. Nothing is worse than doing a project, finishing it, and not loving the final outcome!
Examples of Quick Phone Sketches


Creating Measurement Plan
If you have Adobe Acrobat, you can bring in your design photo and use the measure tool to give you dimensions. Go to tools, open measure, and dimension the height of your door. Then right-click in white space and select change scale ratio and precision.
In the first box, type the current dimension and in the second box type your actual door height. Then push OK and your picture will be scaled to real life.


I used this as a quick way to estimate my wood strips’ lengths as well as my spacing between pieces. It’s not perfect unless you took a really great picture that’s perfectly straight on and not rotated at all. However, it’ll give you an idea.


Step 2: Prep the Door
Depending on the condition of the door, it’ll usually require some prep work prior to attaching your accent pieces. You may need to fill holes and sand your door.
Some people may prefer to remove the door and do the prep and painting in the garage or workshop. Personally, we didn’t want to take the door off the hinges and be missing our bedroom door. Do whatever works best for you.

Fill Holes & Sand
If you have any dents, scratches or holes in the door, now is the time to fill them. For wood doors, we typically fill in imperfections with wood filler. Then take some sandpaper to it to smooth it out after it’s dried.
Additionally, do a rough sand where the wood strips from the design will be attached. This creates a little rougher surface for the wood glue to adhere to.
Don’t Mix Paints
FYI, latex and oil paints don’t mix well and will actually peel apart. So if you don’t know what was on your door prior, sand it all down first. This way none of your paint accidentally starts peeling away when you hang up your door.
Typically, most basic doors in houses are painted with latex paint, but you never know unless you know. If you’re worried, then do a test paint spot to see if it’ll be an issue. That’s what we did when we patched our door as you can see in the photos.
Step 3: Measure & Cut The Accent Wood Strips
Based on your design mockup or sketch plan, it’s time to measure and cut the accent wood strips.
Mark Out The Design & Label
The chosen design was linear pieces with straight ends. So marking them was simply measuring a distance, and drawing a straight line across. If your design has angles, then use an angle guide to help ensure each strip is at the same consistent angle.
Make sure to mark which side is the correct piece. This is so when you cut it in two, you’re not left wondering which piece is correct. Since there were a lot of varying lengths, we also labeled them with the length, so it was easy to match up with my design measurement plan.
Cut Each Piece
Once all the pieces are marked and labeled, it’s time to cut them to the desired length. We used a miter saw as it’s quick and easy. But don’t stress, you could use a jigsaw or a handsaw. Always practice safety when cutting wood pieces!
Have a finished piece pile and a discard leftover pile. Save your leftover pieces for another project. It’s both eco-friendly and budget-friendly for future DIY projects! The smallest scraps that can’t be used for future projects also make great kindling!
Step 4: Layout The Accent Wood Strips
All the cutting is now done! It’s time to lay out the wood pieces to the door.
Execute The Plan
Having a dimensioned layout plan makes this part easy. Use a measuring tape, pencil and a speed square to lay out your pieces and mark where they need to be. Mark the sides at the bottom and top to align when gluing.
Ensure the pieces are straight. I highly recommend taking the measurement in several parts of the same piece. Wood can be warped or bow making what should be a straight line look wavy if you didn’t measure along the whole length.
For example, the 45” long piece was supposed to be 2 inches from the edge of the door and the edge of the next piece. At the top and bottom, it was 2 inches. However, it bowed in the middle to more like 1 ¾” on one side and 2 ¼” on the other. So I measured 2” from the edge at the middle as well and drew a straight line. This created a guide for me to align to when gluing.
Take measurements in multiple locations on all your longer pieces to ensure you have it straight. Additionally, ensure the pieces along the edge won’t interfere with the door frame as you close the door.
Step 5: Glue All The Pieces
After the door is marked, it’s time to glue. There are lots of glues out there, but so far simple wood glue is the best for this application. It doesn’t harden immediately, so you have time to adjust the wood pieces as needed. This ensures your design ends up straight. It also doesn’t add moisture, get bumpy, or warp your wood strips.
DIY Tip – DO NOT use liquid nail or construction glue! It hardens quickly which can be nice, but it also seems to add moisture to the wood pieces. We know from experience, and it sucks for pieces to warp and fall off after all your hard work.

Use Painter’s Tape To Hold In Place
Because the door is still hanging upright in our case, painter’s tape is a great way to secure it while drying.
- Place glue all along the back and then place onto the door.
- Adjust the piece to align with your marks
- Use painter’s tape to secure in multiple places
- If the wood is bowed, use tape at that spot to pull it back into alignment based on the marks.
Repeat this process until all the pieces are attached.
DIY Tip – Make sure to account for the door frame and flooring around your door. You might need to slightly shift your strips so that they don’t interfere with the door’s function.
I went back and added a little glue and tape at the ends to ensure they were flat against the door. Gravity wanted to pull them away and I didn’t want it popping off. If the door has been removed and is laying flat, this may not be needed.

Now just let all the glue dry! Ours dried overnight as wood glue typically requires 24 hours to be completely cured. However, products may vary, so read your product’s label.
Step 6: Paint It
Prior to painting, make sure there are no touch ups to be done. There may be some excess glue around the wood edges that need sanding or scraping off. This way it’s all smooth and ready for paint!
We own a paint sprayer, but it was easier to just roll the paint in my case. So I put down a dropcloth and rolled on the paint using a heavier ½” nap roller. It got most of the wood edges, but I did have to go back to touch up a few that it missed.


If you’re going to spray the paint, I highly recommend removing the door and spraying in a well-ventilated garage or workshop. You’ll want to have a tarped area to catch the overspray. Additionally, you don’t have to tape off your door frame and walls to protect them.
We chose the basic Behr white paint as that’s what our doors and trim are painted. We wanted something subtle by adding the wood pieces, but to still match everything around it. The door could have been painted an accent color instead to bring attention and contrast. Do whichever feels best in your space!
Depending on your paint choice, a second coat may be required.
Step 7: Finishing Touches
If you’re going to add new handles or hinges, now is the time. We just used what we had as they still worked and looked nice. If you removed the door, then rehang it.
Once all that’s done you’ve completed your DIY door makeover! Stand back and enjoy the view!


DIY Door Makeover Tips & Methods
Here are a few other notes on methods and tips when doing a DIY door makeover.
- Detailed Plan versus Random – We’re highly detail-oriented, so a detailed plan and layout was for us. However, using what pieces you have and laying them out until it’s how you desired and then attaching them is fine too. Or you can totally wing it and eyeball the layout if that’s your jam.
- Removing the Door – You can totally do this project by removing the door. You won’t have to fight gravity then! However, you will be missing a door for a while between glue and paint drying, so just ensure you’re good with that.
- Spraying Paint versus Rolling Paint – Totally a personal preference. The textural finish will be a little different depending on which you choose. Sprayers take a little experience too and aren’t always in a typical DIYer’s workshop.
More DIY Projects
Now that you have a bed frame project, why not try one of our other DIYs?! Head on over to our Shop to check out our other DIY plans, and sign up for our newsletter so you don’t miss any new DIY projects and plans.
Also, check out our other Hubby How To posts in our DIY Category. Whether you’re looking to DIY furniture like a hanging daybed or for the perfect balance of DIY and sustainable living with a stacked rain barrel system, we’ve got a ton of resources for you.
- 15 Amazing Woodworking & DIY Projects With Plans And How-To Instructions
- 5 DIY Bed Frame Projects You Can Make
- Eco-friendly Building Materials & Products: A Guide For DIYers & Homeowners
- Home & Garage Organization You Can DIY
- How To Create A Bold Accent Wall Using Leftover Paint


We definitely had fun doing this easy DIY project and will likely do more doors around the house as well! Let us know what you think of this interior door makeover in the comments below!


Disclaimer: This post includes affiliate links, and I will earn a commission if you purchase through these links. Please note that I’ve linked to these products purely because I recommend them and they are from companies I trust. There is no additional cost to you.


