How To Make A DIY Writing Tray For Kids
Ever seen those Montessori sand writing trays, and thought you need one? But also thought you could totally make one, too? Well, that’s exactly what we did! This post covers how to make a DIY writing tray for kids including the tools, materials, and step-by-step instructions.
Updated 1/22/2023

Disclaimer: This post includes affiliate links, and I will earn a commission if you purchase through these links. Read about our privacy policy.
I’ve always seen beautiful Montesorri-inspired wood writing trays, and been wanting to have one for my toddler to practice his letters and writing on. There are a lot of amazing small businesses on Etsy selling these trays.
However, my hubby and I are serial DIYers and prefer to utilize what we already have to make things. As we do a lot of DIY wood projects, we have scrap wood laying around. As a way to DIY sustainably, we used some scrap Poplar wood to make a DIY sand writing tray for our little one.
And of course, we have to share the DIY process, so you too can make one if you want! Here are the tools, materials, and step-by-by instructions on how to make your own DIY sand writing tray.
Tools & Materials For DIY Sand Writing Tray
Tools
- Table Saw
- Drill
- Router with Router Bits
- We used a ¼” template router bit and a ⅛” roundover bit
- Sandpaper (80, 120, 180 grit)
- Vise or Dog Hole Clamps or Super Glue and Accelerator with Painter’s Tape
- There are several ways to secure a tray when routing. Read more in Step 3
Optional Tools
- Random Orbital Sander & Assorted Sanding Discs
- Makes sanding faster for some parts, but will still need sandpaper for edges
- Sanding Block
Materials
- 1 ft of a 1×8 Board or 1 ft of a 4/4 x 8”+ Wide Hardwood Board
- Really it can be any width and length you want, ours is 15” long by 7.5” wide.
- Preferred Finish
- We used Rubio Monocoat Oil Plus 2C Pure (which we LOVE!)
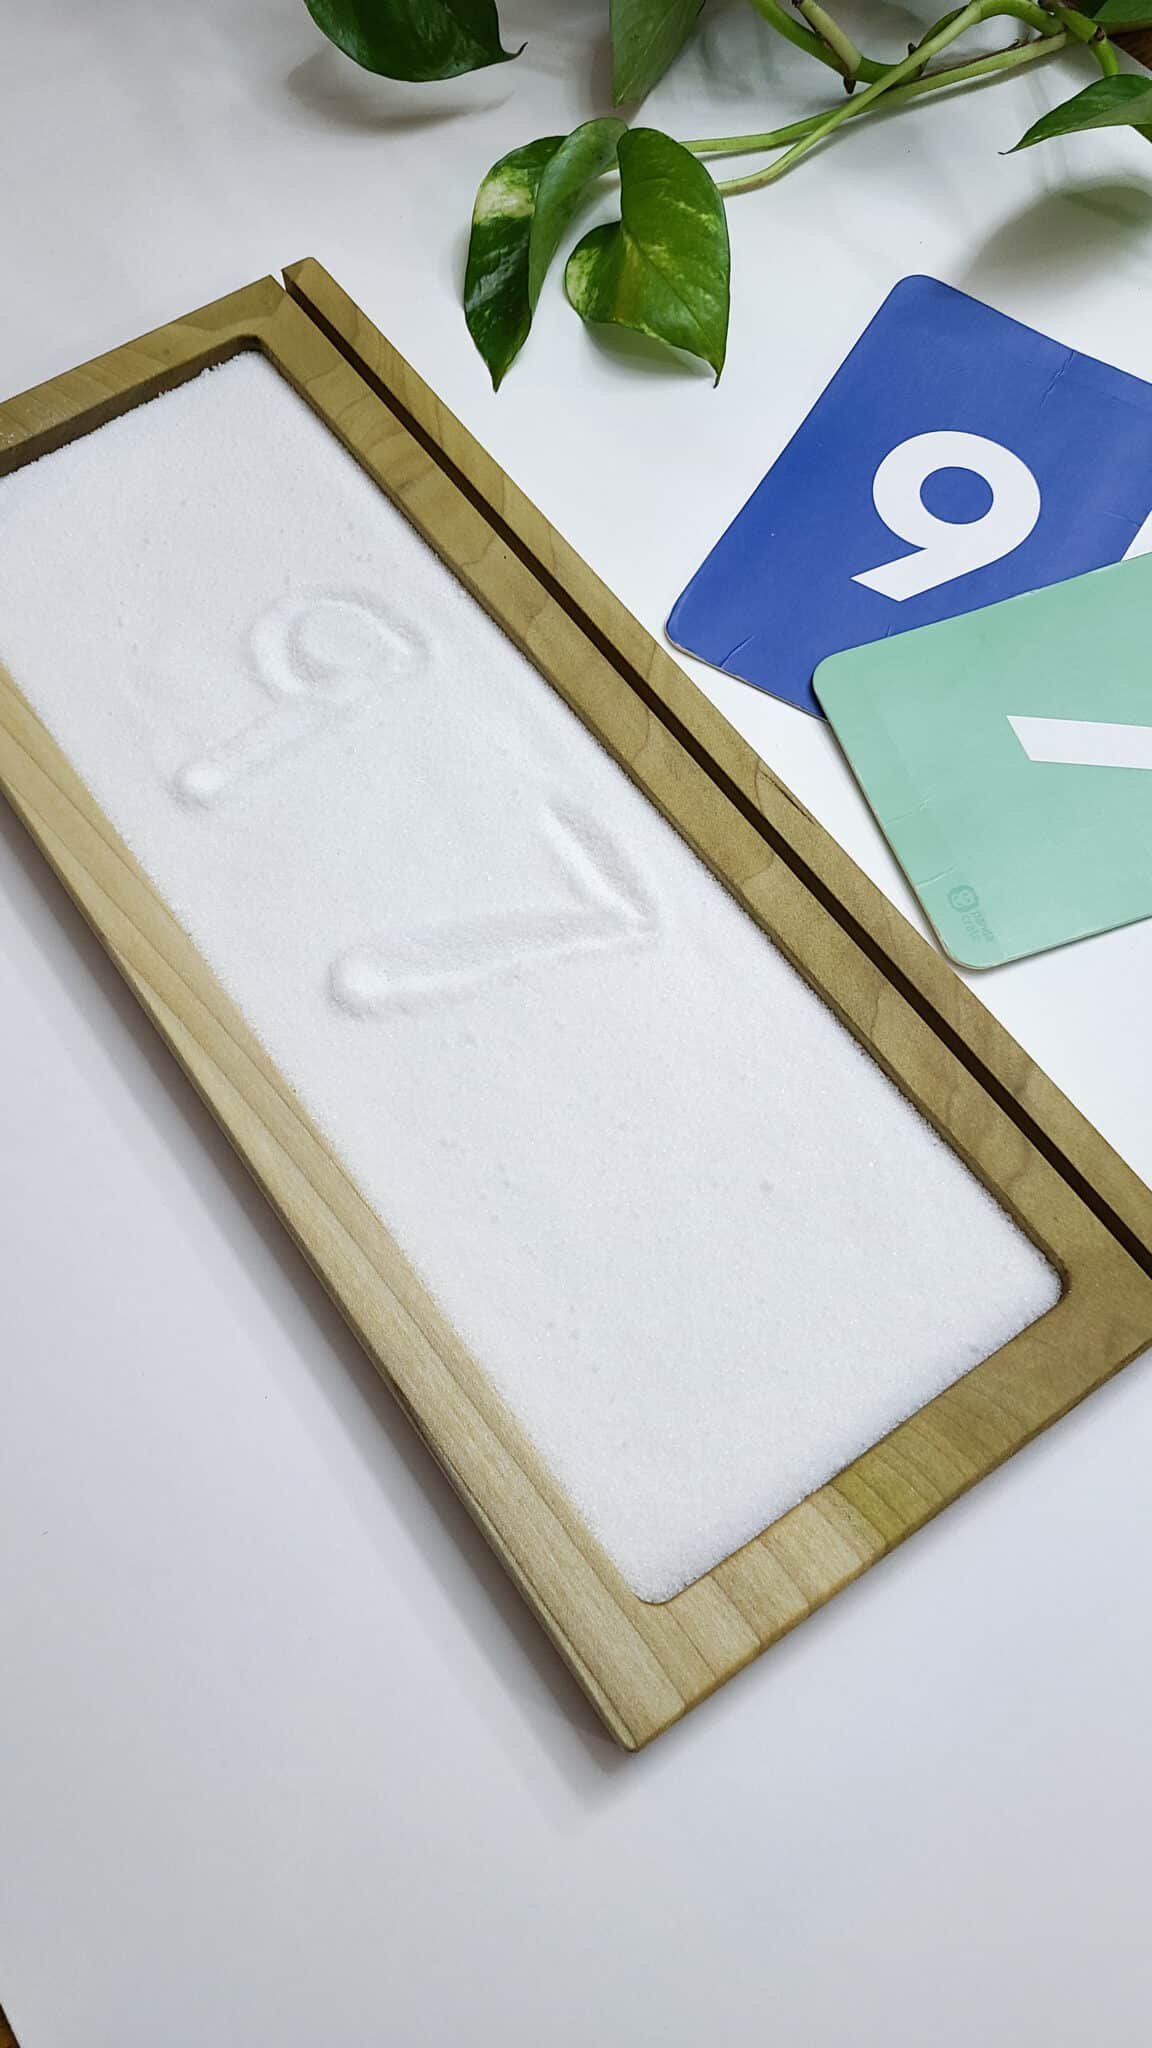
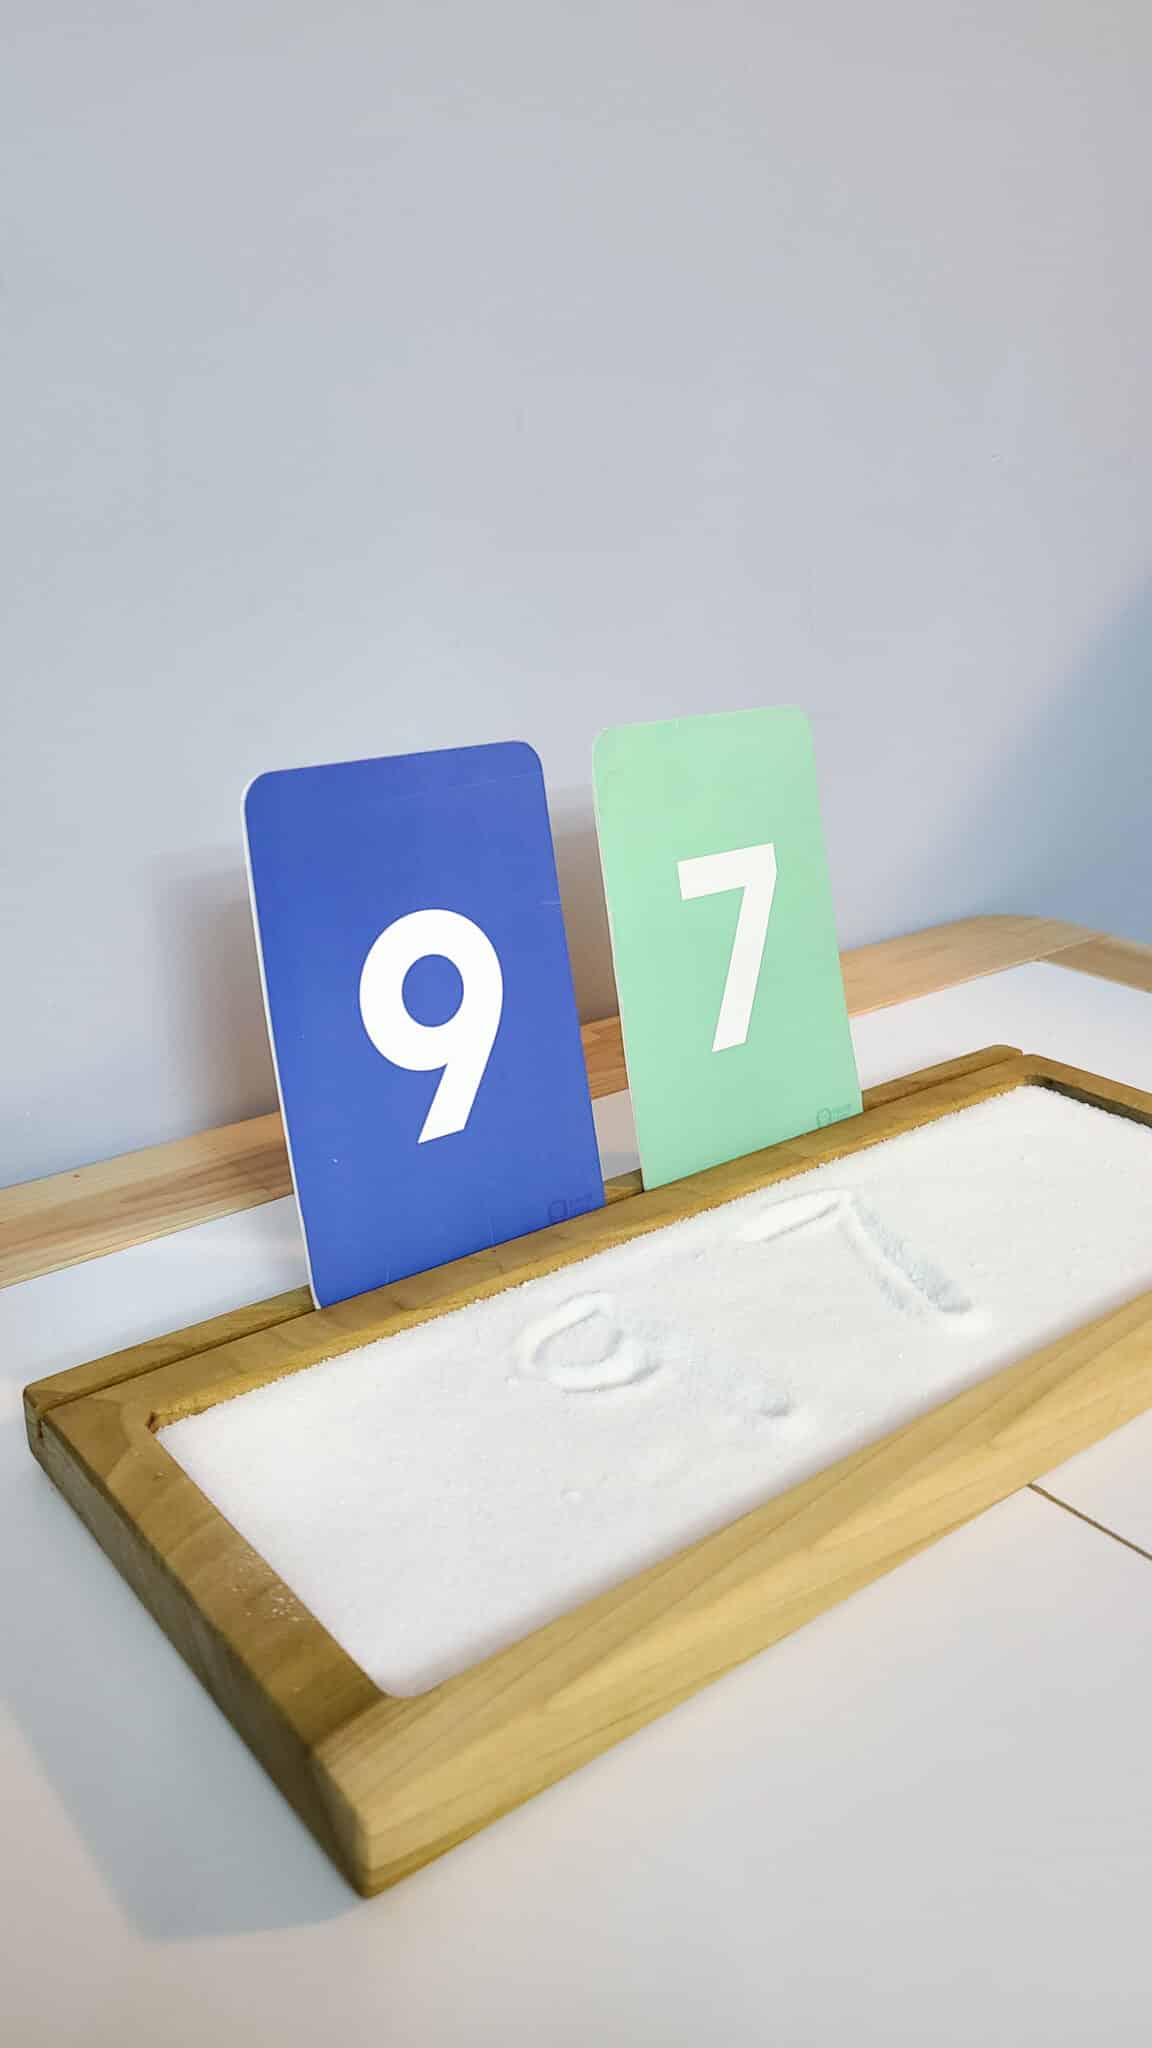
- Sand or Salt or Sugar
- Cards for Writing Practice
Now that you have the tools and materials, let’s get started on creating your DIY sand writing tray! Make sure to check out our YouTube How-To as well!

DIY Sand Writing Tray Steps
Before

After

Step 1: Square & Flatten The Board
Unless you bought a nice finished hardwood board that you know is square and planed, you’ll want to ensure it’s straight and flat. If using rough or S3S lumber, you’ll want to start by flattening your board and squaring it up on the table saw.
You can run it through a planer, if you have one, to ensure it’s flat. No worries, if you don’t. Just pick a piece that doesn’t appear to have major warps or twists.
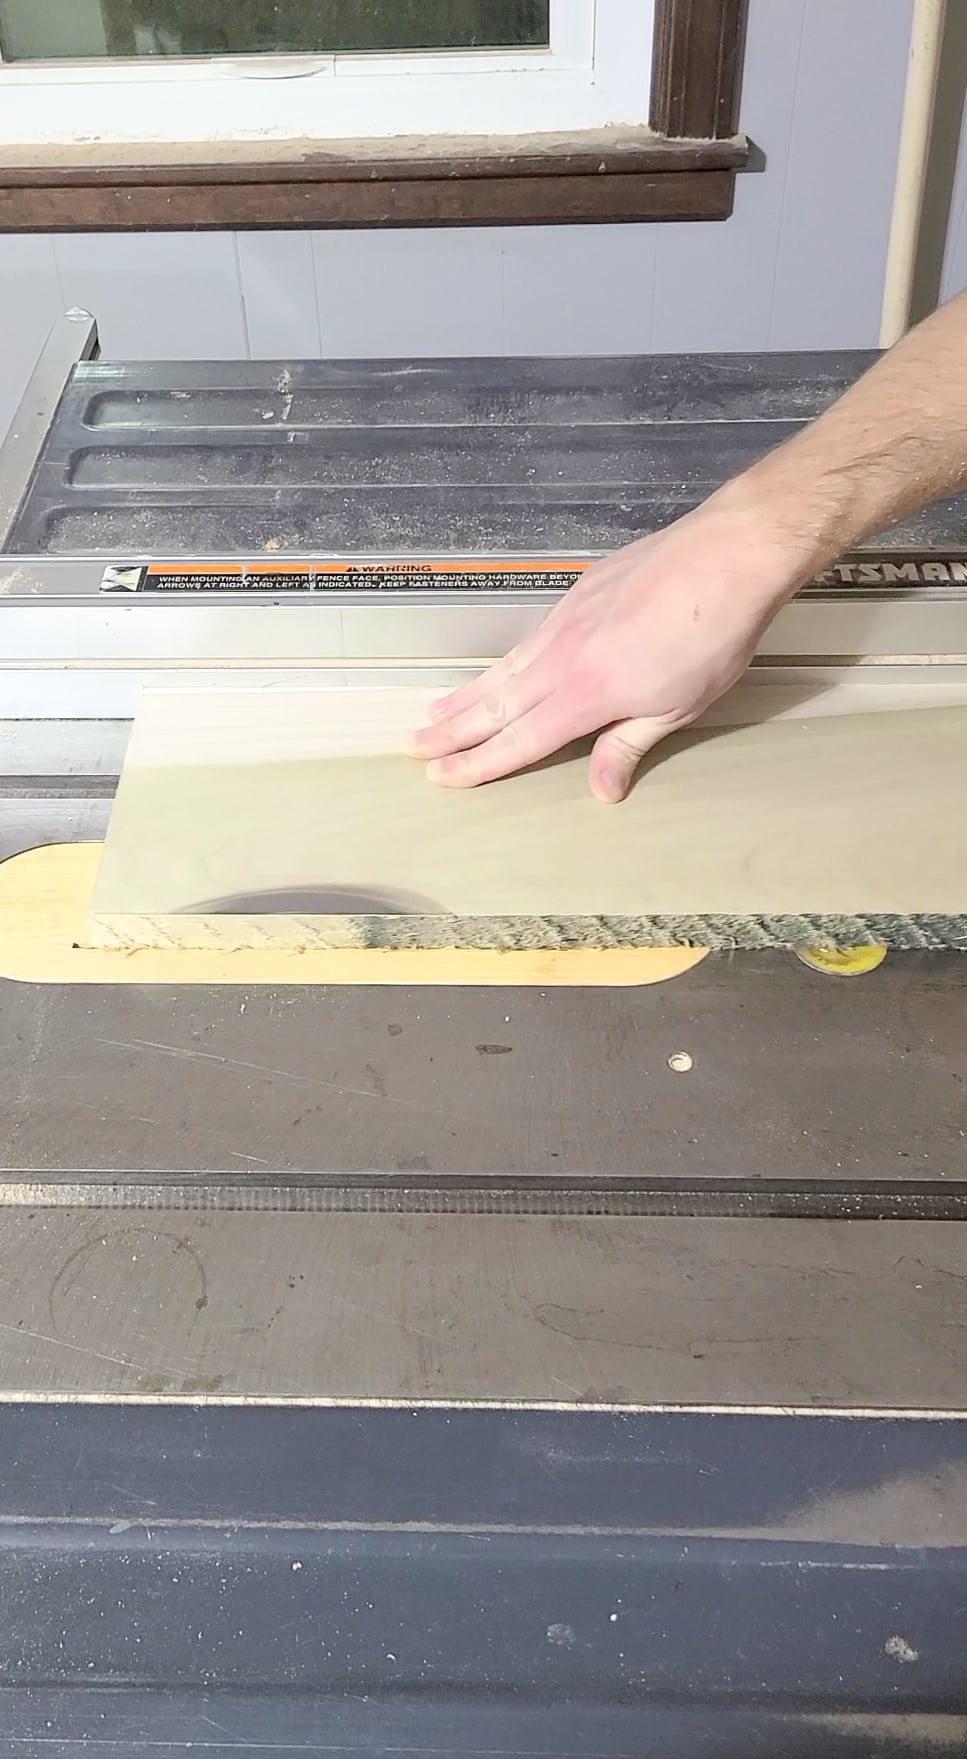
Then create straight edges using a table saw. Set your saw’s fence to the desired dimension and cut to length. Then repeat for the other sides.
DIYer Tip – Sometimes table saw fences aren’t square (especially older ones like ours). Double check the fence by using a speed square to confirm it’s square. Tap it until it’s in place.
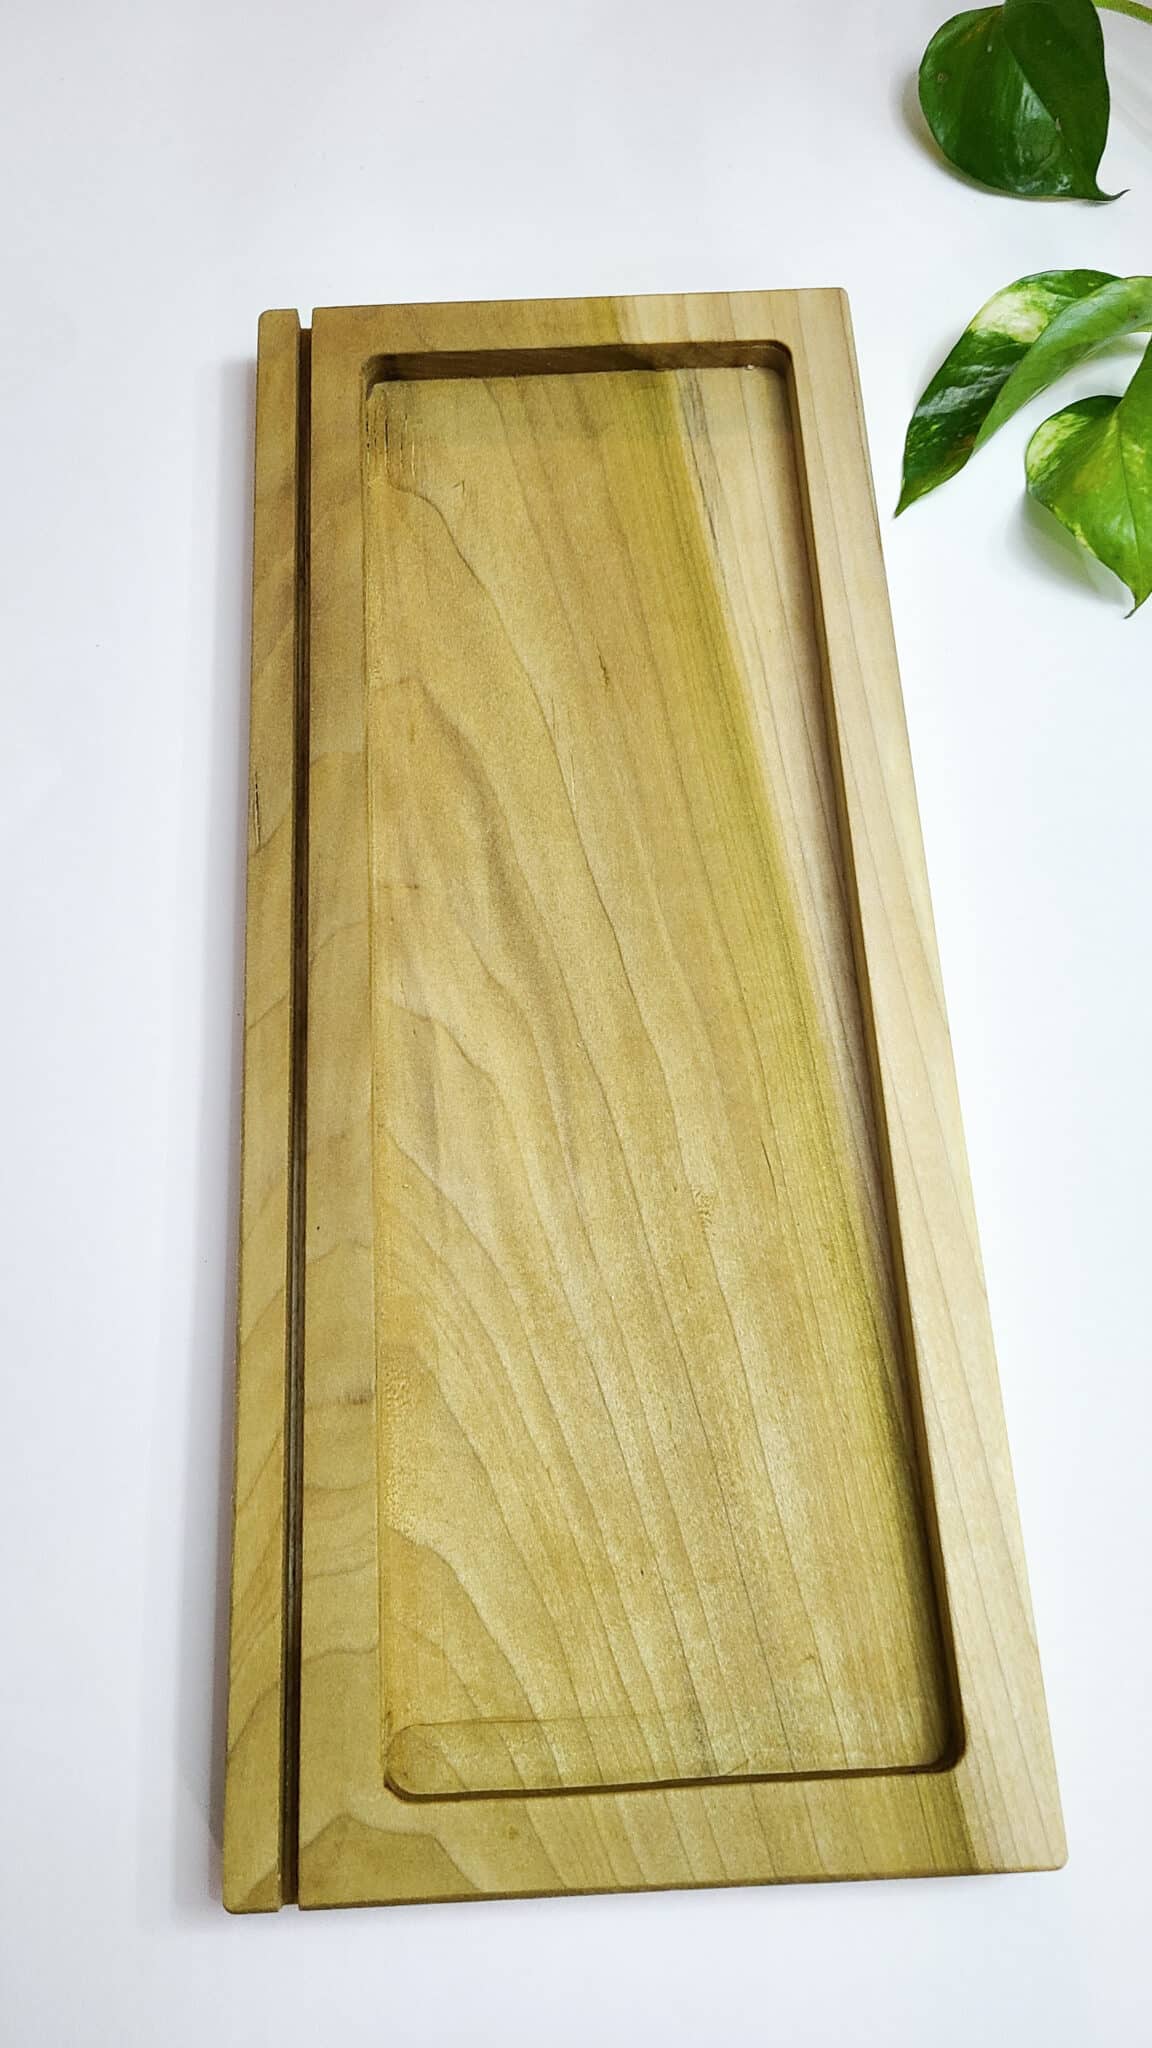
We didn’t use precise measurements on our DIY tray as we were just using a scrap piece of poplar wood. It ended up being about 15” long by 7.5” wide. We preferred a longer tray than you typically see, so that our child could have lots of room to write out words or letters.
 Straighten edges on table saw
 Cross cut board to length
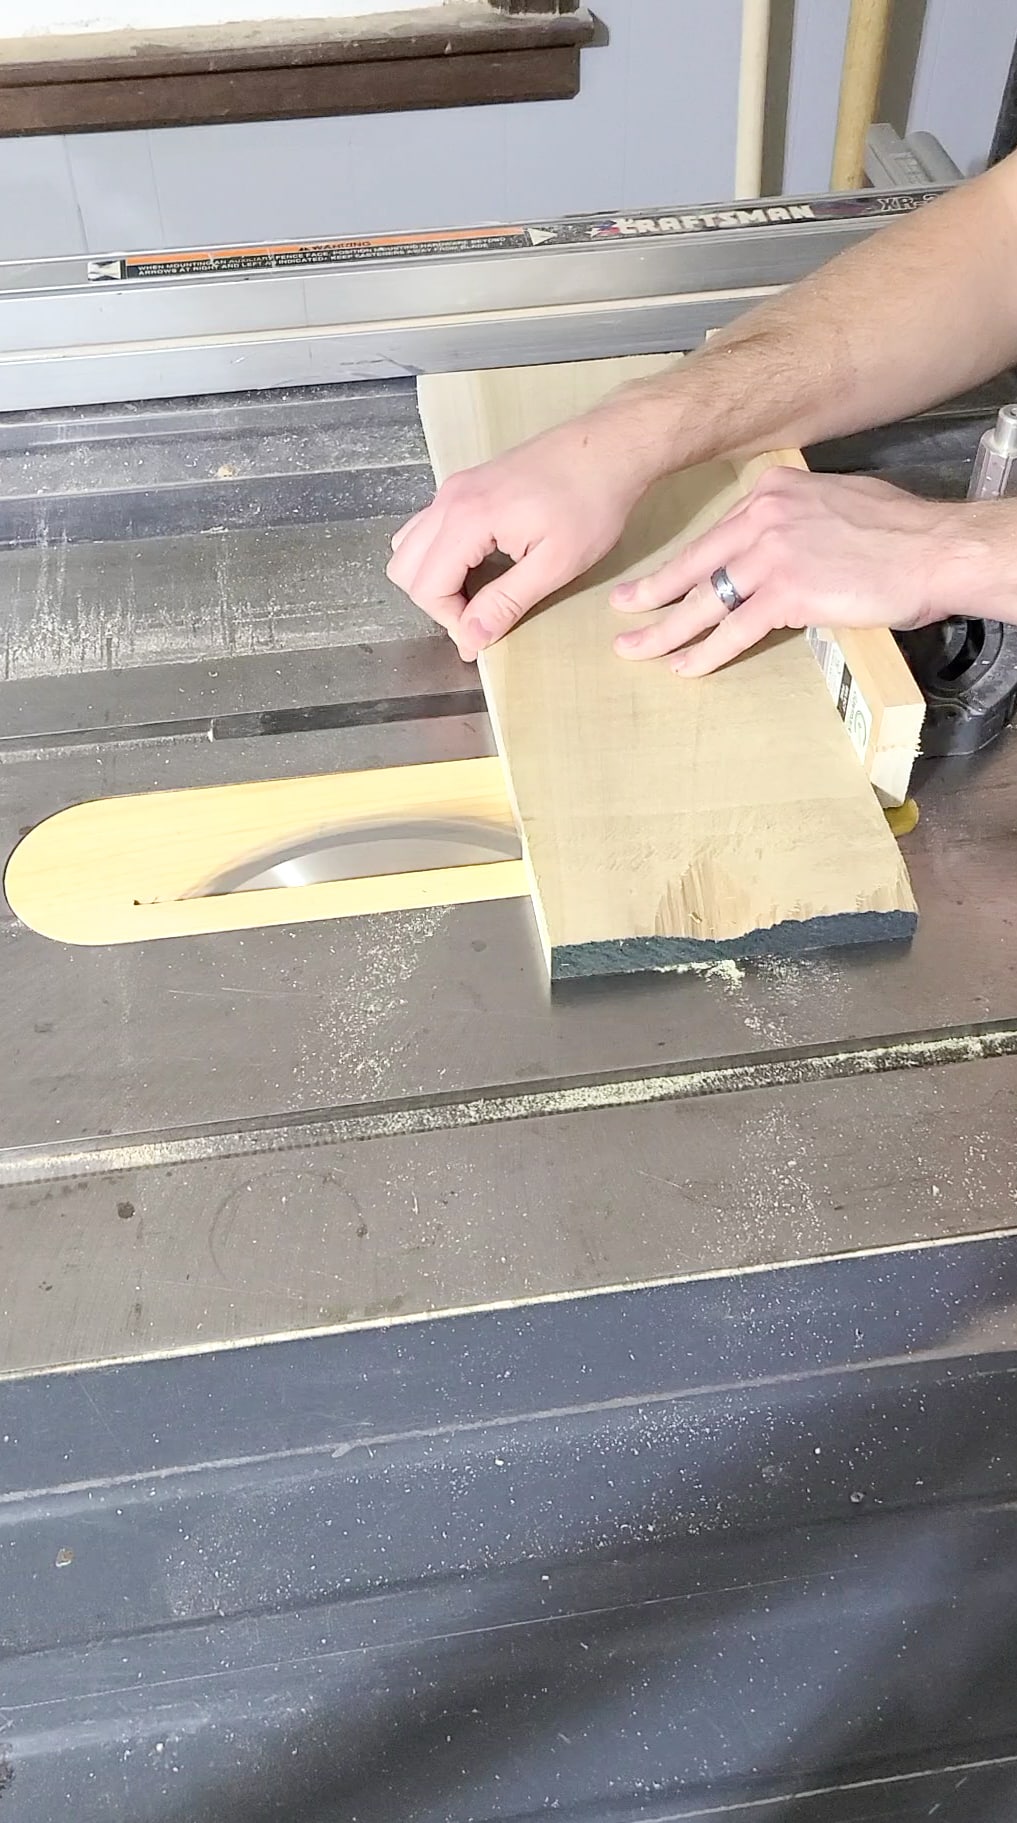
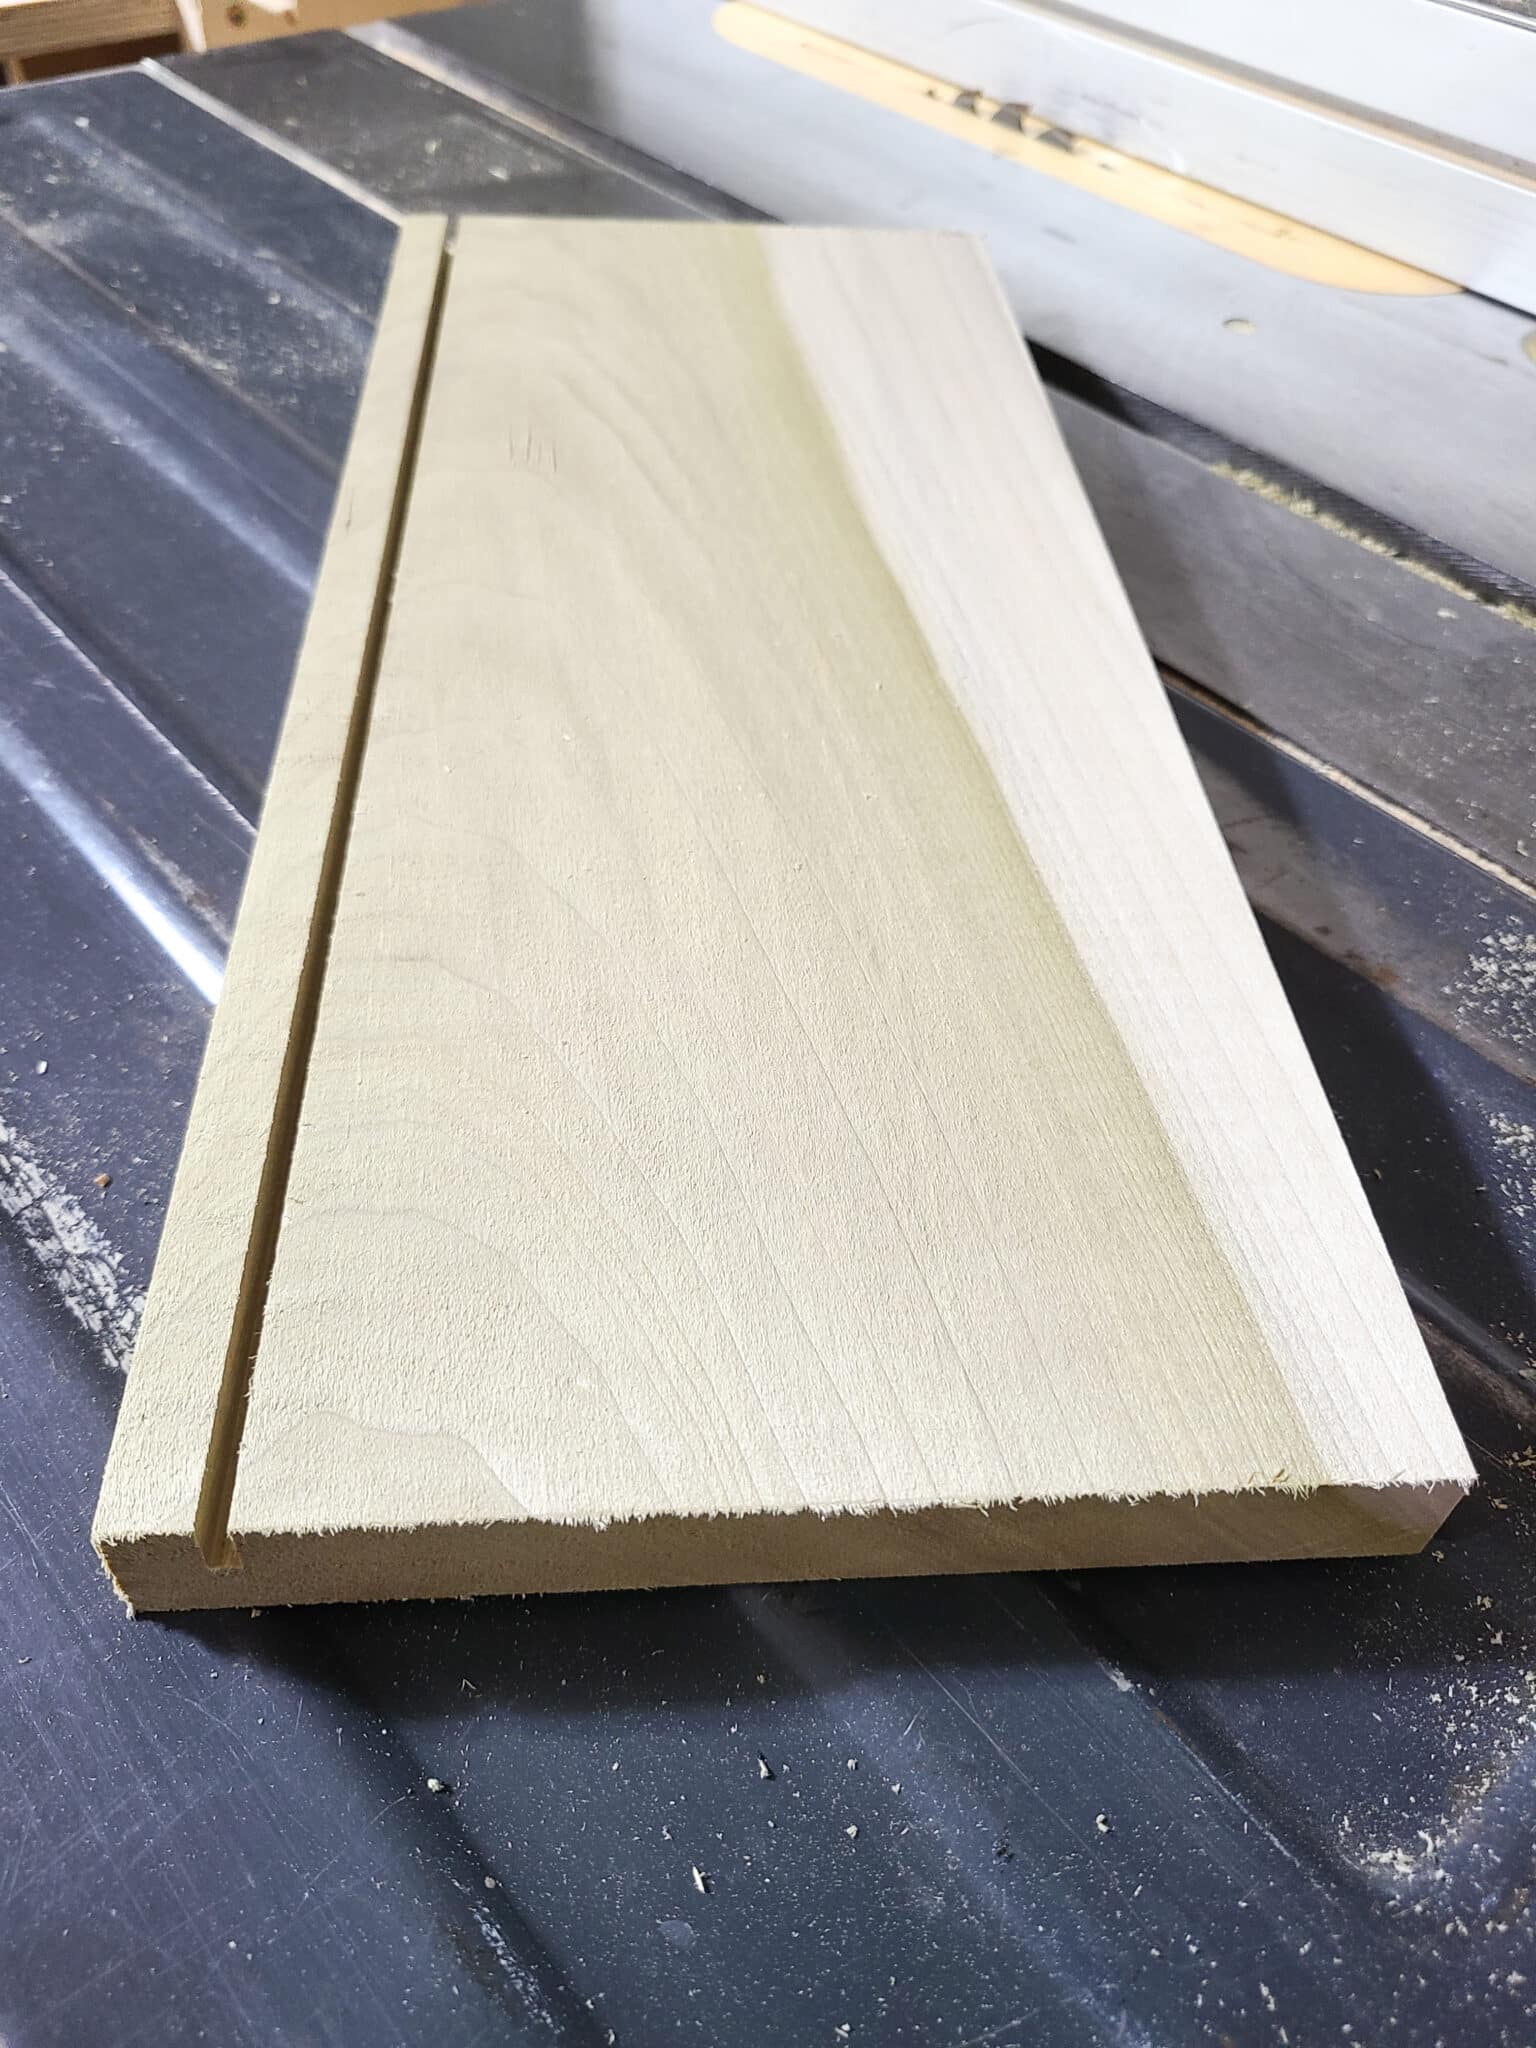
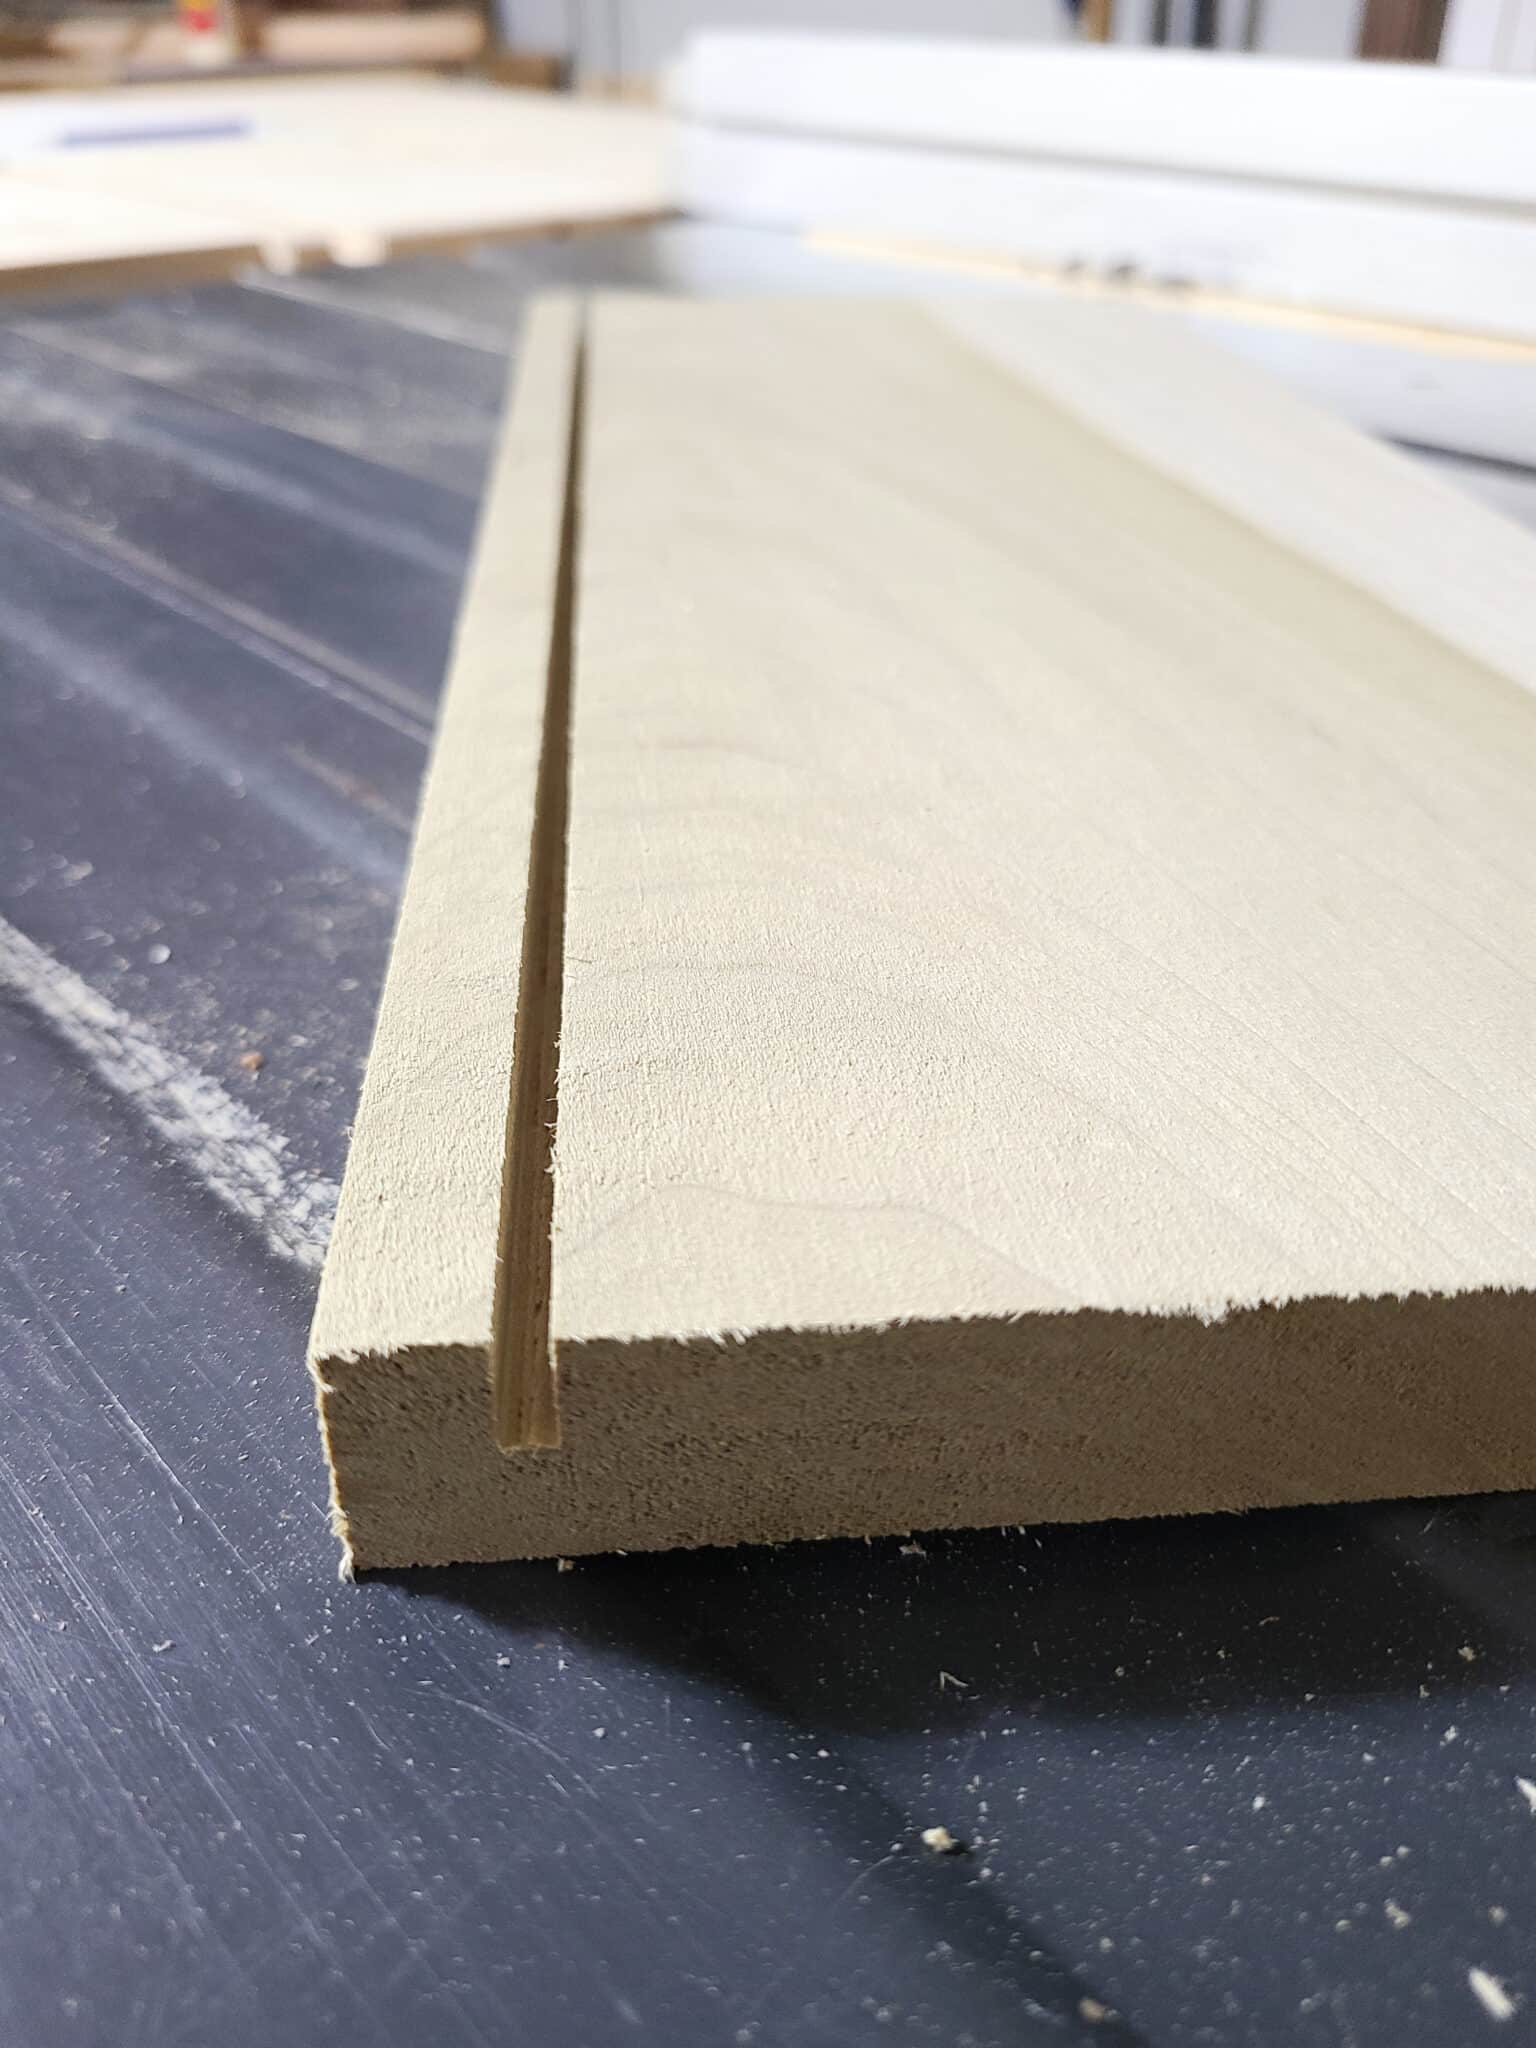
Step 2: Cut A Groove
Next, it’s time to cut the card groove or slot for the DIY writing tray. On a table saw, cut a ⅛” – ¼” groove approximately ⅜” deep.
Do this by adjusting the height of the table saw blade to approximately that ⅜” depth (about half the board depth). We eyeballed it by setting the board next to the blade and adjusting until it was about half the height of the board.

Then take the board and cut a groove along the long side of the board. Shift the table saw fence just a hair and run it through one more time. Using a ⅛” wide saw blade, two passes should be wide enough to hold typical-sized cards.
If you plan to use really thick cards, then you may want to measure the cards and consider cutting a larger groove by taking a few more passes on the table saw.
 Finished cut groove
- Don’t go over half the depth to reduce breakage
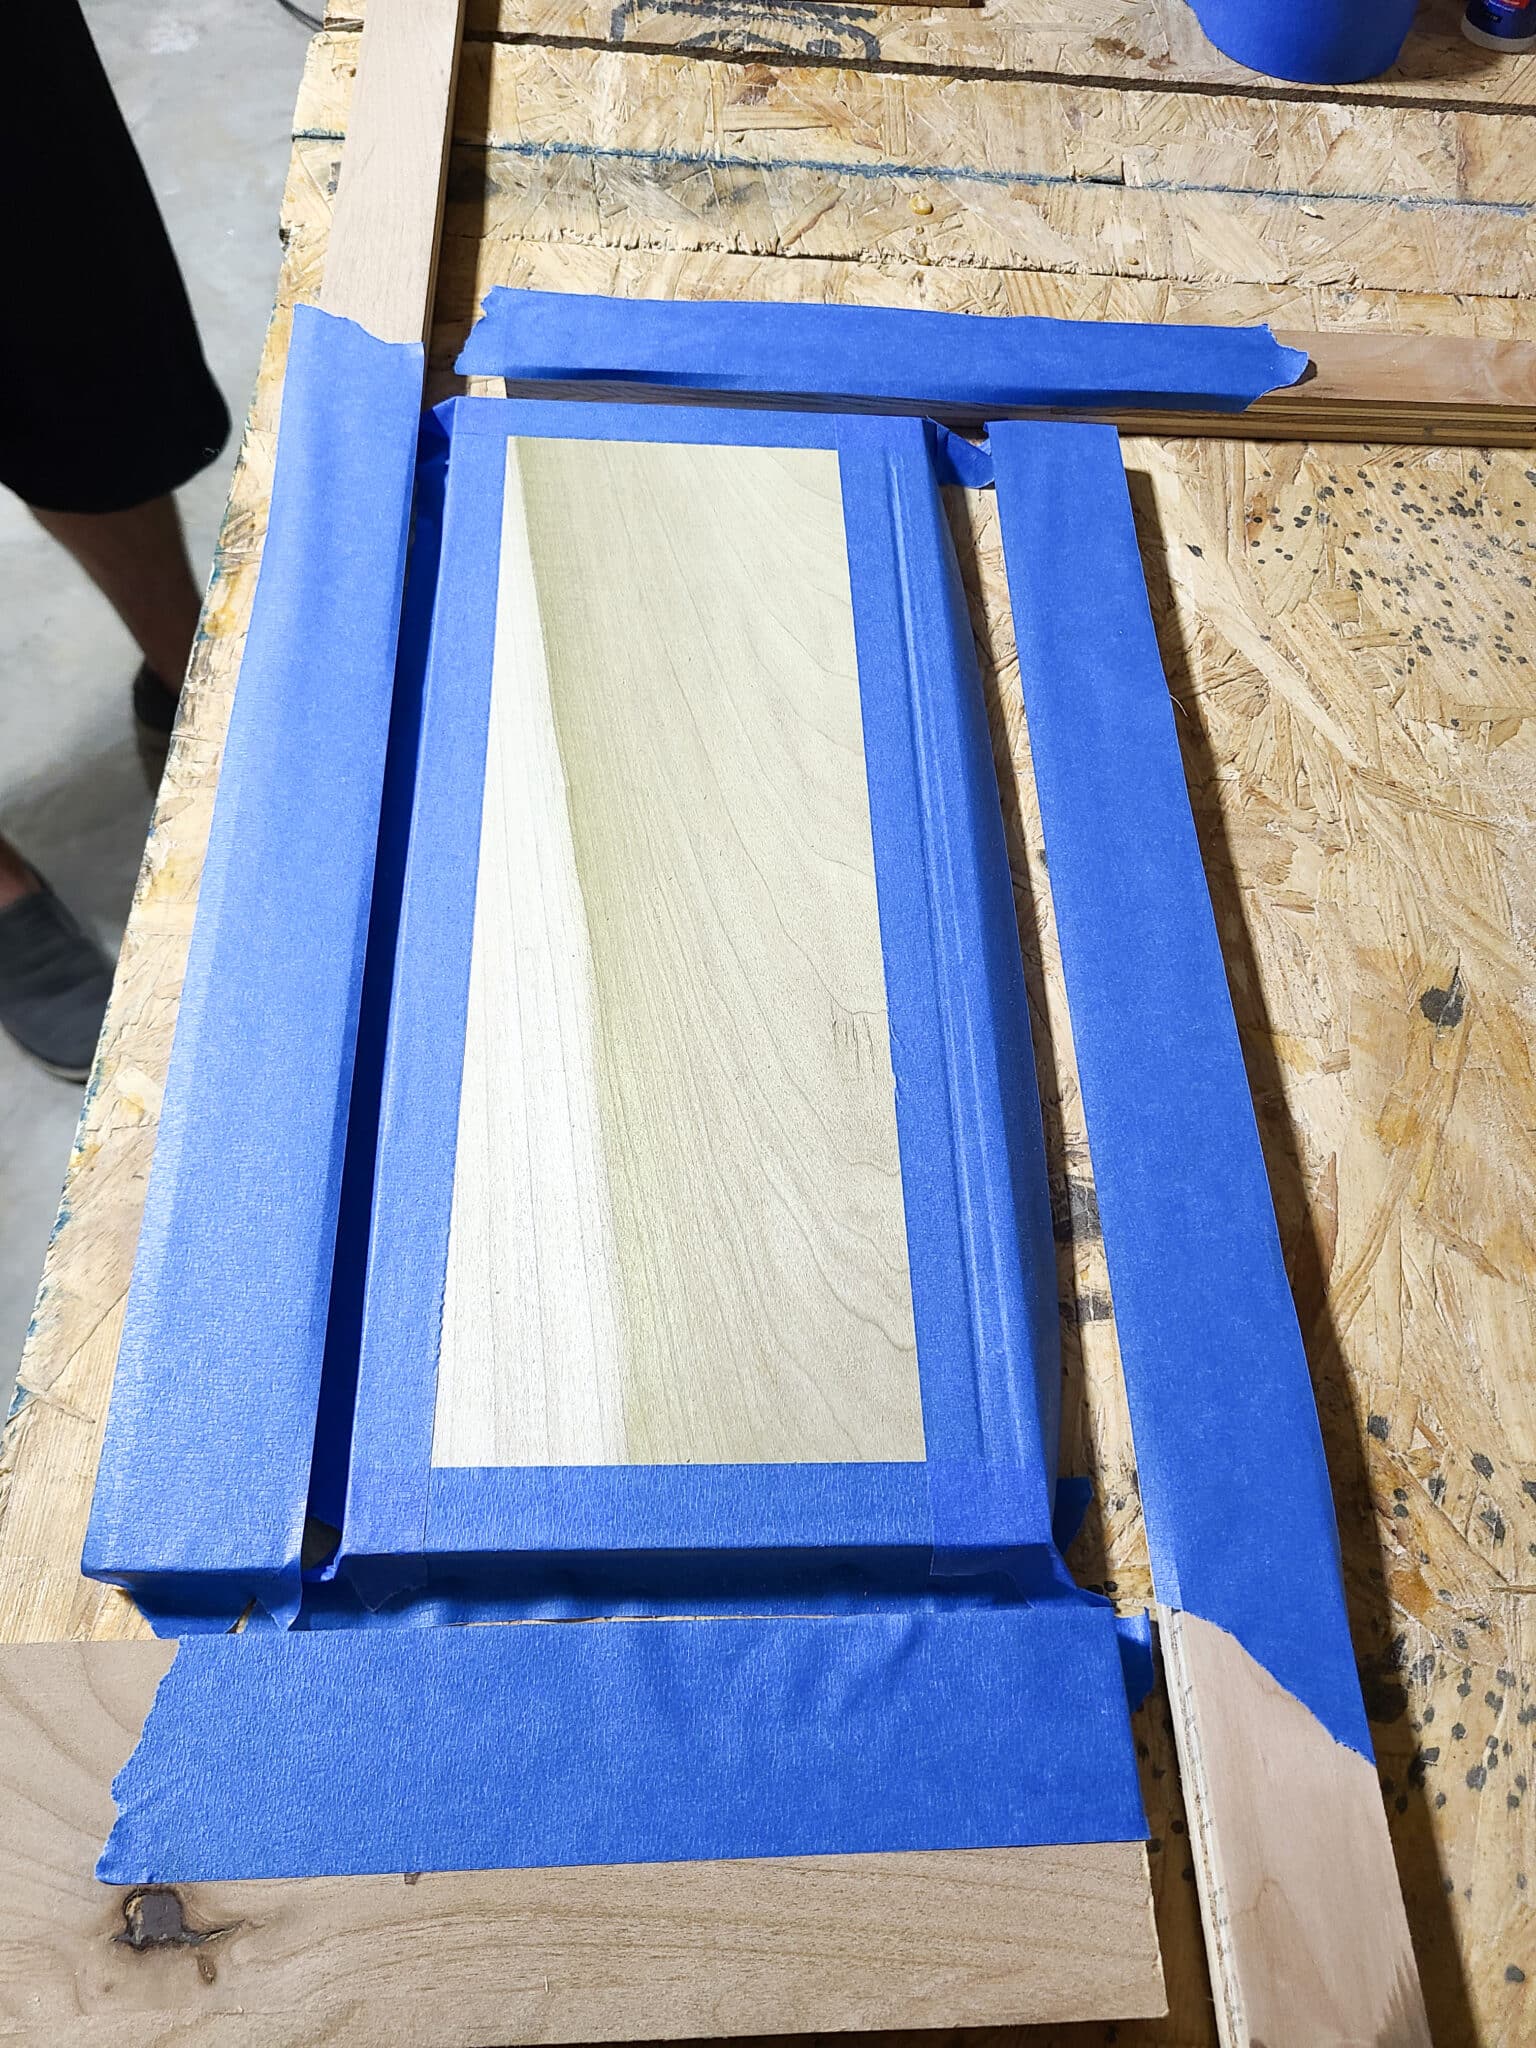
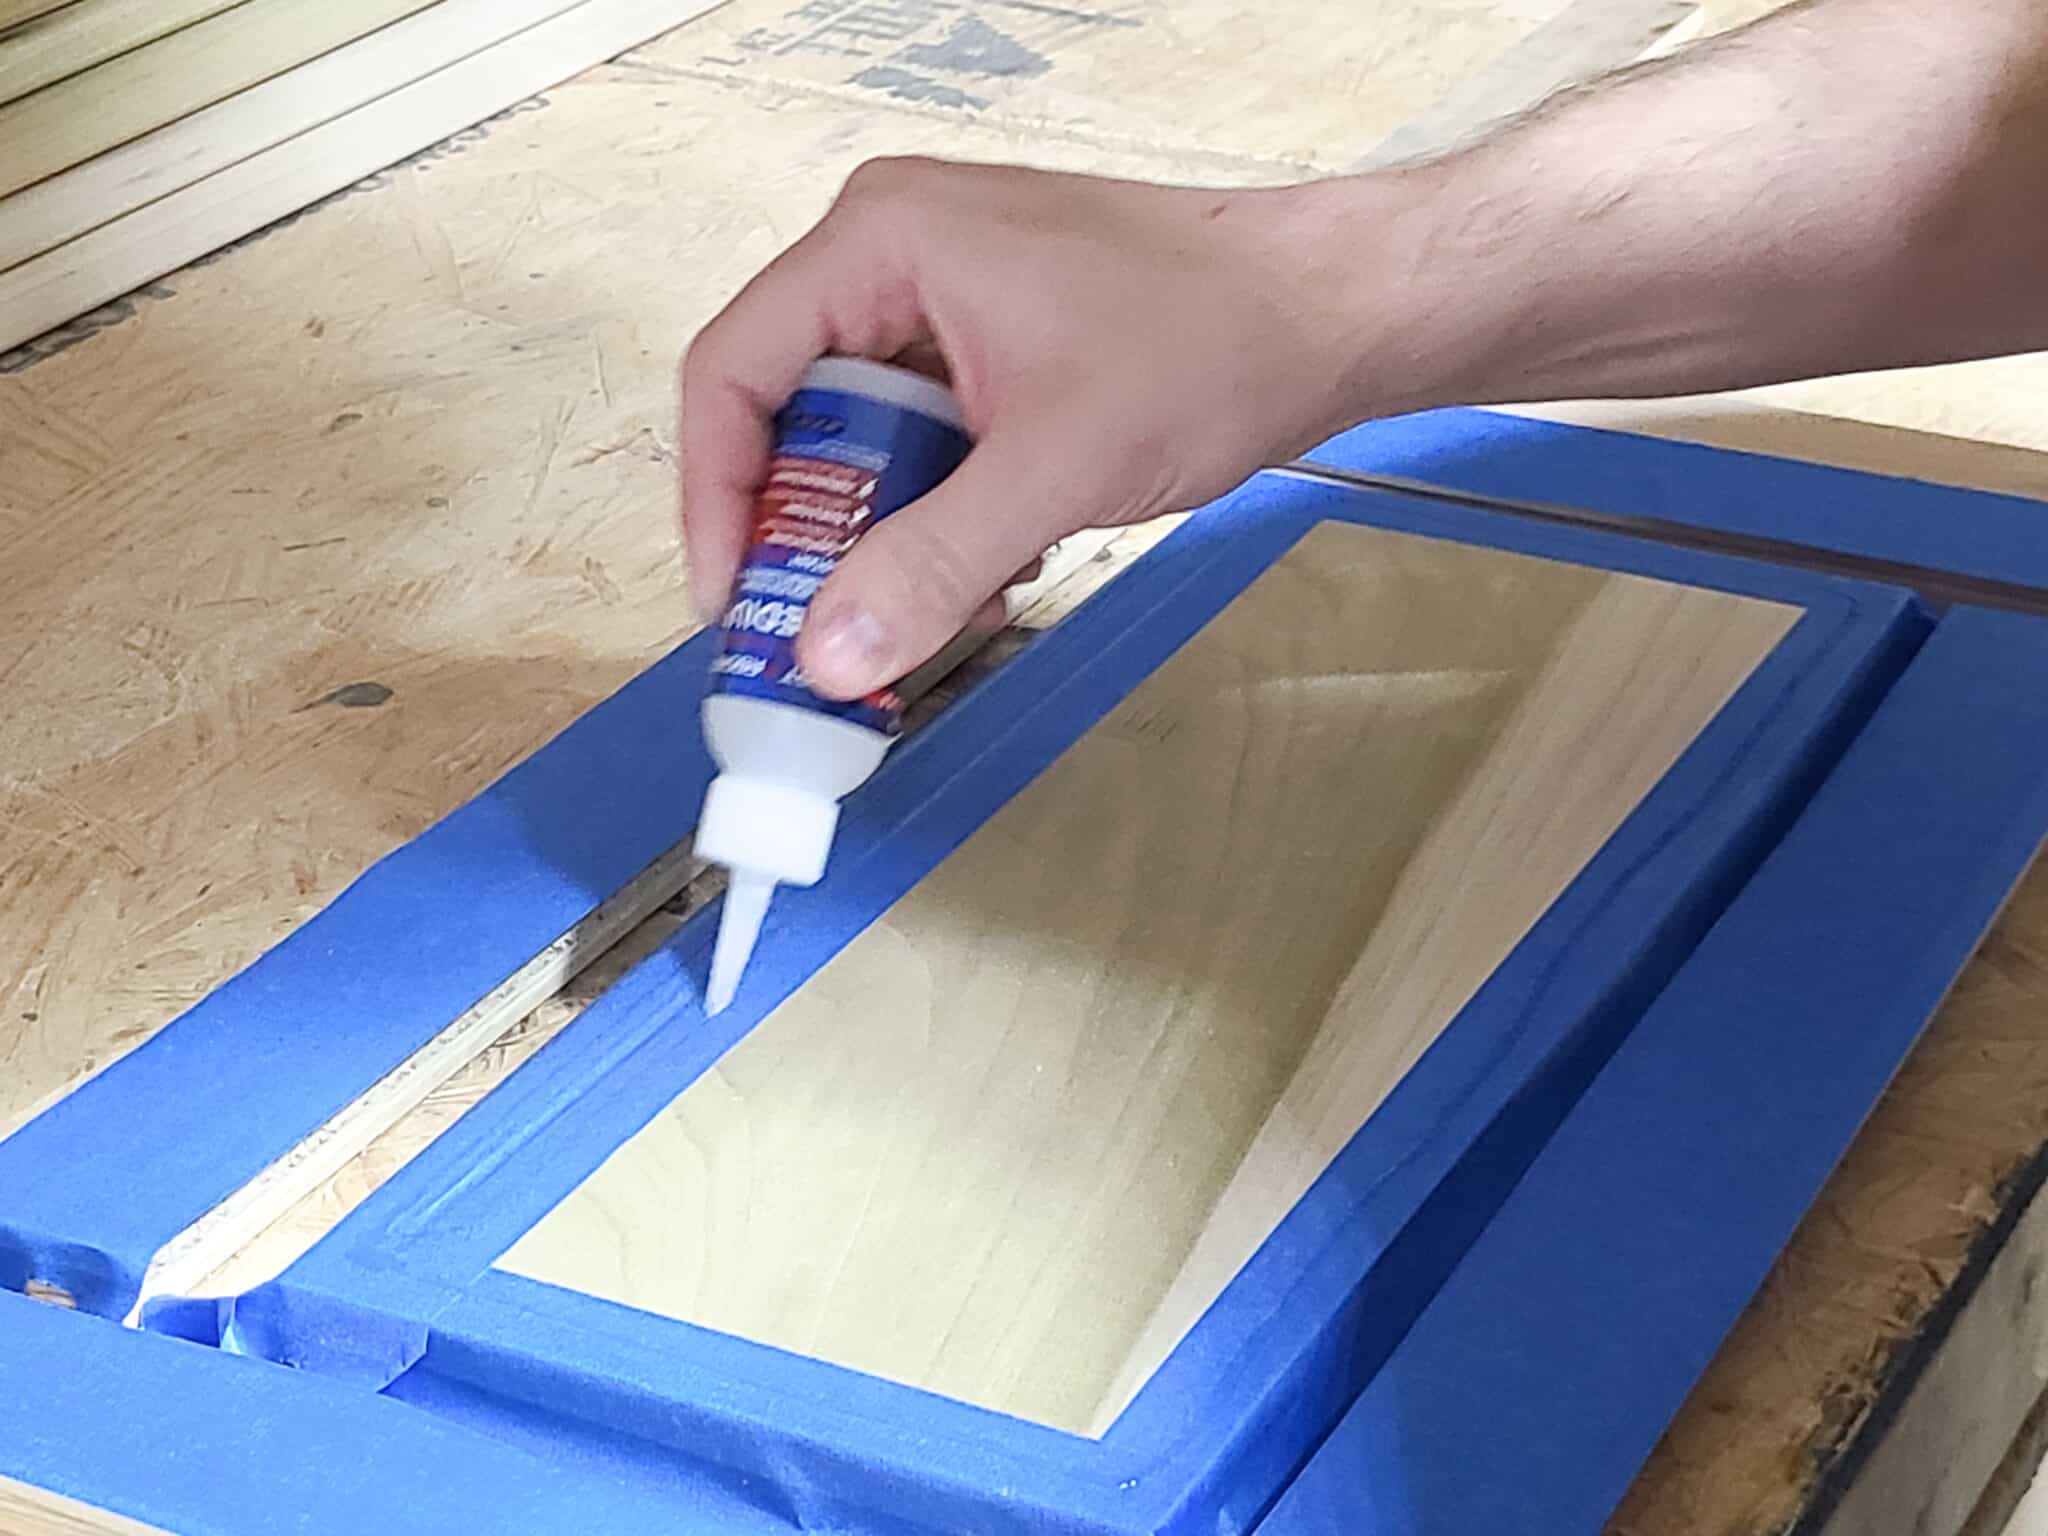
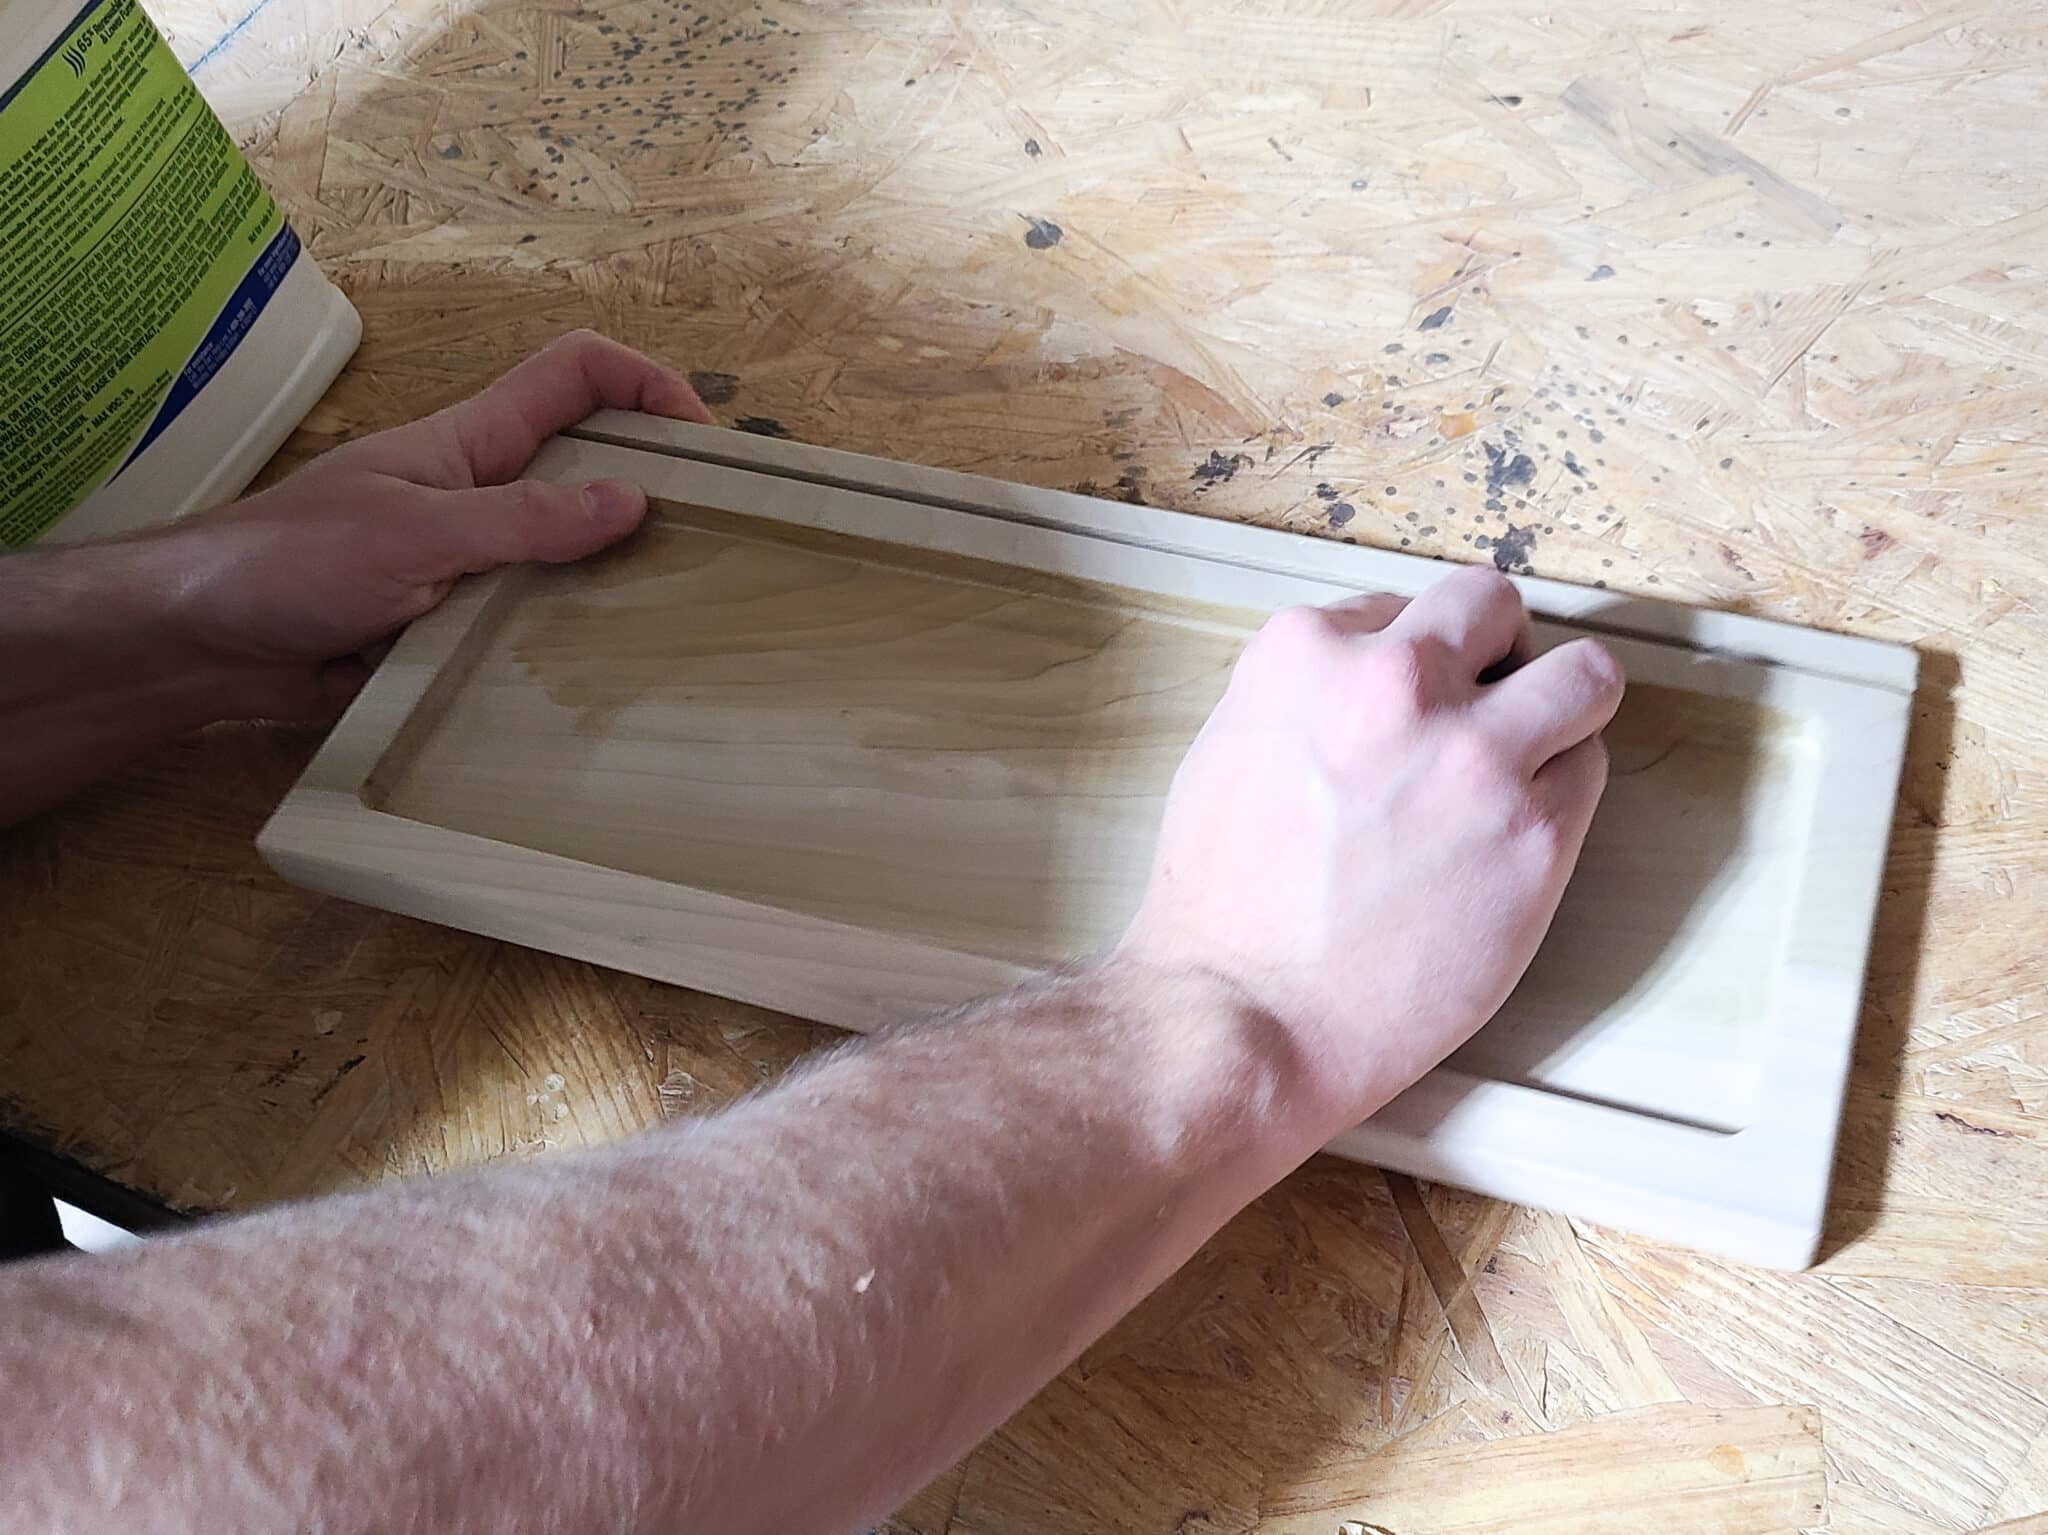
Step 3: Secure The Pieces To A Workbench
Prior to routing the pocket part where the sand will sit, you need to secure the wood piece for safety. There are a variety of ways to attach it to your workbench. A vise, dog hole clamps, double-sided tape, or super glue and painter’s tape will work fine.
We used super glue with an accelerator and painter’s tape to adhere it to our flipping workbench. This allows for a temporary adhesion to the workbench without ruining the wood piece you are working on. Put down a couple of strips of tape on both the workbench and the back of the tray board. Add super glue to the tape on the workbench, and then spray the accelerator on the tape on the back of the tray board. The accelerator just helps the super glue dry almost instantly rather than waiting.
Carefully line up the two sets of tape and push to secure it to the workbench. Let dry.

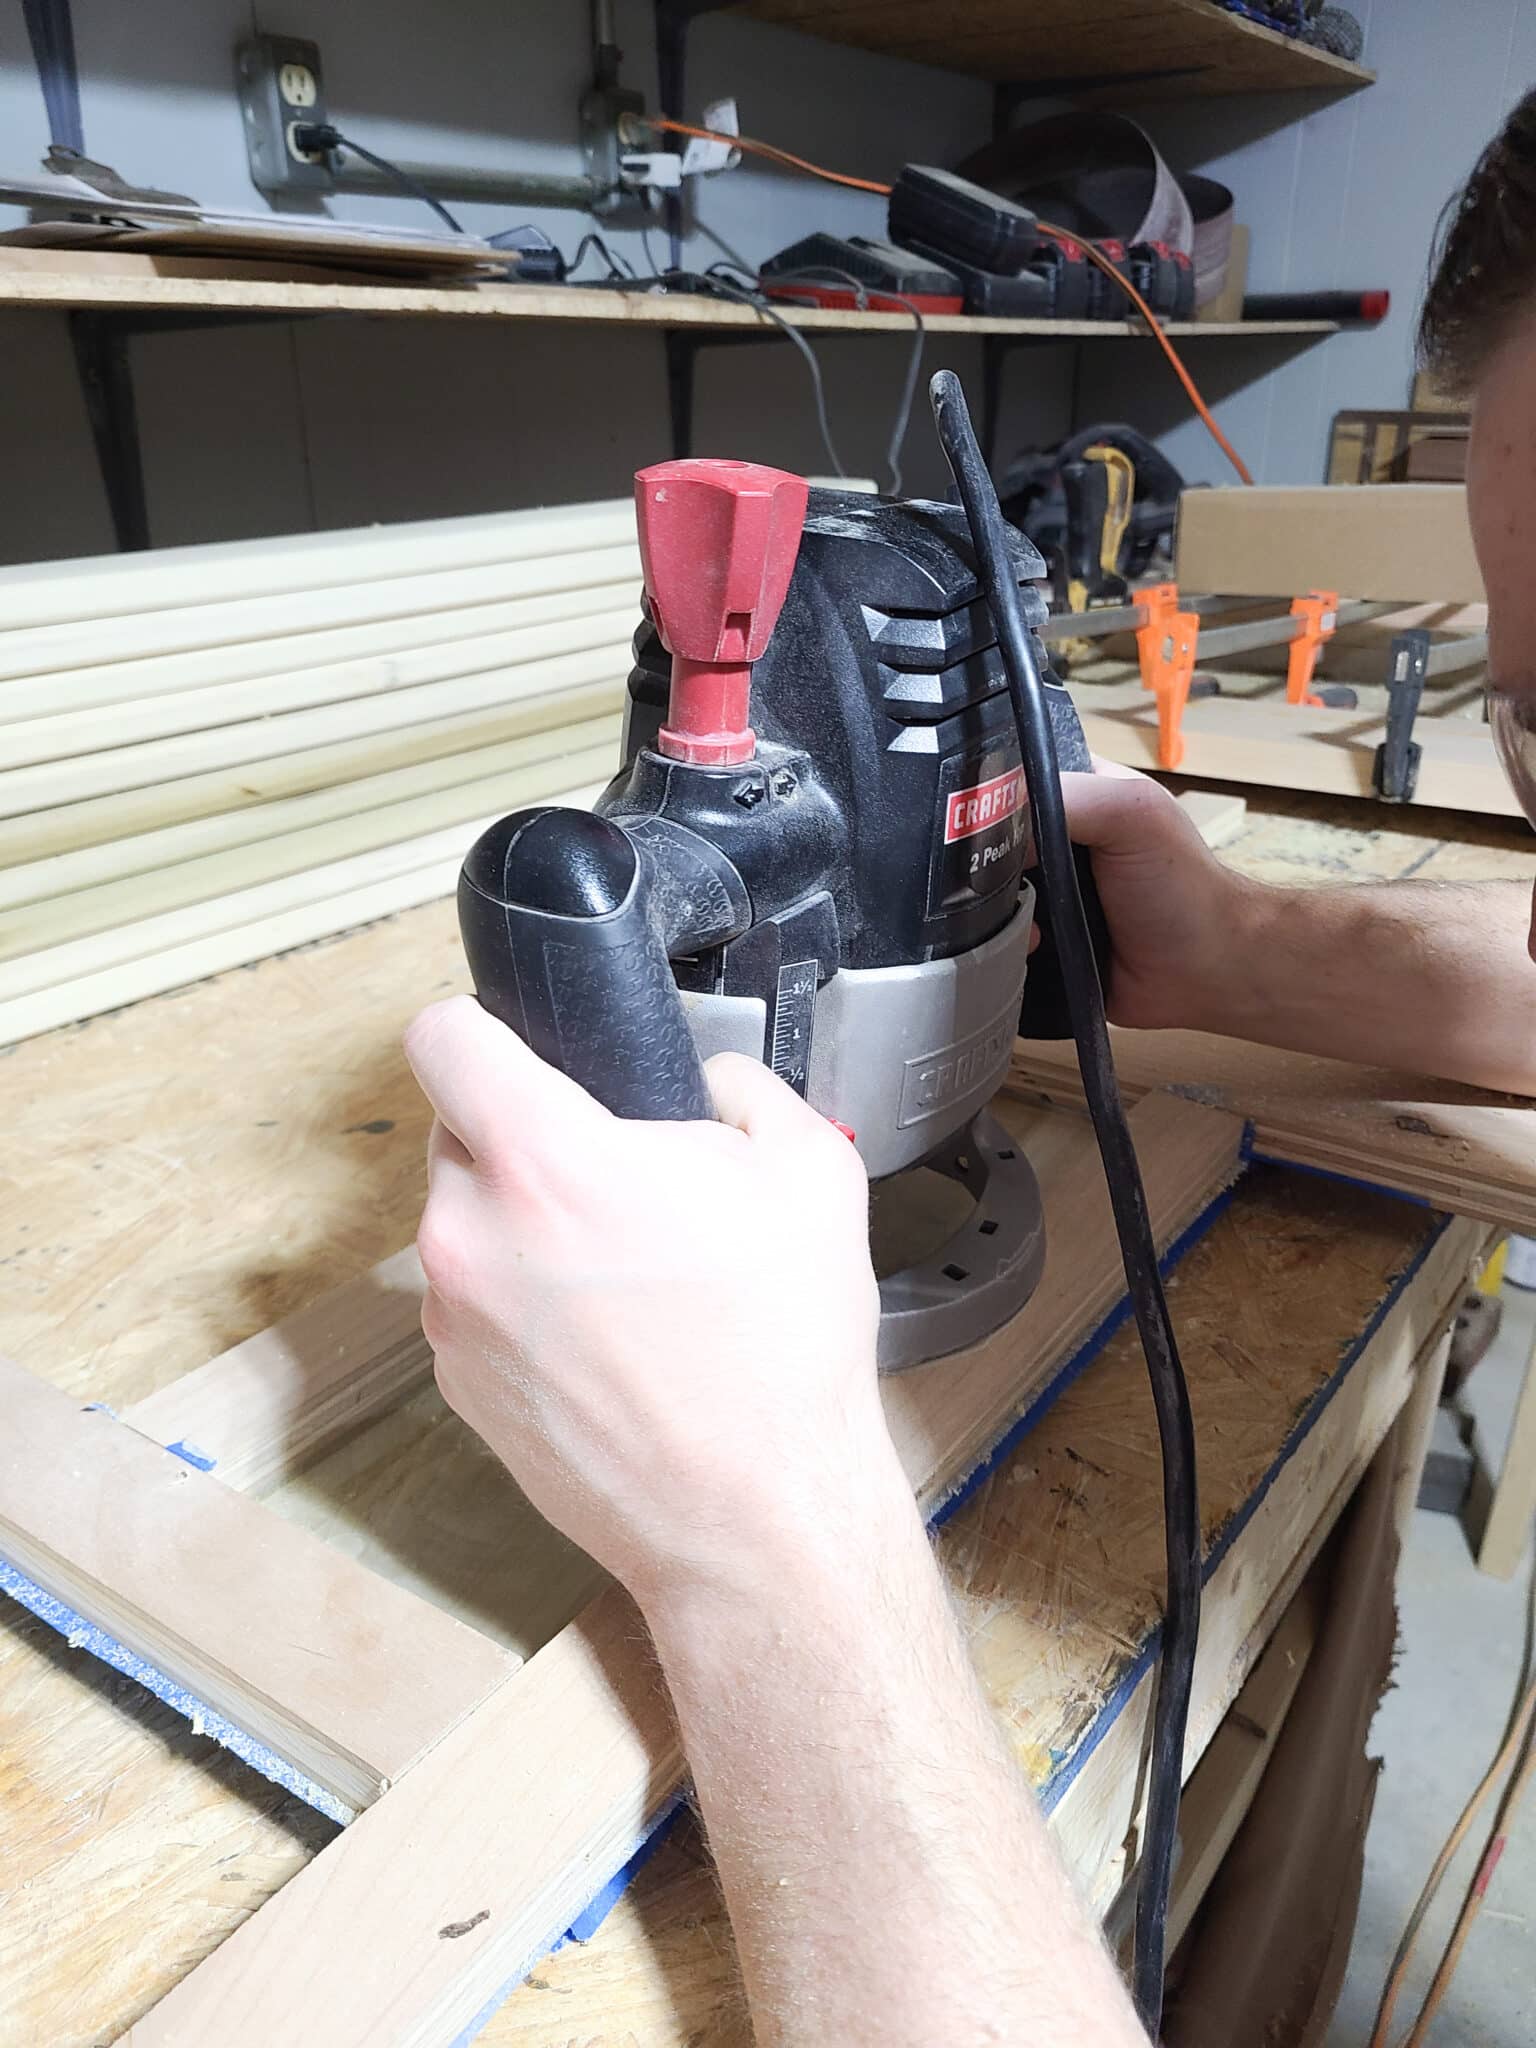
Step 4: Use A Router To Cut Out The Pocket
Next is cutting out the pocket with the router. There are two options on how to cut out the pocket.
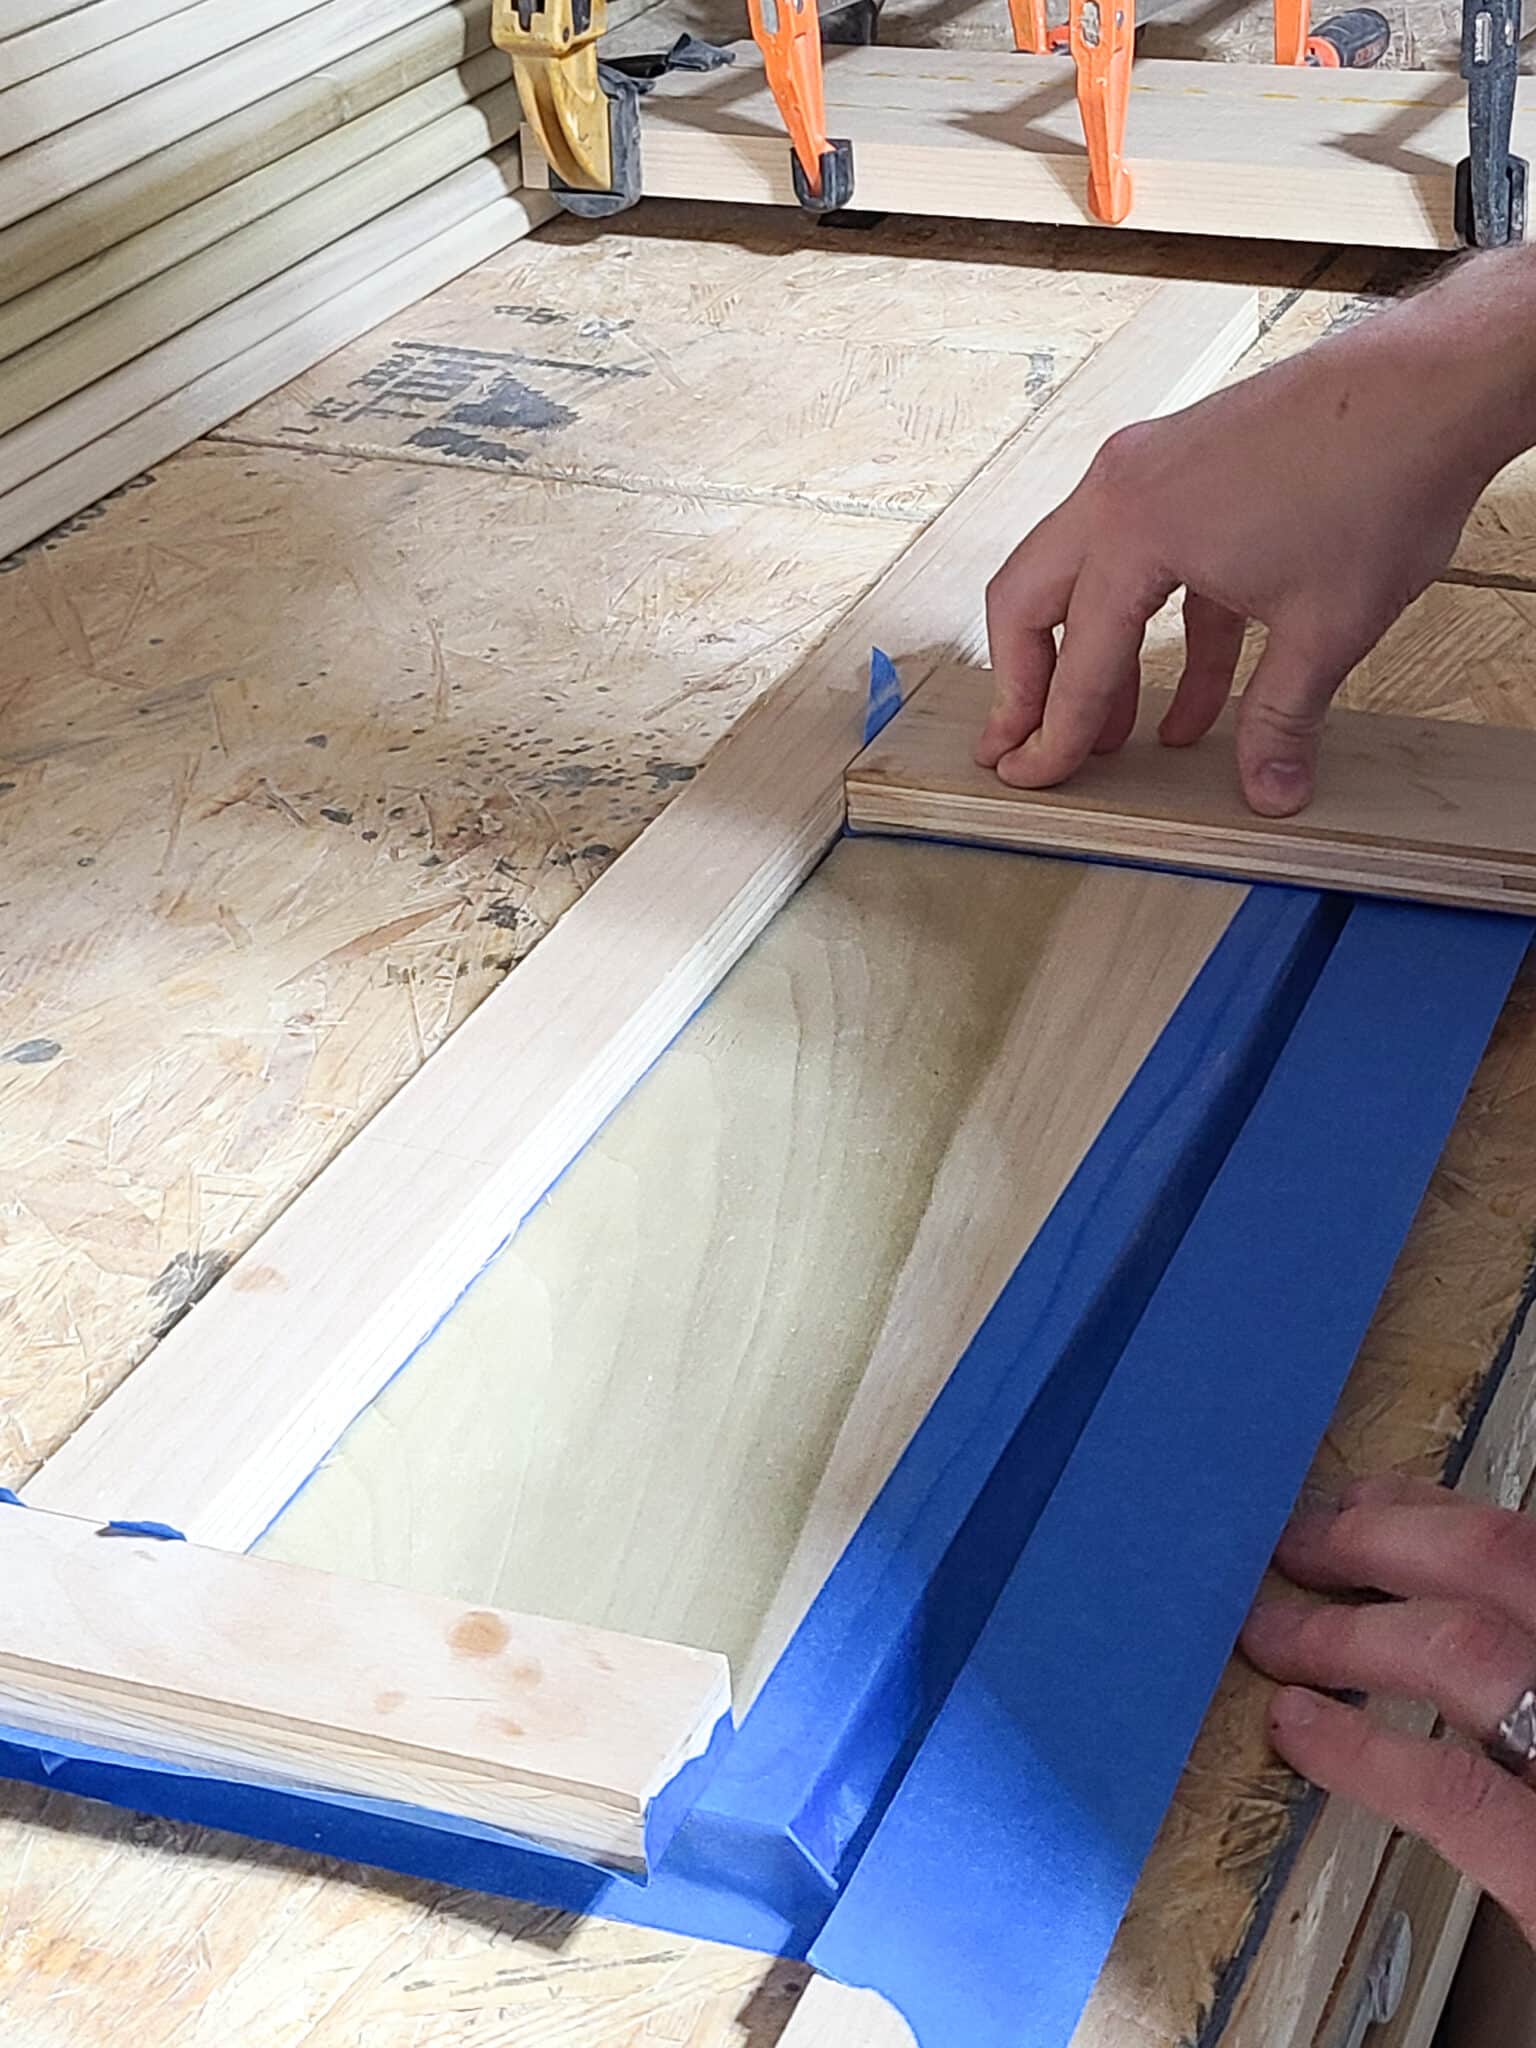
Option 1 – Create A Template & Use Template Router Bits
You can create a template for your regular router to follow, and then use a template router bit or guide bushing set to cut out the pocket. Here’s how:
- Measure out how much edge you want to leave on the tray (or eyeball it!). Put tape down to create the outer frame.
- Secure scrap strips of wood to the outside of the tray board to make a template and frame for the router to follow. (We once again used the super glue/tape method to secure the pieces)
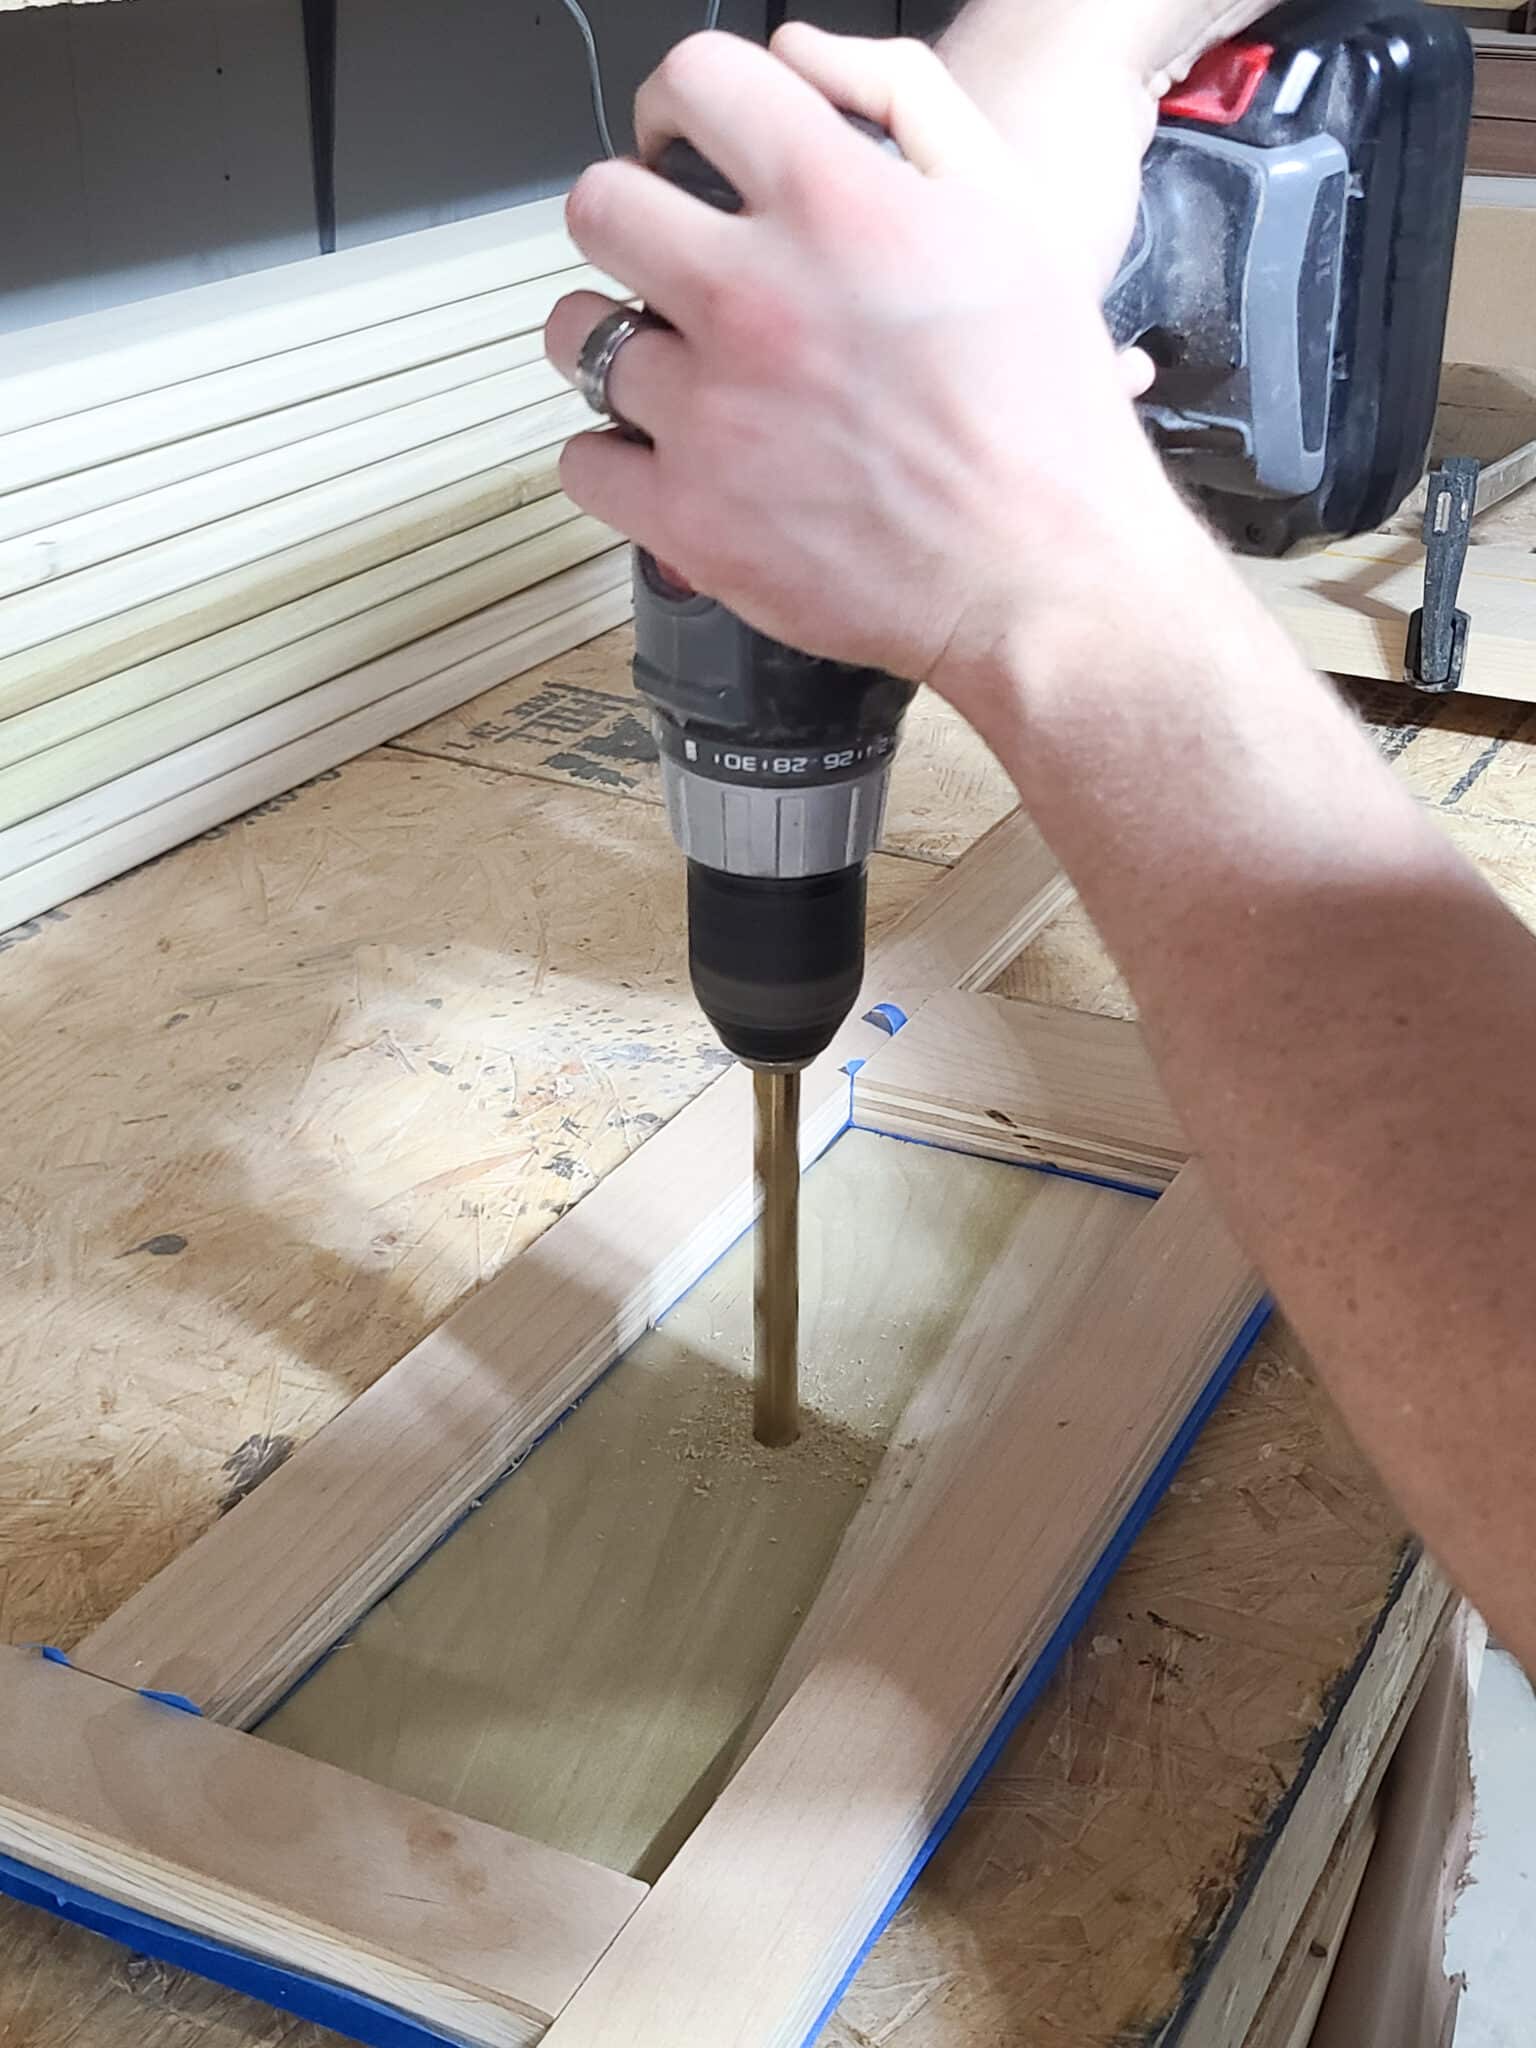
- Pre-drill a hole for your router to start cutting in.
- Set the height of your router for the first pass.
- Router out the pocket using the template as the edge of the pocket
- Repeat the process with a second pass at the final depth.
This is the method we utilized.

Option 2 – Reference the Outer Diameter of the Router Base Plate
If your router has a circular base plate, then you can secure taller strips of wood to your workbench that your router’s outer edge can touch. As long as you keep the round part of the base touching the wall you will cut a straight line. Then use a straight or plunge cutting bit to cut out the pocket. This method can be a bit more complicated because you have to measure your offsets to know where to put your edge guides.
Step 5: Round Over All The Edges (Optional)
After finishing routing the pocket, remove the writing tray from the workbench. Set up your router table with an ⅛” round over bit to round over all of your edges. Run every side through the router to ensure there are no sharp edges. It also gives a nice high-quality look and feel to the final product.
This step can be optional if you don’t have a router table with a roundover bit and/or don’t want to round off the edges of the tray. I do recommend rounding the edges some by hand with sandpaper if you don’t do this, so there are no sharp edges for the child.
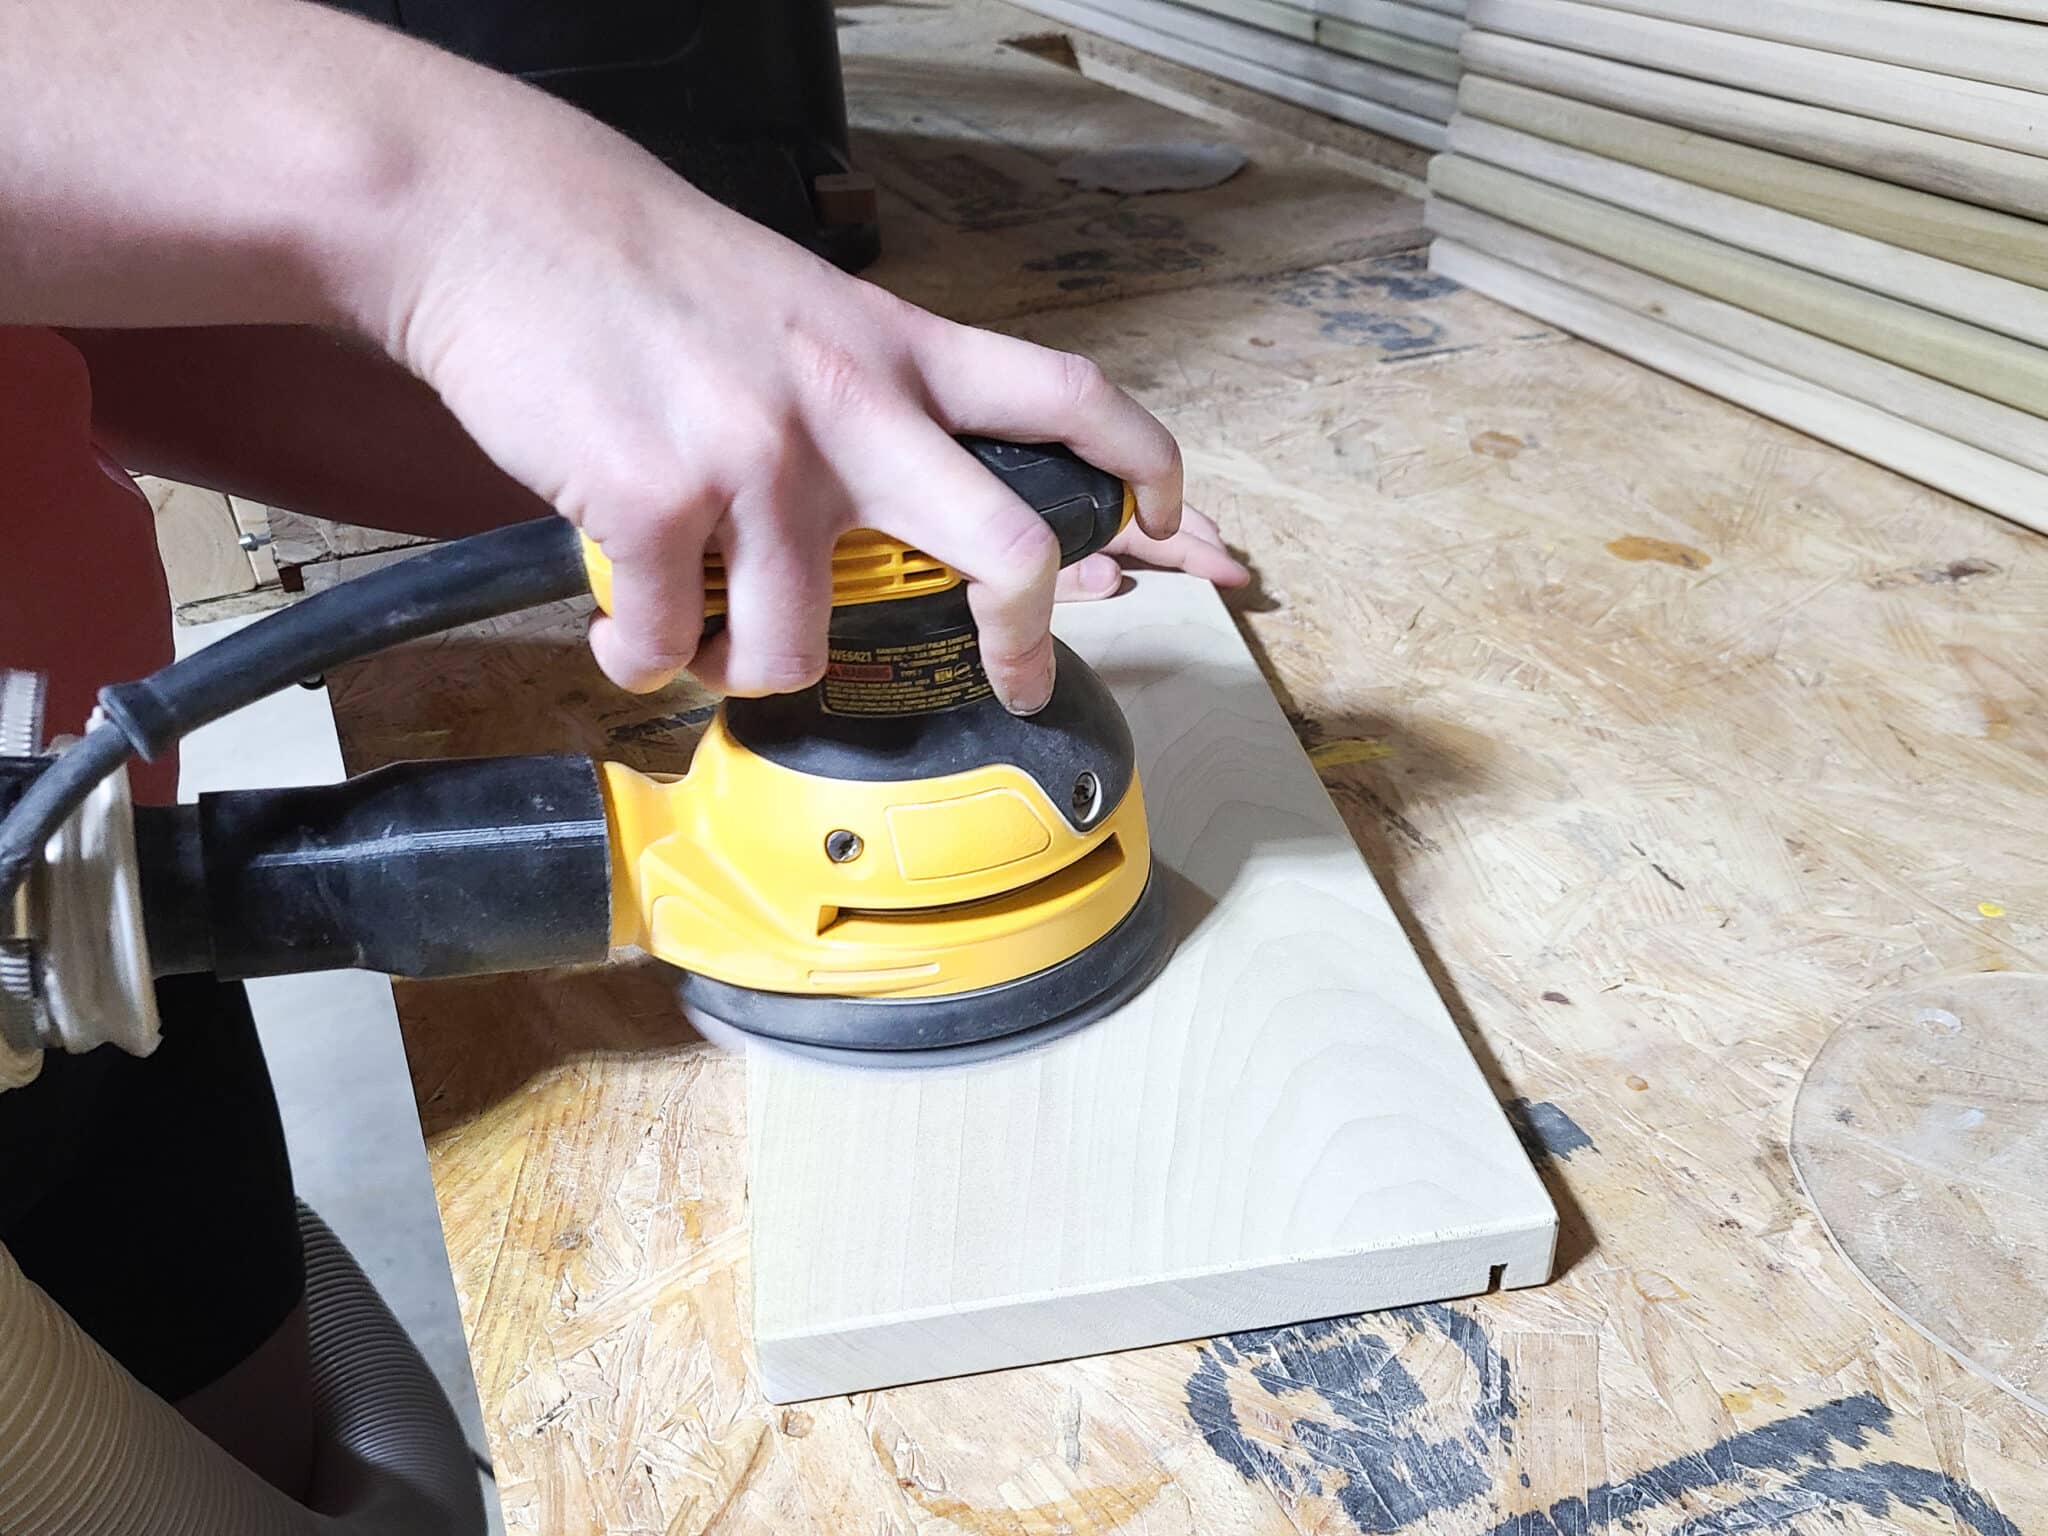
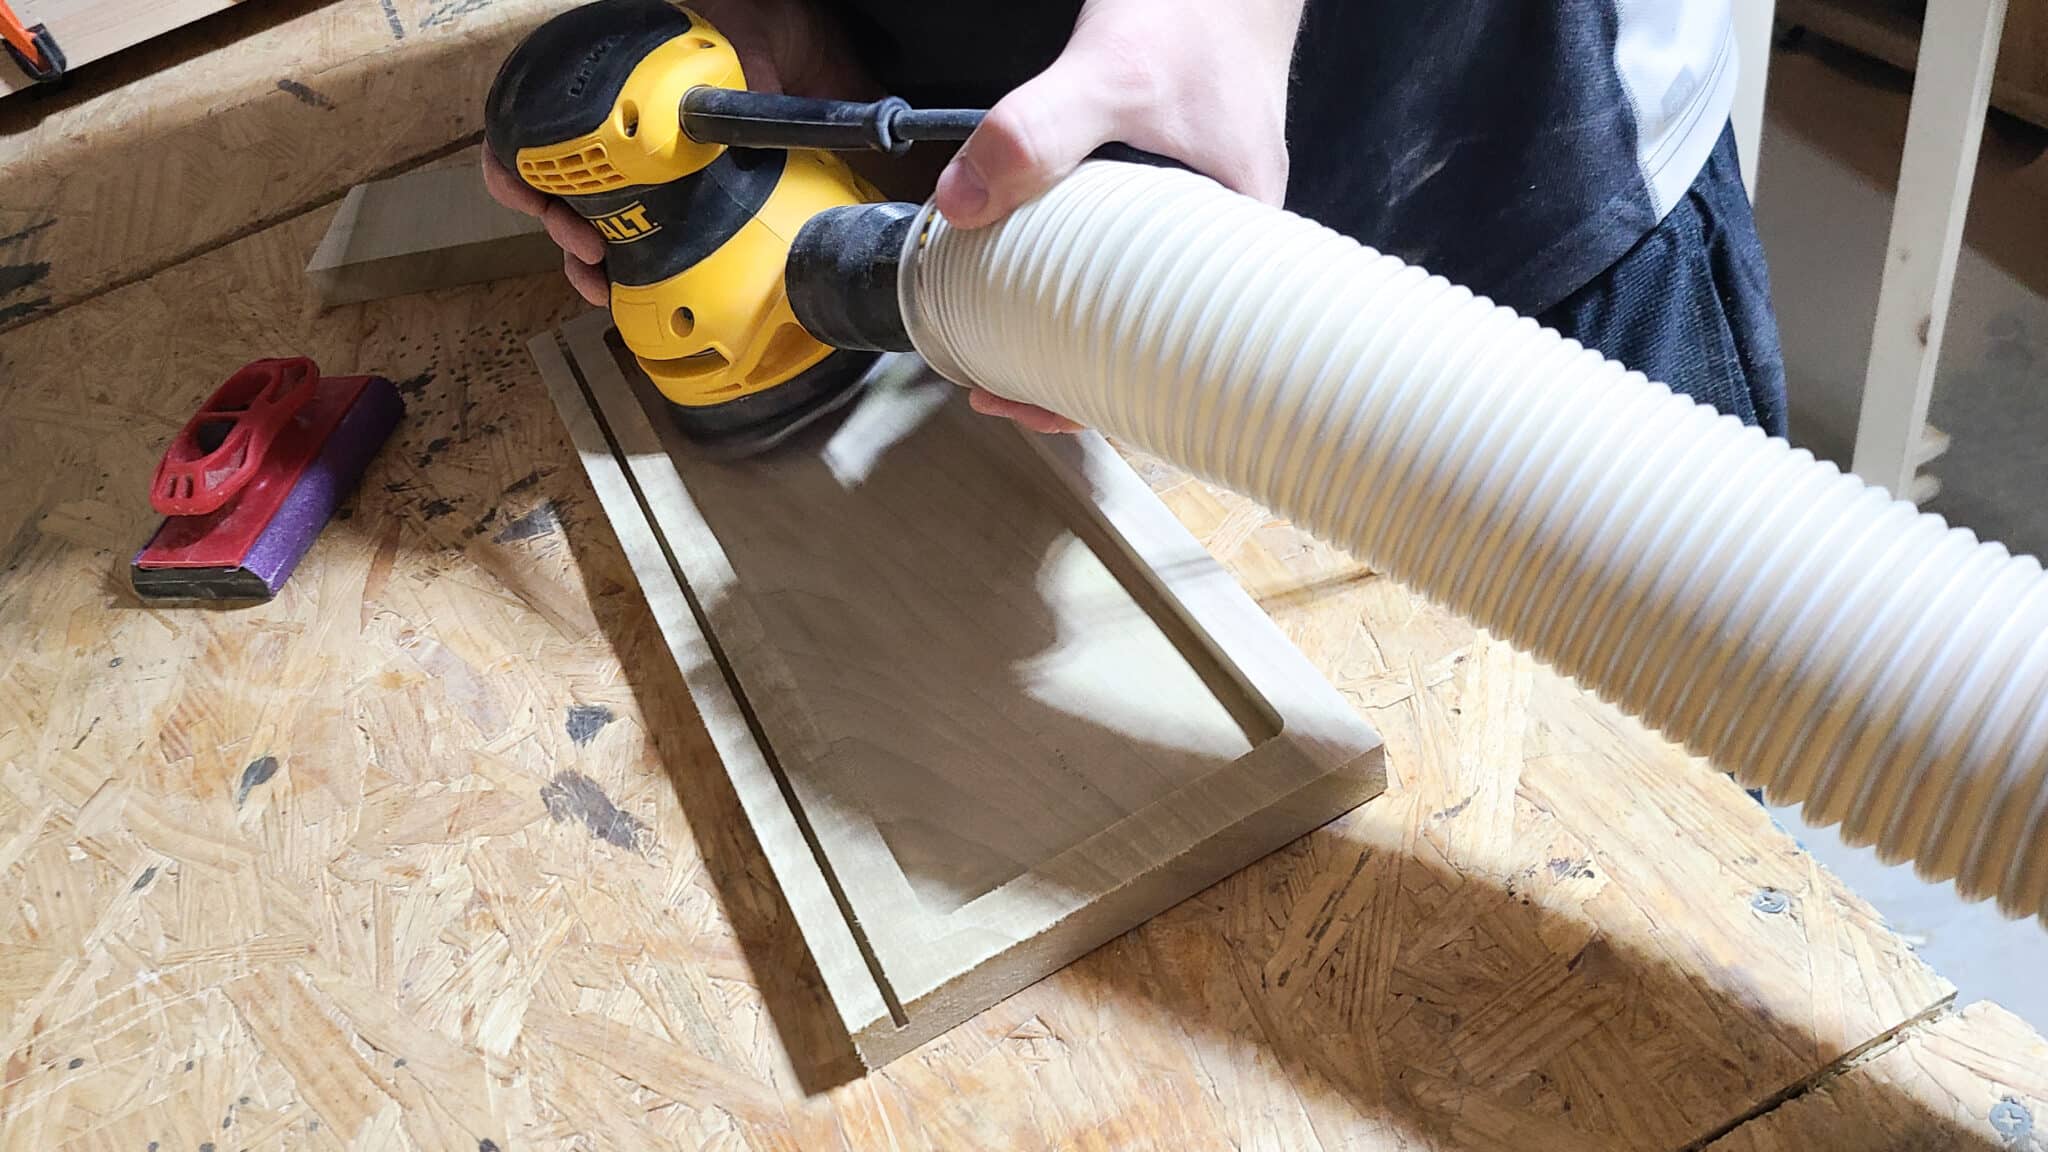
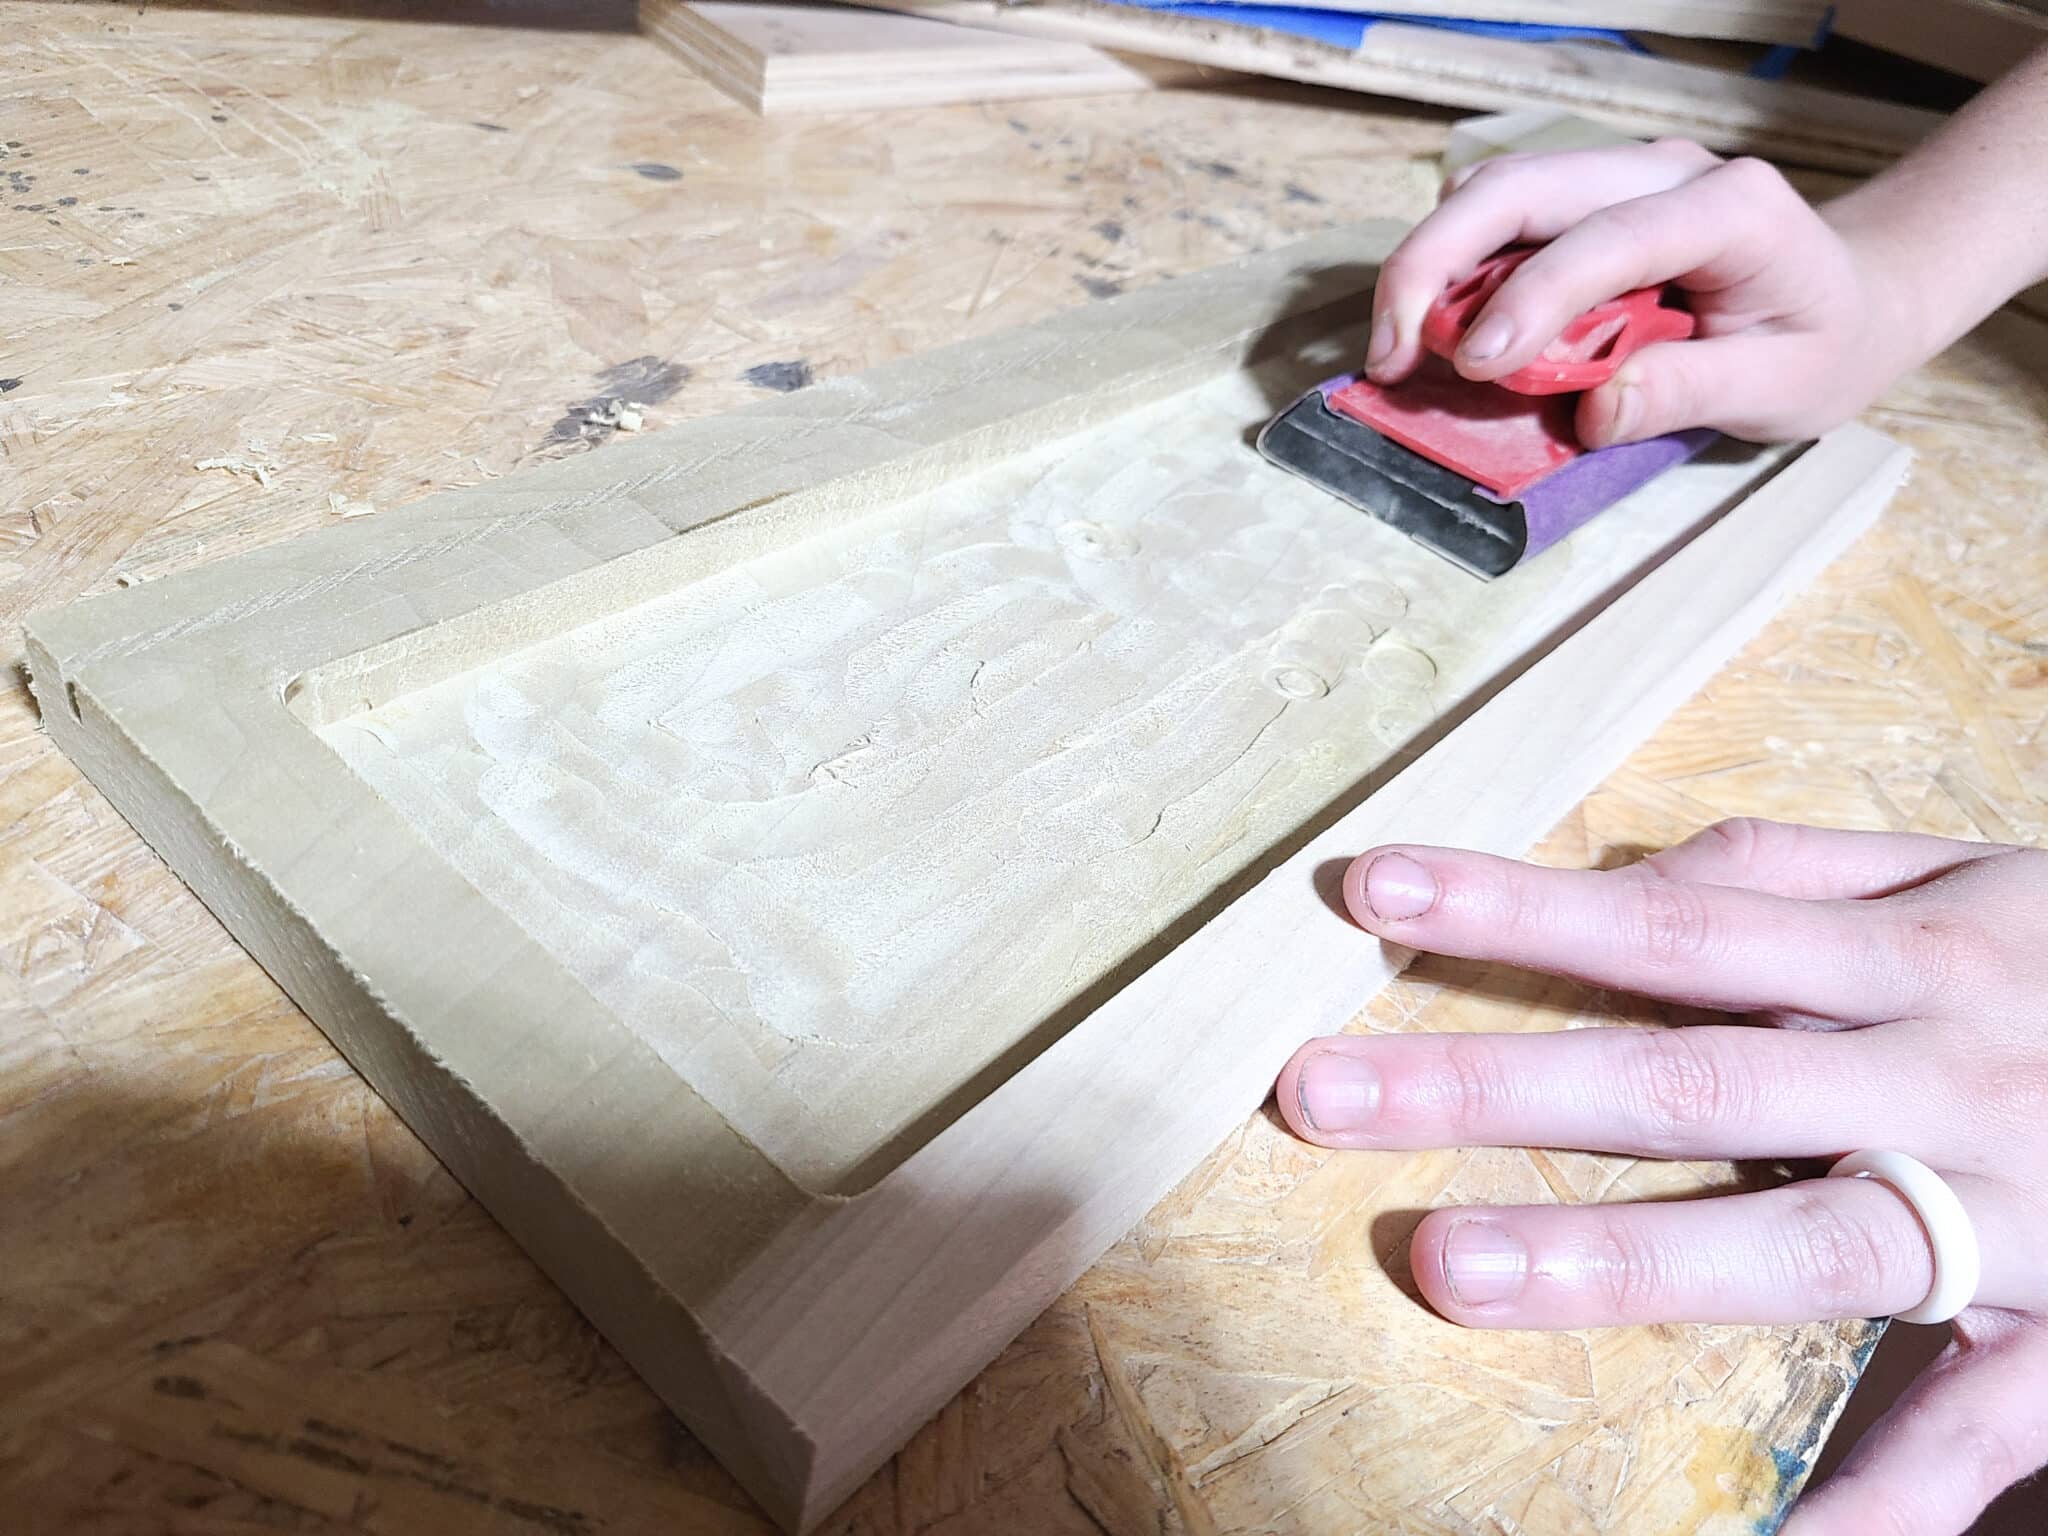
Step 6: Sand The DIY Tray To 180 Grit
With any wood project, you need to sand it smooth and remove any sharp edges. Start with 80 grit sandpaper going over the entire tray. Then repeat with 120 grit and 180 grit. You can use a random orbital sander and sanding discs to make this a really quick process.
However, you will likely need to use sandpaper to do some hand sanding in the pocket and along the pocket’s edges. We like using a sanding block as it’s easier to hold while sanding. We don’t want any possible splinters here when a child is handling the tray.
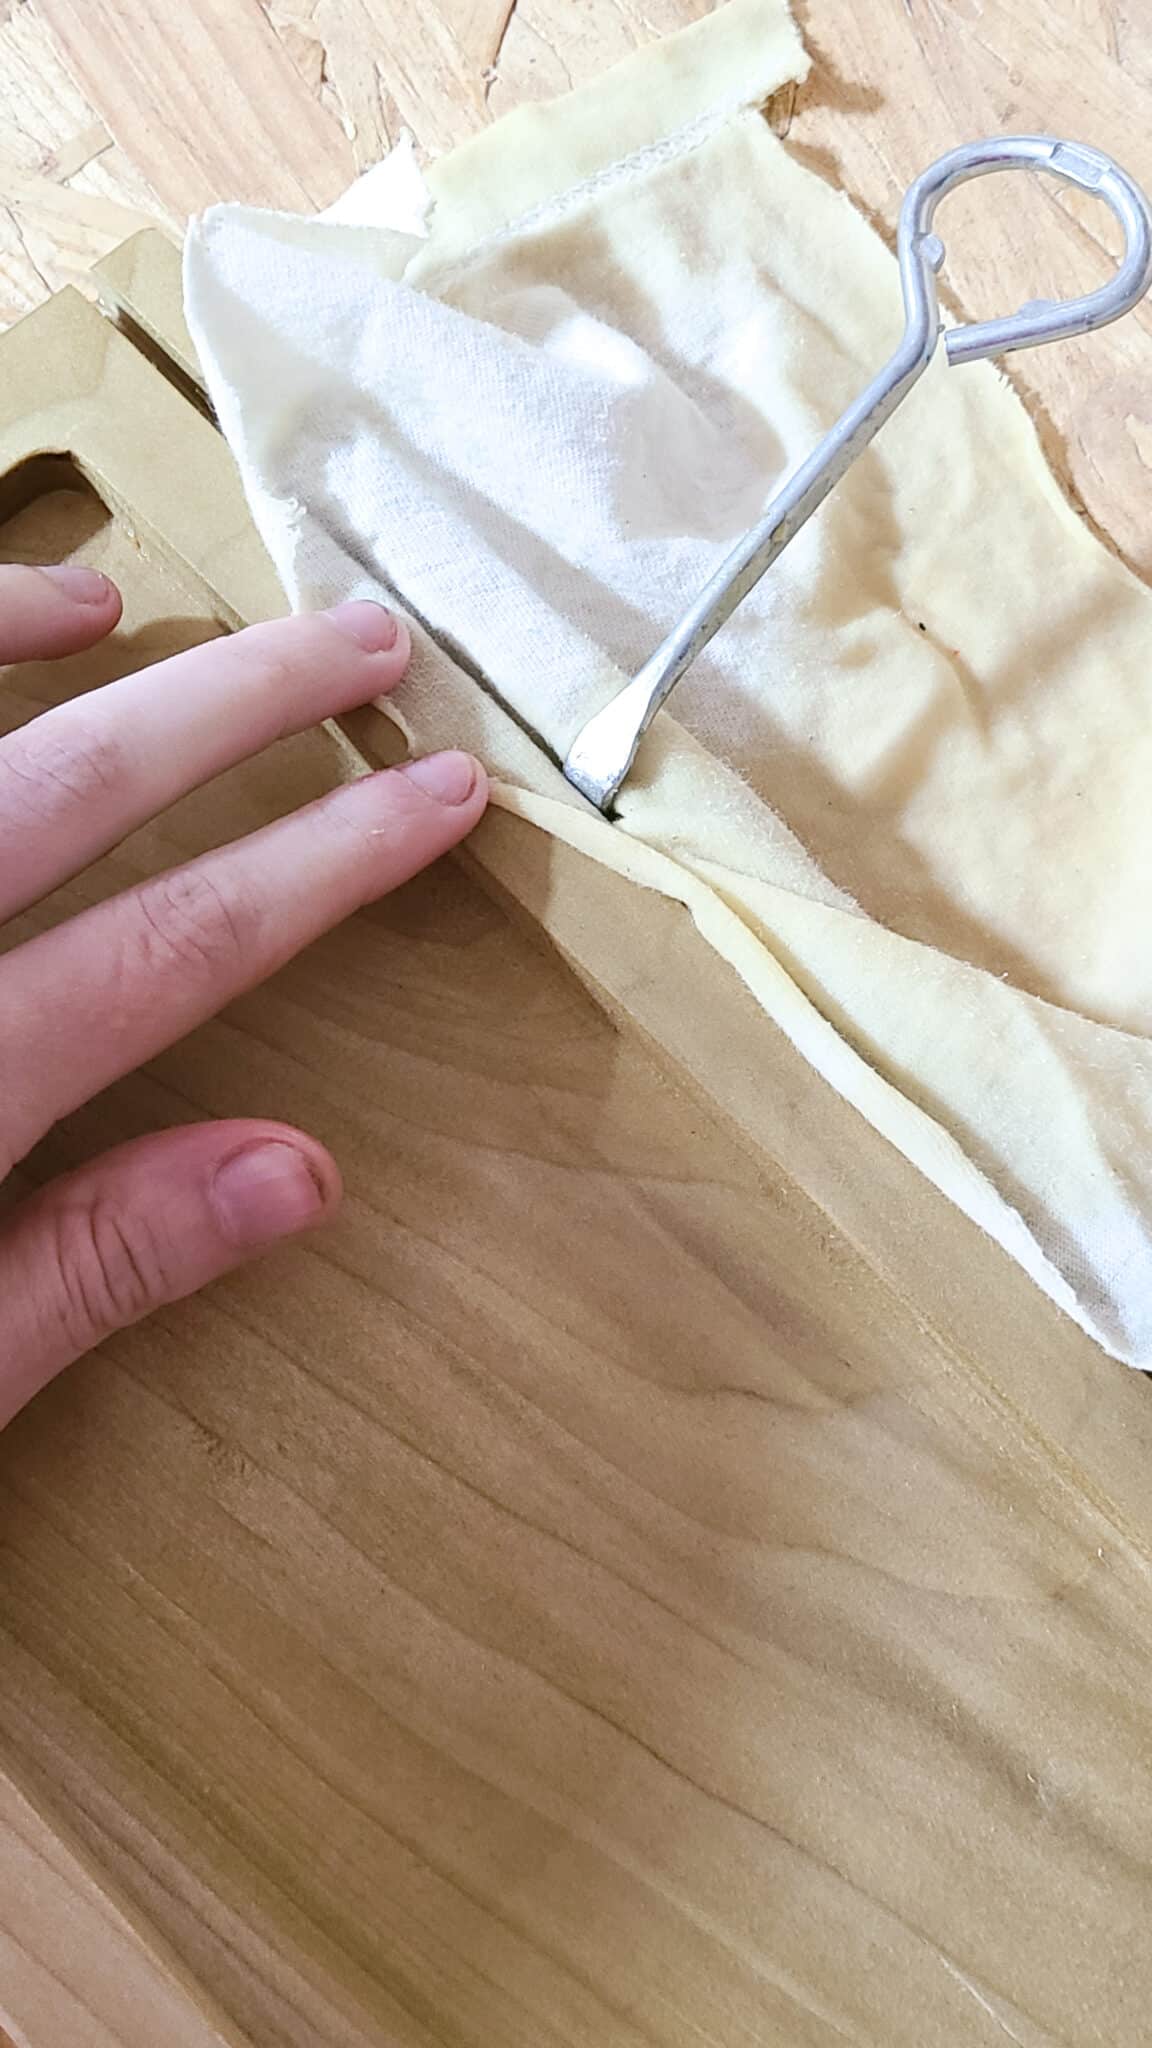
Once sanding is complete, wipe the tray clean using Mineral Spirits prior to applying a finish. Allow time to air dry as well.
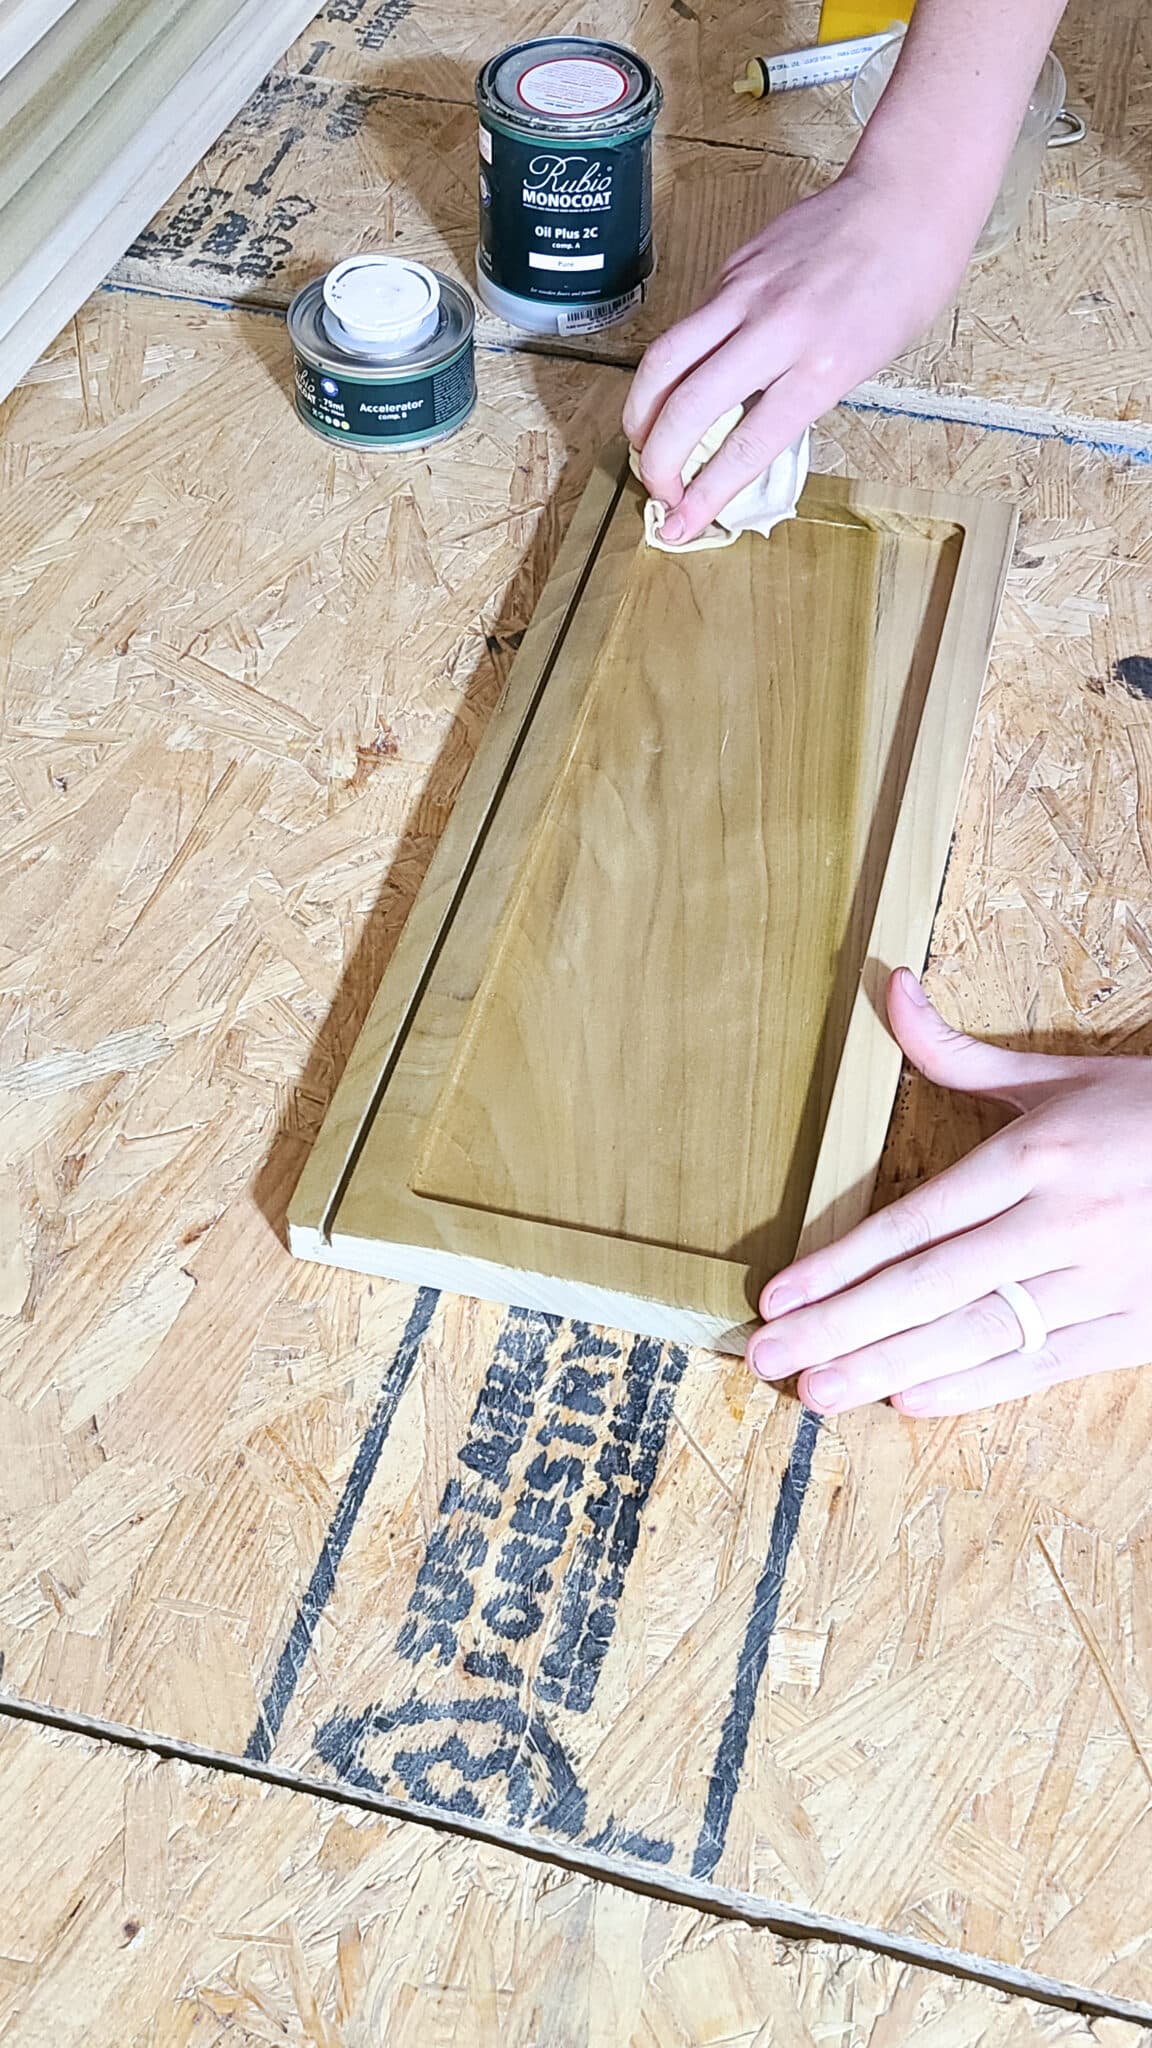
Step 7: Apply Finish (Optional)
While this step could be optional, I highly recommend finishing the DIY writing tray with some protective finish. This way dirty little fingers don’t stain it and a finish will make the wood more durable and long-lasting. You can use any of your preferred finishes, whether it’s stain, polyurethane, mineral oil, etc.
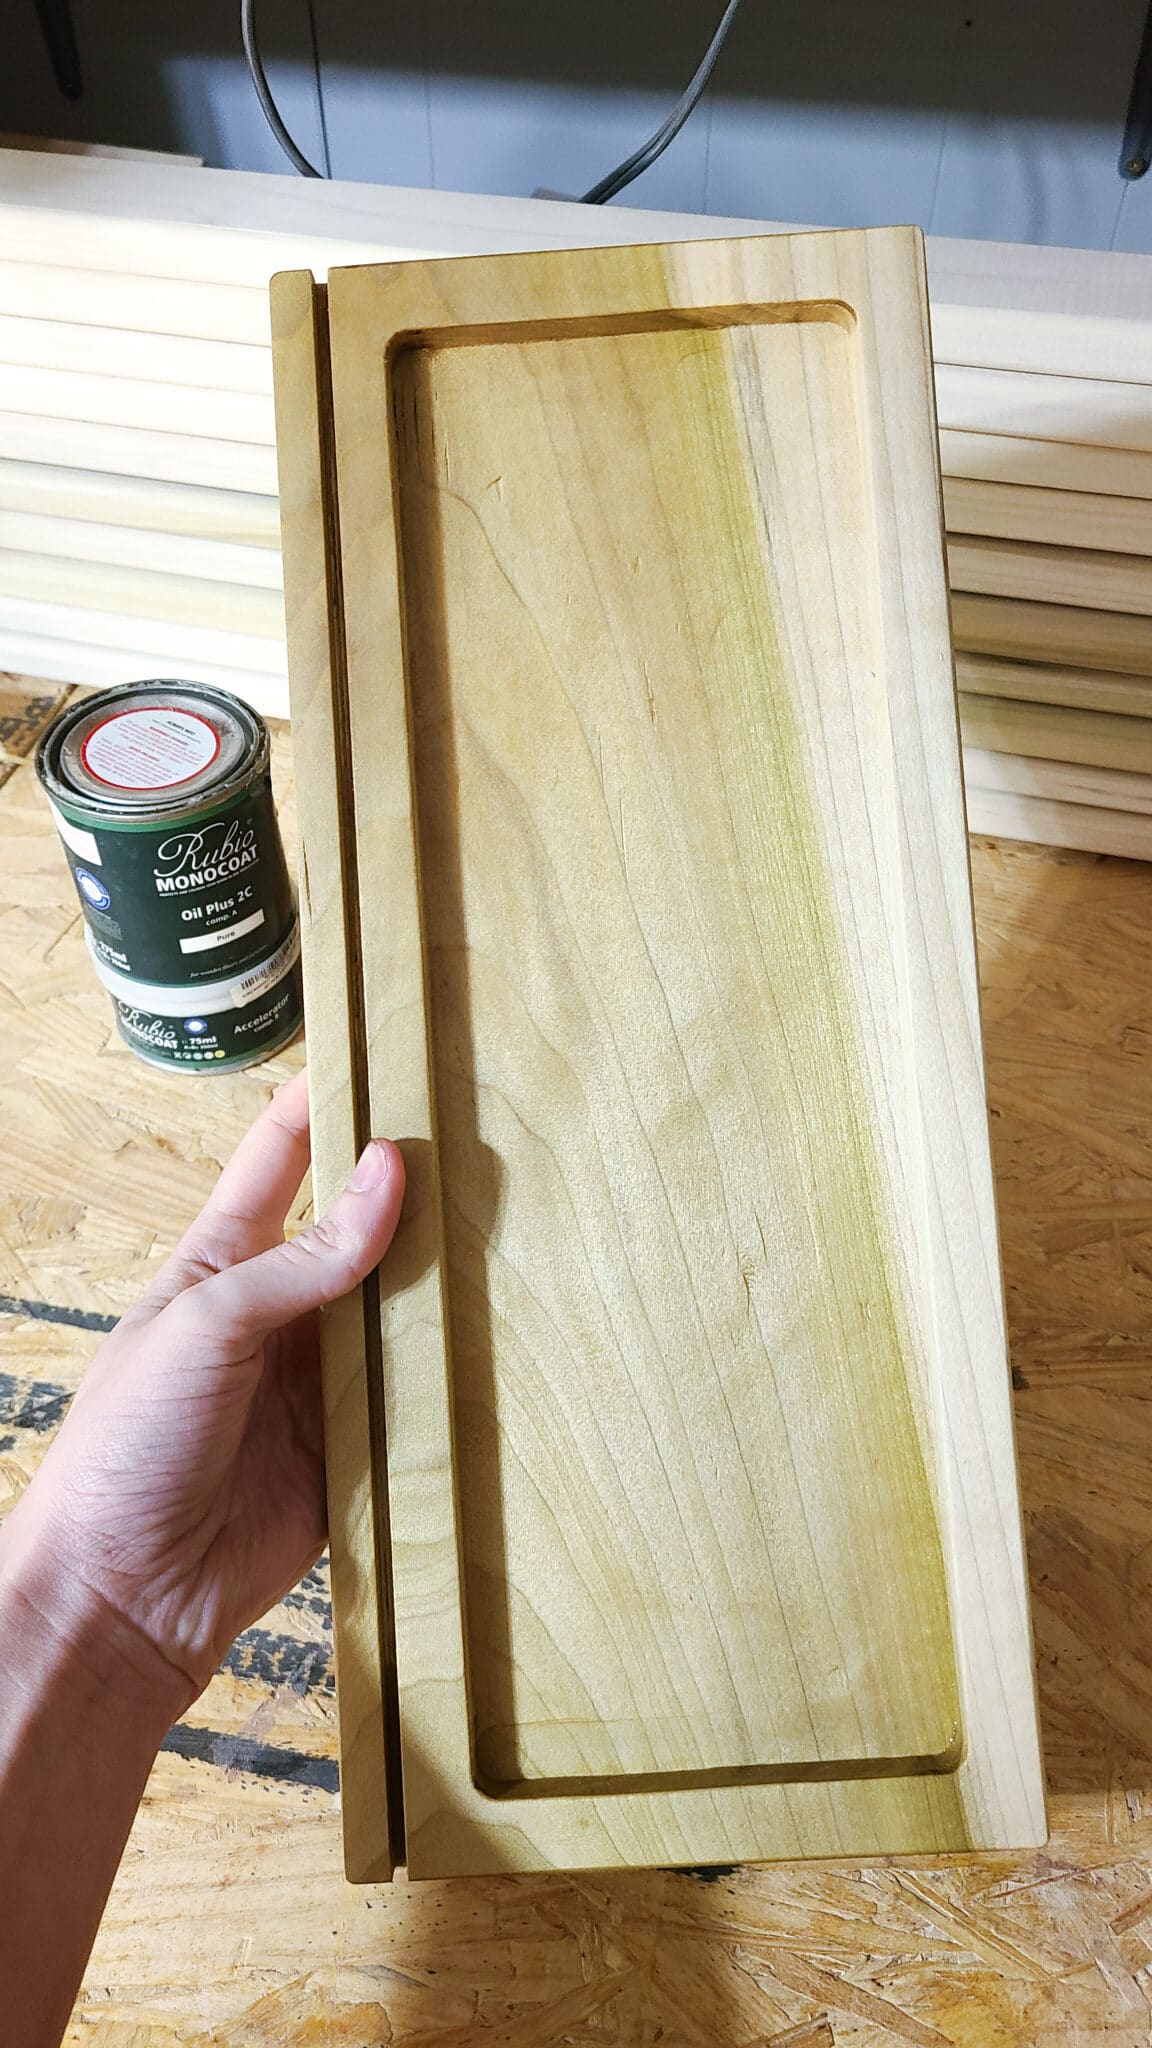
We used Rubio Monocoat Oil Plus 2C Pure, which warms the wood slightly and keeps the color fairly similar to the raw Popular wood board we used.
For all our wood projects, we love using the Rubio Monocoat finish now. It’s an oil-based hardwax finish that only requires one coat and is dry to the touch quickly. We did a color test of 6 different colors on 7 different species of wood as well as a product review if you want to know more!
Step 8: Begin Learning & Playing
After the finish is dry, the writing tray is complete and it’s time to set up for some fun and learning! Fill with whatever medium you desire and start adding learning elements. See more ideas and ways to use the DIY sand writing tray.
How To Use The DIY Writing Tray
Like many Montessori-inspired elements, there are a variety of ways to use the DIY writing tray. So here are some ideas and tips for your DIY creation.
It Doesn’t Have To Be Sand
You can use so many different mediums with this writing tray, so find what you have on hand. Here are a few ideas:
- Sand
- Salt
- Sugar
- Flour
- Cornmeal
FYI sugar can be a little more sticky, which some kids might love and others not so much!
You can also do larger mediums like rice, small beans, small pasta, or lentils for sensory games instead of writing practice.
Writing Cards
The best part of this DIY writing tray is all the different fun learning opportunities with it. You can use it to practice writing letters, numbers, shapes, and more! There are a lot of pre-made cards you can purchase from wonderful small business owners on Etsy (I love these beautiful simple ones!) Or even purchase a printable and print it yourself!
Or if you’re like me, grab some cardstock and handwrite out your own letters, numbers, and shapes! We’ve used a numbers pack from one of our Kiwi Co. Panda boxes (awesome developmental toy subscription box during the early years!).

It Doesn’t Have To Be Writing
This tray can be used for more than practicing writing with the little one. It can be set up for matching games or discovery games or any type of sensory tray you can imagine.
You can hide cards below the sand, use a little brush, and have your kid discover what’s hidden. There are lots of possibilities!
Storage Tips For The Tray
When learning and play is done, putting the sand for storage is key. If you don’t, then you’ll likely end up with sand or whatever dumped all over the place. At least that’s what happens with our toddler!
There are a couple of options to store the sand from the writing tray.
- Pour sand into a container or an old jar – using a funnel helps and we love reusing old food jars!
- Wrap the whole tray up – We use a beeswax wrap as an eco-friendly alternative to cling wrap
- Store it high on a shelf out of reach – You might want to cover it with another piece of wood, paper, or something so it doesn’t collect dust/bugs
Obviously, the sand will eventually get dirty or sticky with the kids playing with it, so make sure to replace it once and a while. If it’s sand, you can put it in outside to become part of the soil. Or if you used a food product (salt, flour, etc.), then you can just compost it when it’s beyond use!
Other DIY & Eco-friendly Crafts
Now that you can make DIY writing tray, check out some of our other DIY projects or Eco-friendly Crafts to do for kids!
- How To Make Fall-Scented Homemade Playdough
- Hubby How To – DIY Wood Train Set
- How To Make A DIY Garland Using Power Tools
We love doing projects for our house too, with our DIY hanging daybed definitely being the most popular build yet!


Hope you enjoy making a beautiful DIY writing tray and enjoy learning and playing! Let us know your thoughts, questions, or suggestions in the comments below!
Share and Pin for later!


Disclaimer: This post includes affiliate links, and I will earn a commission if you purchase through these links. Please note that I’ve linked to these products purely because I recommend them and they are from companies I trust. There is no additional cost to you.


