How To Design & Create A Pollinator Garden
Pollinators play a critical role in our environment and many of us are looking for ways to help support them. Planting pollinator-friendly plants and replacing lawn and non-native plants in your own yard or business can make an impact. Here’s how to create a pollinator garden design and implement it.

Disclaimer: This post includes affiliate links, and I will earn a commission if you purchase through these links. Read about our privacy policy.
My days as a landscape architect led me to do a lot of planting designs on projects. One of my favorite things was when clients would go for native plants with the goal of attracting pollinators.
Pollinator gardens are simply gardens designed to contain plants that provide basic needs (food, shelter, water, etc.) to animals that help pollinate plants. Not only do pollinator gardens have a beautiful wild aesthetic, but they help support the local ecosystems and our food web. In this post, we’ll cover the basic components, how to design and create a pollinator garden, and a list of favorite plants that attract pollinators.
Why Are Pollinator Gardens Important?
The more pollinators you can bring to your property, the better for many reasons. Pollinators, which are insects and animals that move pollen from one flower to another, provide many benefits to our ecosystem and specifically in the area they are.
Benefits of Pollinator Gardens
- Improves Your Vegetable Garden – If you have a veggie garden, then pollinators mean less work for you and more fruit. They pollinate the vegetable flowers continuously and it also attracts beneficial insects to help fight off unwanted pests and diseases.
- Native Plants Stabilize & Improve Soil – Pollinator gardens typically include native plants with a deeper root system than a turf lawn. Deeper roots help reduce erosion, increase the soil’s capacity to store water, and take nitrogen from the air and into the soil.
- Creates Habitats – If there’s no where to live nearby, animals and insects won’t stay and continue pollinating the plants around you.
- Helps The Environment – these gardens are fairly easy to implement and can make a big impact by conserving biodiversity, help with stormwater management, purify the air and much more.
- Mental Health – Increasing access to nature and natural things like gardens has shown a direct association with better mental health outcomes.
Without pollinators, agriculture would suffer leading to food supply issues, all flowering plants would struggle to reproduce, and we’d see a breakdown in our ecosystem. Monoculture lawns and non-native plants don’t always support pollinators’ basic needs leading to their decline in areas where there is a lack of pollinator-friendly plants. Moreover, the heavy use of pesticides in areas can lead to pollinator decline as well.
By planting pollinator gardens, you can create a safe space for pollinators to thrive and provide all the benefits to our environment. Let’s do it together!

Native Pollinator Garden Components
There are specific elements to a garden design if you are targeting pollinators. These are the best practices we recommend having in your garden:
- Food For Every Lifecycle Stage – Adult and baby pollinators need different food. Adults need diversity in the native plants across the growing season with ranges of pollen and nectar. While baby pollinators need host plants for larvae (like butterflies & moths).
- Habitat – Pollinators need protective areas to live like leaves, grasses, or hollowed stems. They also use these for nesting materials to help continue the life-cycle of the pollinator.
- Protection From Pesticides – Keep plants free of chemicals and pesticides as even organic pesticides can be harmful to pollinators.
- Water – All living creatures need water, so providing a spot for access to water is important for pollinators. It doesn’t have to be a fountain or bowl of water that breeds mosquitos. Simply low muddy spots can be areas for water access, while dry areas can become areas for ground nesting pollinators.
How To Create A Pollinator Garden
Now knowing the benefits and components of a pollinator garden, here is a step-by-step guide for creating a native pollinator garden design.
Step 1: Do A Site Analysis
To have a successful pollinator garden, the first step you need to do is a site analysis. You’ll need to assess the existing conditions and climate of your specific site to ensure you select plants that will thrive.
Design Elements To Consider
- Sunlight – You need to know how much sunlight the site gets per day to choose plant types that can grow in that amount of sunlight. Also note the timing whether it’s morning or evening light.
- Full Sun = 6 – 8+ hours
- Partial Sun = 3 – 6 hours
- Shade = 3 or less hours
- Soil – Note the soil composition. Whether it is sandy, loamy, or clay. You can do a soil test to see exactly what the composition is, its pH level, and nutrient levels. This is helpful to know to amend the soil for the plants. The benefit of using native plants is that most plants native to your area are already adapted to the regional soil type. Lastly, over time, native plants with deeper roots will also help improve your soil as well.
- Moisture Levels – Some plants prefer having more wet roots versus others can only survive in well-drained soil. Take note of possible moisture levels after a rainfall on the site.
- Aesthetic – Most pollinator gardens tend to have an informal, wild look, so consider locating where that aesthetic best fits.
- Human Engagement – Consider how people might use the space around the pollinator garden. You wouldn’t want a thorny plant where people would brush up and get injured.
- Pests & Wildlife – Observe and note what pest and wildlife issues may occur. Consider planting natives that are resistant or deter pests that your area has problems with.
- City Codes – Some cities have planting codes and ordinances that should be considered. Commercial businesses and residential areas can have different guidelines. Double-check there aren’t any restrictions prior to investing in your pollinator garden

Step 2: Find Inspiration & Do Research
Next, it’s time to find inspiration for the planting design. Hop onto Pinterest or Instagram and search for pollinator gardens in your hardiness zone. These will help you find an aesthetic and some plant types to inspire the garden design and layout.
After you have some inspiration, it’s important to do some research specific to your area.

Choose Native Plants To Help Local Pollinators
Native plants are “native” for a reason. They can tolerate the climate and soil for the area leading them to survive longer. Moreover, local pollinators are adapted to these types of plants and many endangered pollinators are endangered because there’s a lack of the one native plant that they need to survive. So choosing native plants not only can lead to more successful plants, but also help the local pollinator community thrive.
Tip: Some plants promoted as pollinator-friendly may actually be imported or invasive species. Or they only support the adult pollinators and can be harmful to larvae.
Resources For Plant Research
Here are a few resources for researching plants:
- Know your hardiness zone first
- Any Local Native Plant or Botanical Society
- Missouri Botanical Garden Plant Finder – One of my main resources for finding plant characteristics since we live in Missouri.
- North American Native Plant Society has a database for the whole continent. It helps to confirm whether the plant is truly native or not.
- Local cities or nurseries might have a list of suggested native plants for pollinator gardens
- A simple internet search for “native plant list for name of city/state”

Step 3: Create A Plan
After doing a little research on plants good for your hardiness zone and native pollinators, it’s time to create a design plan!
Planting Design Considerations
Here are a few considerations:
- Seasonality – Consider the seasons when building the plant palette. Some plants bloom in spring and some in the summer. Choose your plants so you don’t have everything blooming at the same time. Moreover, you’ll want plants that have some interest in fall and winter whether that’s textures or leaf color changes. It’s also important to consider what makes a good protective winter habitat for pollinators.
- Aesthetics & Layout – There are a variety of aesthetics when laying out plants. Consider the following:
- Groupings – Group plants in clusters of odd numbers to create a massing effect
- Layering – Consider the height the plant will be. You can layer plants by height, so you don’t have really tall plants in front of shorter plants. This can look like taller plants towards the middle or back of the garden surrounded by shorter plants.
- Break the Rules – You can plant one specimen plant or larger shrub not in a group. You can group in even numbers. It’s all about how you feel about the final look.
- Mature Size & Spacing – Plants’ final mature sizes vary greatly, so know the approximate final size, so you can give enough room between plants. It might look like a lot of space when you first plant, but they will grow in. If you don’t leave enough space, this can lead to lots of pruning and the plants competing with one another for space.
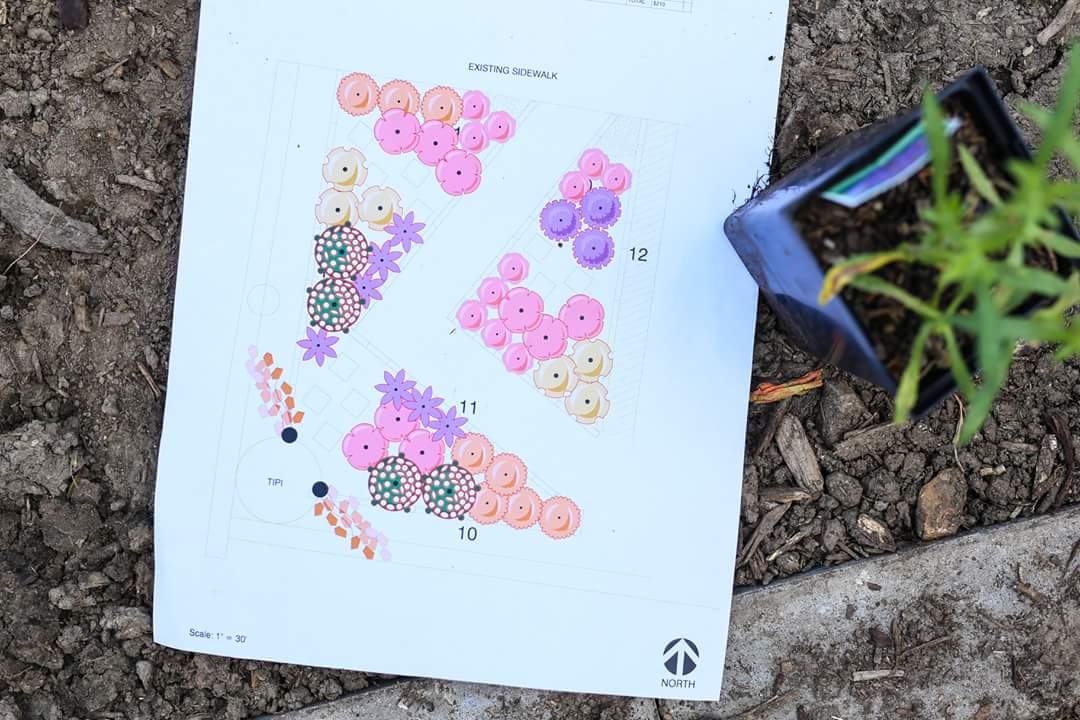
Sketch Out The Design
With those planting design considerations in mind, create your design plan. While you can totally wing it if that’s your style, a plan will help you test arrangements of plants as well as give you an idea of how many of each type you’ll need to purchase.
Design plans don’t have to be anything fancy. Simply grab some paper, pencil, and colored pencils, and draw circles for different plant types. I personally like adding color to each circle to help differentiate between plant types.
If you do sketch on paper, I’d recommend some grid paper so you can draw plants more to scale and size. Or if you have the skills and software, draw it up in a CAD program to scale or an editing software like Photoshop/Illustrator.
After your design plan is set, it’s time to purchase the plants/seeds and prep the site!

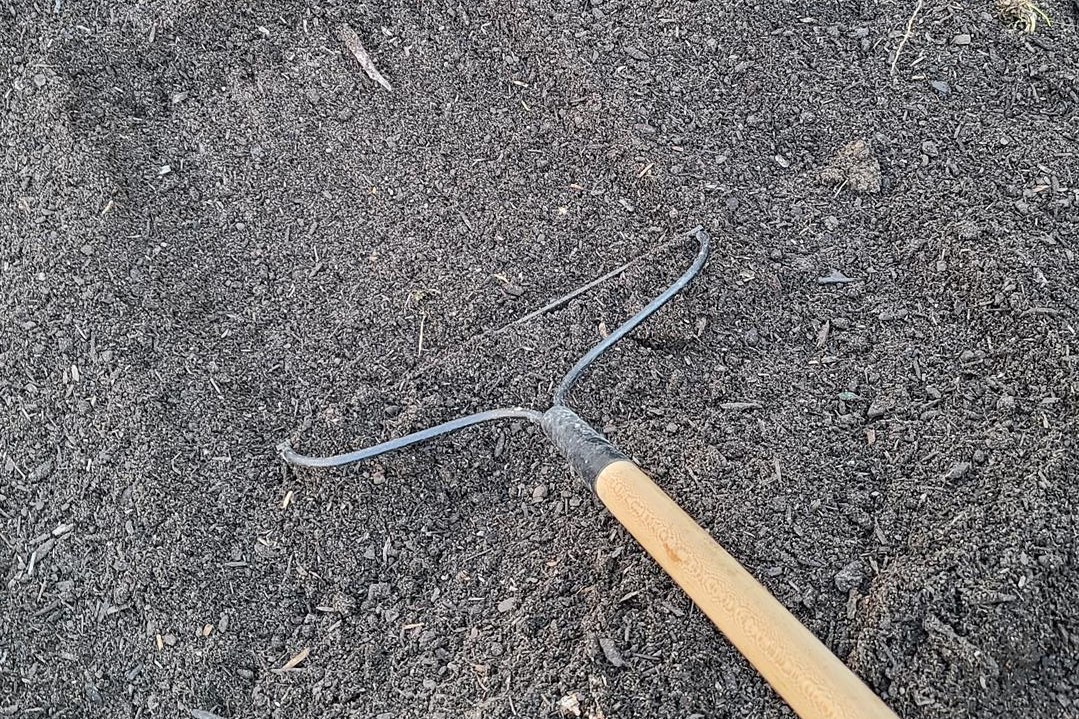
Step 4: Prep The Site
Prepping the site to plant is fairly straightforward. There are two ways to approach the site prep: remove sod/other plants and till soil OR naturally kill off sod/other plants and add soil on top.
In the first approach, you’d cut any sod out and remove any unwanted plants. Typically, the ground can be very compacted underneath and many people will till/turn over the soil to break up clumps (especially with clay soils). Then add a good planting soil mix on top or mix it in with existing soil. This approach is fine but will disturb the soil more and microorganisms and nutrients may be lost.
In the second approach, you would lay cardboard or landscape fabric down over the entire area to smother the sod and deprive it of sunlight. This of course takes time to naturally kill off the sod below. If you use cardboard, then after a few days you can simply add the new planting mix soil on top. The cardboard will break down over time and acts as a good barrier while plants are being established. Overall, this method leaves the soil less disturbed and intact.
Personally, I prefer the second approach as it minimizes soil disturbance leaving all the good microorganisms that create a healthy soil ecosystem alone.

Always Add Organic Matter
However, when you are preparing the site, there is one thing you’ll want to do for sure. Adding organic matter like compost or manure will be critical in helping your new plants thrive. Compost and manure are high in nutrients plants need that existing soil may no longer have. Mix it in with the soil for your pollinator garden. Some planting mixes will come pre-mixed with compost, so check the descriptions.
Not only does organic matter add nutrients to the soil for the plants to thrive, but it also helps retain moisture. Organic matter stores more water in its pores than most soil by itself meaning it retains moisture better for your plants and there is less need for watering. This can also help reduce stormwater runoff and erosion as the soil mixed with compost can hold more water over time.
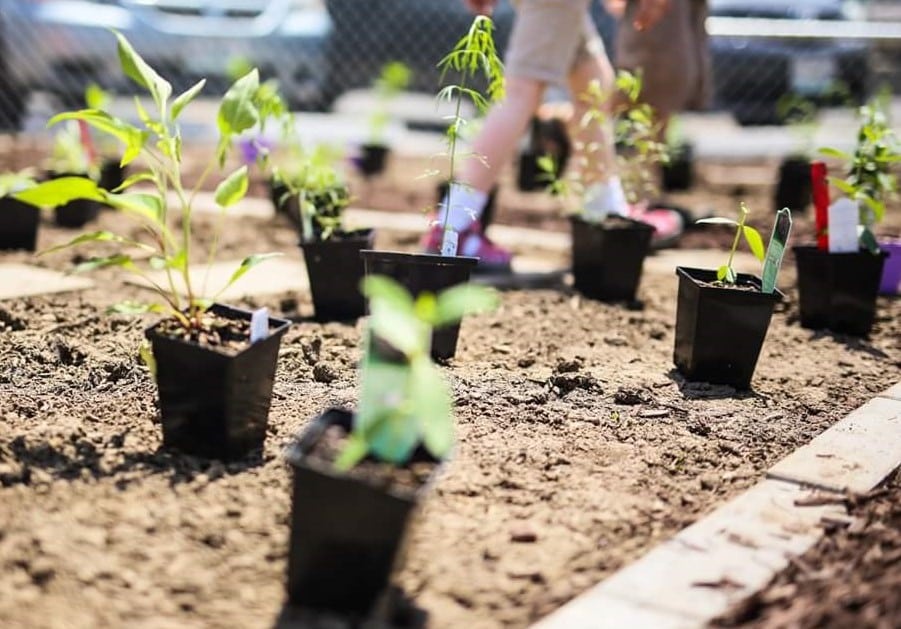
Step 5: Lay Out The Pollinator Garden
With the area ready, take time to lay out all the plant material based on your plans prior to digging holes. However, the plans are a guideline. If you feel like something is looking wrong or perhaps something is in the way, then don’t hesitate to adapt and move plants around to make it work. Once you’ve laid everything out and made minor adjustments, it’s time to start digging.

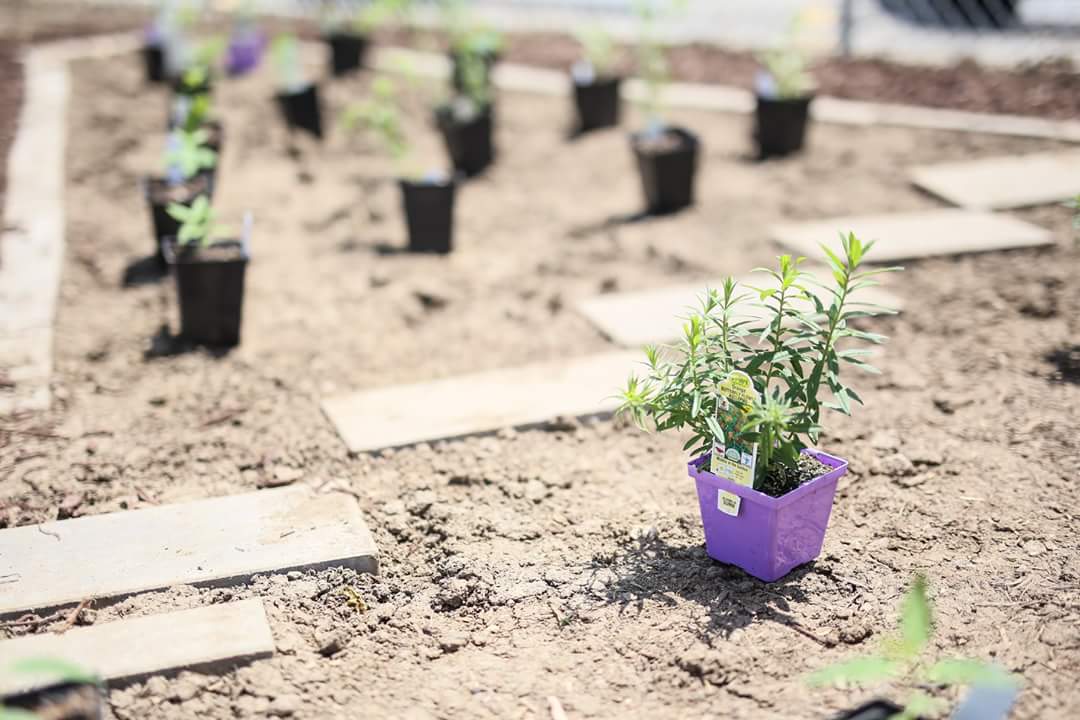
Step 6: Plant Natives
Now that everything is prepared it’s time to plant!
- Start in one area, unpotting (if needed) and gently loosen the soil around the roots. If the rootball is stiff, soften it up by soaking it in water. The soil will break away easier and not break the roots. This also helps the roots absorb a lot of water directly during transplanting.
- Use a trowel or shovel for larger plants to dig a hole the depth of the roots .
- If planting in the site’s existing soil, make sure to dig a hole 2 times the size of the rootball width and fill in with good compost or planting soil. This starts the plant in less compacted conditions and gives it a change to establish.
- Next, place the plant in the hole, filling with dirt and gently pressing down.
- Repeat the process throughout the new garden area.
- Water in all the new plants in the pollinator garden. Be careful not to flood or cause washout around the plants. It helps to have a spray nozzle or water wand to be gentle with the delicate baby plants.
- Add natural mulch to help retain moisture on the newly transplanted plant. This will also help control weeds and give the plants time to establish and grow without competition.
DIYer Tip – Grab some friends or family to help and this can go very quickly! Just have the plants laid out or a printed plan so it’s easy for everyone to be on the same page.

Step 7: Care For The Pollinator Garden & Enjoy!
Like any living thing, the plants in the new pollinator garden will need some care. So here are a few of my tips after planting.
Water Often The First Year
Consistent watering is critical for any new plant trying to establish in its new home. Add a temporary drip irrigation system to provide consistent water while the new plants get established. Typically after a year or so native plants have grown and don’t need much supplemental water from irrigation systems. Just water when necessary during the heat. We use an easy DIY irrigation system paired with a timer for our terraced vegetable garden that’s easy to install and remove.
Additionally, rain barrels are great for supplemental water. We use our DIY rain barrel to collect rainwater from our roof and then use that water for our garden containers on our deck and in the backyard.
Deadhead Your Flowers Often
To keep your flowers producing more flowers throughout the growing season, try removing (deadheading) withered blooms. This encourages the plant to produce new flowers and not waste energy trying to keep a faded bloom alive. It’s beneficial in a pollinator garden to deadhead as fresh, open flowers typically have the most nectar and pollen. Moreover, you can easily save seeds from many flower heads, like marigolds, so you have seeds for next year!


Cultivate & Maintain
All landscaping needs some maintenance, even native landscapes. Here are a few things to consider.
- Weed by hand and drop the weeds back onto the soil – Most weeds when picked will die off when the roots are exposed. Leave them on the soil to break down and this will return any nutrients they absorbed back to your soil for the native plants to use.
- Leave flower heads & stalks for habitat and food for insects and birds throughout the winter. Leaves can be left to act as mulch, retaining moisture in the soil and protecting plants during the winter. It also adds beautiful winter textures to your landscape when all the green is gone.
- Cut back and/or prune flowers and grasses in the spring accordingly to encourage new growth.
- Avoid pesticides and chemical fertilizers as these can be determinantal/toxic to pollinators.
Don’t Forget to Observe & Enjoy!
Lastly, don’t forget to watch and enjoy the pollinator garden! It will grow and change over time. It’s also amazing to see what is attracted to each plant. So take time to slow down and enjoy your hard work!

Bonus Tips For Pollinator Garden Design
It Doesn’t Have To Happen All At Once
Installing a large pollinator garden all at once can be expensive. Especially, if you are purchasing larger plants! Nurseries are trying to make up the cost of growing it to that size, and resellers are adding profits on top of that cost.
So consider phasing the planting of your pollinator garden. Start with what you can afford and fill in over time.
Here are a couple ways to save money if you don’t mind waiting for growth or progression over time:
- Buy smaller plants – The larger the plant material, typically the more it costs. Moreover, larger plant material tends to have more transplant shock leading to stunted growth and higher die-off rate than smaller plants. In my experience, smaller plants tend to catch up in size quickly as they adapt better.
- Buy bare root plants – these are dormant plants that are dug up and stored without soil around the roots. Bare root plants can take off much quicker than potted ones and tend to not go through as much transplant shock. Additionally, many times they cost less because there’s less material and shipping is much lighter.
- Start from seed – this takes a time and care investment but can be a fraction of the cost of buying grown plants. Just make sure you buy good seeds from a reputable nursery/seed provider to get the best germination rates. I love ordering Baker Creek’s seeds as they are high quality and always germinate well..
- Propagate plants from one you already have – many perennials can be separated/divided into more plants as they grow. This basically becomes a free plant that you can then fill in gaps in your garden with. All it takes is a little time and care to propagate the new plant.
- Fun fact – Although it’s an annual, basil can be propagated in water and grow new roots in a matter of weeks! I do this all the time to have an abundance of it!


Evaluate & Change Over Time
Landscapes are ever-changing and your pollinator garden will change over time. Plants don’t always survive. That’s just a fact. Sometimes it’s our fault for planting in soil conditions it doesn’t like or without enough sunlight or maybe we just didn’t water it enough. Sometimes nature will take its course with disease or pests or the plant species just wasn’t meant to grow in your site’s microclimate. It can be a little trial and error to see what thrives best on your garden site.
Watch the garden to see what does well and what doesn’t. And change it up if you need to. Fill in gaps where plants have died off and maybe try something new. Pollinator gardens and all landscapes should be looked at as something that will change over time.
Do A Container Garden
Any amount of space can become a pollinator garden. So if you’re lacking in space on site, try a container garden following the same principles. Use a planter box or group of pots to grow native, pollinator-friendly plants. If putting multiple plants in a pot, consider only putting together ones with similar sun and water needs.
Plants To Attract Pollinators
Here is a list of some popular plants that attract pollinators and also my favorite ones! Remember to consider the sun and water requirements, and whether they’ll grow in your zone.
Flowering Shrubs & Grasses
Great for both pollinators and to add some structure or foundation planting to your pollinator garden.
- Oakleaf & Panicle Hydrangeas
- Buttonbush
- Ninebark
- Butterfly Bush
- Prairie Dropseed
- Side Oats Grama
Perennials
These plants will return each year bringing color and attracting pollinators. Double-check if they are perennial in your zone.
- Coneflower (Echinacea)
- Phlox – more of a groundcover
- Bee Balm (Monarda)
- Yarrow (Achillea)
- Black-Eyed Susan (Rudbeckia)
- Aster
- Coreopsis
- Blazing Star or Gayfeather (Liatris)
- Milkweed (Asclepias)
- Lavender (Lavandula)
- Goldenrod (Solidago)
Annuals
Although you’ll have to replant next year, you can easily save the flower heads of many annuals to have free seeds for the next year.
- Marigolds
- Borage
- Calendula
- Zinnias
- Nasturtiums
- Sunflowers
More Gardening & Homestead Ideas
After you get a pollinator garden going there’s so much more you can do to improve your landscape as well as leave a little footprint on your environment. Check out some of our favorites below or our Gardening & Homesteading Archives.
- Down To Earth Tips For Eco-friendly Lawn Care
- Hubby How To: DIY Stacked Rain Barrel System
- 18 Ways We Homestead In The Suburbs To Live More Sustainably
- Terraced Garden Beds After One Year – Words of Advice


I hope all these details help you create a beautiful pollinator garden! Let us what questions or thoughts you have in the comments below!


Disclaimer: This post includes affiliate links, and I will earn a commission if you purchase through these links. Please note that I’ve linked to these products purely because I recommend them and they are from companies I trust. There is no additional cost to you.


