How To Make A Homemade Soda & Reduce Your Waste
Looking for a way to reduce your waste when it comes to drinking soda or carbonated beverages? Well in this post, we cover the carbonation equipment needed, the cost breakdown, our homemade ginger ale recipe, and the carbonation process and soda creation.
Updated 8/27/2022

This post may contain affiliate links. Read about our privacy policy.
I don’t know about you, but as a kid and young adult, I grew up with soda (or pop, if you call it that!) as a beverage staple in our household. We didn’t drink it all the time, but it was there and drank it weekly. I still love drinking a bubbly carbonated ginger ale and truthfully, I have nothing against drinking what tastes good and that you love!
However, during our sustainable living journey, I realized how much myself and my husband were contributing to the plastic waste stream. We drank a 2 liter bottle of ginger ale almost weekly along with a plastic jug of iced tea. So we came up with a plan to carbonate and make our own homemade soda as a more eco-friendly option!
Below, we’ll cover how we do it and the equipment needed!
Why Reduce Plastic Waste
According to the Environmental Protection Agency (EPA), both PET and HDPE plastic bottles are only recycled about 29% of the time. The 2018 Data tables show that out of 3,130,000 tons of PET plastic and 750,000 tons of HDPE generated that year, only 29.1% and 29.3% were recycled respectively. This category covers all plastic bottles and it’s mind-blowing.
Knowing this, we realized we were contributing heavily to this plastic waste stream with our pre-packaged iced tea and 2 liter ginger ale consumption. We were recycling, but we had not way of knowing if our waste was actually recycled or just ended up in a landfill, so we wanted to take another step to reduce our footprint as a family.
However, we were not ready to give up soda and in our case, ginger ale forever!
We’re big ginger ale drinkers for a few reasons. I personally struggle to drink plain water (I know crazy!), bubbles in carbonated beverages are wonderful, it’s good for digestion, and there’s no caffeine. So time to look for a more eco-friendly option!

Switch To Homemade Soda
To reduce our waste with soda, we decided it was time to start making our own homemade soda. We were totally looking into getting a Soda Stream originally. It’s still a great option to help reduce your plastic waste, especially if you’re a heavy carbonated beverage drinker.
However, we decided to go a step further by getting our own larger CO2 tank and carbonation equipment, while also making a simple soda syrup ourselves. It’s honestly kind of like setting up a mini micro-brewery at your house!
Next, we cover the carbonation equipment needed, the cost breakdown, our ginger ale recipe, and the carbonation process and soda creation. You can totally use this same equipment and process to make any carbonated beverage. Just switch out your syrup recipe!
Homemade Soda Carbonation Equipment

Equipment Needed
- CO2 tank
- Empty Plastic Bottle (2L)
- Regulator
- Hose
- Carbonation Cap
- Glass Bottles (optional)
- Food Grade CO2 vendor
CO2 Tank
Sounds scary, but it isn’t as complicated as it seems. Some guides recommend a paintball gun tank, but those can have residue left from the machining process. Metal particulates, machining oil, etc., so opt for a food grade, clean, aluminum tank. If you drink a lot of soda in your house, it may even make sense to get a bigger size than this. Our 5 lb tank should last us two years give or take. Some gas suppliers will swap your tank with a full one, so don’t get too attached to your shiny new tank.
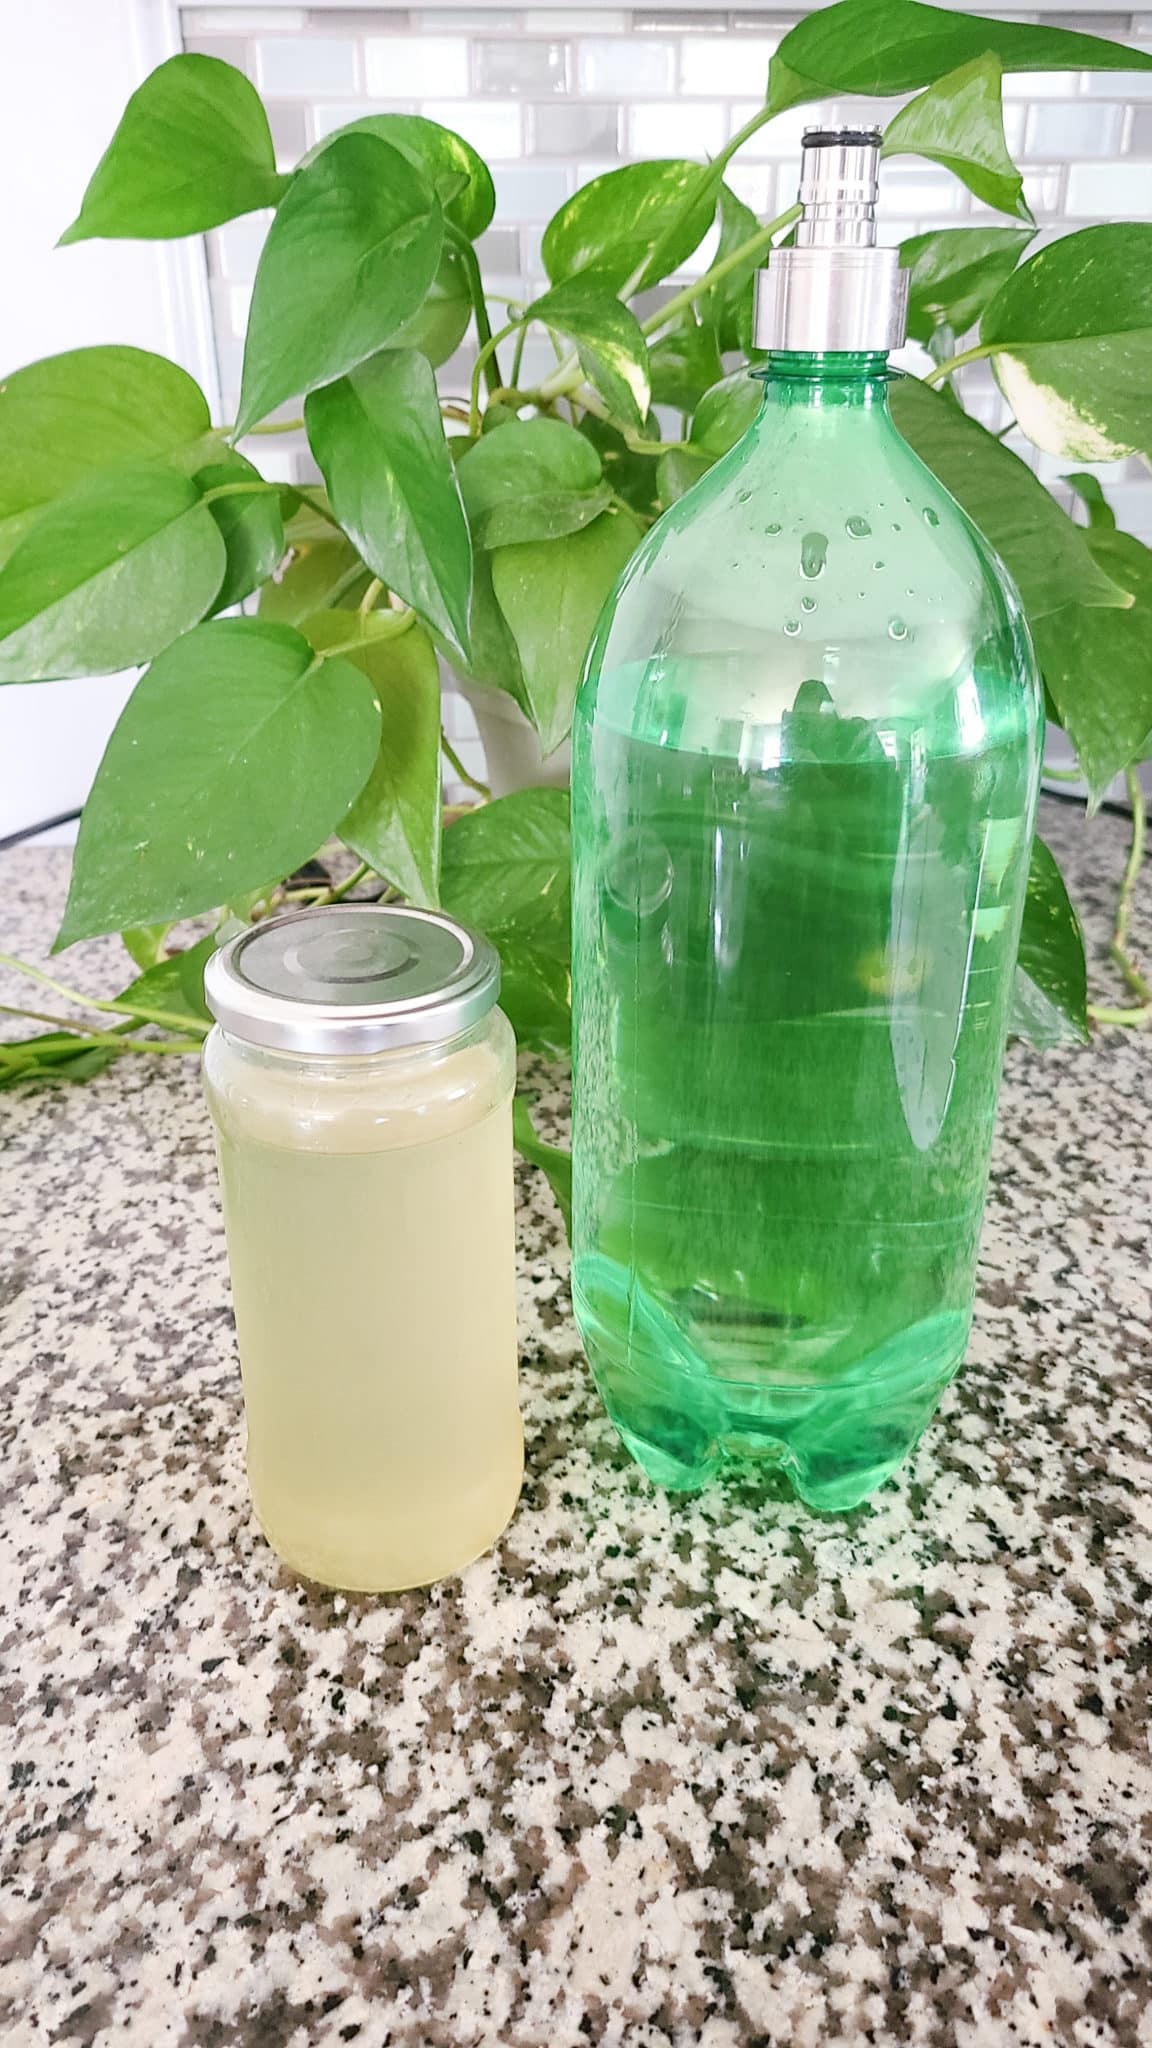
An Empty Plastic Soda Bottle
Yes, plastic. This is needed to hold the water you are about to carbonate. It needs to have threads for a lid so that it can be connected to your tank and you need to be able to compress it to squeeze the air out of it. Can’t really do that with a glass bottle.
Reuse is good, so use an old cleaned 2 liter you have or ask for one from someone you know who drinks soda. You might be able to repurpose a different type of plastic container if it has threads to attach to the tank, but we’ve only tried 2 liter bottles.
A Regulator – to connect to your tank
There are a lot of regulators out there that really do the same thing, but this is the one we chose. Pick one that is well reviewed and make sure you always follow the instructions when turning on your gas so you don’t end up breaking it. Even the more expensive ones can break if not treated properly. Make sure all valves are closed, slowly open the CO2 tank, then slowly turn the regulator’s big knob until it gets to your desired pressure, then slowly open the regulator’s small knob to allow air to flow.
A Hose – to connect your regulator to your bottle
This one has a ball fitting that fits the carbonation cap we will be using.
A Carbonation Cap – to put on your plastic bottle
This cap threads onto the end of the bottle to allow you to pressurize it and then dis
connect it without releasing the CO2.
Food Grade CO2 vendor – to fill the tank you purchase
Firstly, pay the extra money for food grade CO2. Put your mind at ease and don’t risk the health of your family by not getting food grade gas that has been deemed safe for human consumption. A good vendor can be hard to find, but it’s worth it.
We found a beverage gas vendor in Kansas City called M&H Gas. They are able to fill the tanks with food grade CO2. So do a quick internet search for a beverage gas vendor and give them a call. Call ahead to confirm they can fill your tank and for pricing that way you don’t drive all the way there to be turned down.
Glass Bottles – to store your Soda (optional)
We didn’t save multiple plastic bottles to reuse, so we chose to store the homemade soda in glass bottles. Moreover, the glass bottles look nice, work great and hold the carbonation well. You can also use them for water and other drinks, if desired.

Homemade Soda Cost Breakdown

Equipment
Tank: $67.90
Regulator: $46.99
Hose: $14
Carbonator Cap: $10.99
Total Equipment: $139.88
Glass Bottles (optional) : $23.88
CO2 Gas
Food Grade CO2 Refill: $30
5 lb tank makes approximately 320-330L based on Soda Stream Estimates (Soda Stream estimates their 60L cylinder makes 60L of soda and it contains approximately 14.5-15 oz of CO2. Extrapolate that out and our 5 lbs of CO2 is 320-330L)
CO2 Total Cost: Depends on how carbonated you make your drinks & how often used but its about $0.092 per L
Ginger Ale Ingredients
- Ginger
- Sugar
- Water
- Lemon Juice
Ingredient Cost breakdown
Ginger: $4/lb (3 oz per 10 L of Soda so $0.075 per L)
Sugar: 4 cups per 10L (Approximately $0.085 per L)
Water: 3 cups per 10L (negligible cost)
Lemon Juice: 4 tsp per 10L (negligible cost)

Payback Period
The payback period to break even with the cost of the equipment versus purchasing pre-made soda will depend on the pricing of the soda or ginger ale you typically drink. We used to typically get the Great Value brand Ginger Ale from Walmart, so the following example uses that to estimate our payback period.
Compared to Great Value Ginger Ale = $1 for 2L
$139.88 + $30 + $23.88 / (1$/ 2L) = 387.5 L
x1 Refill CO2 Tank – adds another $30 of cost
$193.76 + $30 / (1$/ 2L) = 447.5L
Total Volume To Meet: 447.5L
We drink 2L per week-ish so that’s 223 weeks or 4.3 years before we break even.
To be honest, cost-saving wasn’t the true goal here, but it will be nice when we’ve met our payback period and only have the mostly negligible ingredients costs. But we also get into things for the long-term like our solar panel journey. So that payback period is fairly minor and totally worth it to help reduce plastic waste, save the environment, and have fun while doing it! The whole carbonation process is like a fun science experiment for us!
Moreover, if you compare to Canada Dry Ginger Ale at $2 or more each or other types of soda, then the payback period is much shorter!
Okay now time for the Homemade Ginger Ale recipe and process!

Homemade Ginger Ale Recipe & Carbonation Process
The following recipe is specifically if you are going to make ginger ale. However, you can follow the same carbonation process and add flavored simple syrup of your preferred choice if you want to make a different type of soda or carbonated beverage. For example, you could cook some oranges instead to make orange soda!
Homemade Ginger Ale Ingredients
Simple Syrup
- 3 ounces of Ginger
- 4 cups of Sugar
- 3 cups of Water
- 4 teaspoon Lemon Juice
*Note this makes 5 cups of simple syrup. You only need 1/2cup per liter, so store extra syrup in the fridge for next batch.
For Carbonation
- 2 liters of filtered cold water
Step 1 – Fill just under 2L of filtered water into plastic bottle, squeeze out air, and refrigerate.
- We use cold water from our refrigerator as it has a filter and fill an empty 2L until just under slightly full.
- You can use tap water that’s been filtered through a pitcher if you don’t have water filter with your fridge.
- Next, gently squeeze out the excess air to leave room for the CO2 during the carbonation process.
- Screw on the Carbonation Cap tightly.
- Lastly, refrigerate for several hours, overnight if possible, to ensure water is cold.

Step 2 – Create the Simple Syrup
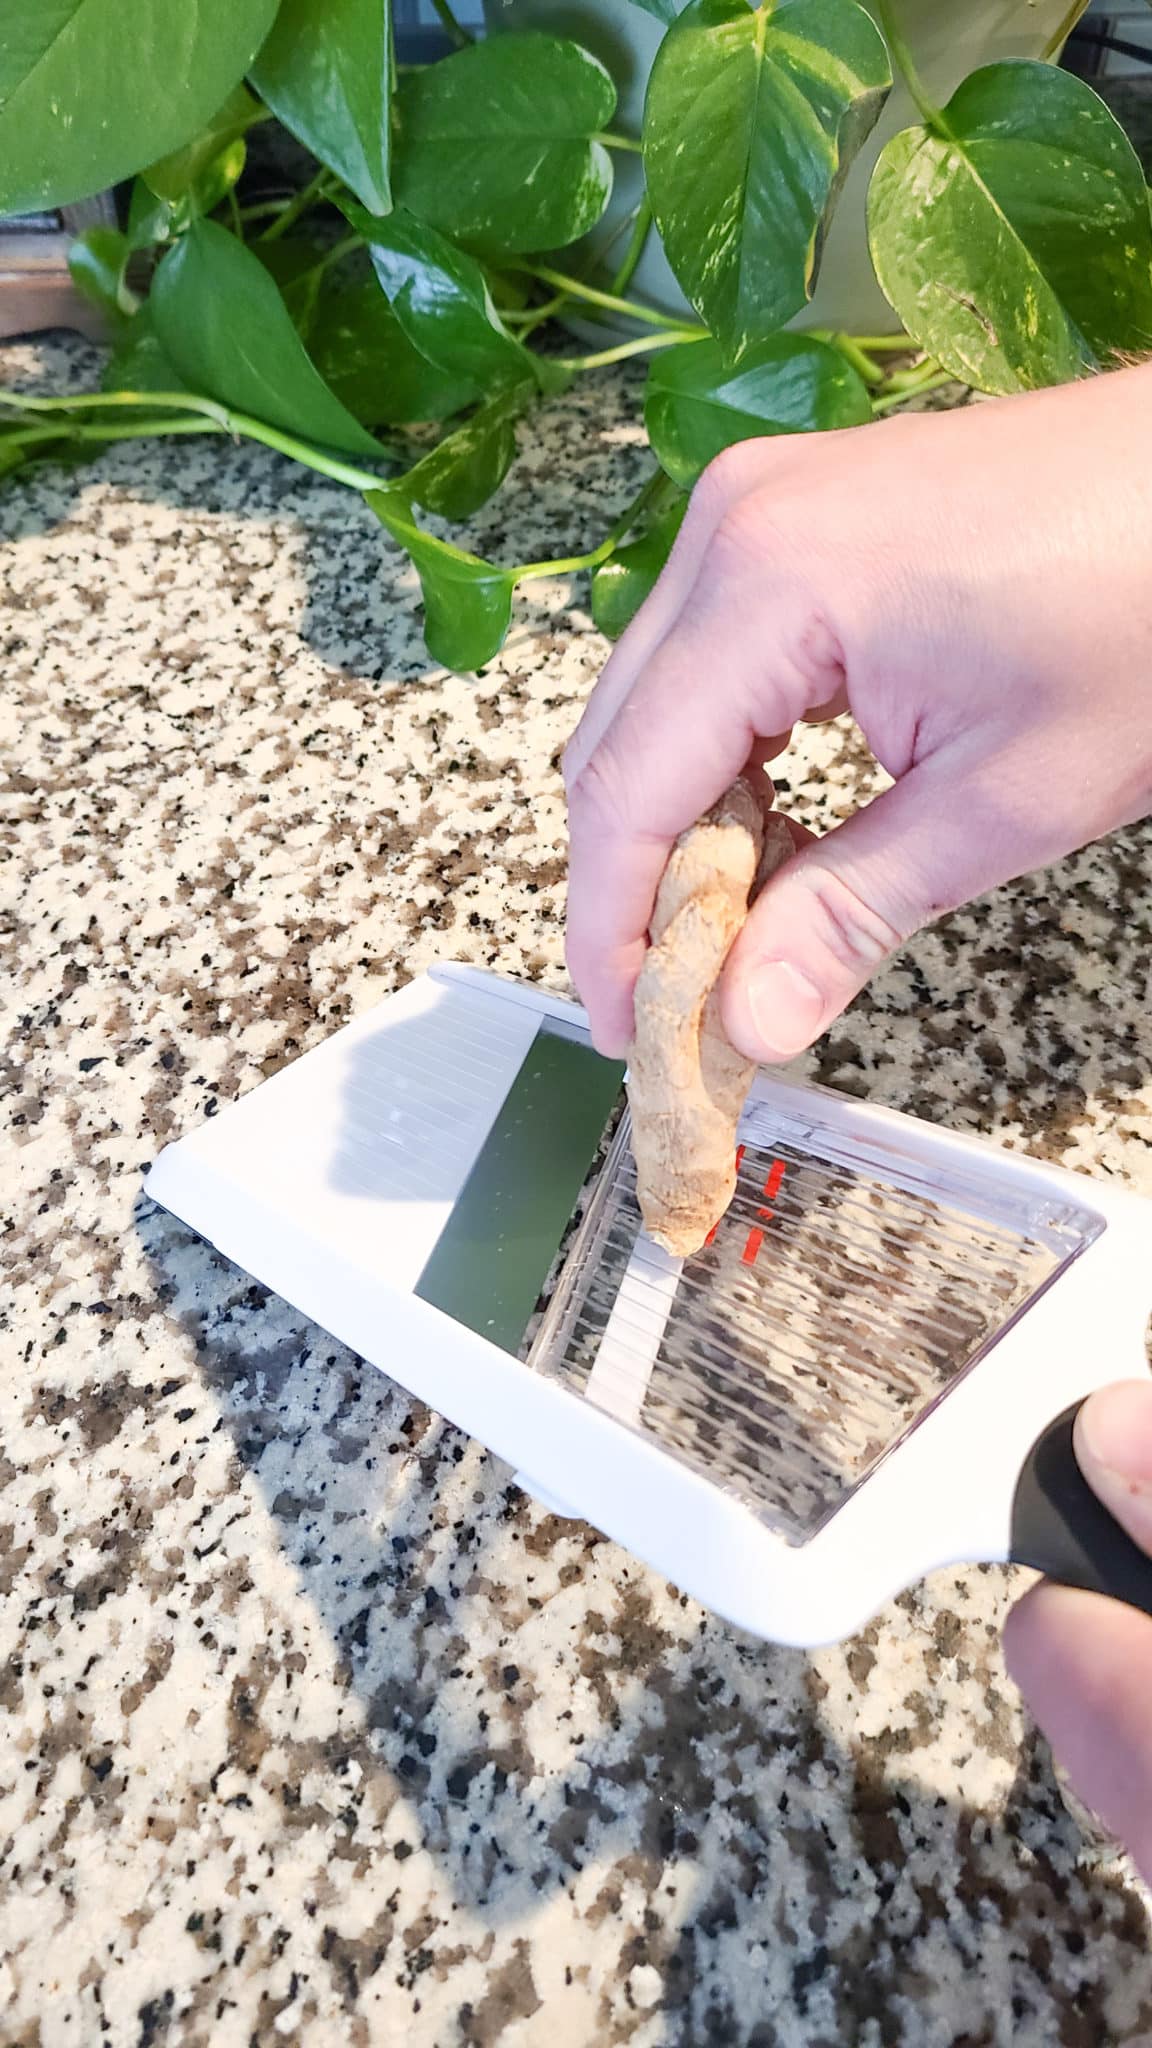
- Finely mince ginger or slice it on a mandolin
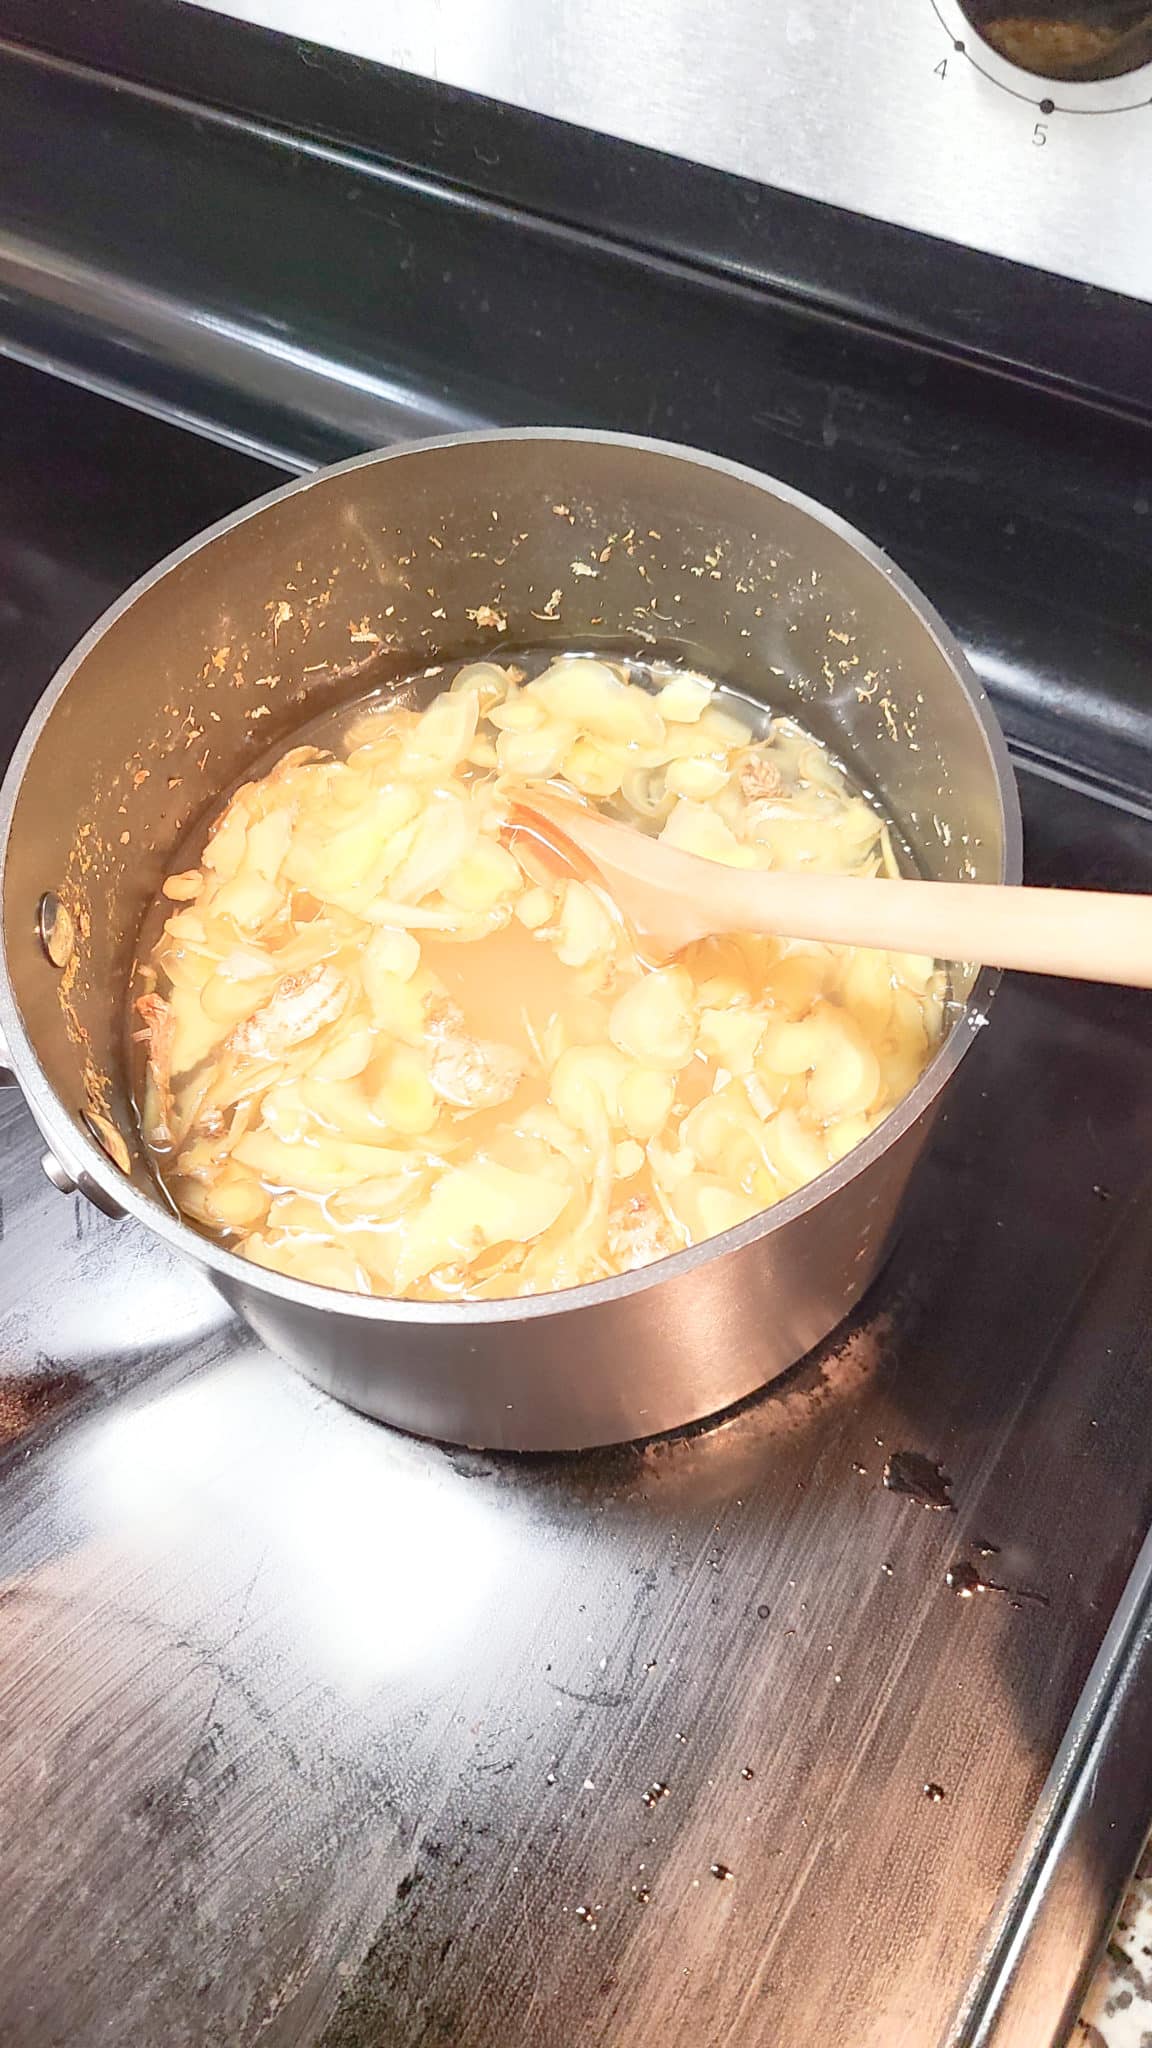
- Boil the water, ginger, and lemon juice for 10 minutes with a lid on to keep your water from boiling away.
- Add Sugar and stir until dissolved
- Heat the sugar mixture until it starts to bubble a little bit so that the sugar combines to form a smooth syrup
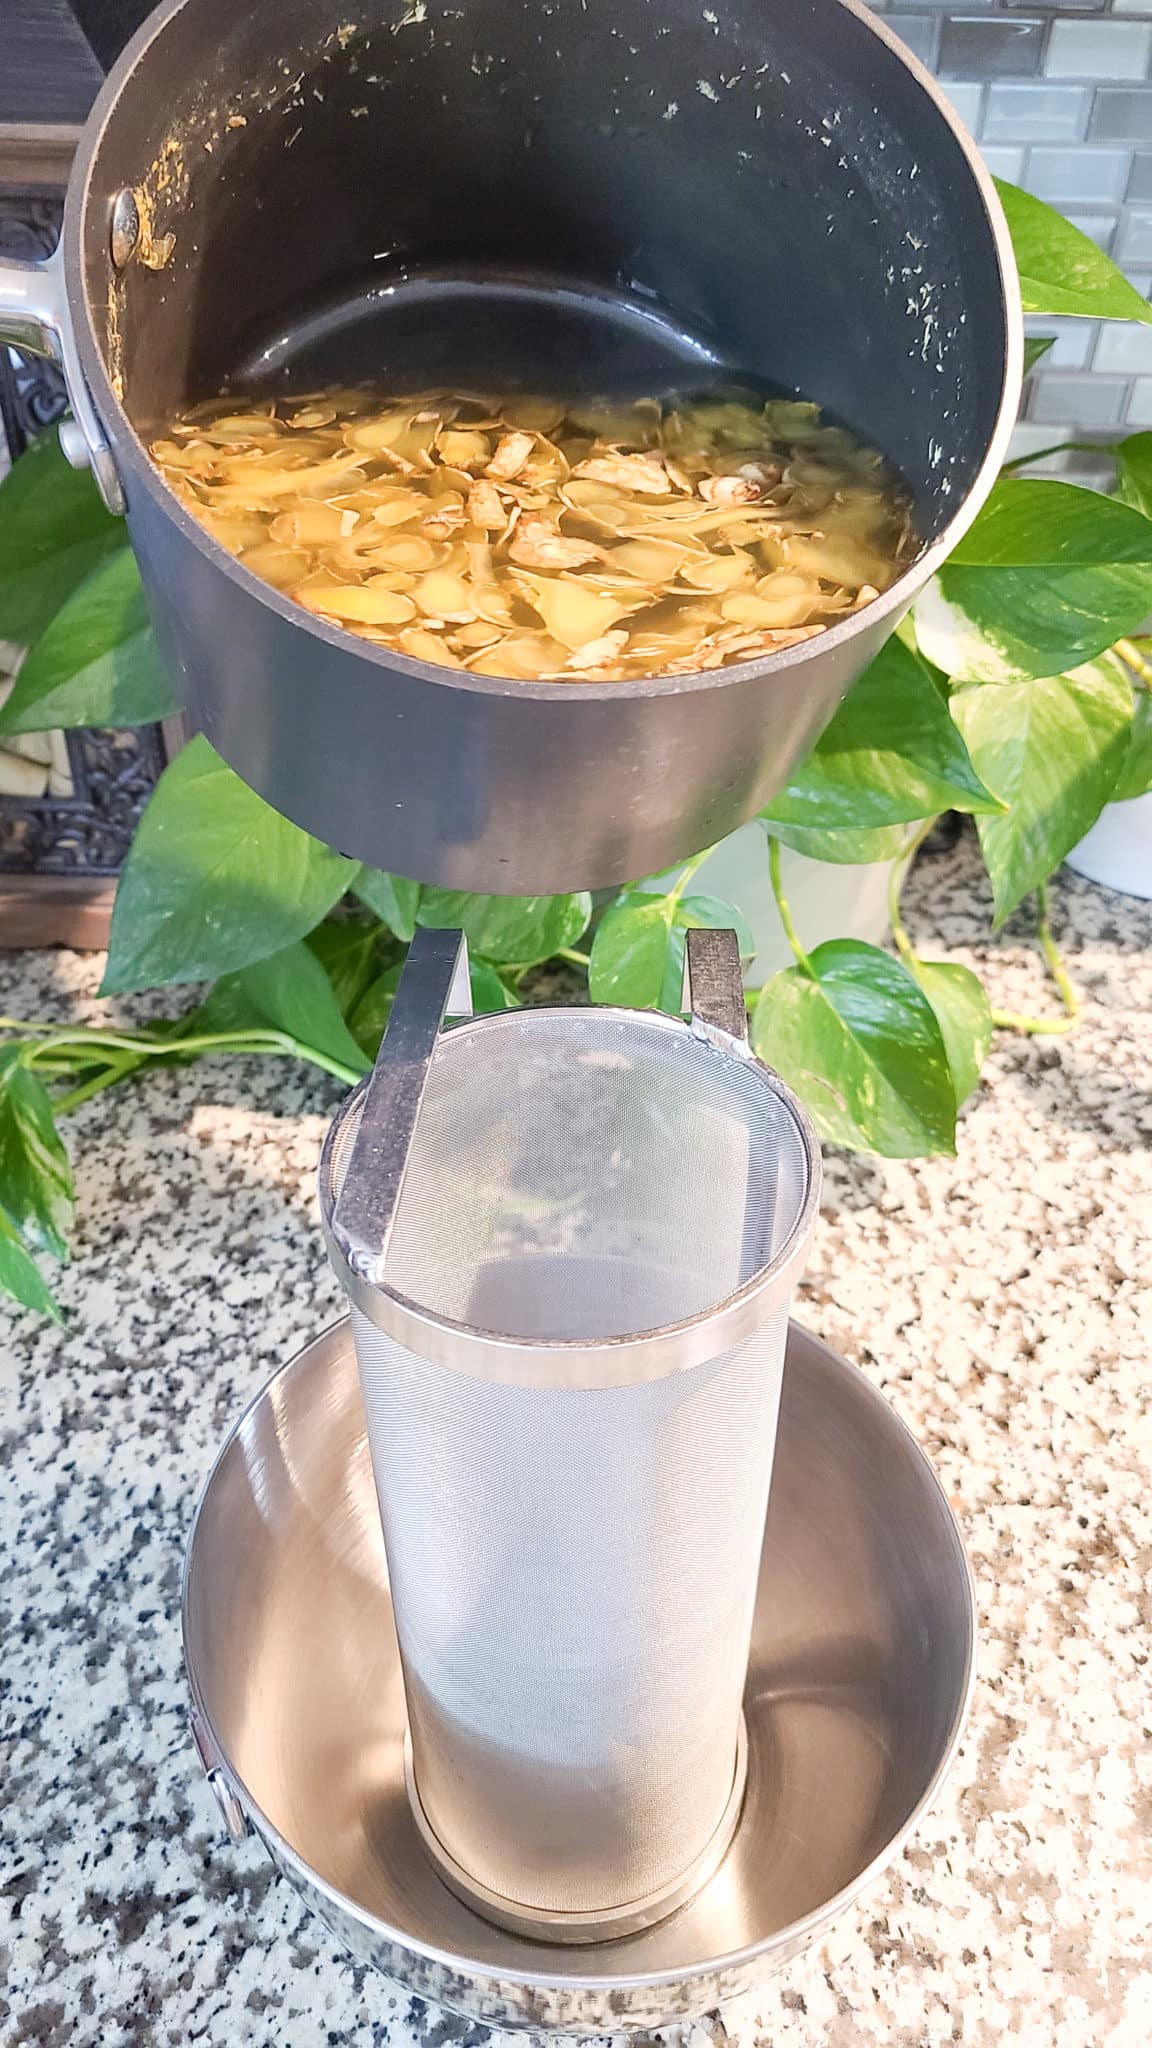
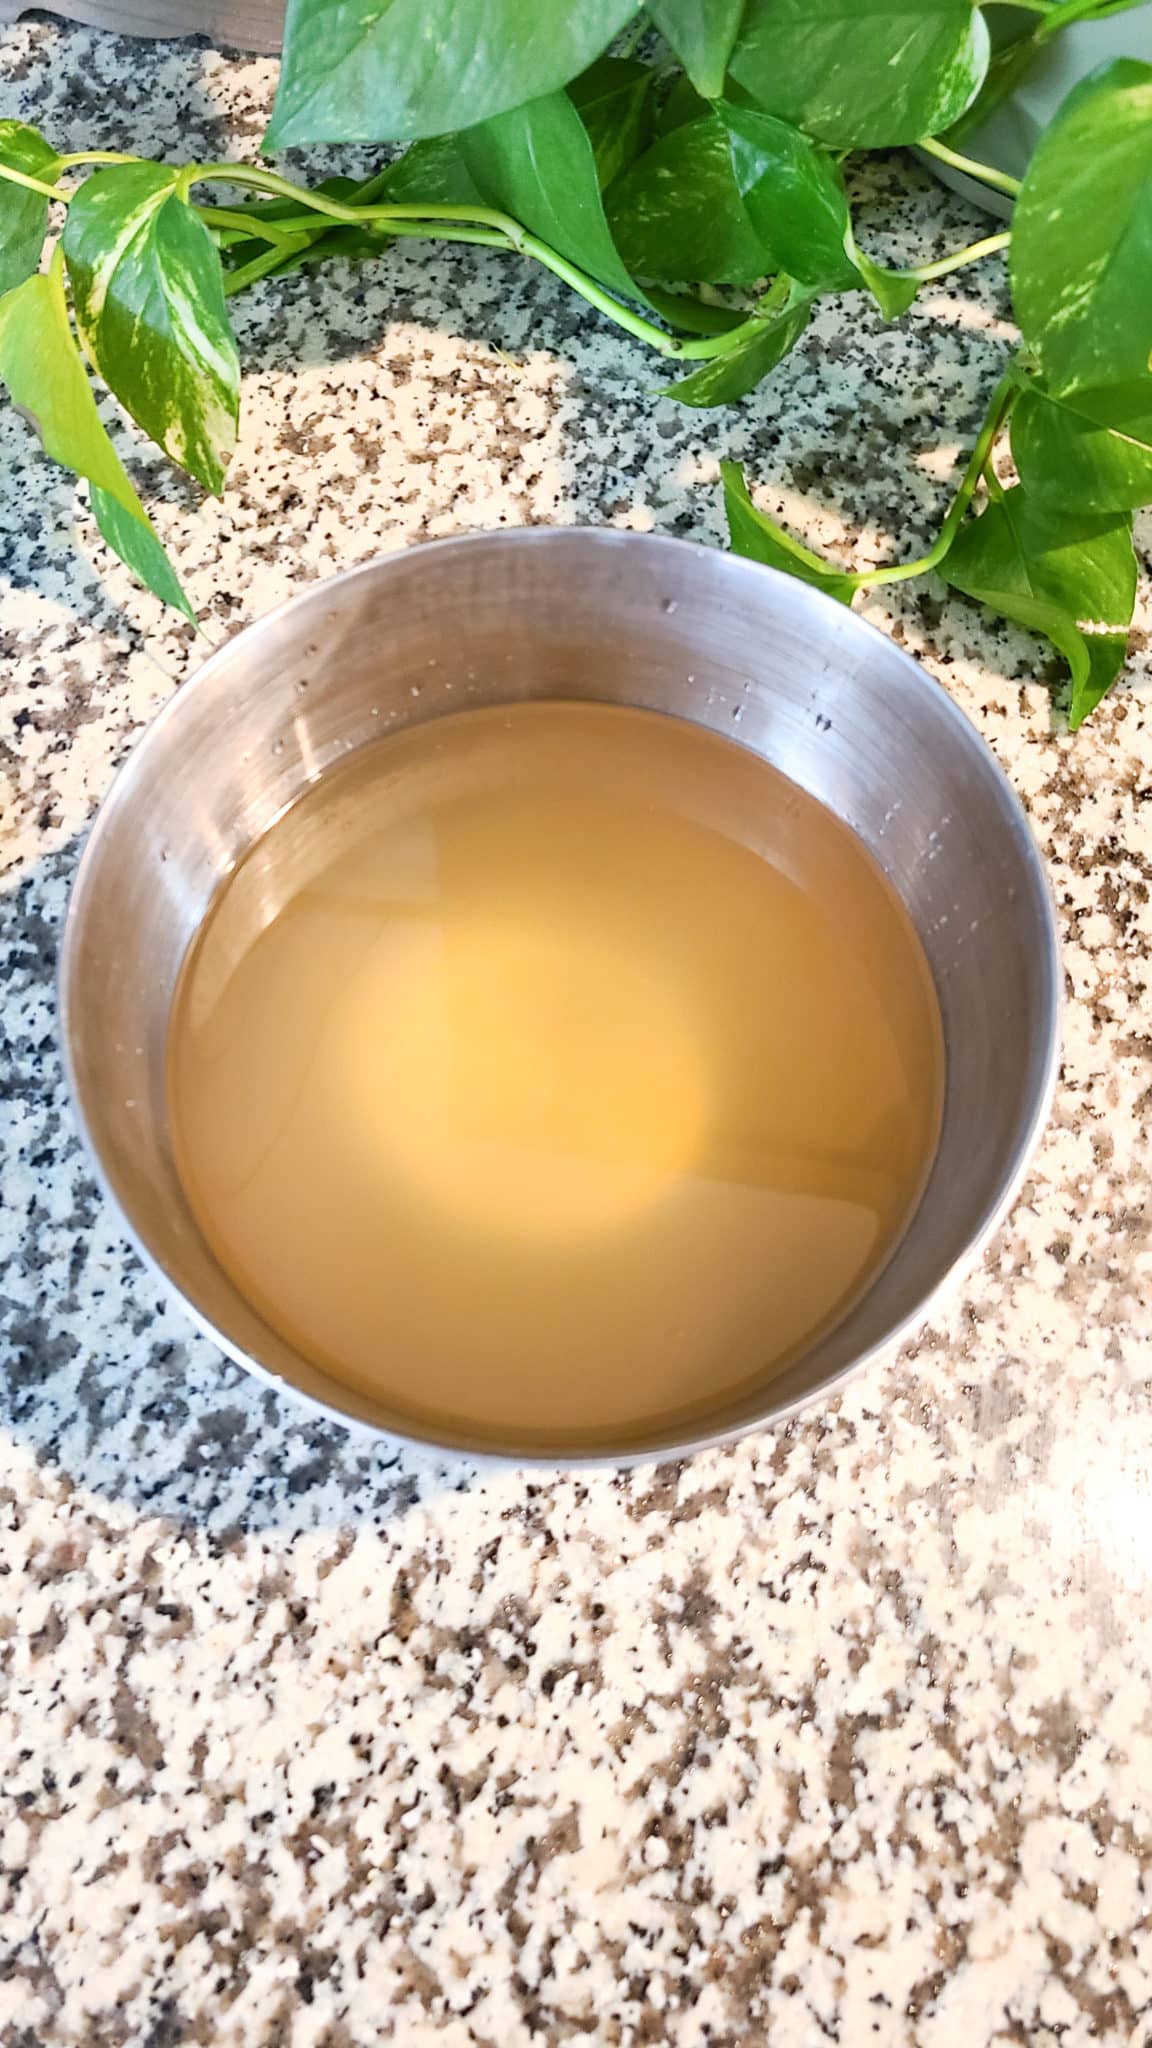
- Let the syrup cool for 10 minutes
- Lastly, strain syrup to remove any ginger chunks. You can press the ginger against the strainer to get out excess flavor and juices.
Step 3 – Carbonate Your Filtered Water
- Firstly, make sure all valves are closed and connect your bottle to the hose.
- Then slowly open the CO2 tank valve followed by slowly turning the regulator’s big knob until it gets to your desired pressure
- Slowly open the regulator’s small knob to allow air to flow.
- While everything is still open, give your bottle a good shake to help the CO2 combine with the water.
- Finally, close your valves in reverse order that you opened them and disconnect your now pressurized bottle.


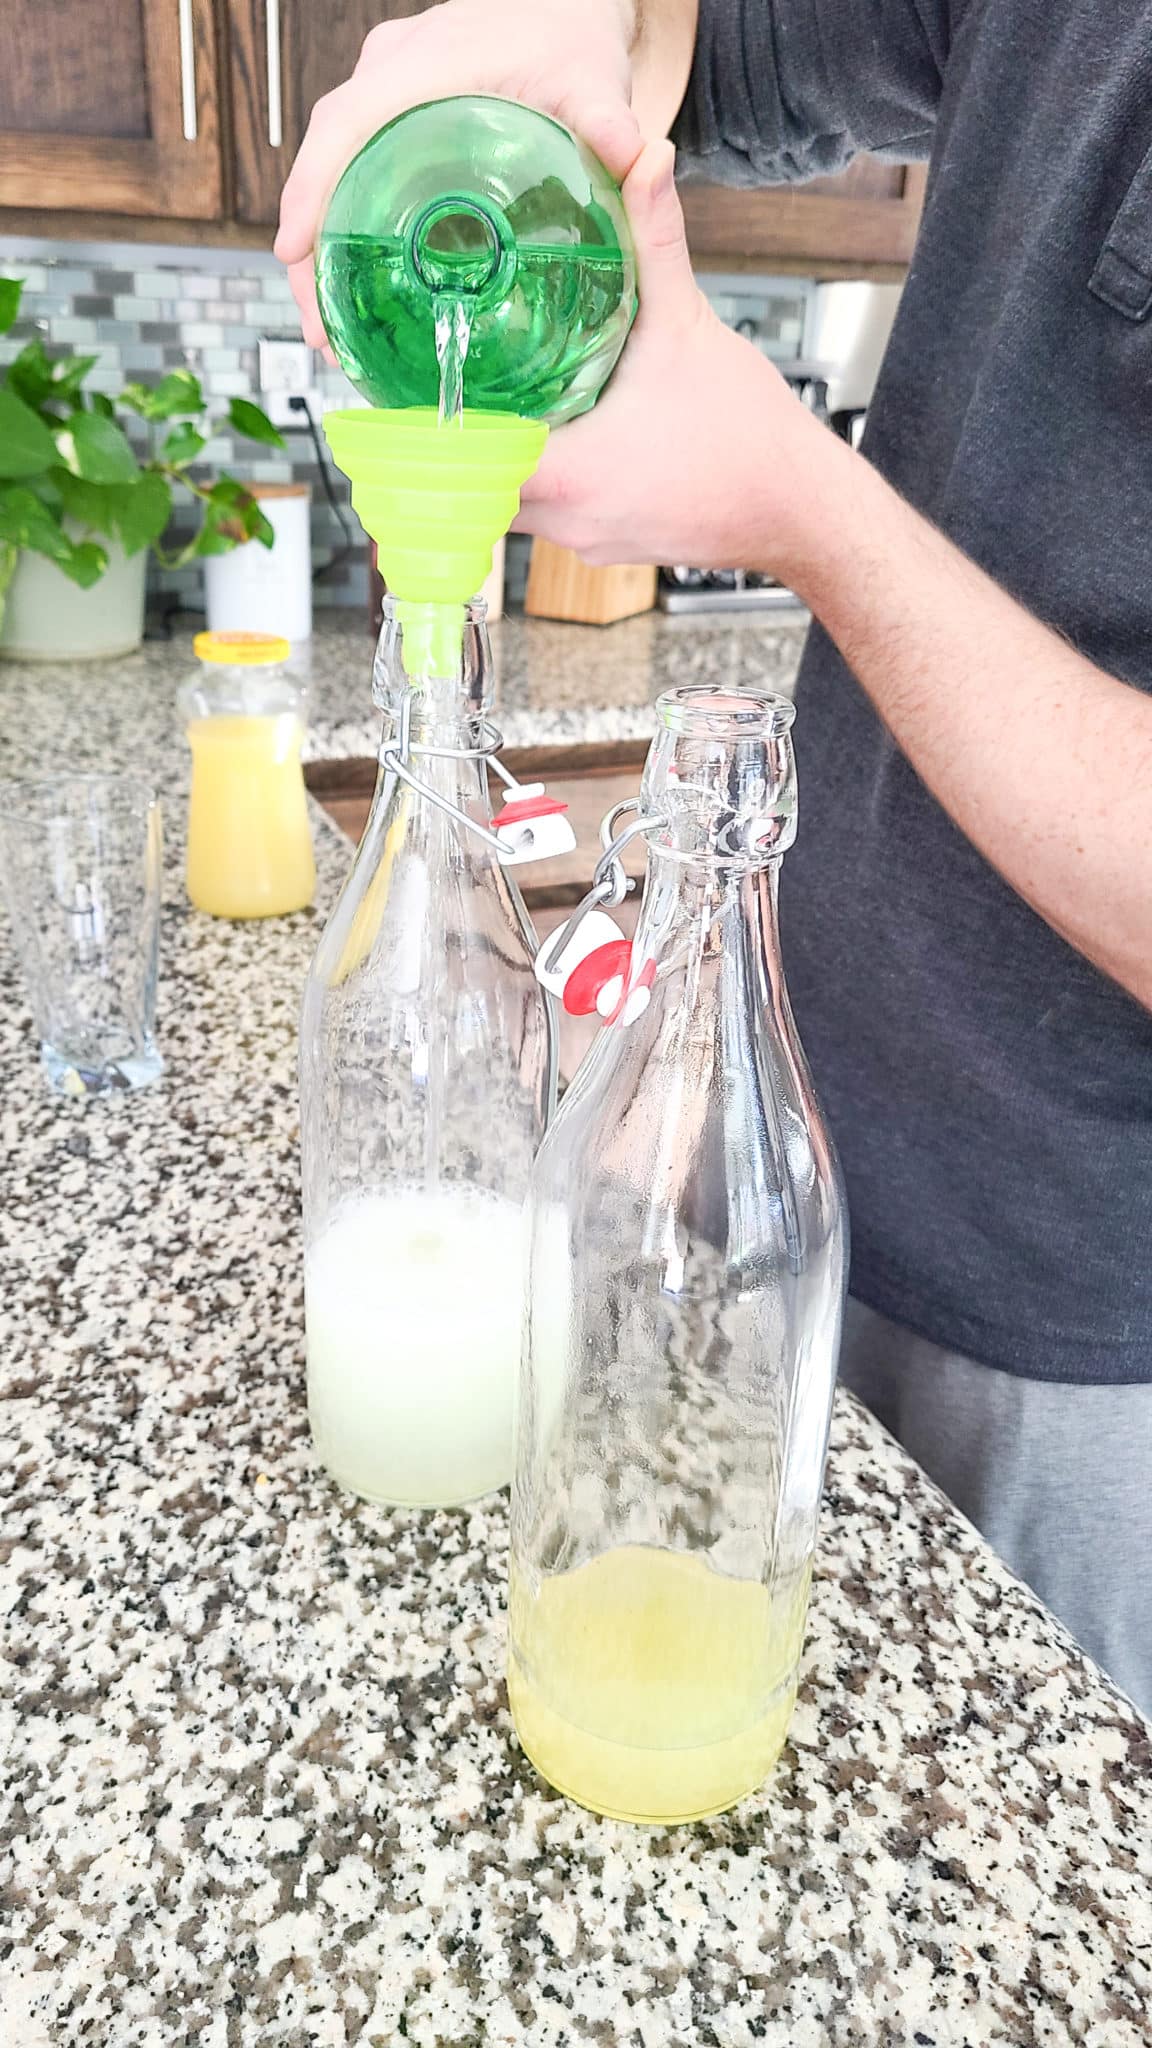
Step 4 – Add Simple Syrup to Bottles
Just like it says, next is to add the simple syrup you created to the bottles. The homemade ginger ale recipe yields about 5 cups of syrup. Our glass bottles are 1 liter each, and we add 1/2 cup of syrup to each bottle, so our recipe yield 10 L of soda. You can of course adjust the amount of syrup based on your taste.
Step 5 – Add Carbonated Water to Bottles
Next, add the carbonated water to the containers with the simple syrup. Again, we split it in half into 1 liter containers, but you can also use a 2 liter container with all the carbonated water. If you’re not good at pouring, a funnel helps a lot!
 Carbonated Water & Simple Syrup
- Combining Water & Syrup
Step 6 – Now Enjoy!
Enjoy all the bubbly goodness of reducing your waste with homemade soda!


Other Sustainable Living
Check out our How To Ditch Plastic Tea – Sustainable Bulk Tea Process if you’re interested in other ways to reduce your plastic waste related to beverages! Also, would LOVE to hear if you use this process with other soda simple syrup recipes!
There’s also tons of other eco-friendly and sustainable living tips/reviews! The Earth Breeze laundry detergent sheets are by far our favorite easy, eco swap.
We also have lots of DIY projects and plans to help you live more sustainably. From a DIY stacked rain barrel system to our most popular build, the hanging daybed (pssst everyone’s favorite because it’s so relaxing when complete!)
Hope you try this out as a way to reduce your footprint or even just as a fun experiment! Let us know what you think of the process and recipe in the comments below!


Disclaimer: This post includes affiliate links, and I will earn a commission if you purchase through these links. Please note that I’ve linked to these products purely because I recommend them and they are from companies I trust. There is no additional cost to you.


