How to Make Zero Waste Holiday Cards & Tags
Junk mail just seems to inevitably show up in your mailbox, so why not reuse it and make awesome zero waste holiday cards and tags!? Here’s a super easy step by step process on how to make your own handmade zero waste holiday cards and tags from junk mail or scrap paper.
Updated 8/27/2022

This post may contain affiliate links. Read about our privacy policy.
During the holiday season, we inevitably get a LOT of junk mail or grocery ads. I always feel a little guilty as it all goes directly into the recycle bin usually and even then I’m doubtful on how much actually gets recycled.
So thinking back to my childhood Girl Scout days, I remember making my own paper from other paper that would have been recycled. Epiphany! Let’s make some new paper for zero waste holiday tags and cards! So here’s the step by step process of how to make your own zero waste holiday tags and cards out of your junk mail.
Zero Waste Holiday Tags & Cards Materials
- 3 cups of shredded junk mail or any scrap paper
- 3 cups of warm water
- Blender (I use my same Ninja Blender that I do for food. It’s amazing!)
- Rolling Pin
- Towels
- Sheet pan or something movable for paper to dry on
- Decorations – Pens, Watercolors, Cotton Twine, Greenery (Whatever you’re feeling creatively!)

How To Make Zero Waste Holiday Tags & Cards
These recycled holiday cards and tags are made from just junk mail and water! I use a super simple method with just a rolling pin over the conventional paper making method with a mould and deckle and a tub of water. It can create a little more inconsistency and take a longer to dry, but it’s super easy and takes me less time. Also, I like the outcome of a little more wild, wrinkly, and textured paper for handmade holiday cards and tags. If you have your own mould and deckle, feel free to use that!
Step 1 – Shred all the Paper
If you have kids, this is a great way to get them involved as well as teaching a small lesson in reuse. You can use any paper that isn’t laminated or glossy. So all those non-glossy grocery ads or those insurance / credit card pre-approved letters are perfect for this. Make sure to read up on our tips below if you’re looking for specific color outcomes!
Step 2 – Add warm water to shredded paper
In a large bowl or pan add your shredded paper then add an equal amount of of water. Approximately 1 cup of shredded paper = 1 cup of water
Step 3 – Allow paper and water to soak
Allowing the paper to soak in water for 30 minutes to an 1 hour to soften it all, and prepare it for the blender.
Step 4 – Dump soften paper and water into blender
Pulse until a fine pulp is created. Honestly, it doesn’t take but a minute usually! Do this in batches if needed for your blender, but most will hold quite a bit.

Step 5 – Pour onto hand towel and lightly squeeze out some water
Don’t squeeze out all the water or the next step of rolling it out becomes harder. The water seems to help it adhere to itself as you roll.

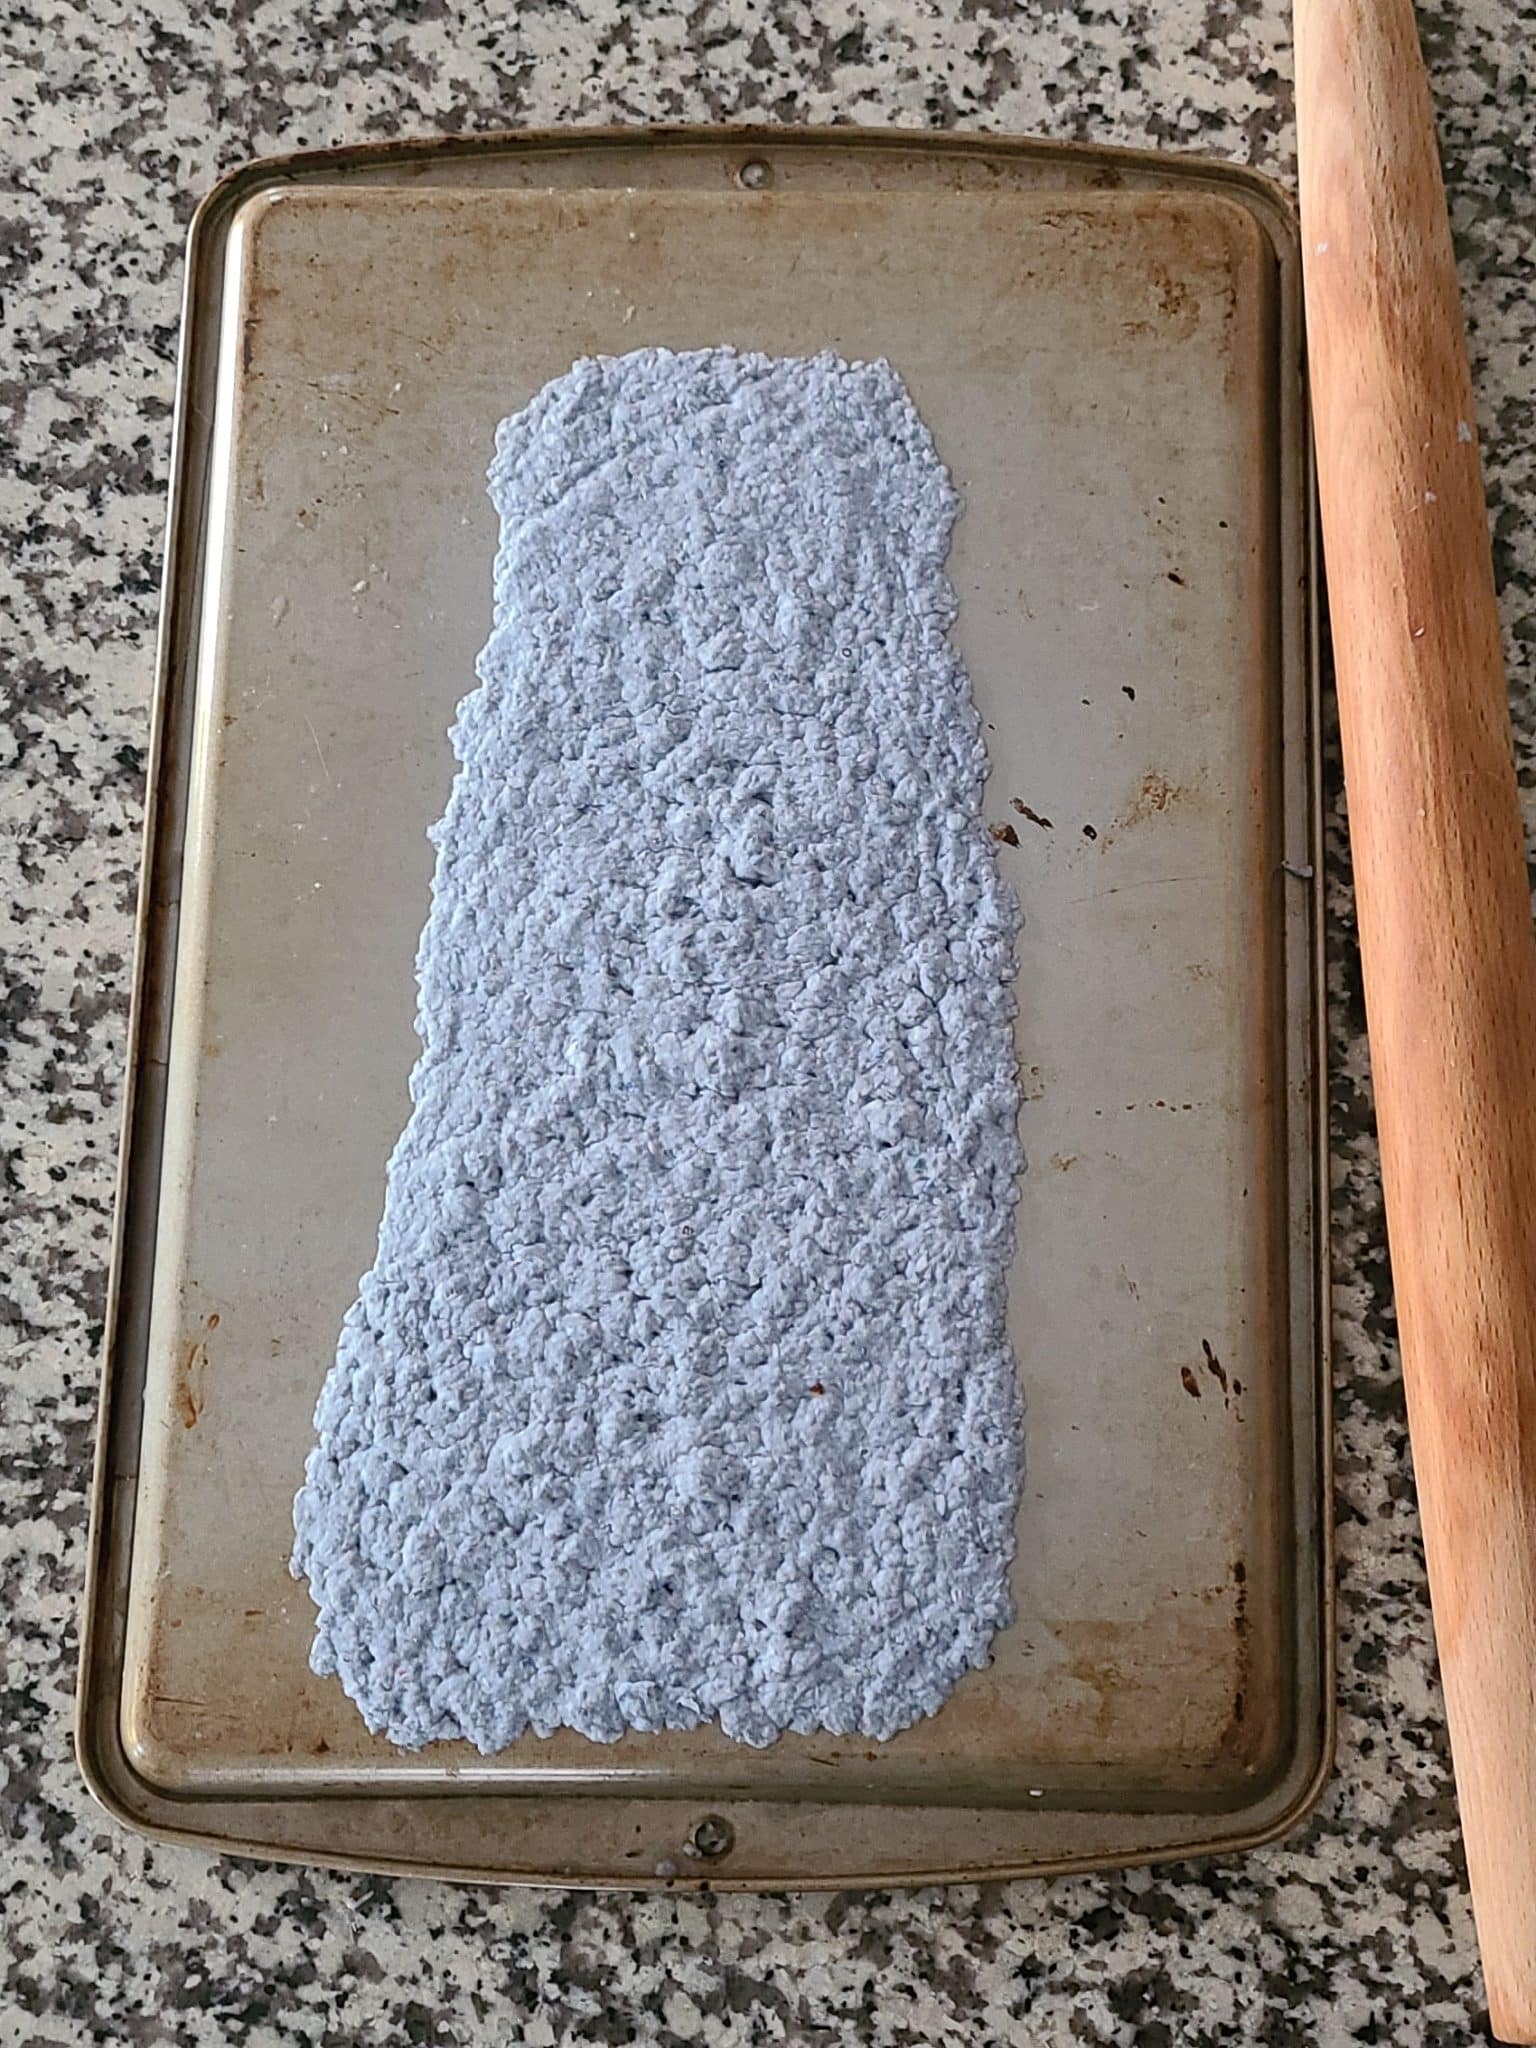
Step 6 – Transfer to sheet pan and roll out flat.
I usually start rolling it out with the kitchen towel on top of it to absorb some of the water and not stick to my rolling pin. You’ll want to do this on top of something like the backside of a sheet pan so you can move to a safe place to dry. Because if you’re like me, I’m always using my kitchen countertop and I don’t have a dedicated craft area for leaving the paper to dry for a few days.
 Paper pulp on sheet pan
 Rolling out pulp with towel
 Rolled out paper


Step 7 – Allow for the sheets to dry overnight.
If sheets are still damp after one day, you can gently flip them with a spatula and let them dry out longer. Depending on how thick you roll out the paper, it can actually take several days. But sooooo cool and worth it in my opinion!
Alternatively if you don’t want to wait that long to air dry, you can dry the sheets in the oven on low heat. I’ve done it at 200°F for 30 minutes to an hour. You just have to watch it so that the paper doesn’t get too dry and brittle.
Step 8 – Flatten the paper
You can use the paper immediately when it’s dry, but it’s usually a little wavy. So I find a heavy book or object to lay on top of it to help flatten it out. I used one of my plant identification textbooks (it’s huge!) to weigh our paper down!

Step 9 – Cut out holiday card or holiday tags
This is the fun part! You made your own paper, so now create whatever holiday item you need. Then add some simple text or little decorations to personalize your handmade holiday card or holiday tag.
Step 10 – Repeat if you have more junk mail!


Important Paper Making Tips for Zero Waste Holiday Cards and Tags
Here are a couple important tips and tidbits that I learned while making paper from junk mail!
- Tip #1 – Holes?! No problem!
If you roll it out and a hole appears, don’t worry! Just take a piece of pulp from the edge and squish it into the gap. Lightly roll over it to get the fibers intertwined with the surrounding ones and viola, gap fixed! Sometimes I also have to add a little water to help the adhesion. - Tip #2 – If you want a specific colored paper, then sort your shredded paper.
If the junk mail has a lot of different colors and you blend it up, it will turn out a grey-ish to brown-ish color. That’s just basic color theory. So if you’re looking for a more specific color scheme then try to sort the paper a little.
For this example, I used some insurance junk mail that was mostly white with black text, but it had tints of blue and purple. The handmade paper came out a blue-grey color (which I LOVED!). If you’re looking for a more red holiday colored paper, sort out all the red colored junk mail and use that to make your paper.

- Tip #3 – Use a Mould & Deckle for more consistency
There’s another way to make handmade paper using a mould & deckle (screen attached to a frame) that will give you a more consistent sheet of paper. There’s lots of tutorials out there on how to do this and make your own or you can purchase a simple kit like this one. Maybe someday I will! But I wanted to do this with minimal tools and not having to DIY my own mould & deckle. So doing this with just a blender, rolling pin, and towel is my way to go!

I’m always looking for fun, creative and eco-friendly ways to reuse items, especially junk mail that I never wanted. So making handmade paper from my junk mail is soooo fulfilling and helps push us toward our family goal of leaving a little footprint on our environment. Also, it is just fun and makes beautiful cards and tags and doesn’t cost me a thing!
Remember to remind those people you are giving the card or gift to that the handmade paper can be recycled or composted when they no longer want it!
Other Eco-friendly and Zero Waste Ideas for Green Living
Lastly, usually holiday cards and holiday tags go along with gifts. Well we’ve put together a list for the Ultimate Holiday Guide to the Best Eco-friendly Gift. So check it out if you’re looking for some eco-friendly gift ideas to go with your low waste holiday card or tag.
Also you can check out more crafts and creative ideas our Sustainable Living archives and DIY projects.
Hope you try making your own zero waste holiday cards and tags from junk mail or scrap paper! Let us know what you think of the zero waste holiday cards and tags in the comments below!


Disclaimer: This post includes affiliate links, and I will earn a commission if you purchase through these links. Please note that I’ve linked to these products purely because I recommend them and they are from companies I trust. There is no additional cost to you.


