How To Make DIY Floating Shelves – Live Edge Wood Shelves For Kitchen
Floating shelves are an easy way to add storage space or display items without taking up valuable floor space. This post will cover how to make DIY floating shelves using live edge wood, including all the tools and materials necessary.
Updated 2/09/2023

Disclaimer: This post includes affiliate links, and I will earn a commission if you purchase through these links. Read about our privacy policy.
Open shelving is a staple in most homes to store items or even as a decor feature. Something has always been appealing about a floating shelf and not being able to see the hardware. Floating shelves are simply made up of two parts: a cleat or bracket attached to the wall, and a hollow box or board with drilled holes to slide over the cleat/bracket.
They can be made from standard wood or even live edge wood slabs. We’ll be covering how we made live edge wood shelves for our kitchen to have some open pantry shelving. However, floating shelves can be used in any room in a multitude of ways!
Here’s the tools, materials, and instructions for DIY floating shelves made from live edge wood!

Steps To Make DIY Floating Shelves
Tools
- Tape Measure
- Drill & Drillbits
- Drill Block
- Stud Finder
- Table Saw
- Jigsaw
- Tapering Jig and Cross-cut sled
- Random Orbital Sander & Assorted Sanding Discs
- Buffing pads for drill OR Orbital Buffer
- 12” Planer
- Speed Square
- Rubber Mallet or Hammer
- Painter’s Tape
- Chisel and Dremel (optional)
Materials
- 1 or 2 sets of DIY floating shelves brackets (dependent on number of shelves & wall studs)
- Live edge wood slab
- Ours was 16” wide x 96” long Elm slab 5/4” thick
- Oak, Cherry, and Walnut also make gorgeous shelves
- Rubio Monocoat wood stain oil (Pure)
- Mineral spirits

Live Edge Wood Slab
It’s best to know your desired shelf depth and length prior to buying the live edge wood slab. Because live edge wood can be pricey, we wanted to have a slab we could cut in half and use both sides. We knew we wanted 7.5” wide shelves, so that meant a minimum of a 15” wide wood slab. We also wanted just under 4 feet in length, so we needed an 8 foot slab to cut in half as well. However, you can totally make DIY floating shelves from whatever slabs you have available. Just ensure your floating shelf design accounts for the sizes you have.
Sourcing Live Edge Wood Slabs
Sourcing a live edge wood slab can be either easy or difficult depending on where you live. We did a quick internet search for lumberyards and places selling reclaimed lumber. We specifically wanted to find a company that sustainably harvested their trees, and we could go pick the perfect wood slab.
In Kansas City, we found Urban Lumber Company, who supplies sustainably harvested tree slabs from the metro area. They’ll also do all the planing and cutting for you, and even make full custom tables (obviously at a price). However, we’ve already made our own live edge wood table with metal legs. Our favorite part was all the wood slabs from the company have labels with who and where they got the wood slab from.

We love a good DIY (and the money it saves us!), so these instructions show how to take a full wood slab and do all the work yourself. We purchased a 16” x 96” wood slab of beautiful elm to plane and cut ourselves. The board we chose was 5/4” thick. This is the skinniest you’ll want to go otherwise the brackets won’t have enough wood to support on each side. You can definitely go thicker up to 2” or so, just consider the extra weight.
Overall, do a little hunting to find the perfect wood slab for you and find a local source, if possible.
DIY Floating Shelves Instructions
Our floating shelf design here is for a 45″ by 7.5” wide shelf. Your shelves can be whatever length and depth best fits your space and holds the desired items. The specified DIY floating shelf brackets are 6.6” long and hold as much as 20 lbs per bracket. If you’re making wider or thinner shelves or need to hold more weight consider finding another bracket.
Before

After

Step 1: Lay Out Your DIY Floating Shelves
We’re highly visual people, so we always try to make a plan when starting a DIY project and do a mockup, if possible. This helps us DIY sustainably by not buying any extra materials or needing to return anything.
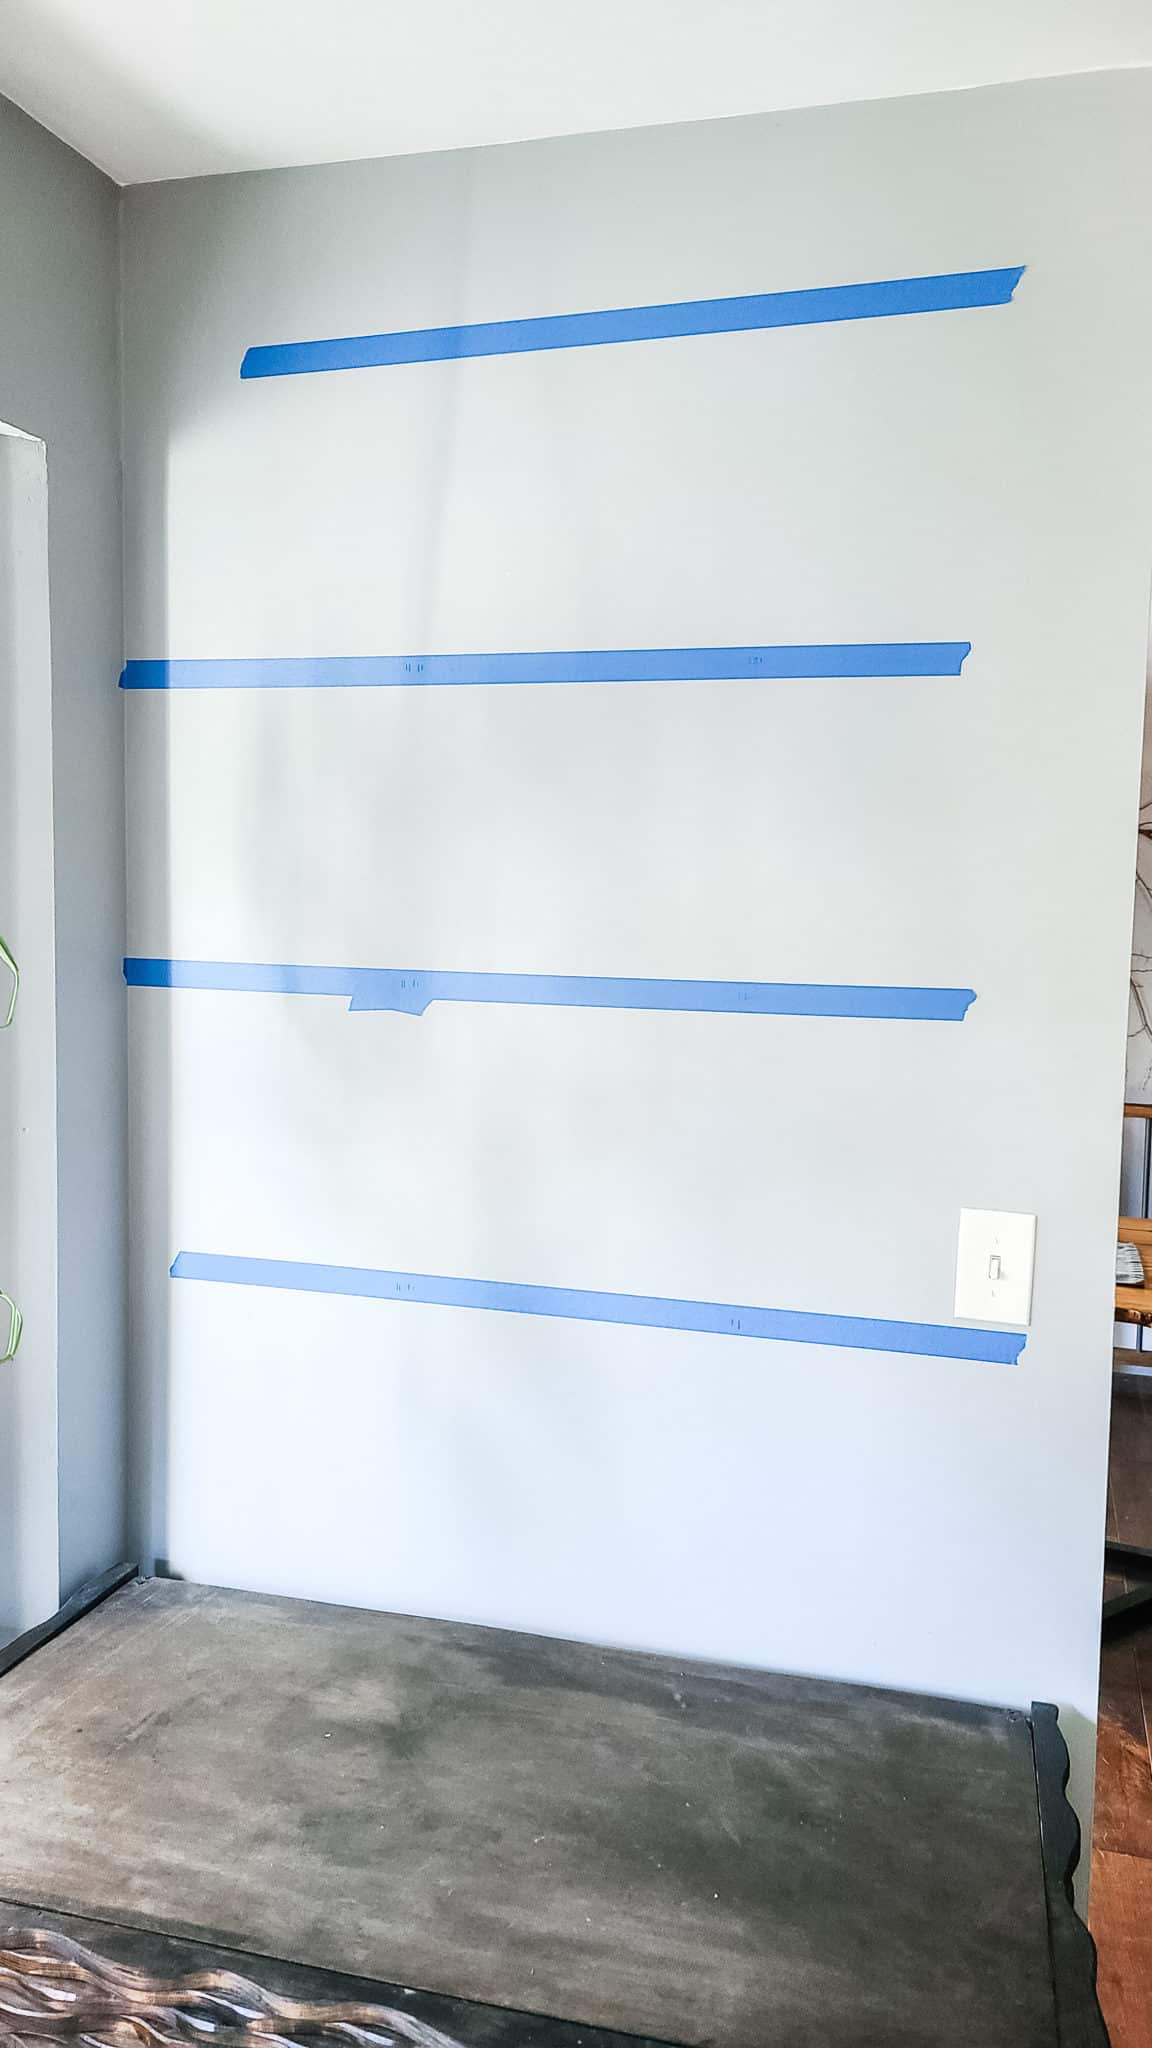
Using painter’s tape or paper tape, lay out your desired design on the wall. Test a few ideas to see what works best for you. Take into consideration your tallest object you might have on the floating shelves and space them just a little more than that. Once you know where you want your shelves, use a level to make sure that your tape is level on the wall as we’ll use this as a reference for installing our brackets. Adjust the tape as needed.
We had enough for four shelves, but decided three shelves was the best design aesthetic and functionally reaching the top shelf would be hard. We spaced ours 15 inches apart. This was specifically so the floating shelves were spaced enough to hold our reused jars and homemade ginger ale glass liter bottles.
Step 2: Layout Shelves On The Slab
Now that you have your layout on the wall, it’s time to lay it out on the wood slab. This is a crucial next step as you don’t want to mount brackets or anything prior to confirming you have enough wood.
Again, we decided to have three floating shelves for the kitchen at 7.5” wide by 45” long. Using the tape measure and a straight edge, lay out the design.
Layout Tips
- Try to avoid using the pith in the center of the wood slab. It’s weaker and might stain slightly different.
- Try to avoid using the ends of the boards and cut them off as the ends are usually warped/cracked. It’ll be easier to flatten in the planer if you can minimize the amount of warpage you’re fighting.
Once you’ve confirmed and marked the layout, it’s time to begin cutting and planing the wood.
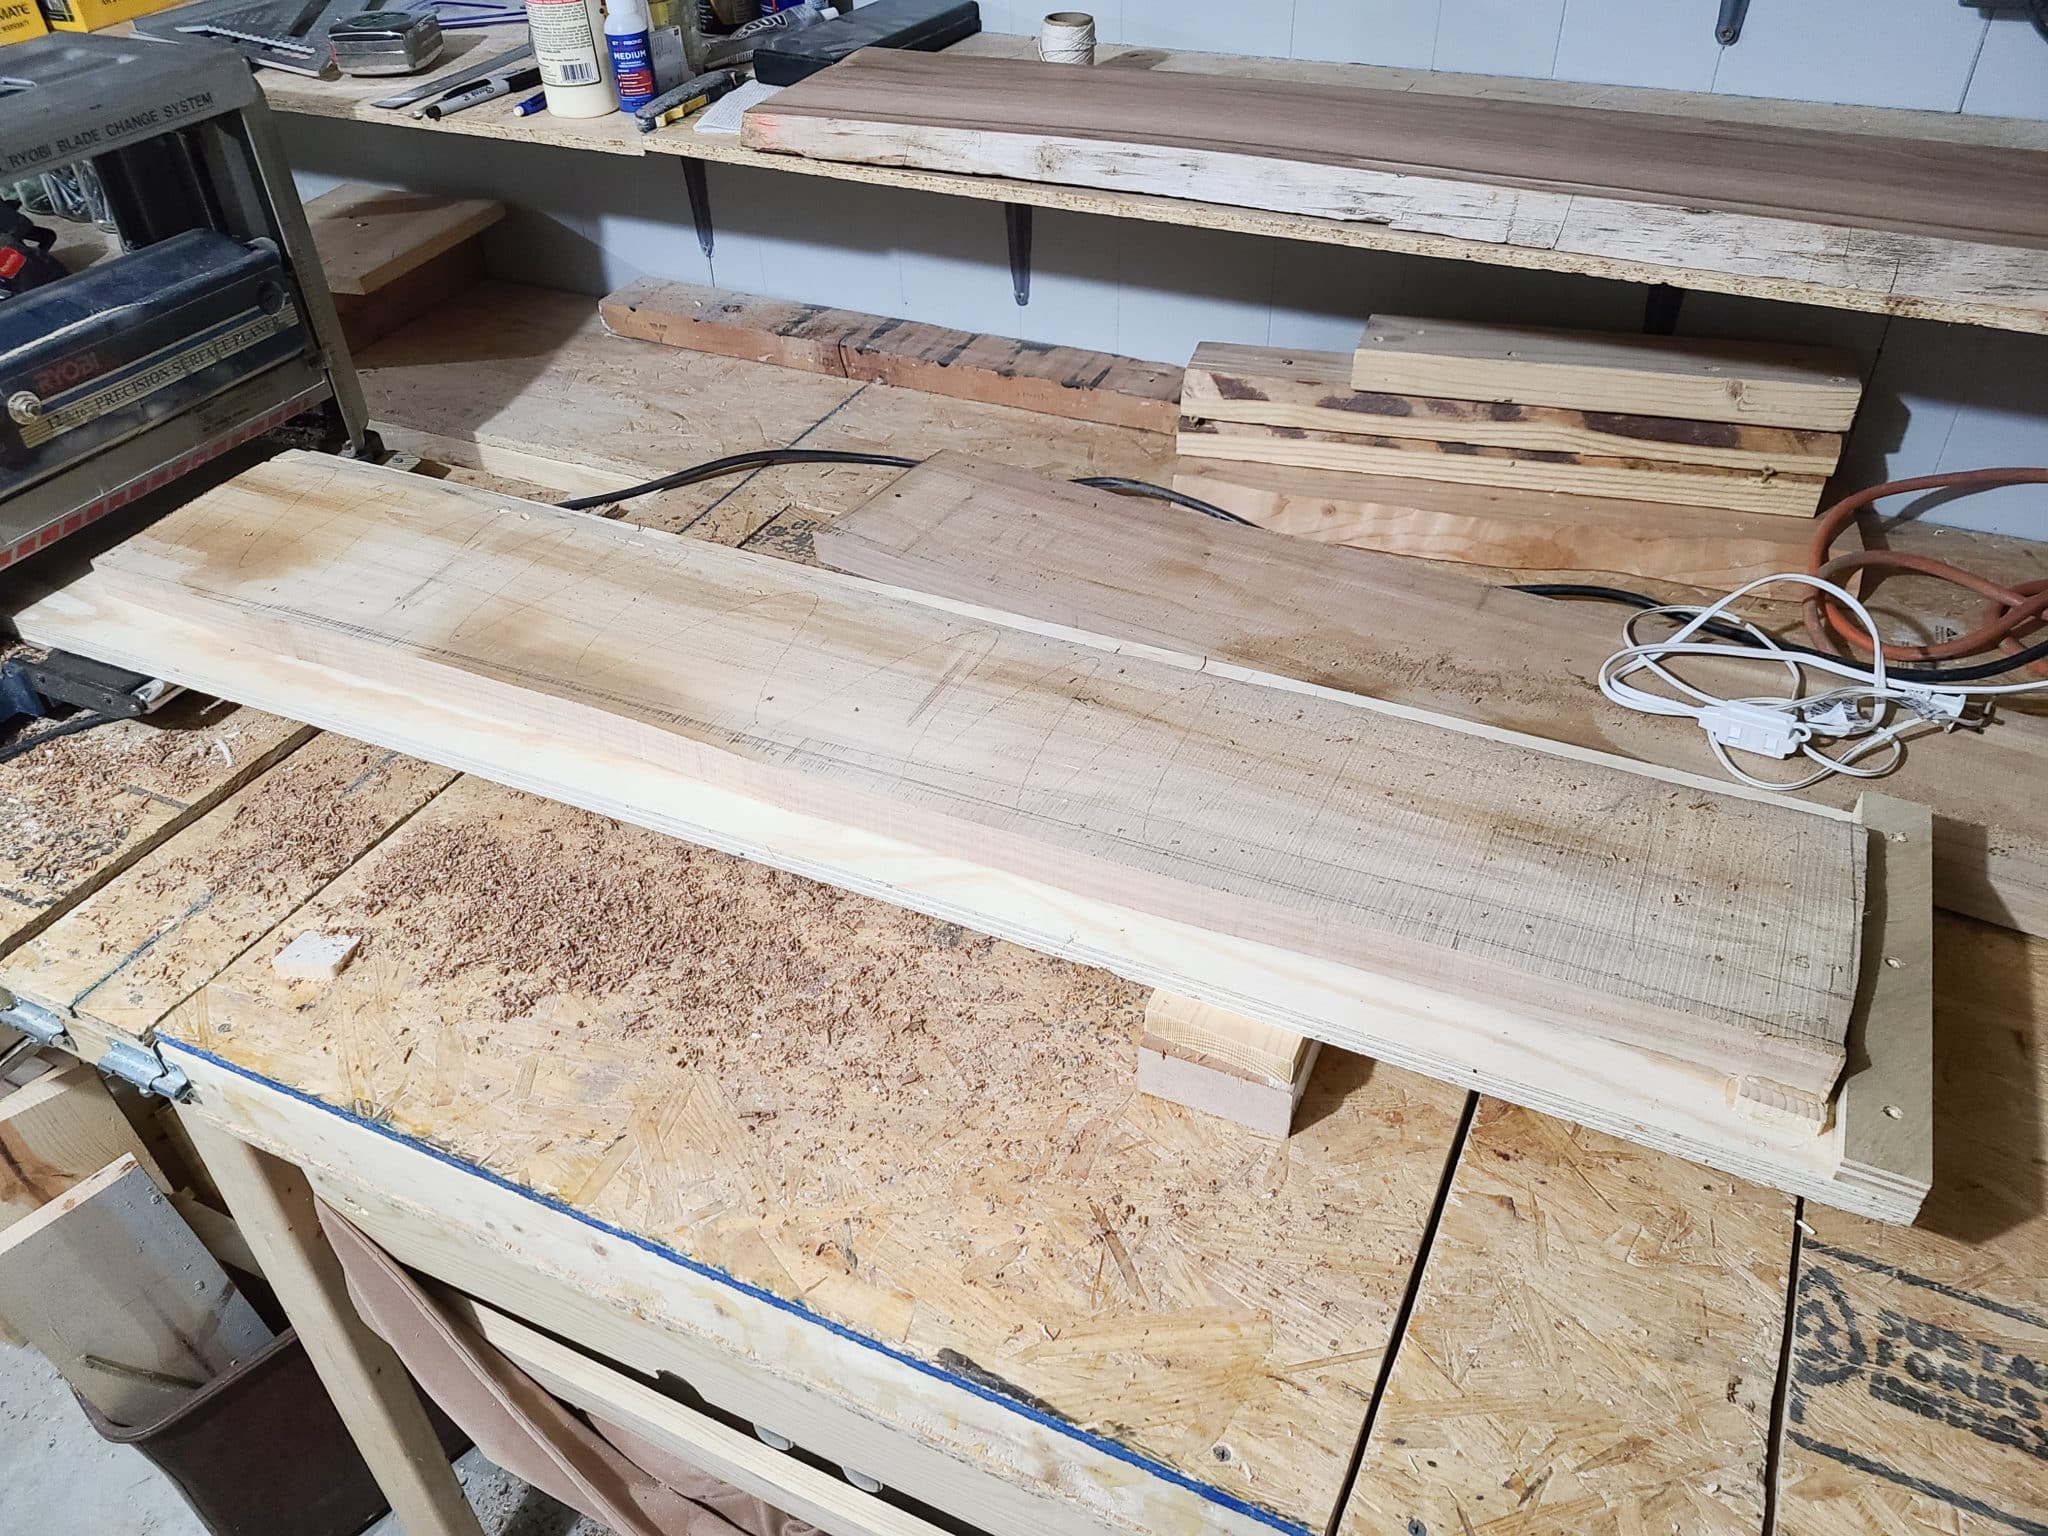
Step 3: Cut Out & Plane The Floating Shelf Boards
Using a jigsaw, roughly cut the shelf boards out to size leaving a little extra for straightening later on the table saw.

Next is planing the shelf boards flat. To flatten warped wood you can’t just run it through the planner. The planer will push the wood down to it’s plate with a fair bit of pressure before trimming off the top surface. You’ll end up with a smooth top, but it will still be warped or twisted.
How To Plane The Shelf Board
To combat this, place the shelf board on a plywood sled. Then place shims under any of the raised edges until the board can no longer wobble or flex when you press on it. Use hot glue to secure the shims to the sled and to the board. This acts as a guide to ensure the top of the board will be planed flat and parallel to the plywood sled. Run the board through the planer, while incrementally lowering the thickness until you end up with a flat top surface.
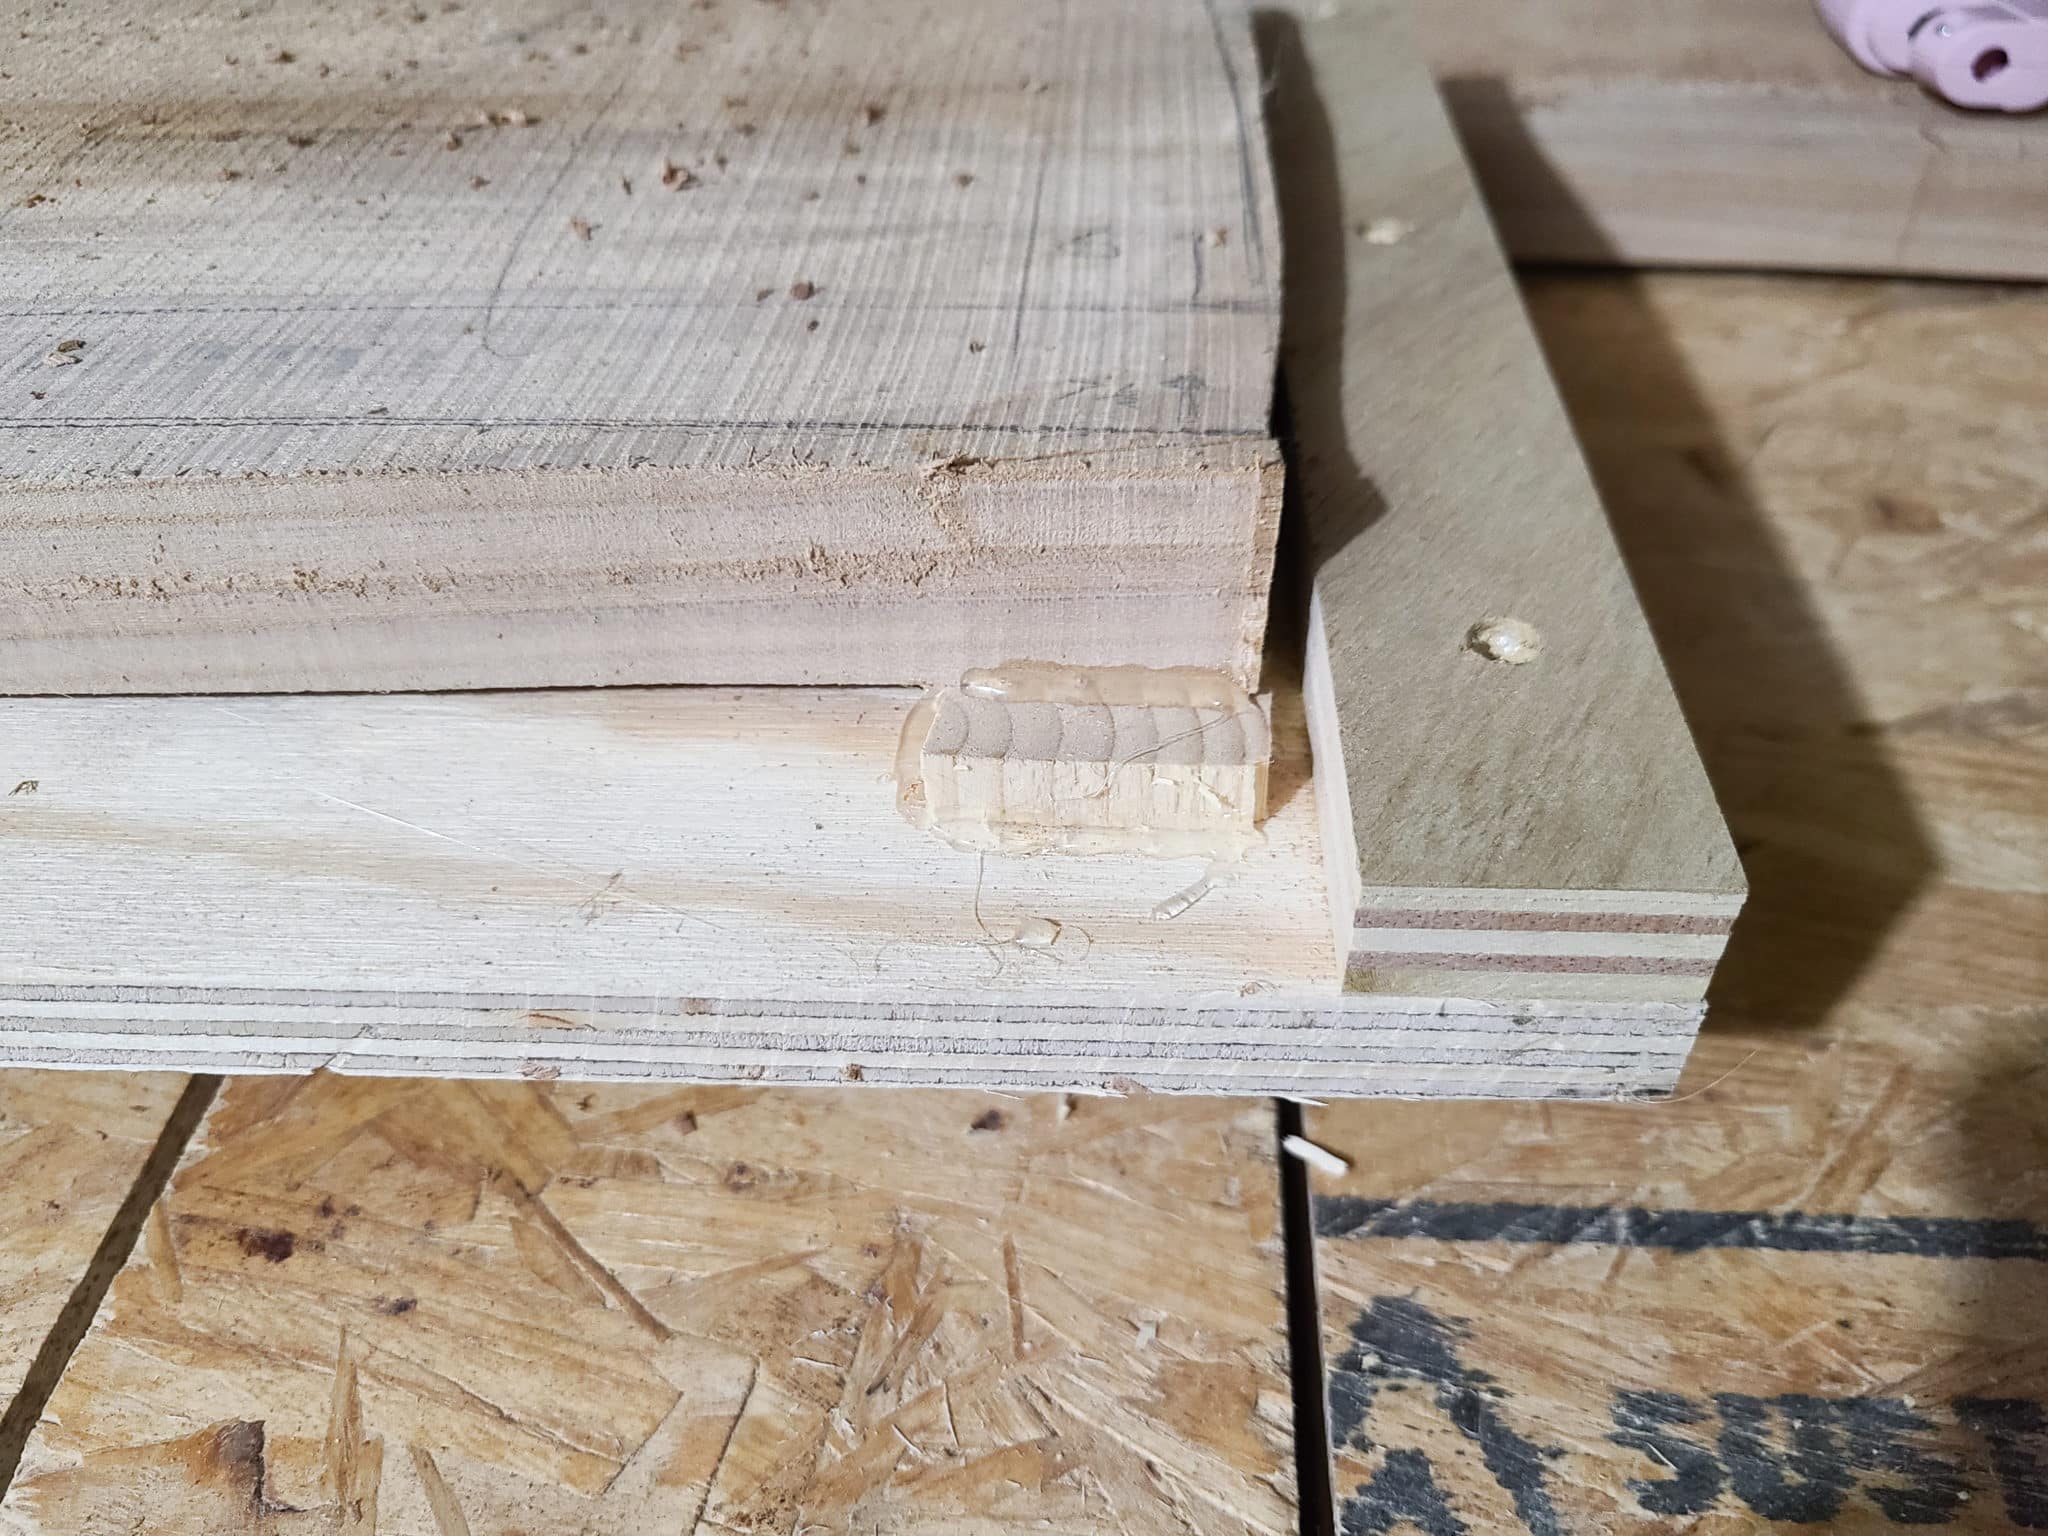
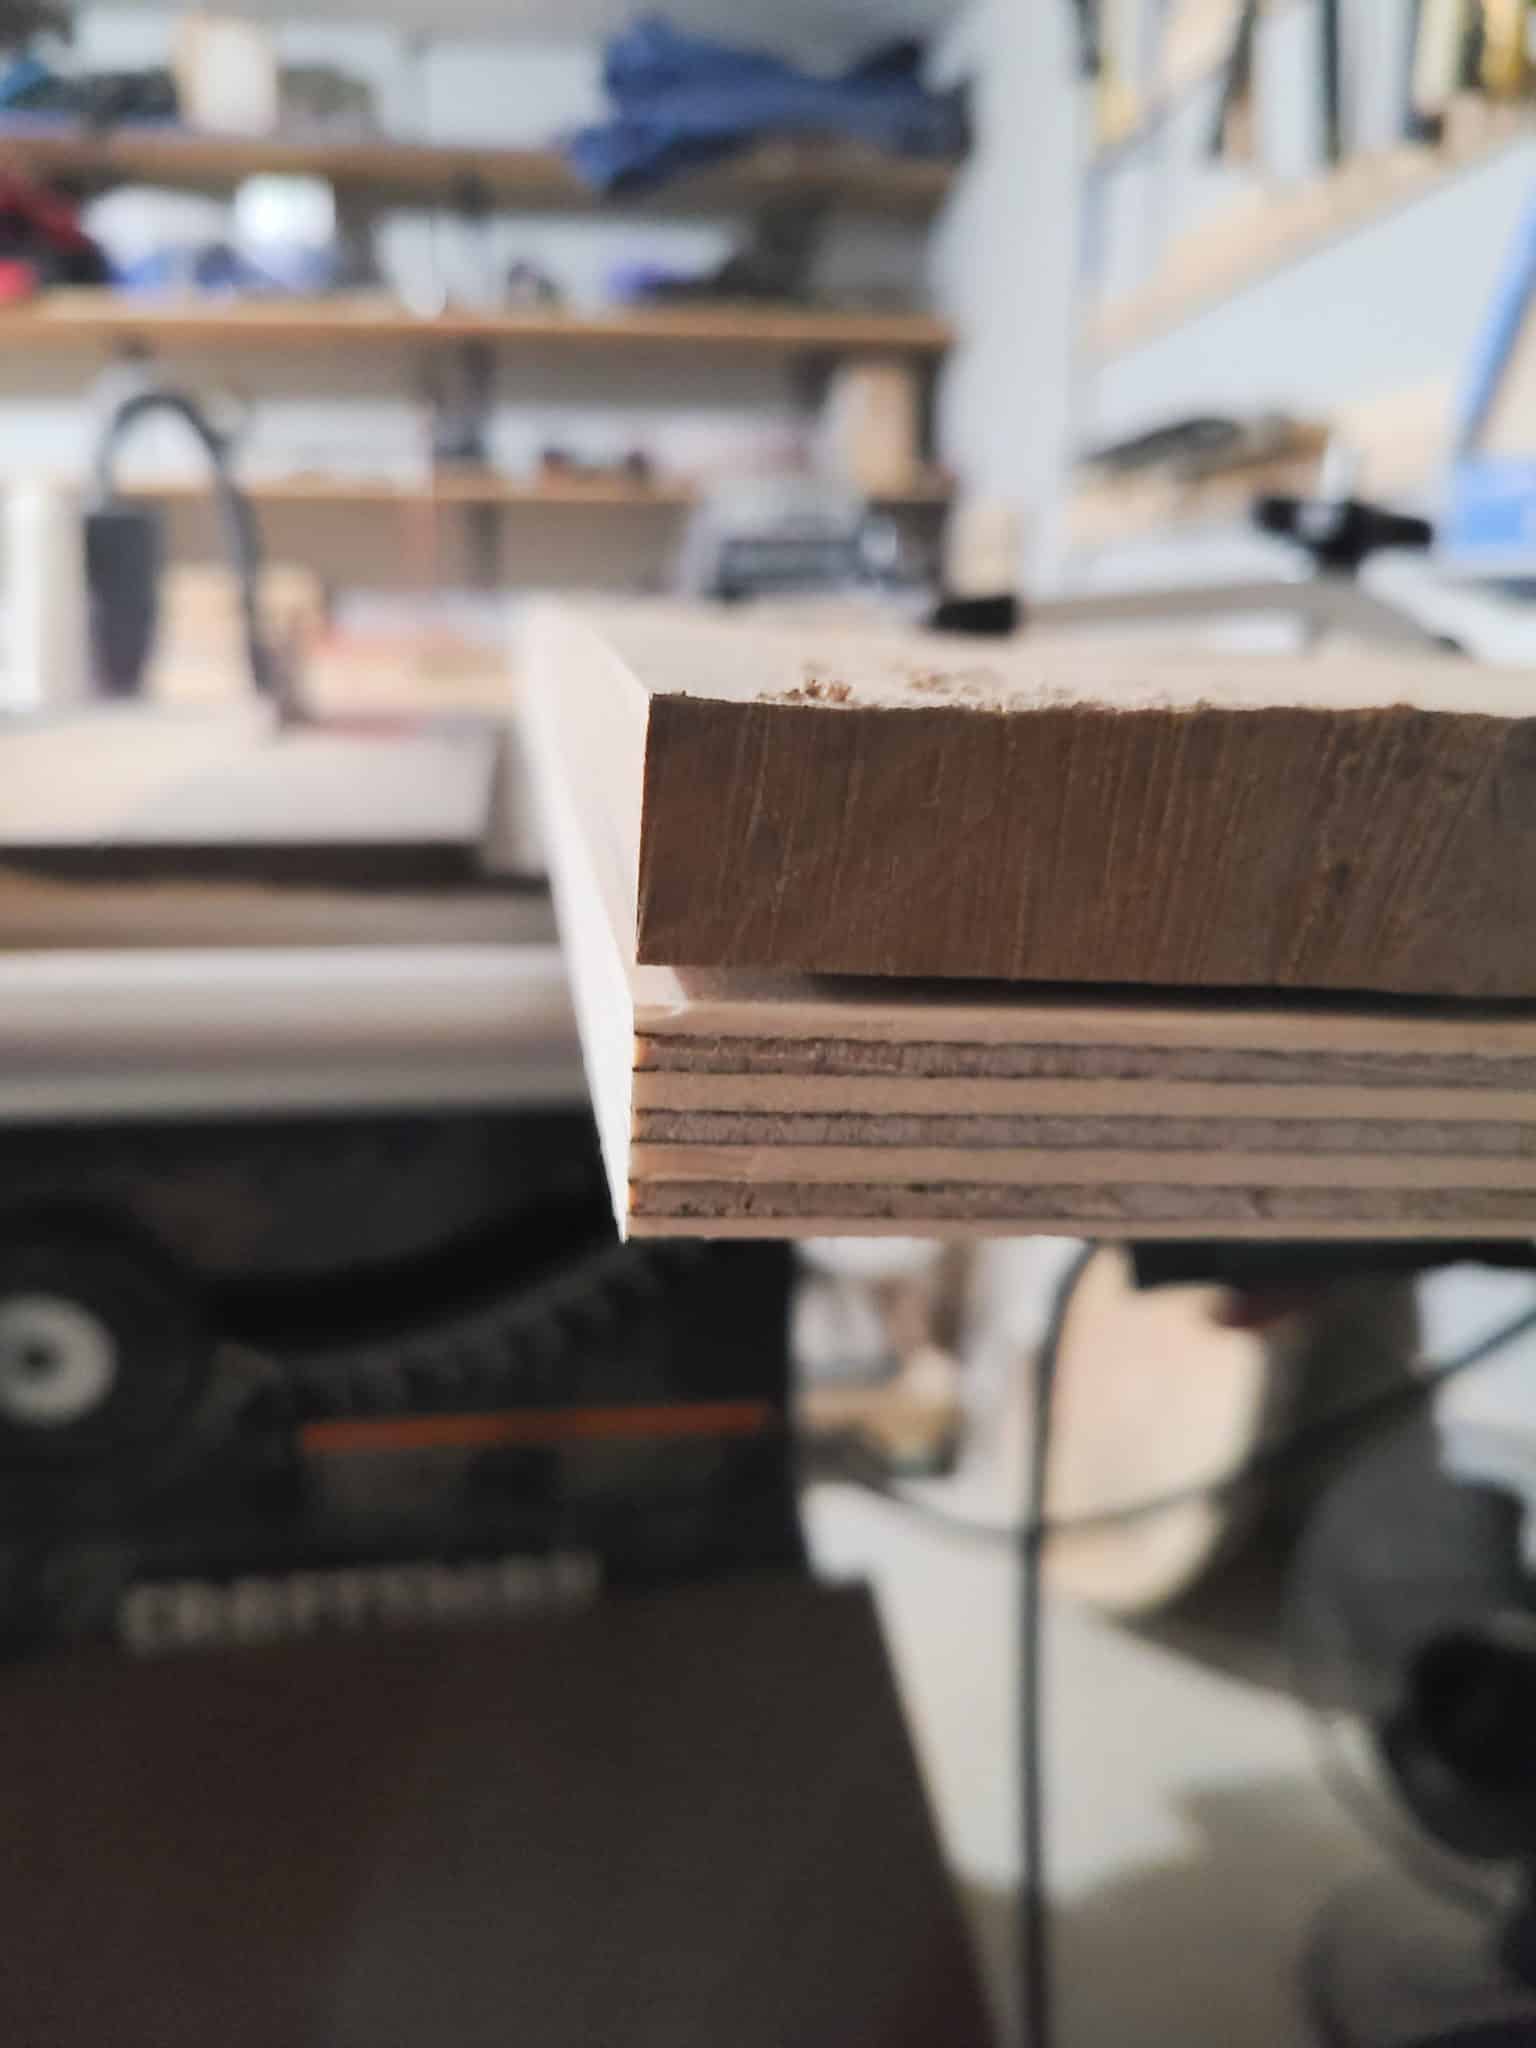
You can repeat this process with the other side if desired. However, we only planed the top side (side we’d be putting items on). The shelf thickness (5/4”) would have become too skinny to house the floating shelf mounting brackets if we’d planed both sides. This is due to the amount of material we had to remove to flatten out the warped board. Only planing one side kept enough wood surrounding the hidden brackets. If you have a thicker wood or wood that started out pretty flat, then planing both sides is likely fine.
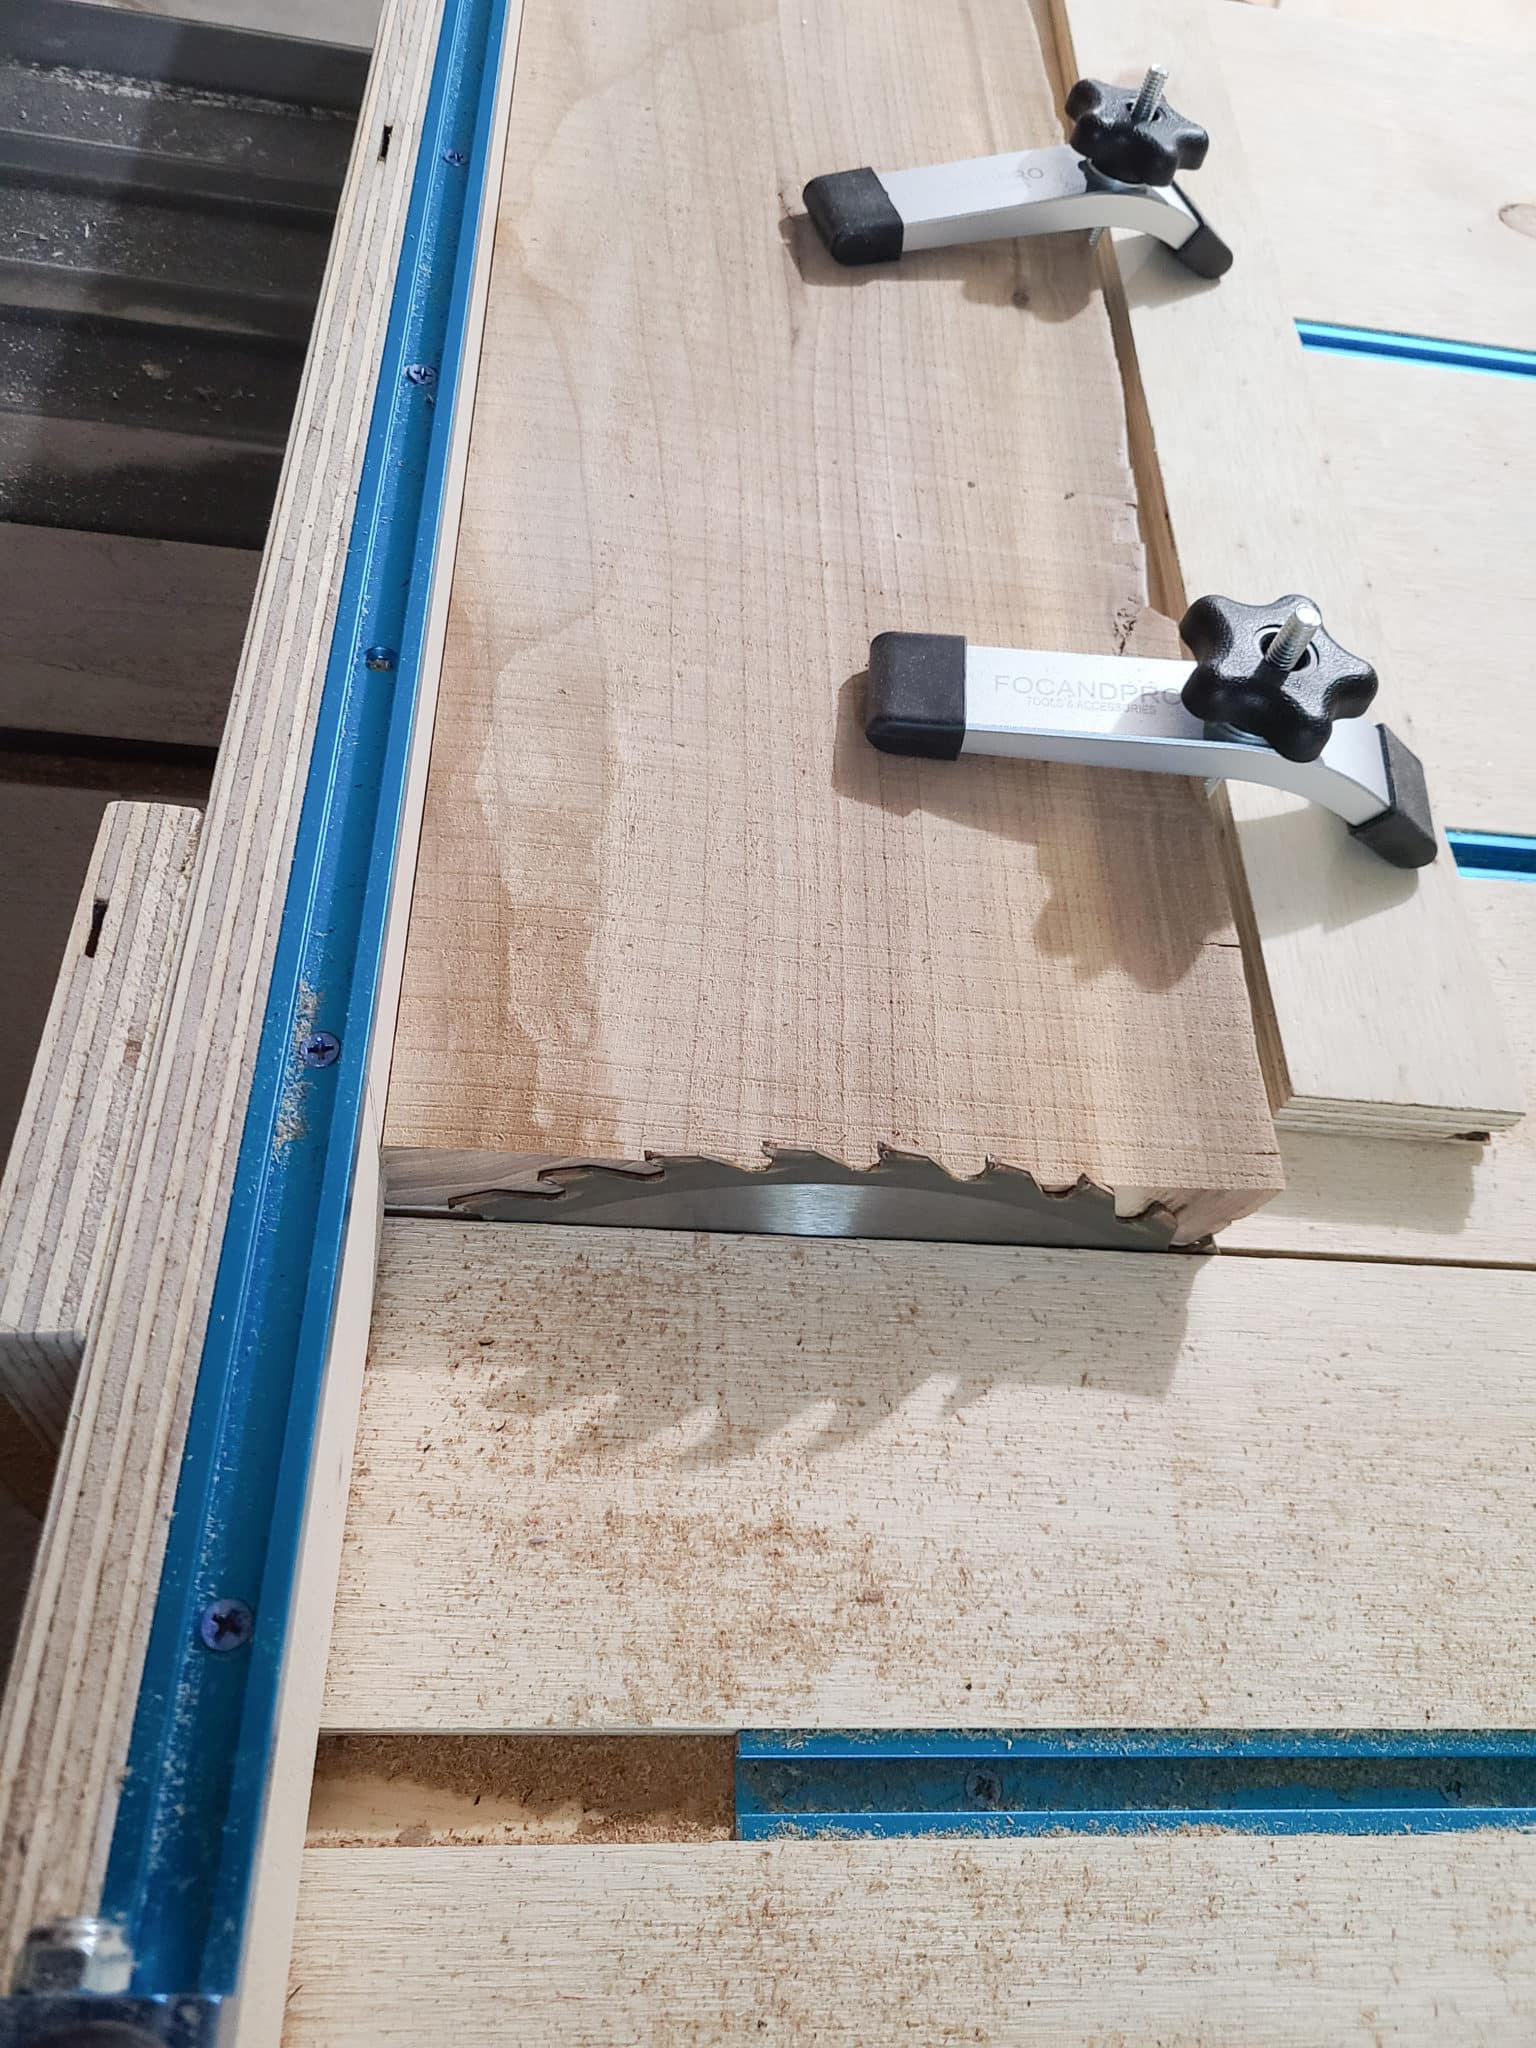
Step 4: Use Jigs To Create Straight Edges
Now with a planed flat surface, use this as a reference surface to create the rest of the straight edges. Begin by cutting the edge that will contact the wall surface. We left extra material on the board when we cut it out with the jigsaw to now go back to cut this edge and end up perfectly straight and perpendicular to the top surface.
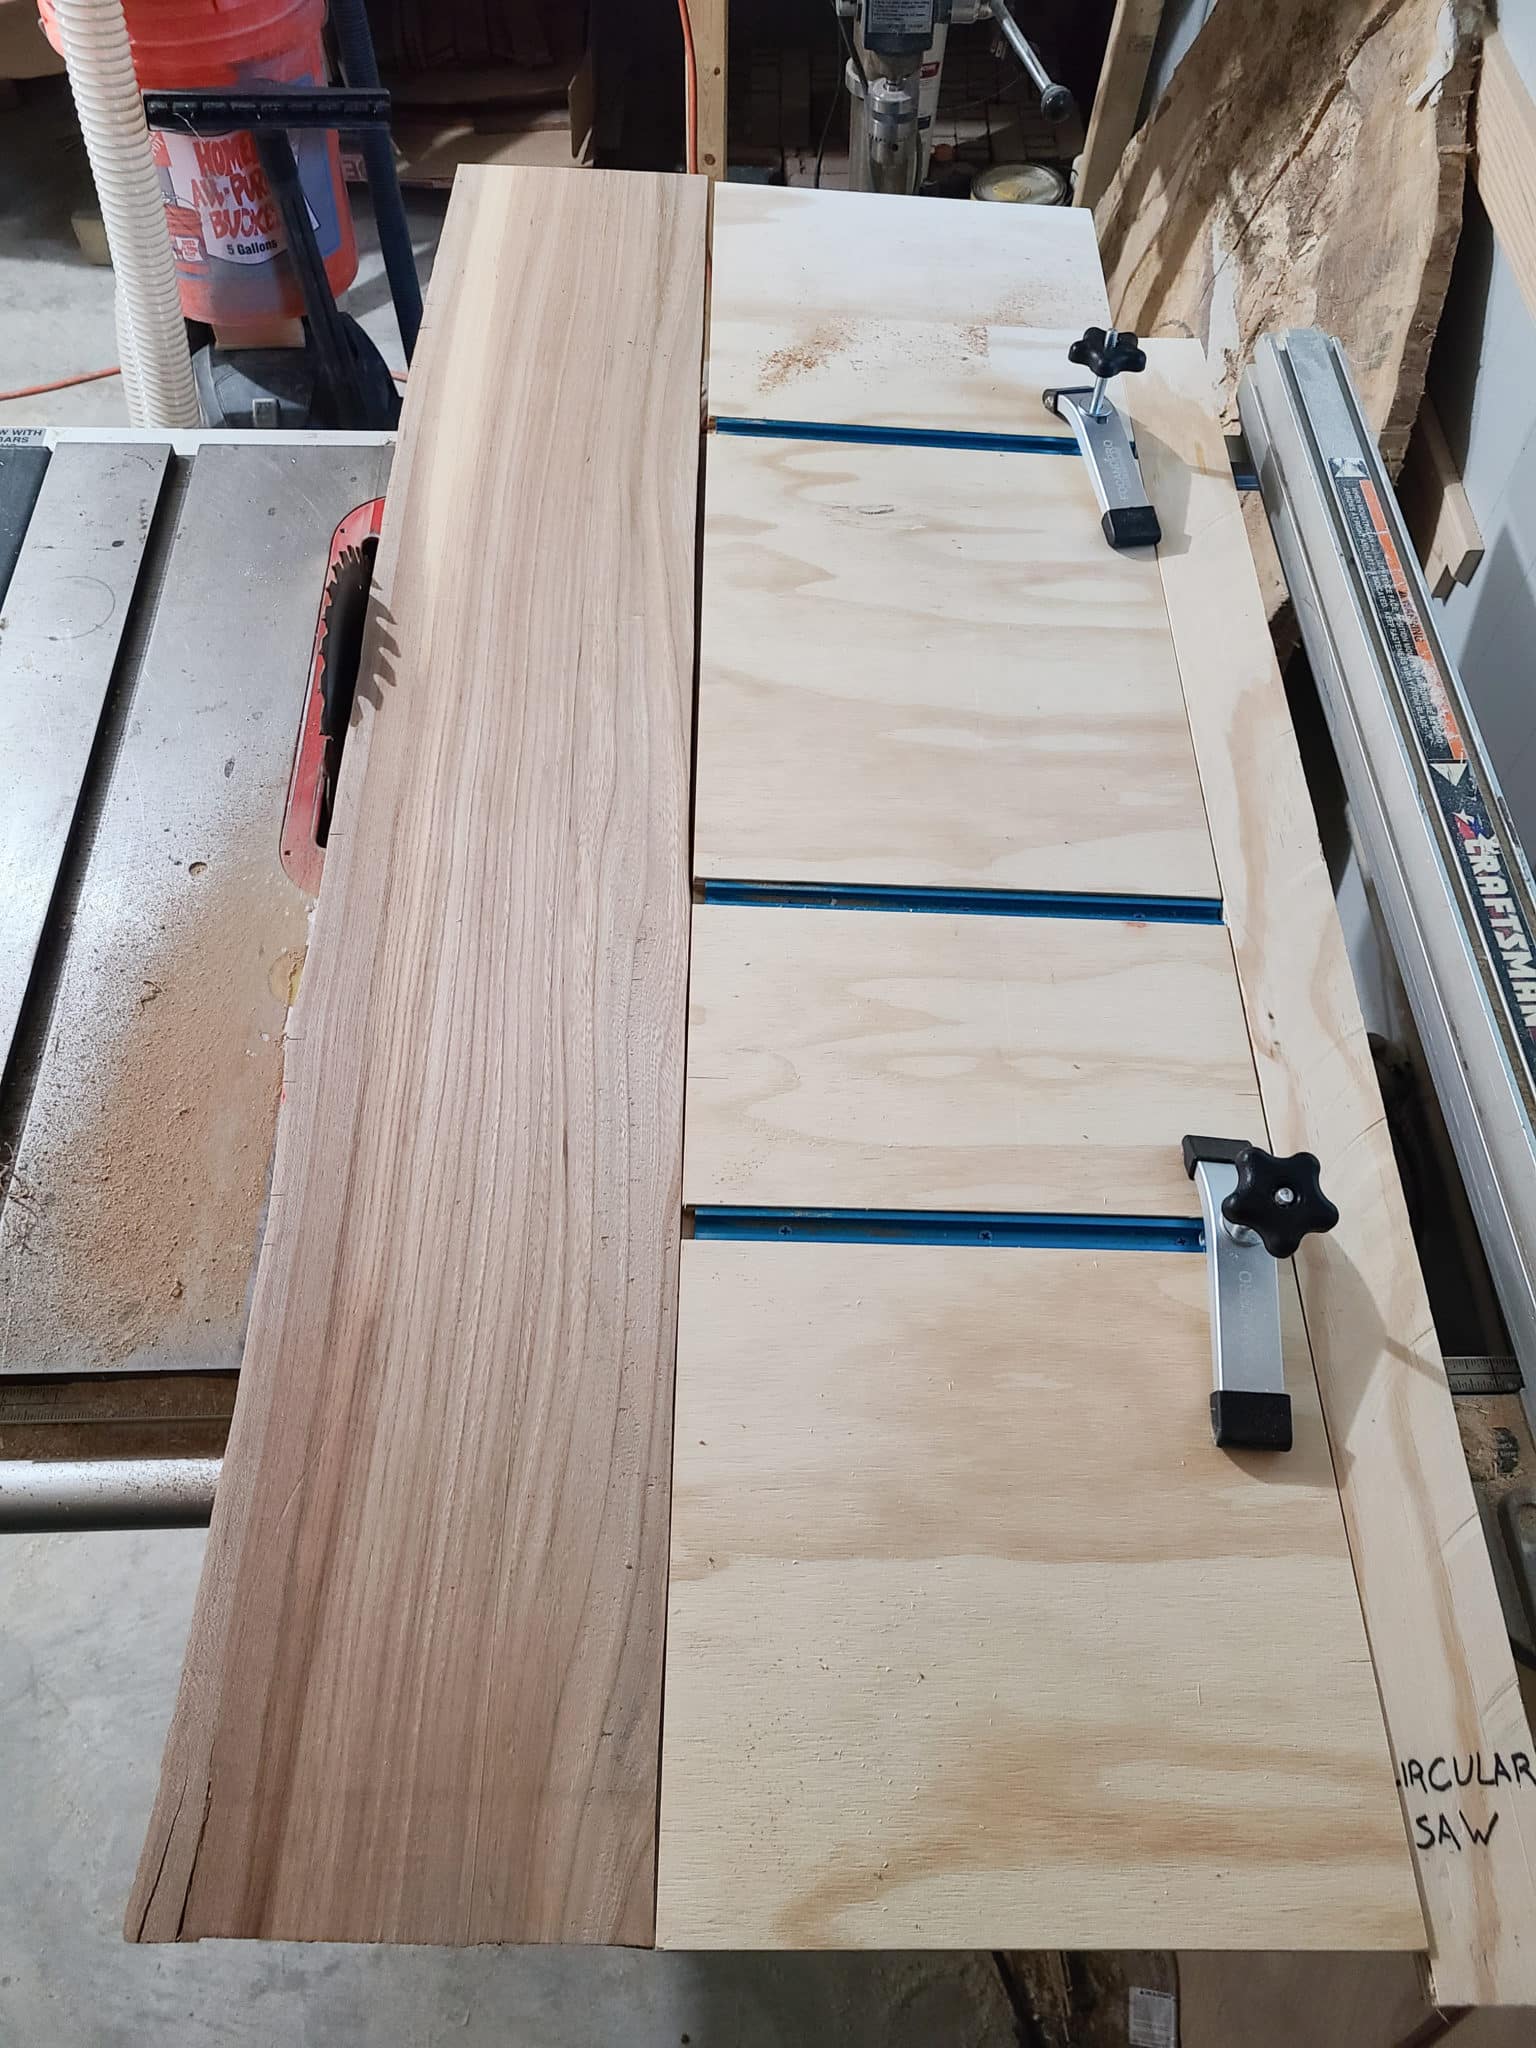
The best way to end up with a straight edge is to use a tapering jig. This jig is a piece of plywood with some recesses cut into it where T-Rail can be mounted. We can then put clamps into the T-Rail and use those to hold our shelf board to the jig. If your jig has a good straight edge then you can hold the edge against the fence of your table saw while you run it though.
DIY-er Tip – I don’t like relying on my ability to hold an awkward board against a fence. So I cut a strip of plywood and glued it to the bottom of my jig. This way I could set the jig into the miter slot of my table saw and ensure it doesn’t wobble. This take a bit of extra effort, but it is worth it if you plan to use this jig again in the future.
Using the Tapering Jig
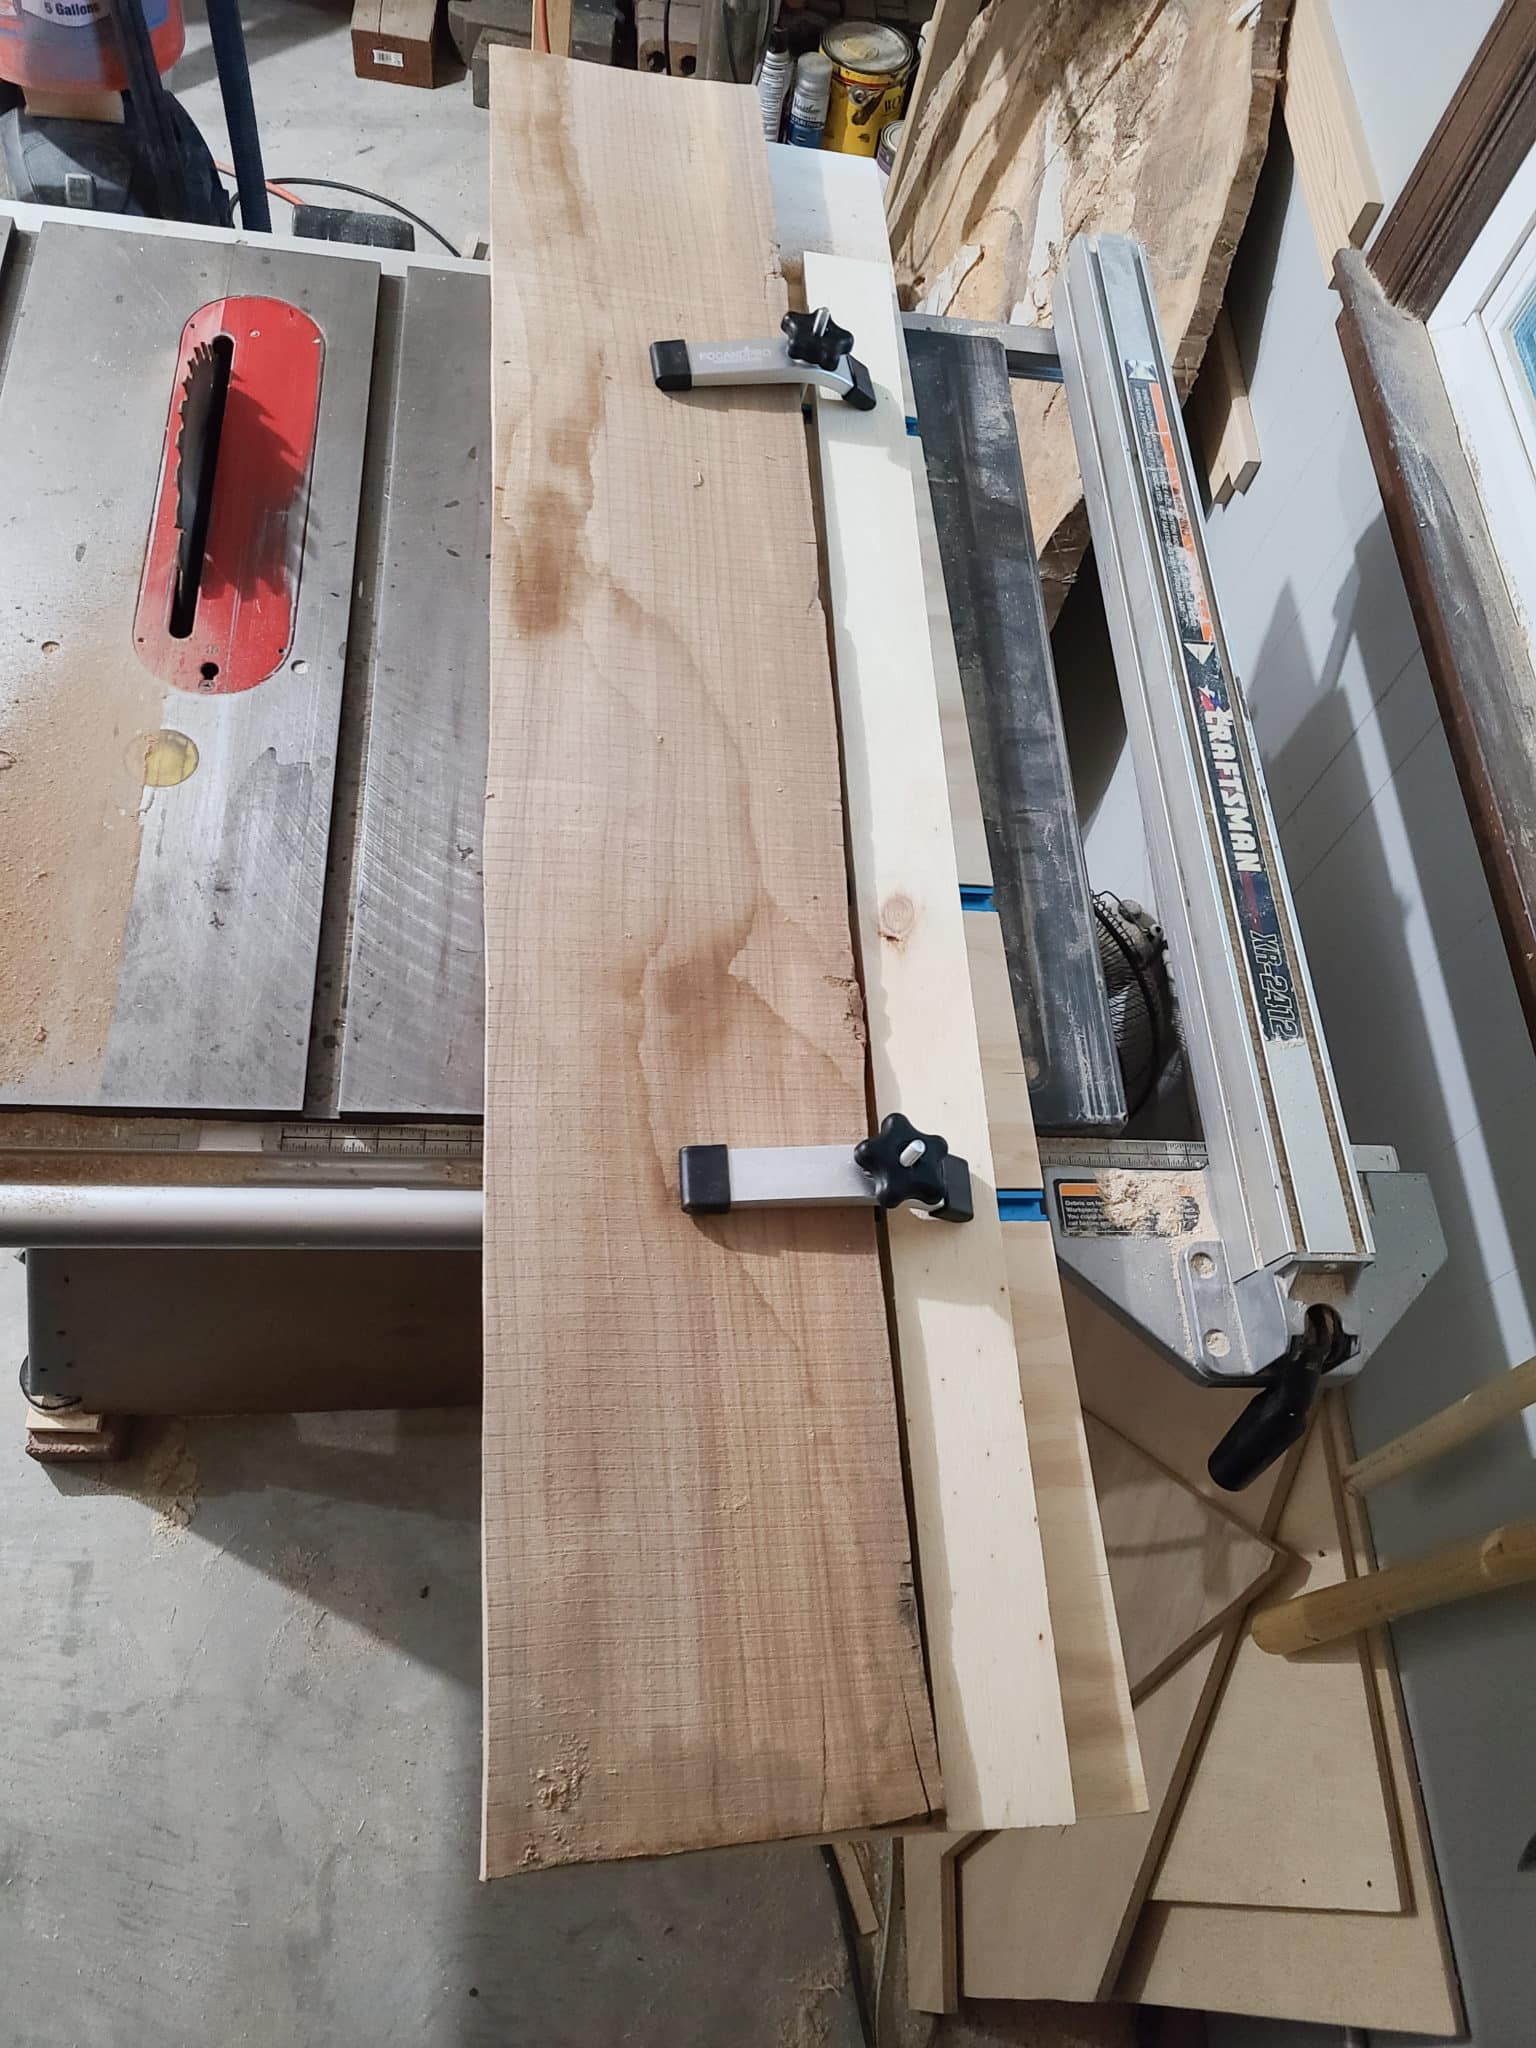
- Set the board onto the tapering jig with the flat top side down against your plywood to ensure the cut is perfectly perpendicular to this flat surface.
- Adjust the position of the board so it hangs out over the saw blade edge of the jig. This edge of the jig will be your guide to line up your final cut.
- Once the board is positioned, use the clamps to hold it down to the jig then raise up your saw blade and run the jig and the board through. You’ll end up with a perfectly straight cut that we can reference next.
If you don’t think you’d use this jig again and you want a quick fix, then simply cut off the end of a piece of plywood and use the factory edge as your reference edge to hold against your table saw fence. Then attach the shelf boards to this piece of plywood with double sided tape. Make sure the correct portion is overhanging the saw blade edge. Then run it though while holding it down to help make sure the tape doesn’t slip.
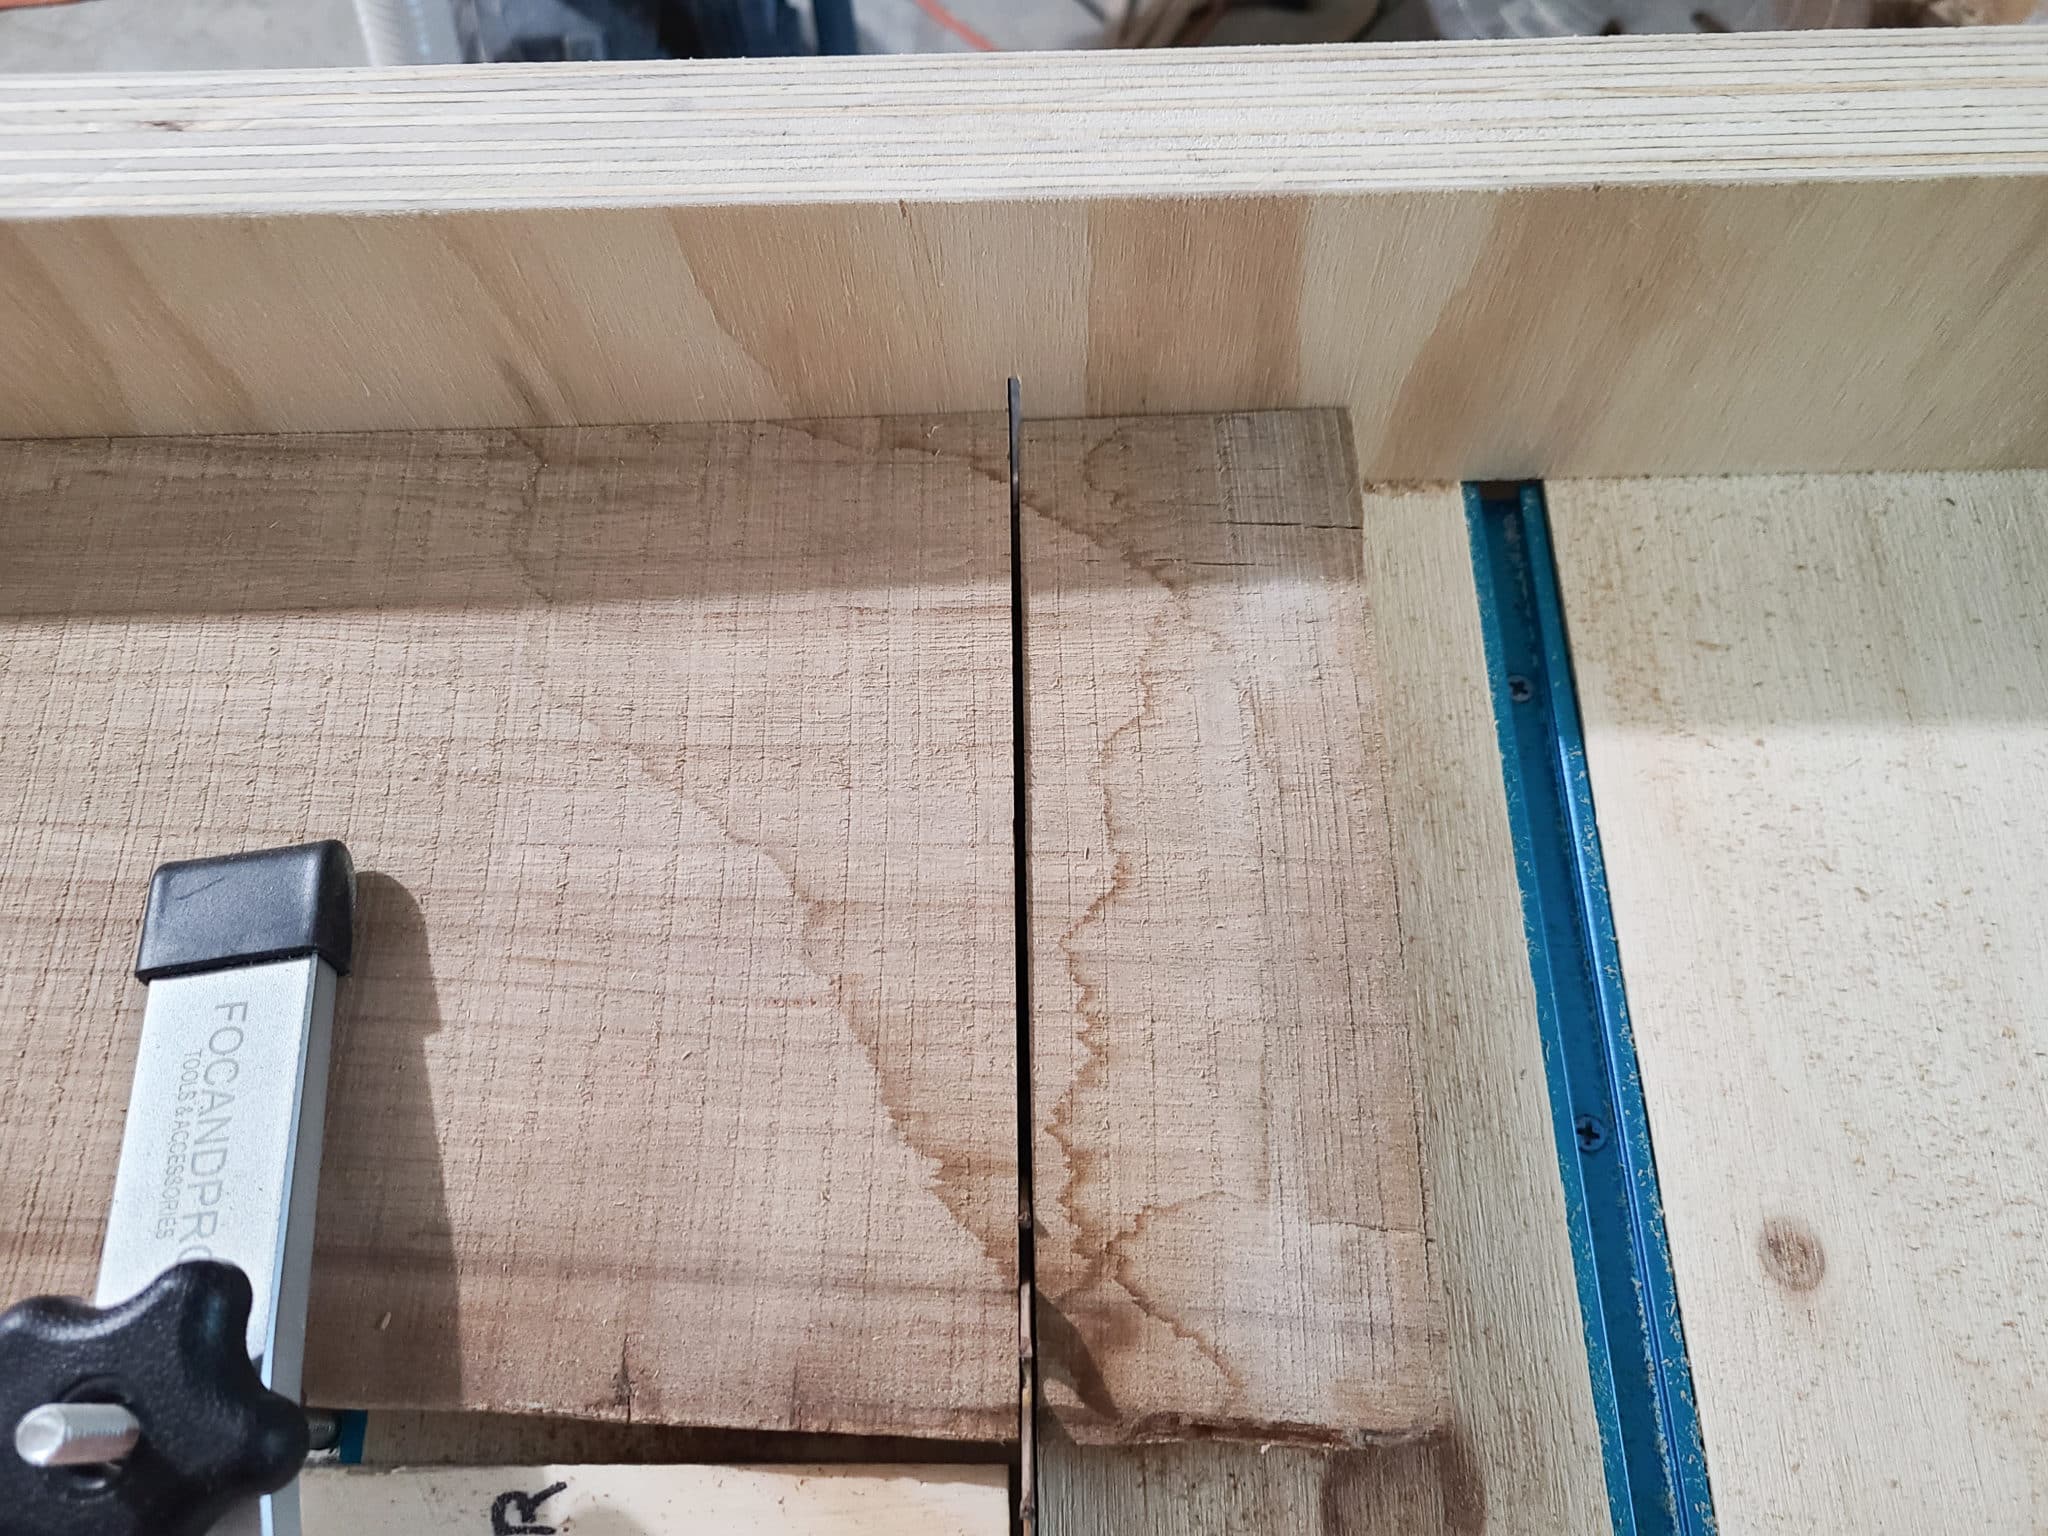
Cut Edges of Floating Shelves
Once you have a good straight back edge it is time to cut the sides. The cleanest way to do this is to use a cross-cut sled on the table saw to square off the two short sides of the DIY floating shelves. Cut using the sled while holding the back edge against your back stop. If you don’t have a cross-cut sled, use the miter gauge on the table saw or a miter saw. Just be sure to double check that these are set to be perfectly square before cutting.

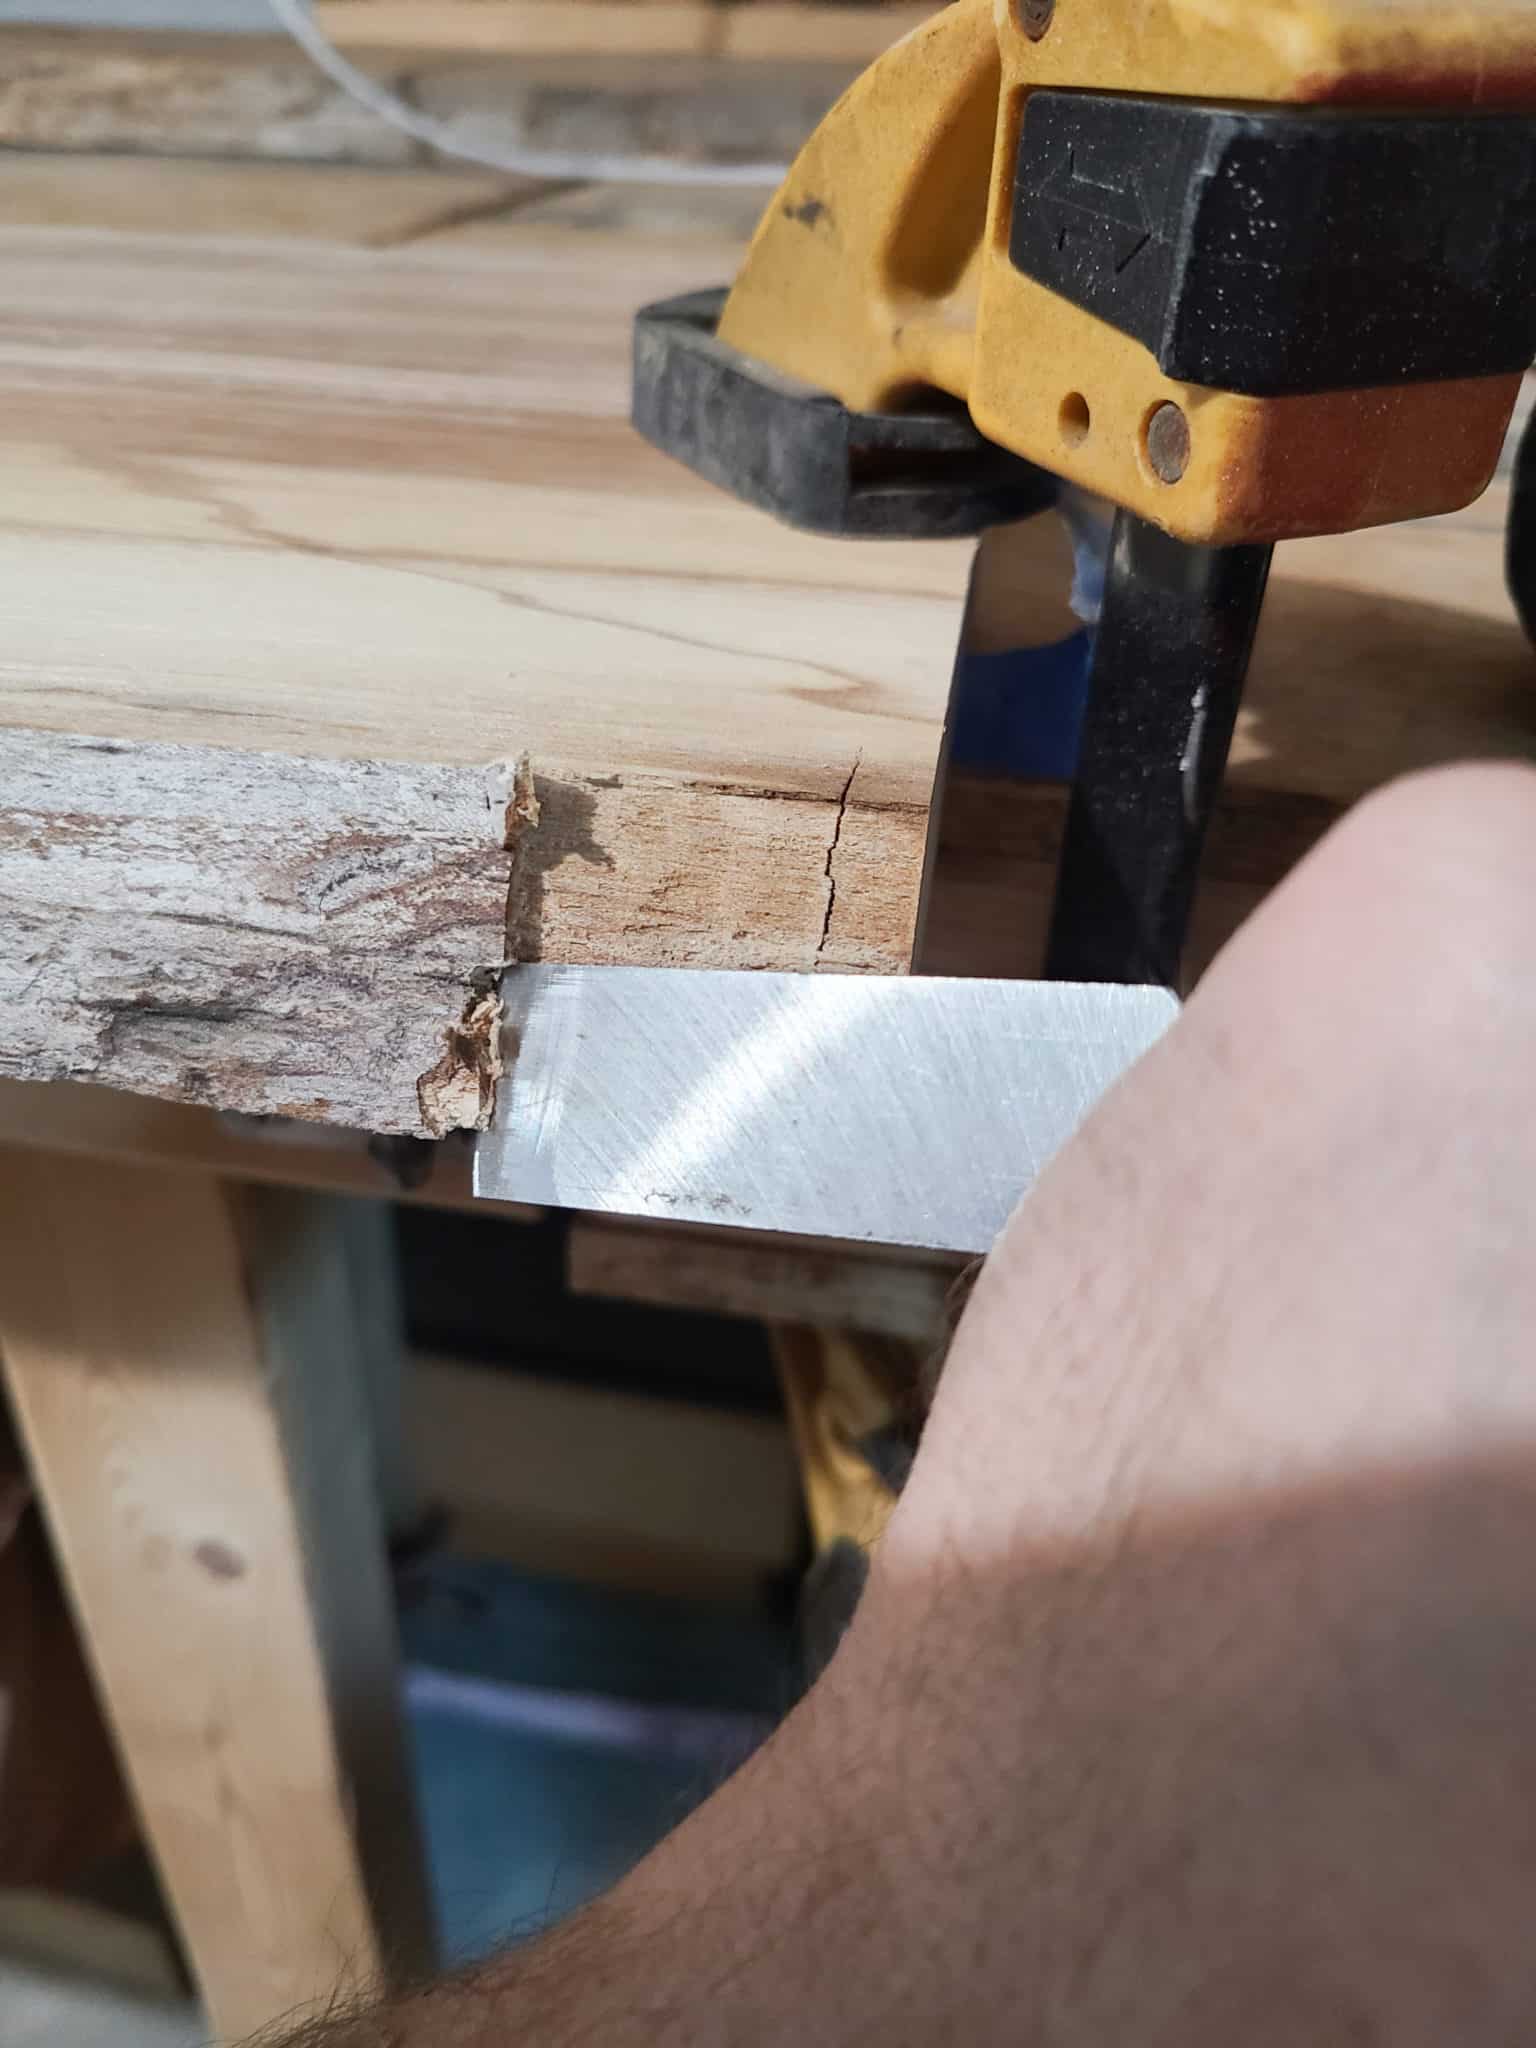
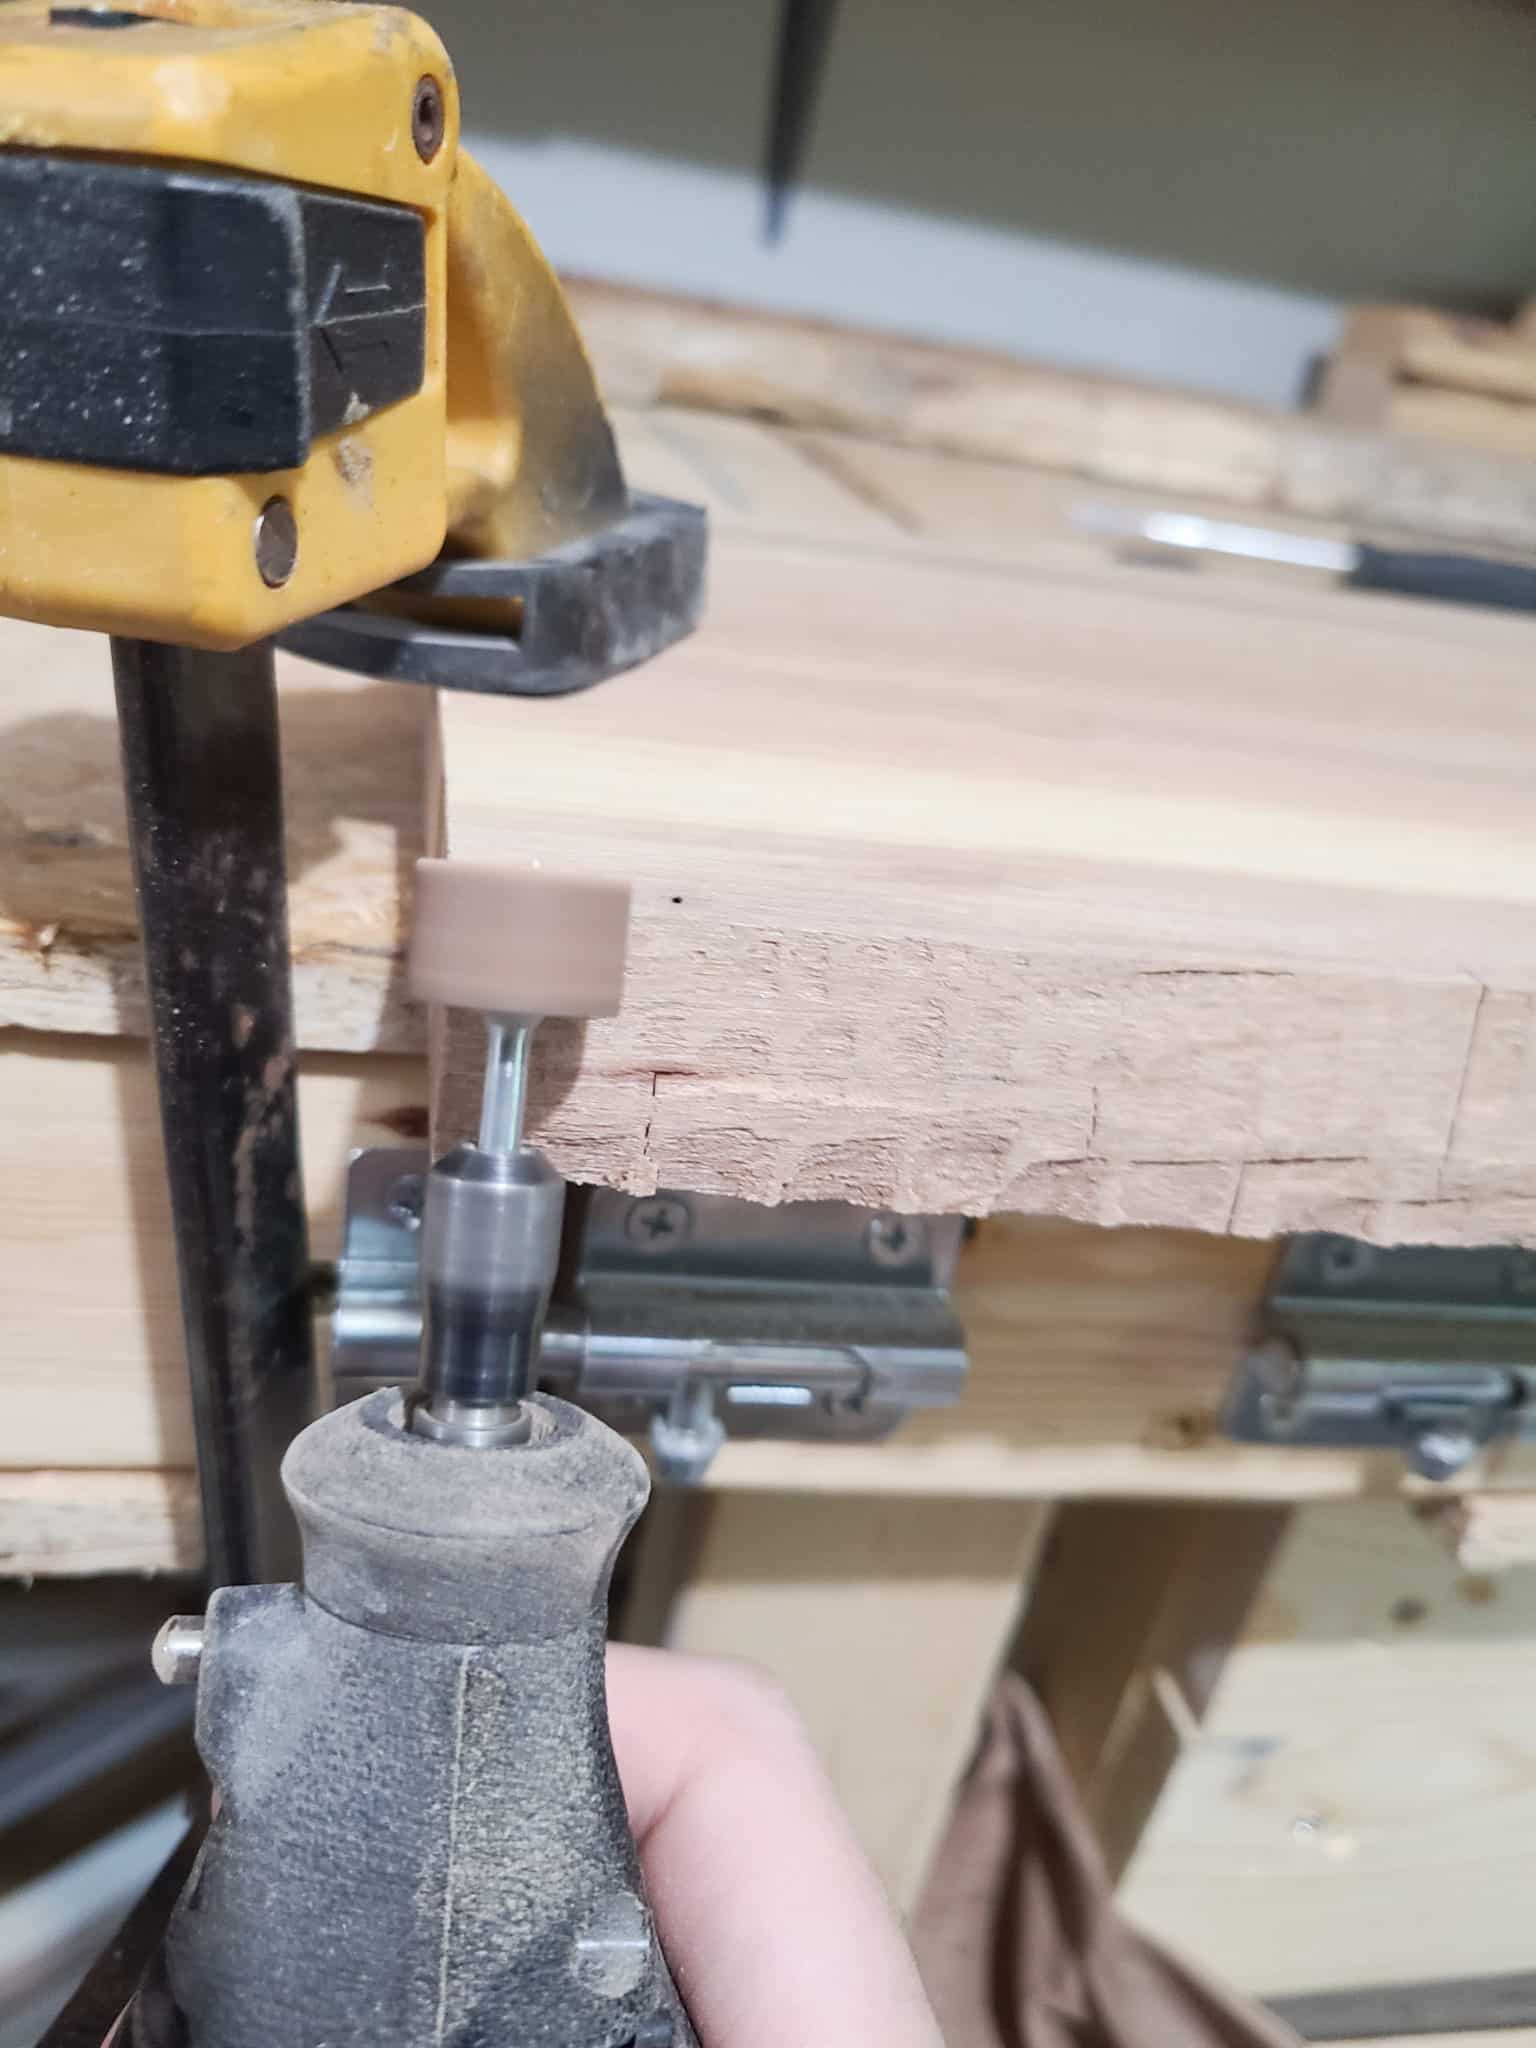
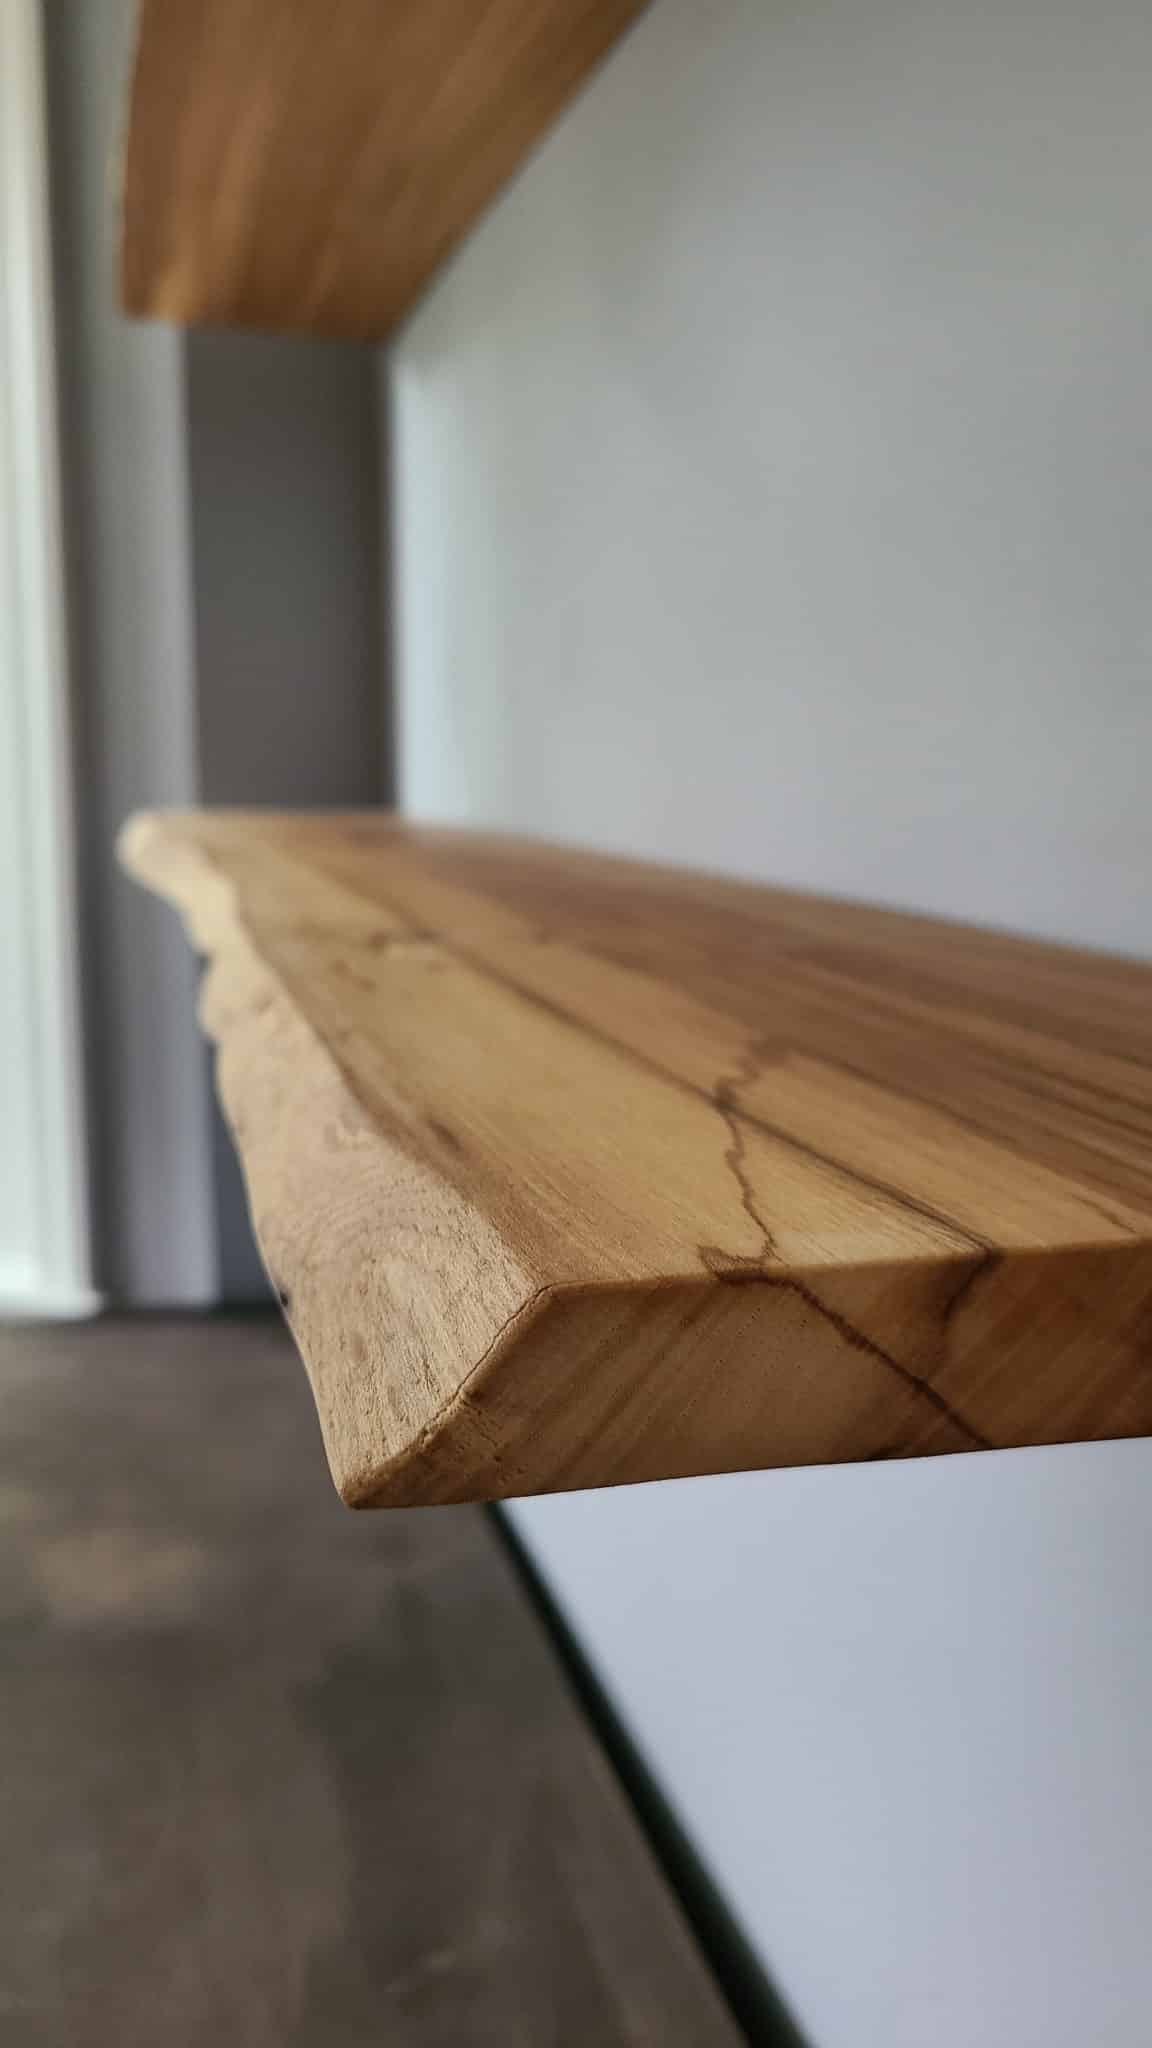
Step 5: Removing Live Edge Bark
Some live edge wood slabs will still have the bark layer on. It might not even really look like bark, but there’s usually an obvious seam/transition where it happens. In our experience, it’s really tough to preserve the bark intact on the wood, and it ends up failing eventually or chipping as your work on it. You are better off removing the outer layer of bark while trying to preserve the character underneath. You’ll generally encounter two types of bark:
- Chunky bark (like oak) – Most of it can be knocked off with rubber mallet and then come back with a screwdriver or dull chisel to scrap off fibers and finish with some hand sanding to smooth the wood.
- Thin bark (like elm) – Use a chisel to remove the thin layer of bark while following curves to keep character. Then use a Dremel to get into cracks to shape and smooth them and finish with hand sanding. If you don’t have a Dremel, you can do all of your shaping with sandpaper, it just take a bit longer.
The goal here is to remove all of the bark and get down to the wood layer without destroying the flowing shape of the edge. As tempting as it may be, do not just take your sander and start sanding away.
Step 6: Find & Mark Studs
Once you finalize your layout and get your boards cut, use a stud finder to locate your wall studs. Mark the center of the studs on your tape.

In our case, we had two studs along the wall. As you can see, they’re not symmetric on the wall or anything, so our shelf brackets will be offset. With the almost 4 foot shelf length we were doing, we’d have preferred having three brackets per shelf, but we only had two wall studs. It’s still plenty strong to hold items, but always go for a little stronger, if possible.
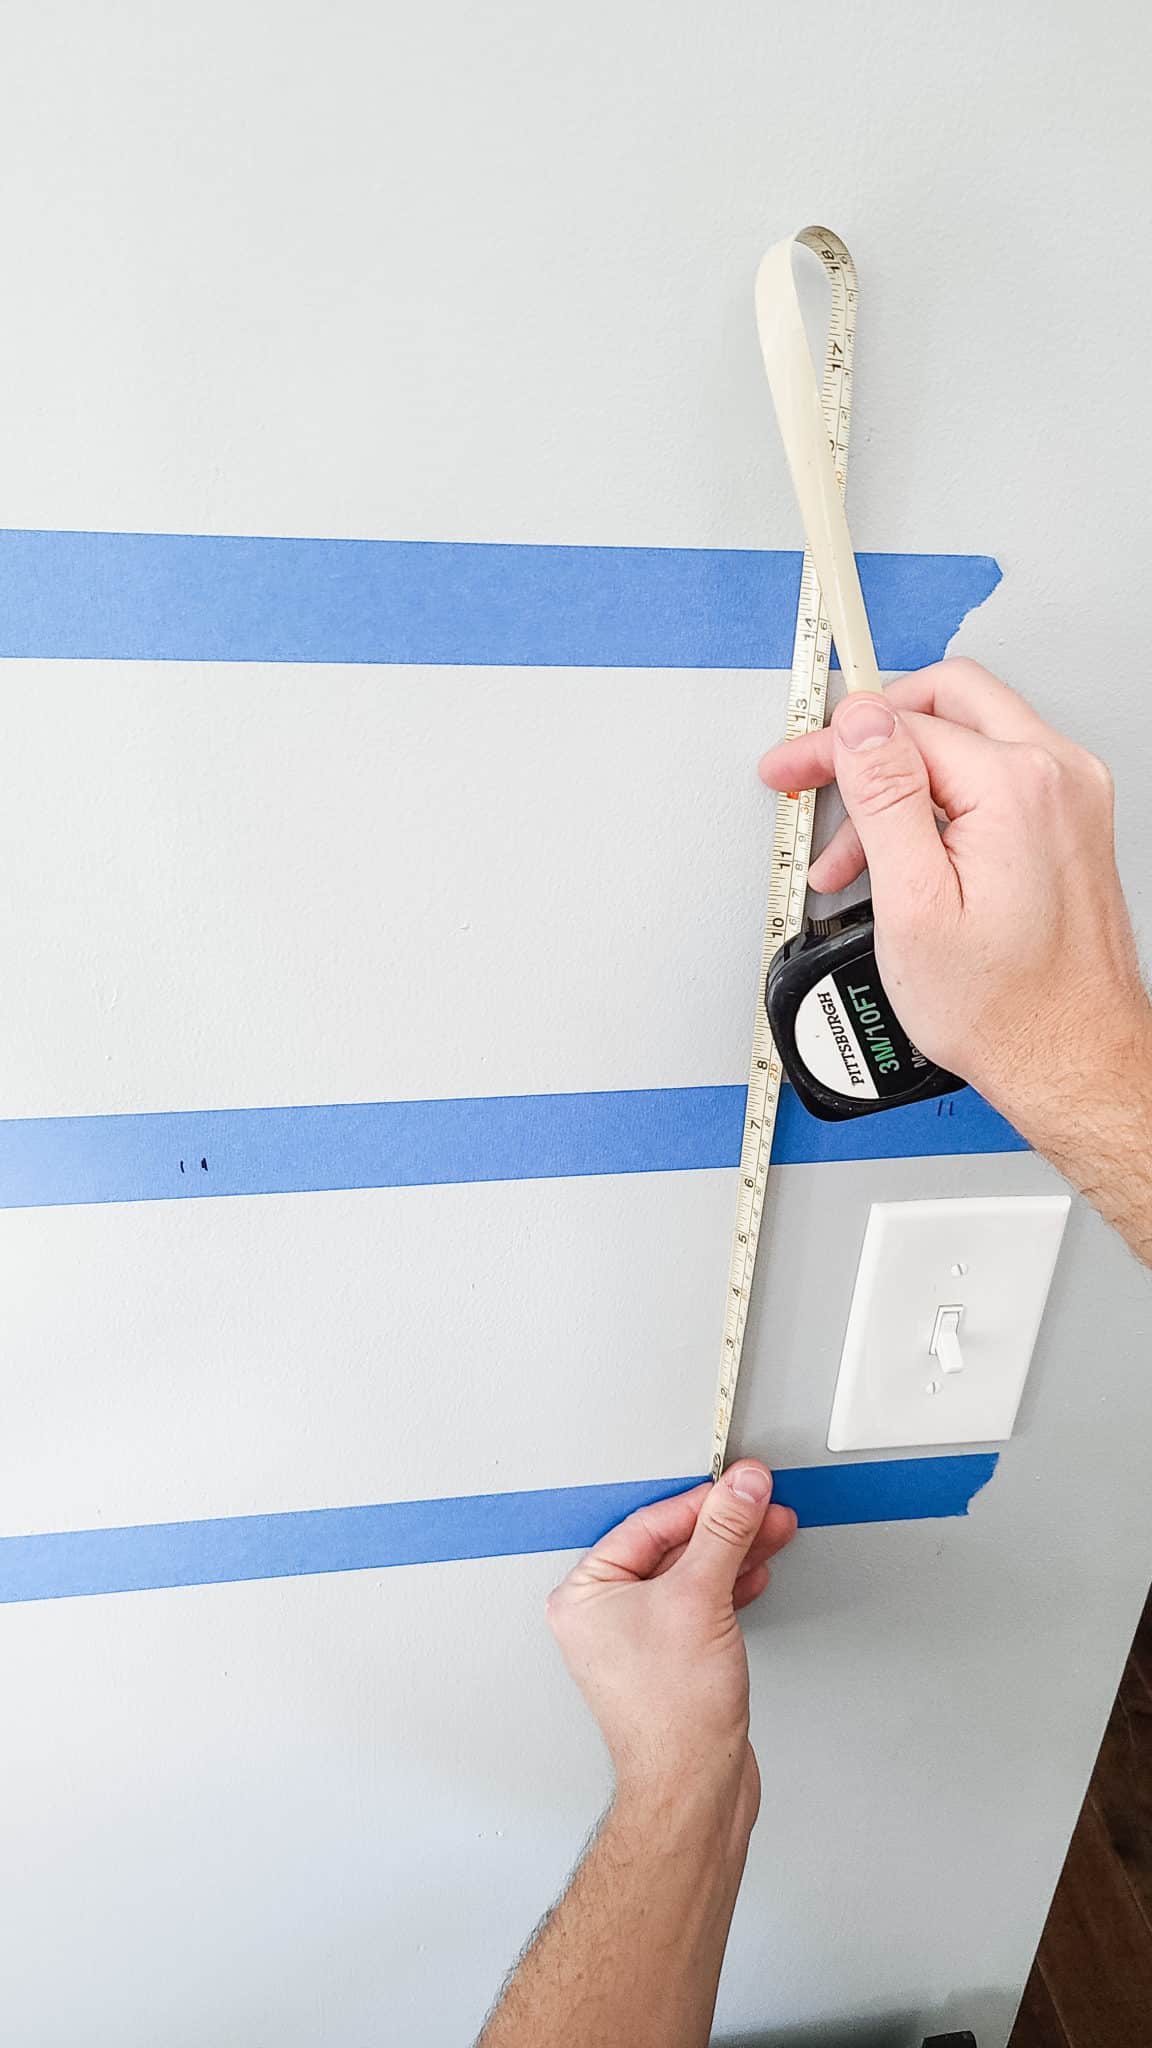
Once you have the studs located, measure how far away from the edge of the shelf they will be. Write those numbers down and keep track of them. You’ll need them to mark and drill the holes in the boards.
Step 7: Install The Floating Shelf Brackets
Next is installing the floating shelf brackets on your wall. Since your tape is level, your can use this as a reference. Measure down from the edge of the tape and mark a point. We used a paddle bit as a consistent spacer to mark our points on all of our tape.
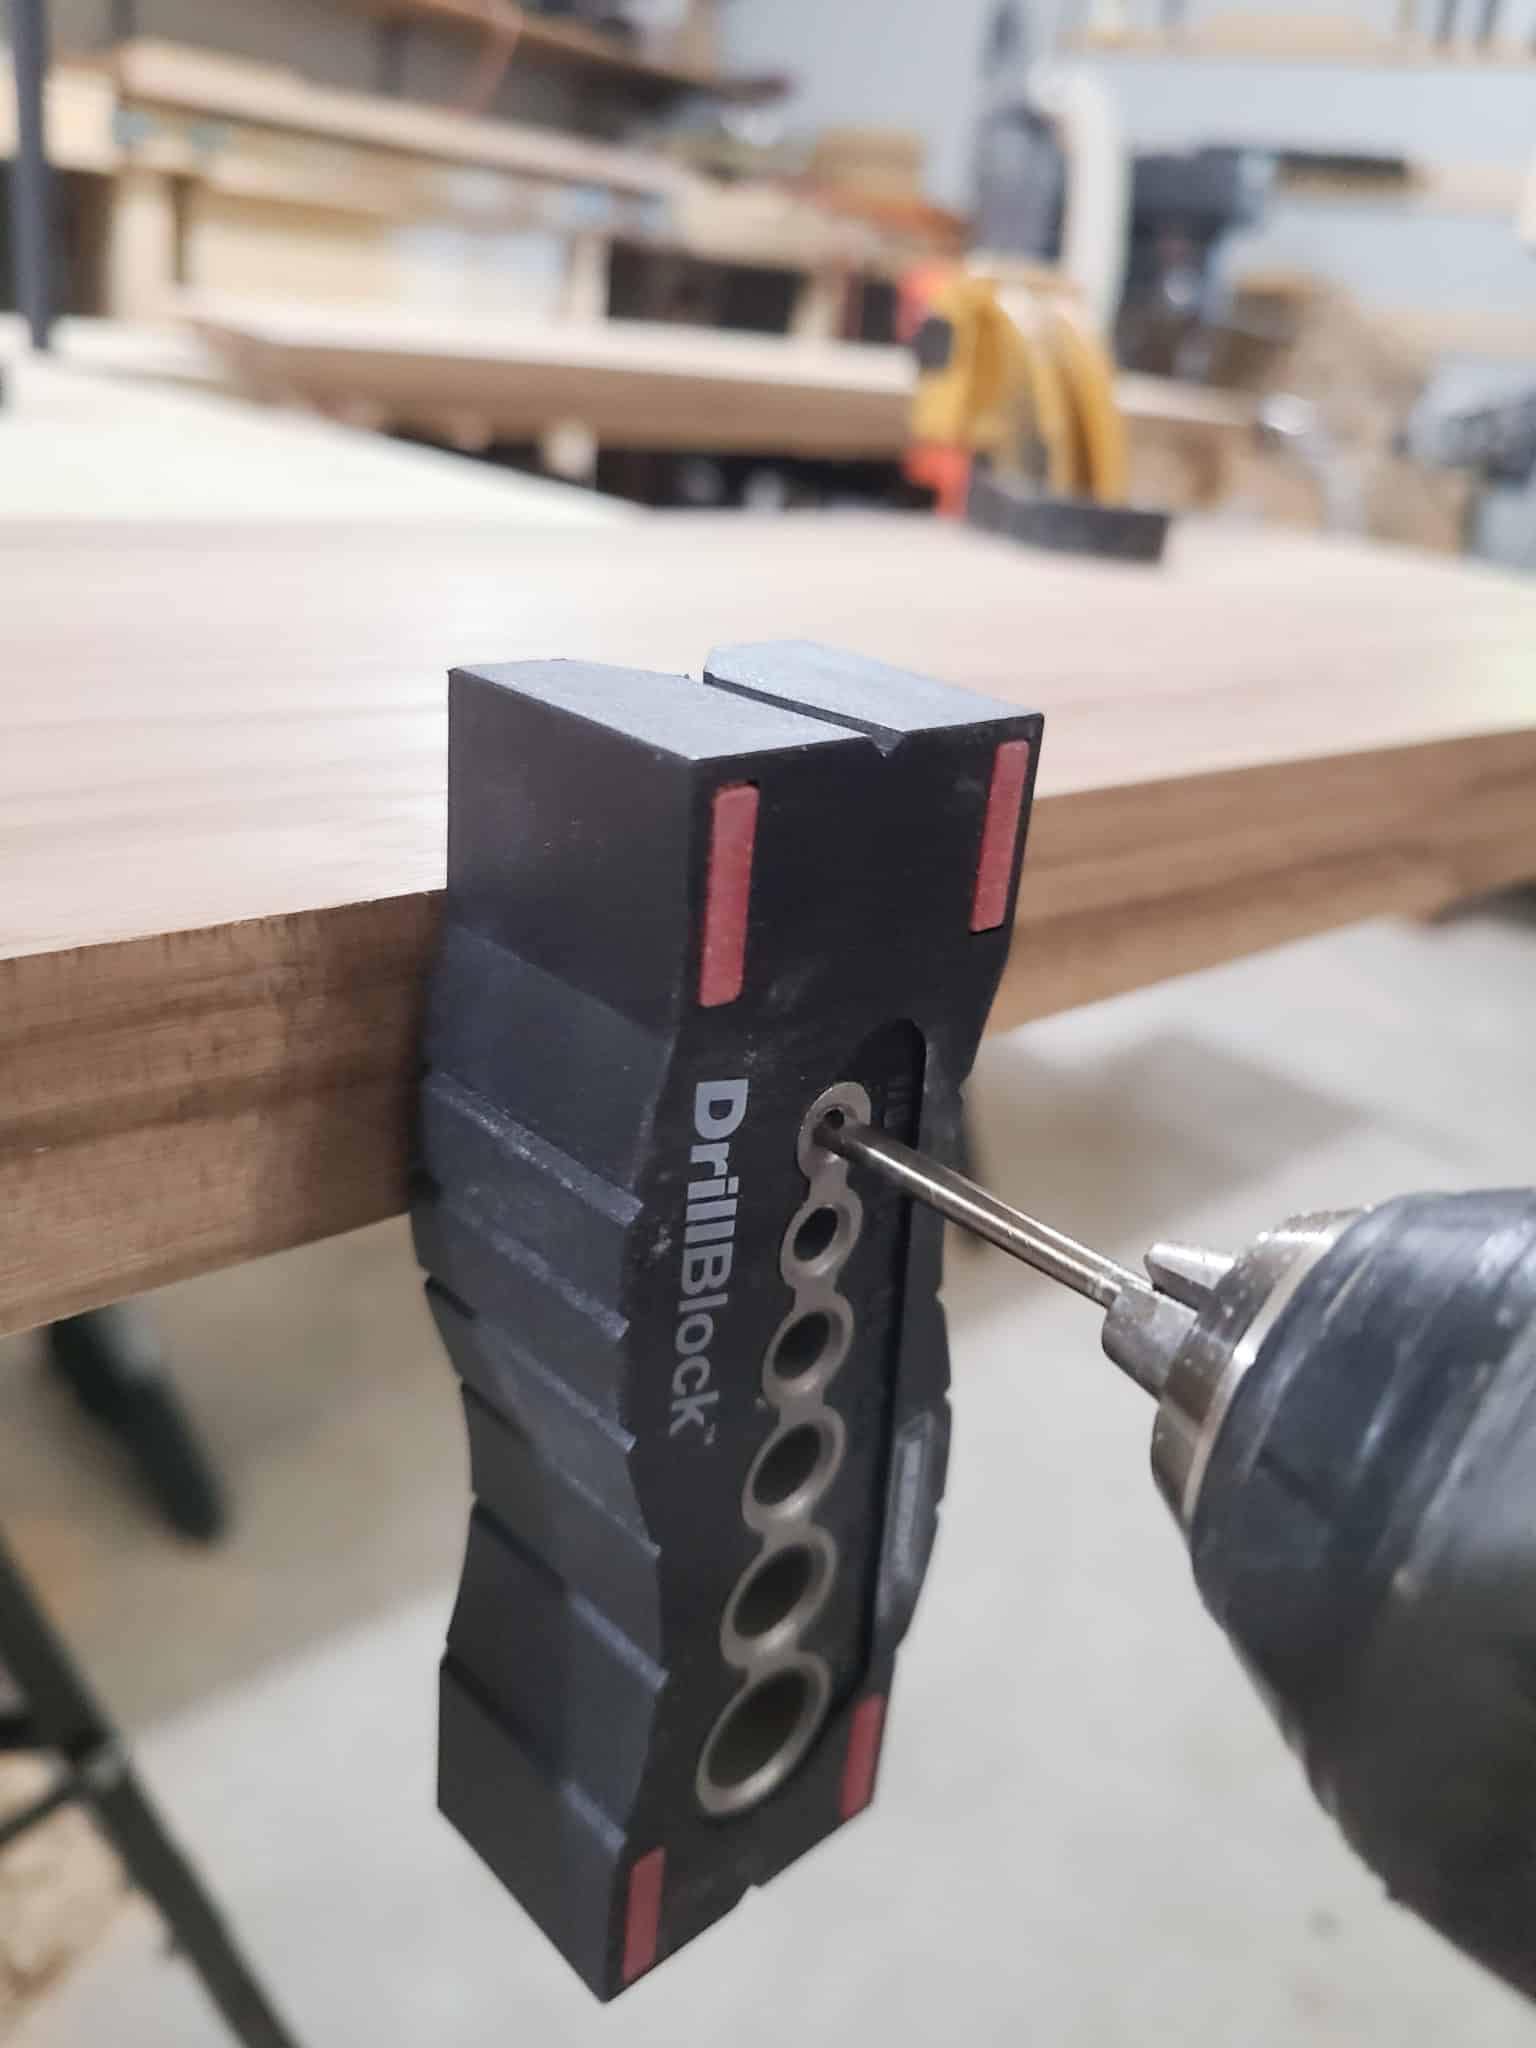
You should now have a “+” where your height line meets your stud center line. Indent the center of this plus with a center punch or a screw and a hammer to ensure your drill bit doesn’t walk, then drill holes per the bracket manufacturer’s recommended diameter. I recommend you start by drilling a pilot hole using a drill block to ensure your drilling perpendicular to the wall.
We installed our floating shelf brackets prior to drilling holes into the live edge wood shelves. This allowed us to confirm there actually was a stud where the stud finder said it would be. No one likes to have to drill holes twice and potentially mess up!
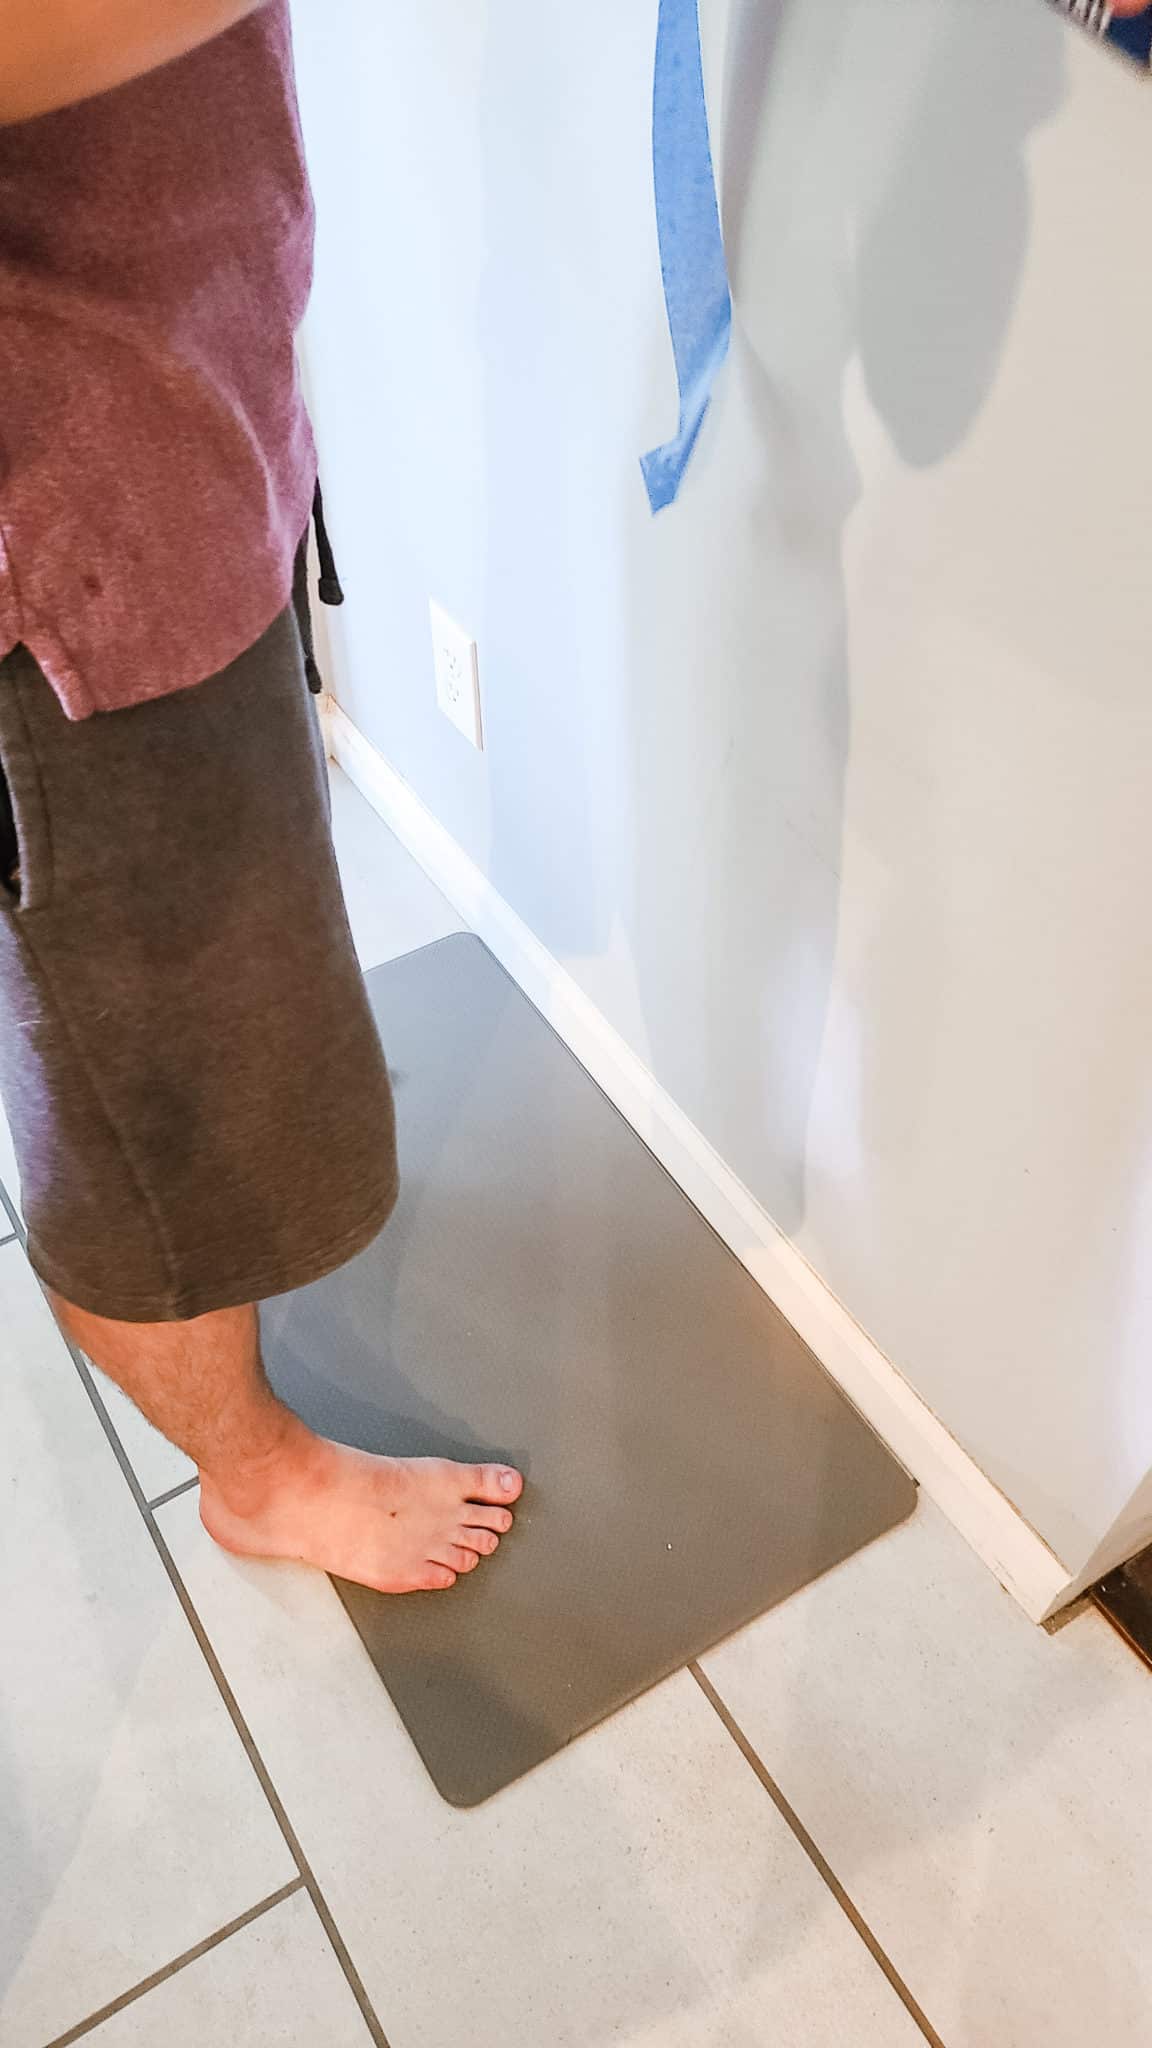
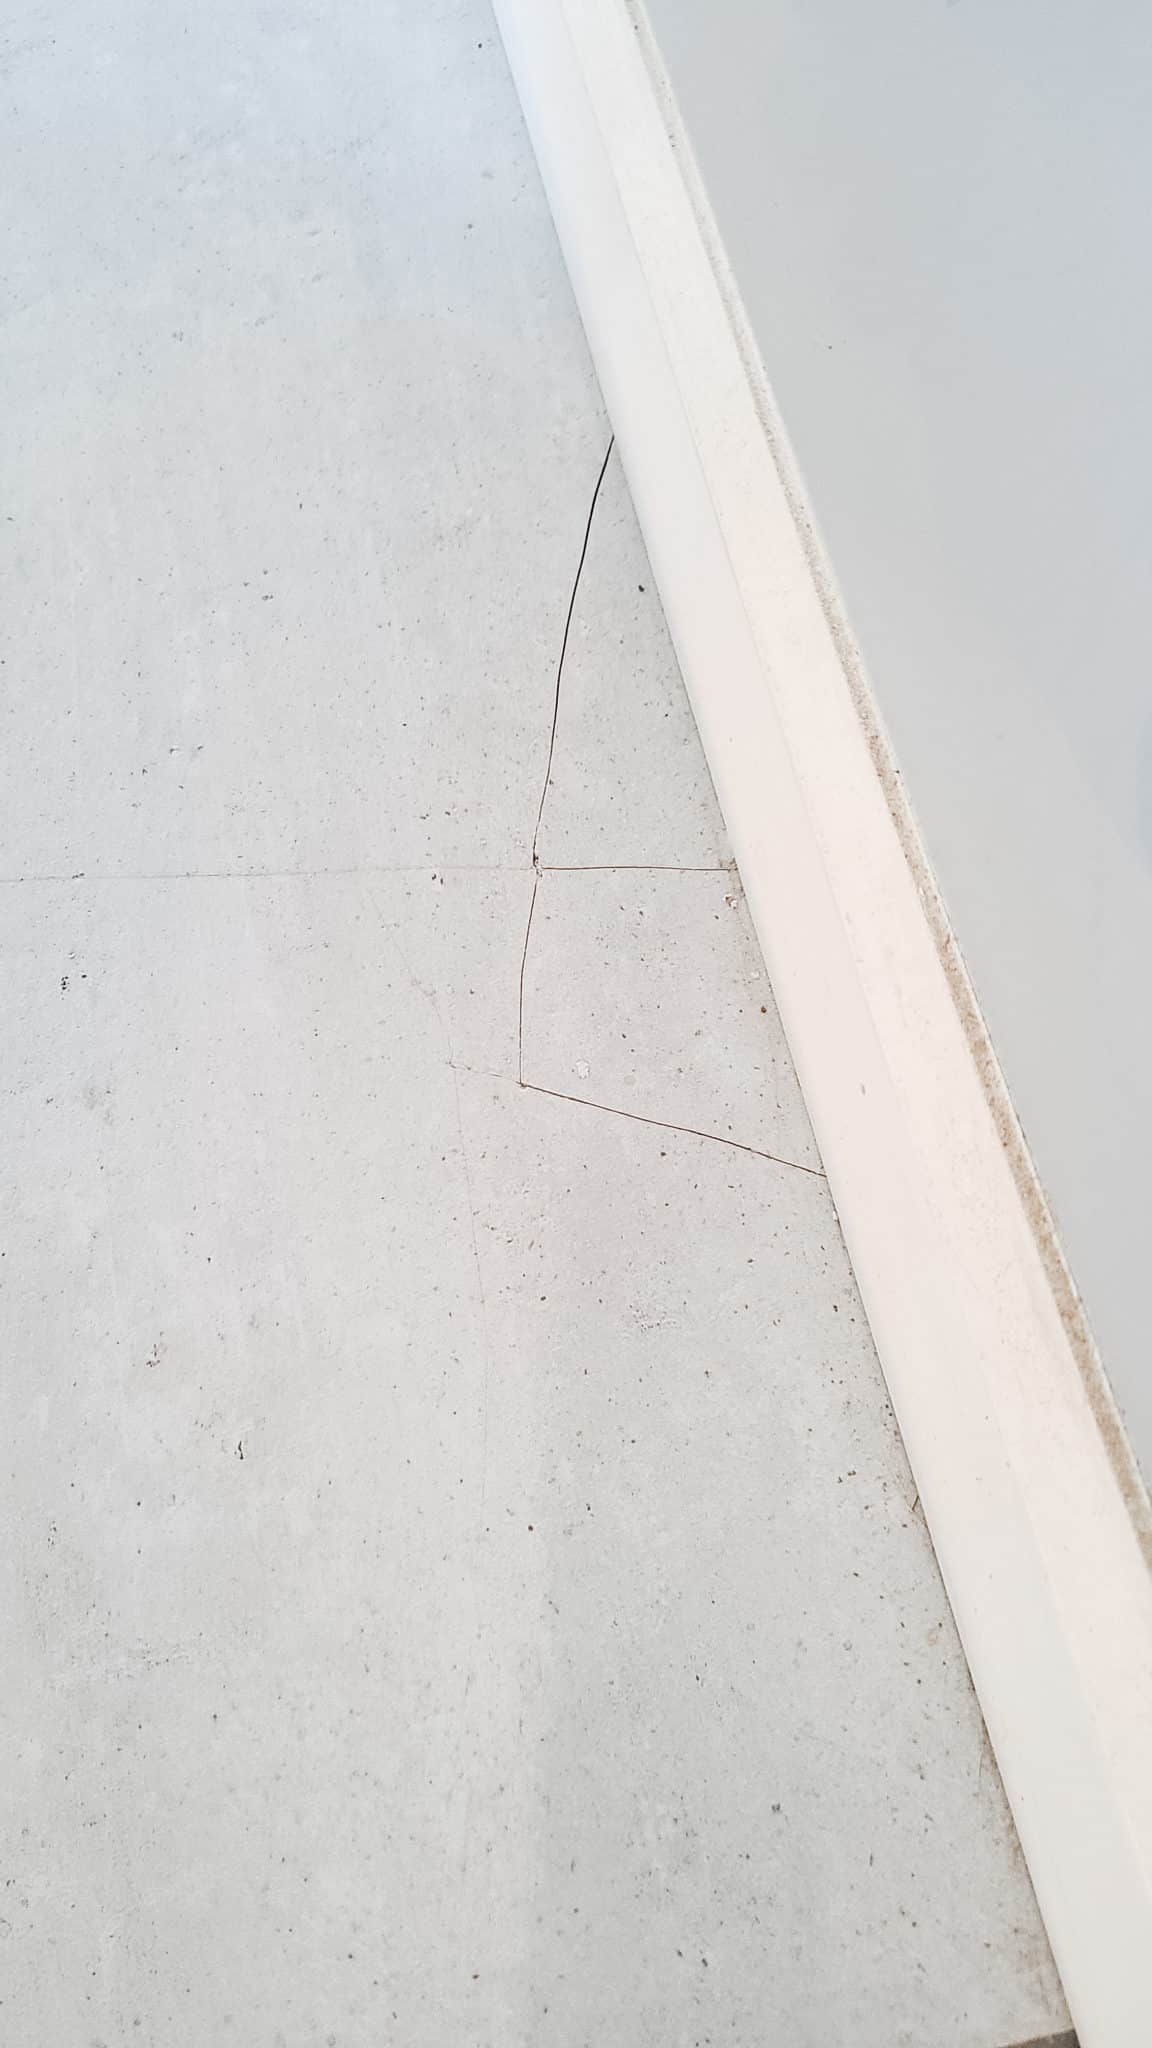
DIYer Tip – Put a mat or towel below where you’re installing the brackets. The brackets are heavy and can cause damage when dropped or if you accidentally drop your wrench while installing them… Sadly, we learned this the hard way and cracked a tile…still learning with every DIY project!
Adjusting Brackets
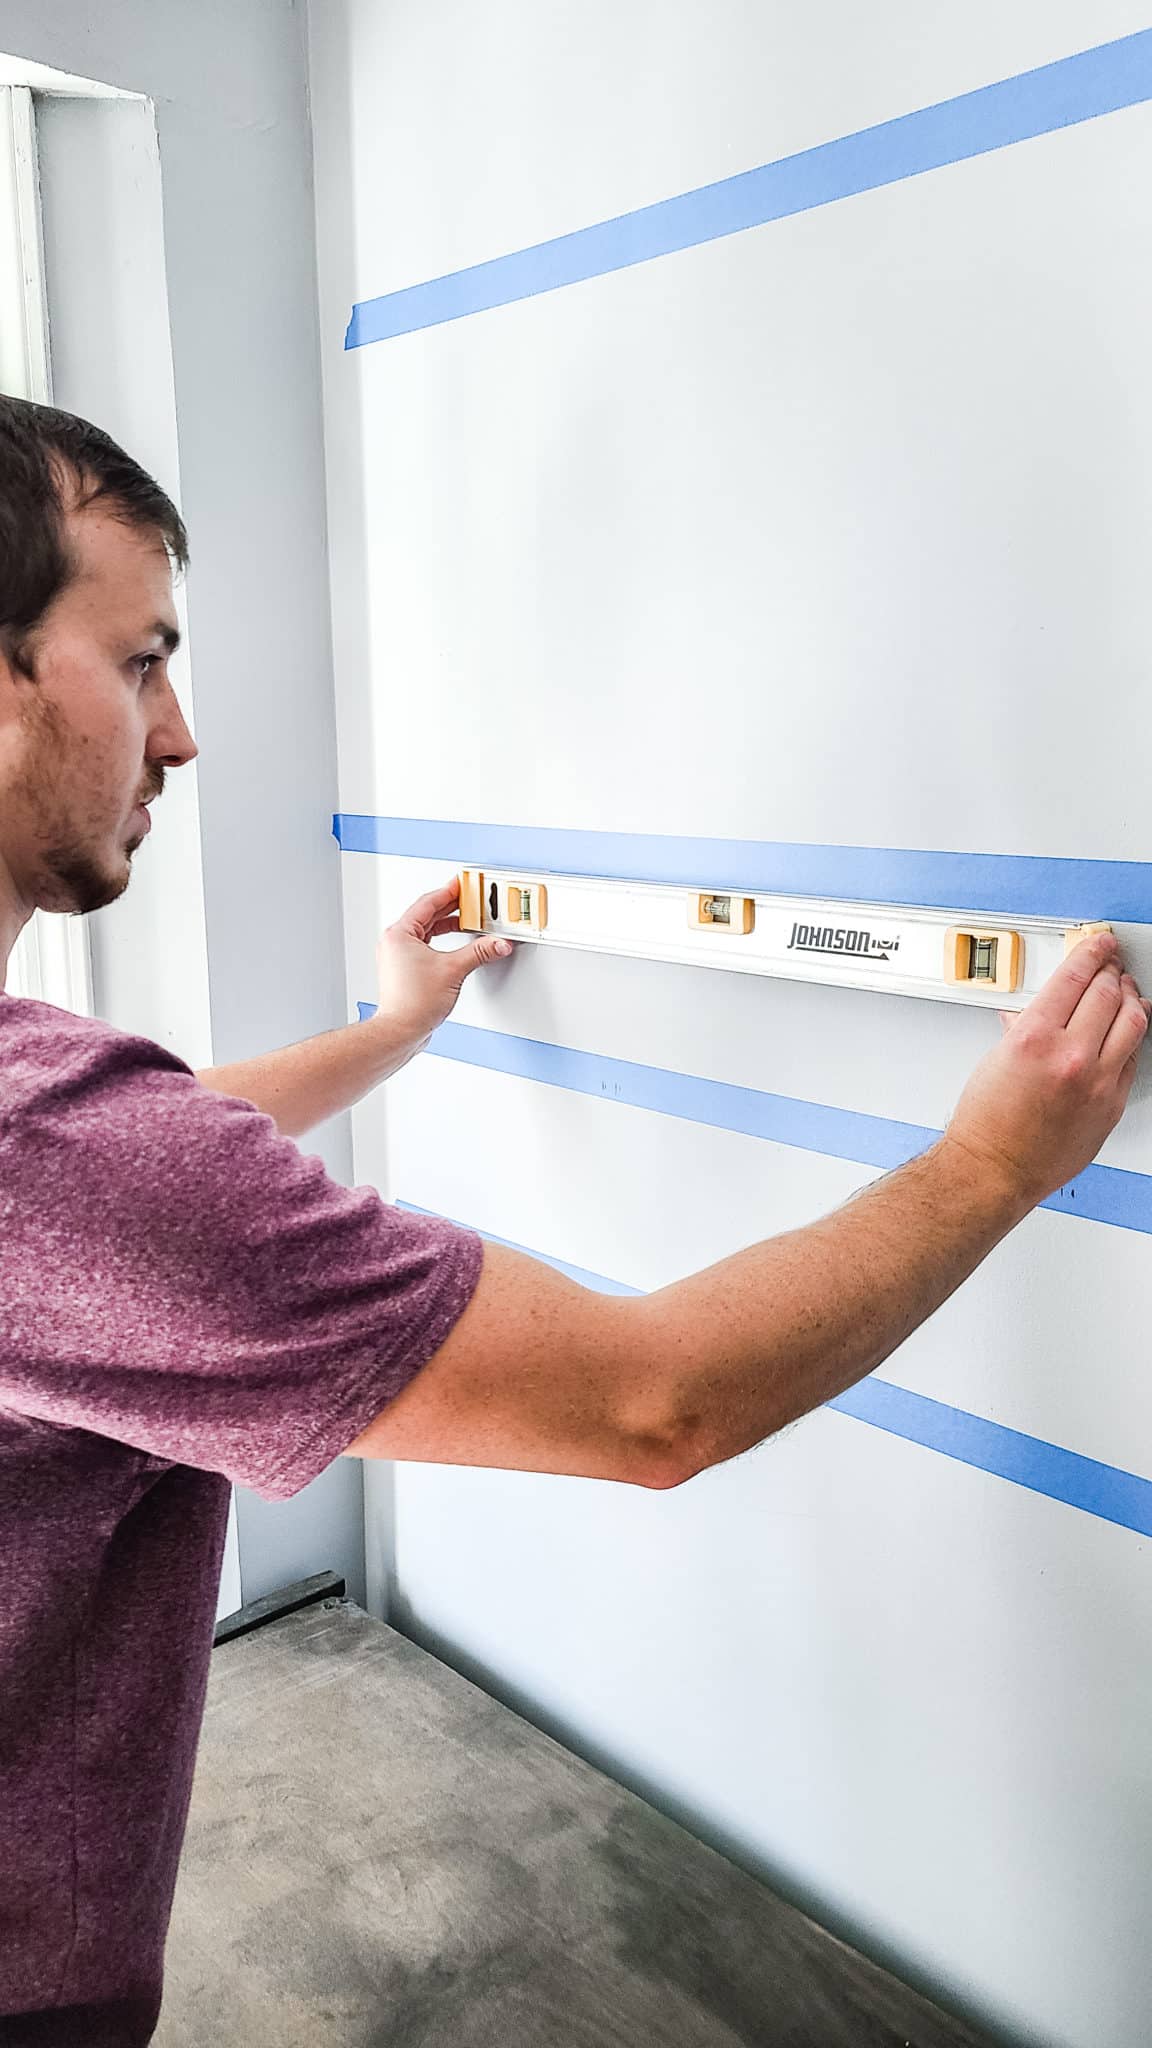
Next check to make sure your floating shelf brackets are level. Depending on how straight and accurate your drilling was, you may need to adjust them. The floating shelf bracket’s shaft is acentric to the threads. This means you can rotate the bracket in order to adjust the positioning.
- Test the brackets by placing a level on the brackets and pressing it up against the wall to ensure they are level at the point closest to the wall.
- Rotate them as necessary until they are level.
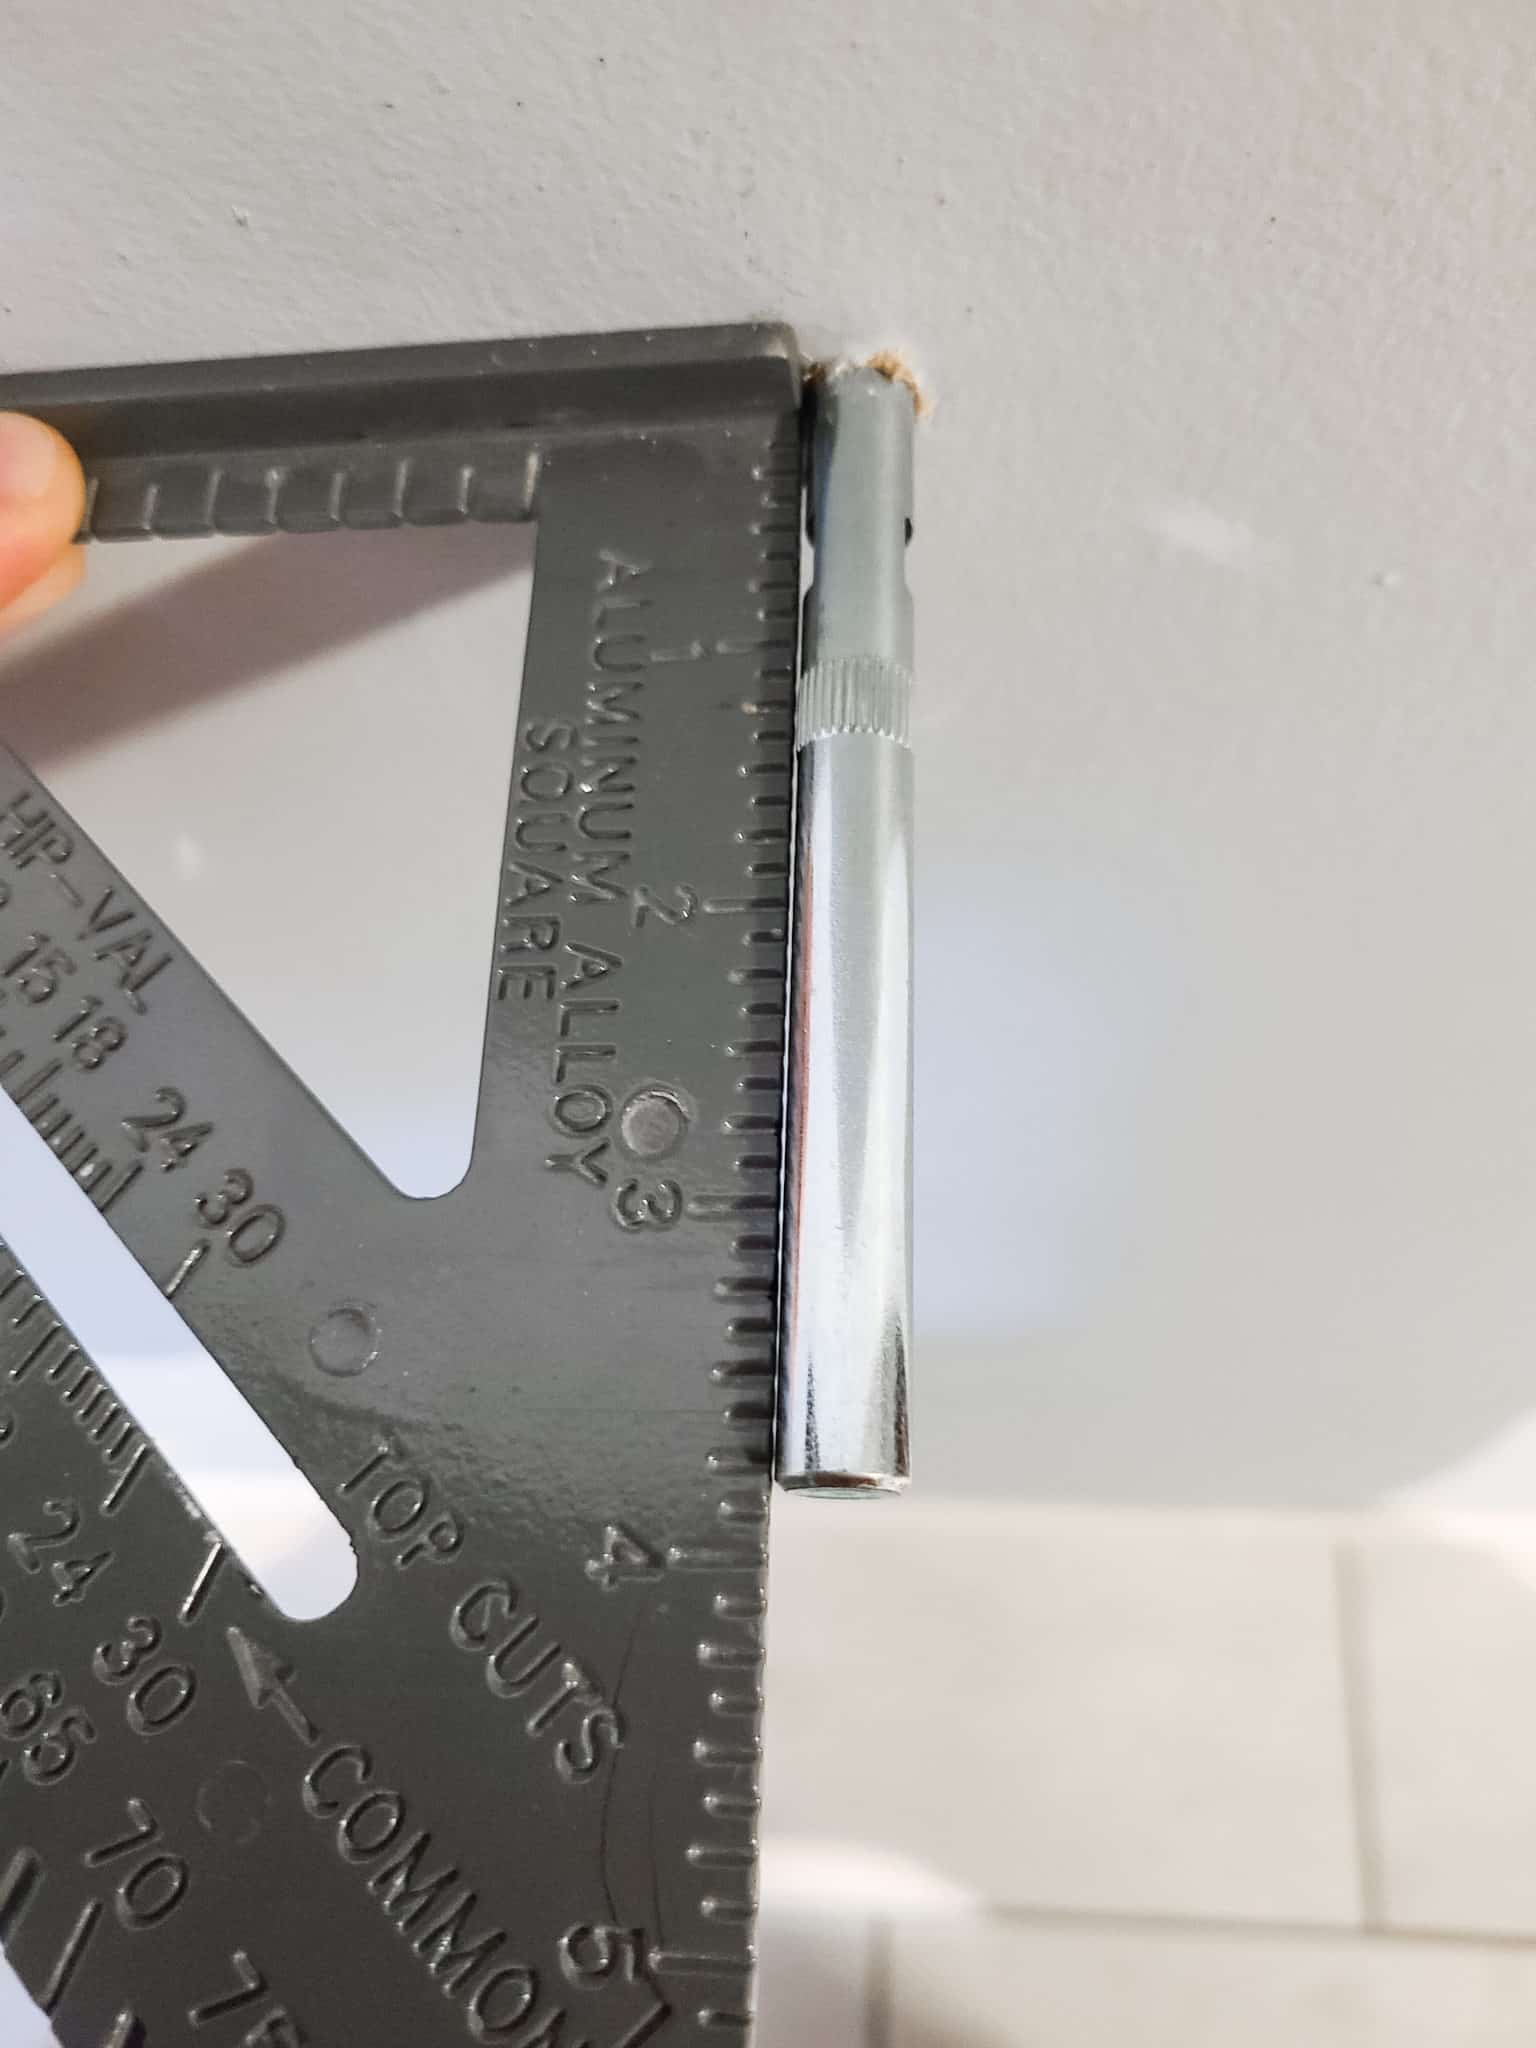
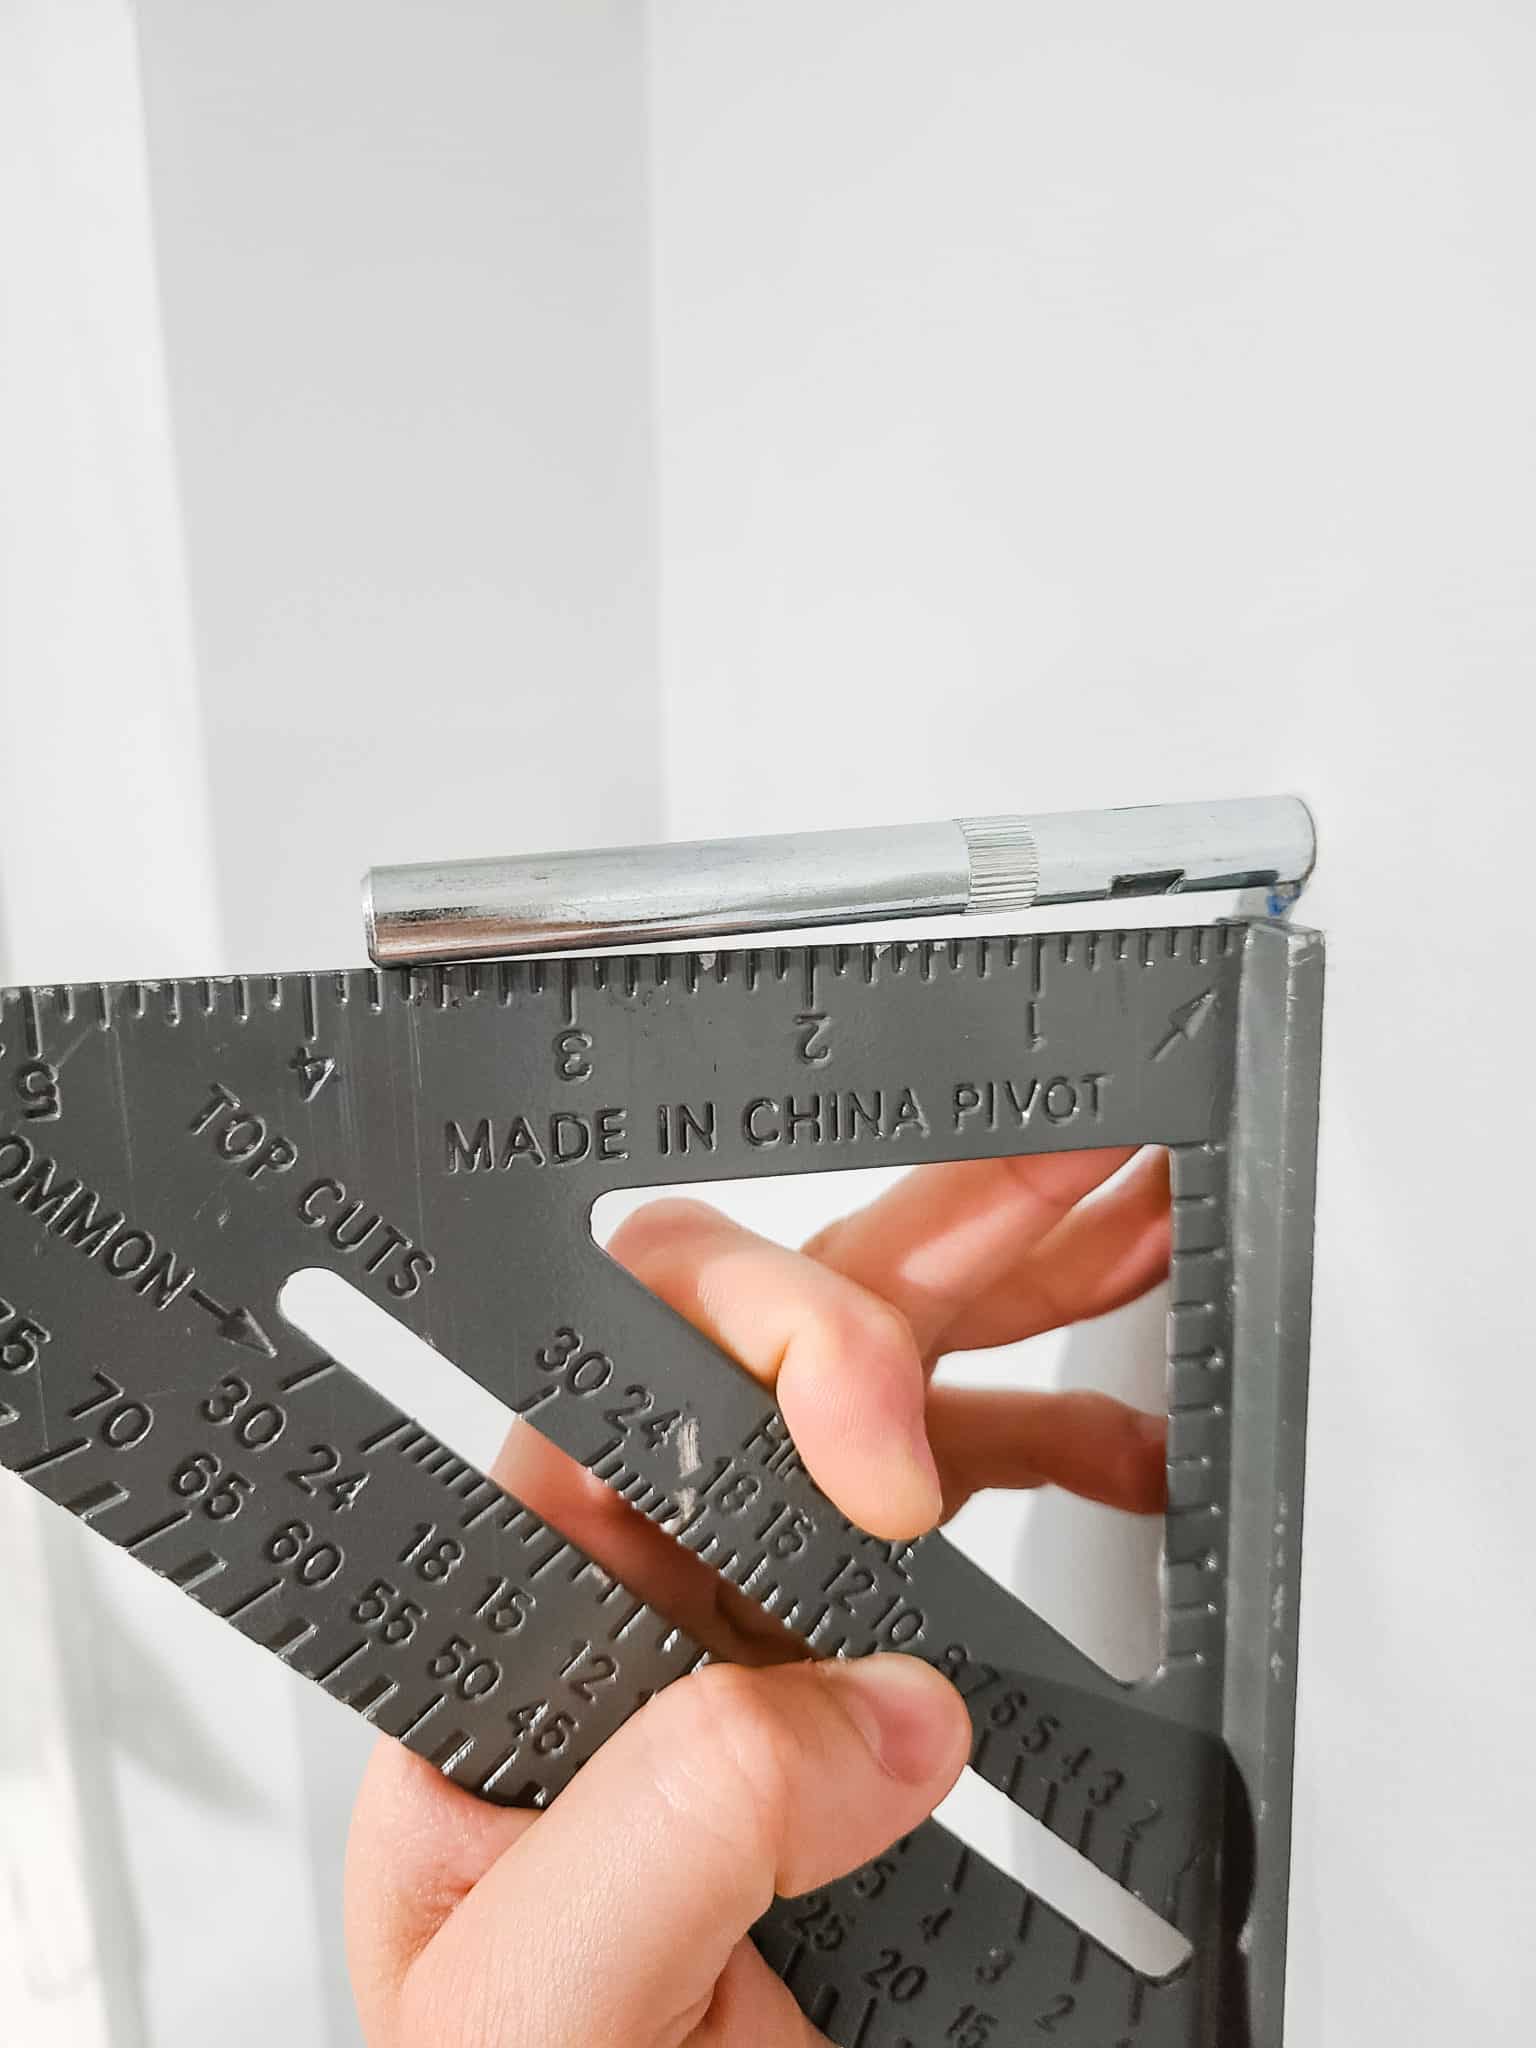
- Once level, check the brackets are perpendicular to the wall. If you used a drill block earlier then they should be pretty close. If the brackets are off, use a rubber mallet and speed square to adjust them as needed. A few good taps will flex them into proper alignment.

Step 8: Drill Holes For Brackets
Start by marking the positions of the brackets on the boards. Do this by transferring the measurements from earlier onto the back side of the boards. Keep in mind, if you had to rotate the brackets at all, the measurements could change by up to 1/16″ of an inch in either direction. Double check the measurements before drilling. Be sure to reference the top flat edge when placing their position into the thickness of the board in order to ensure the board will be level.
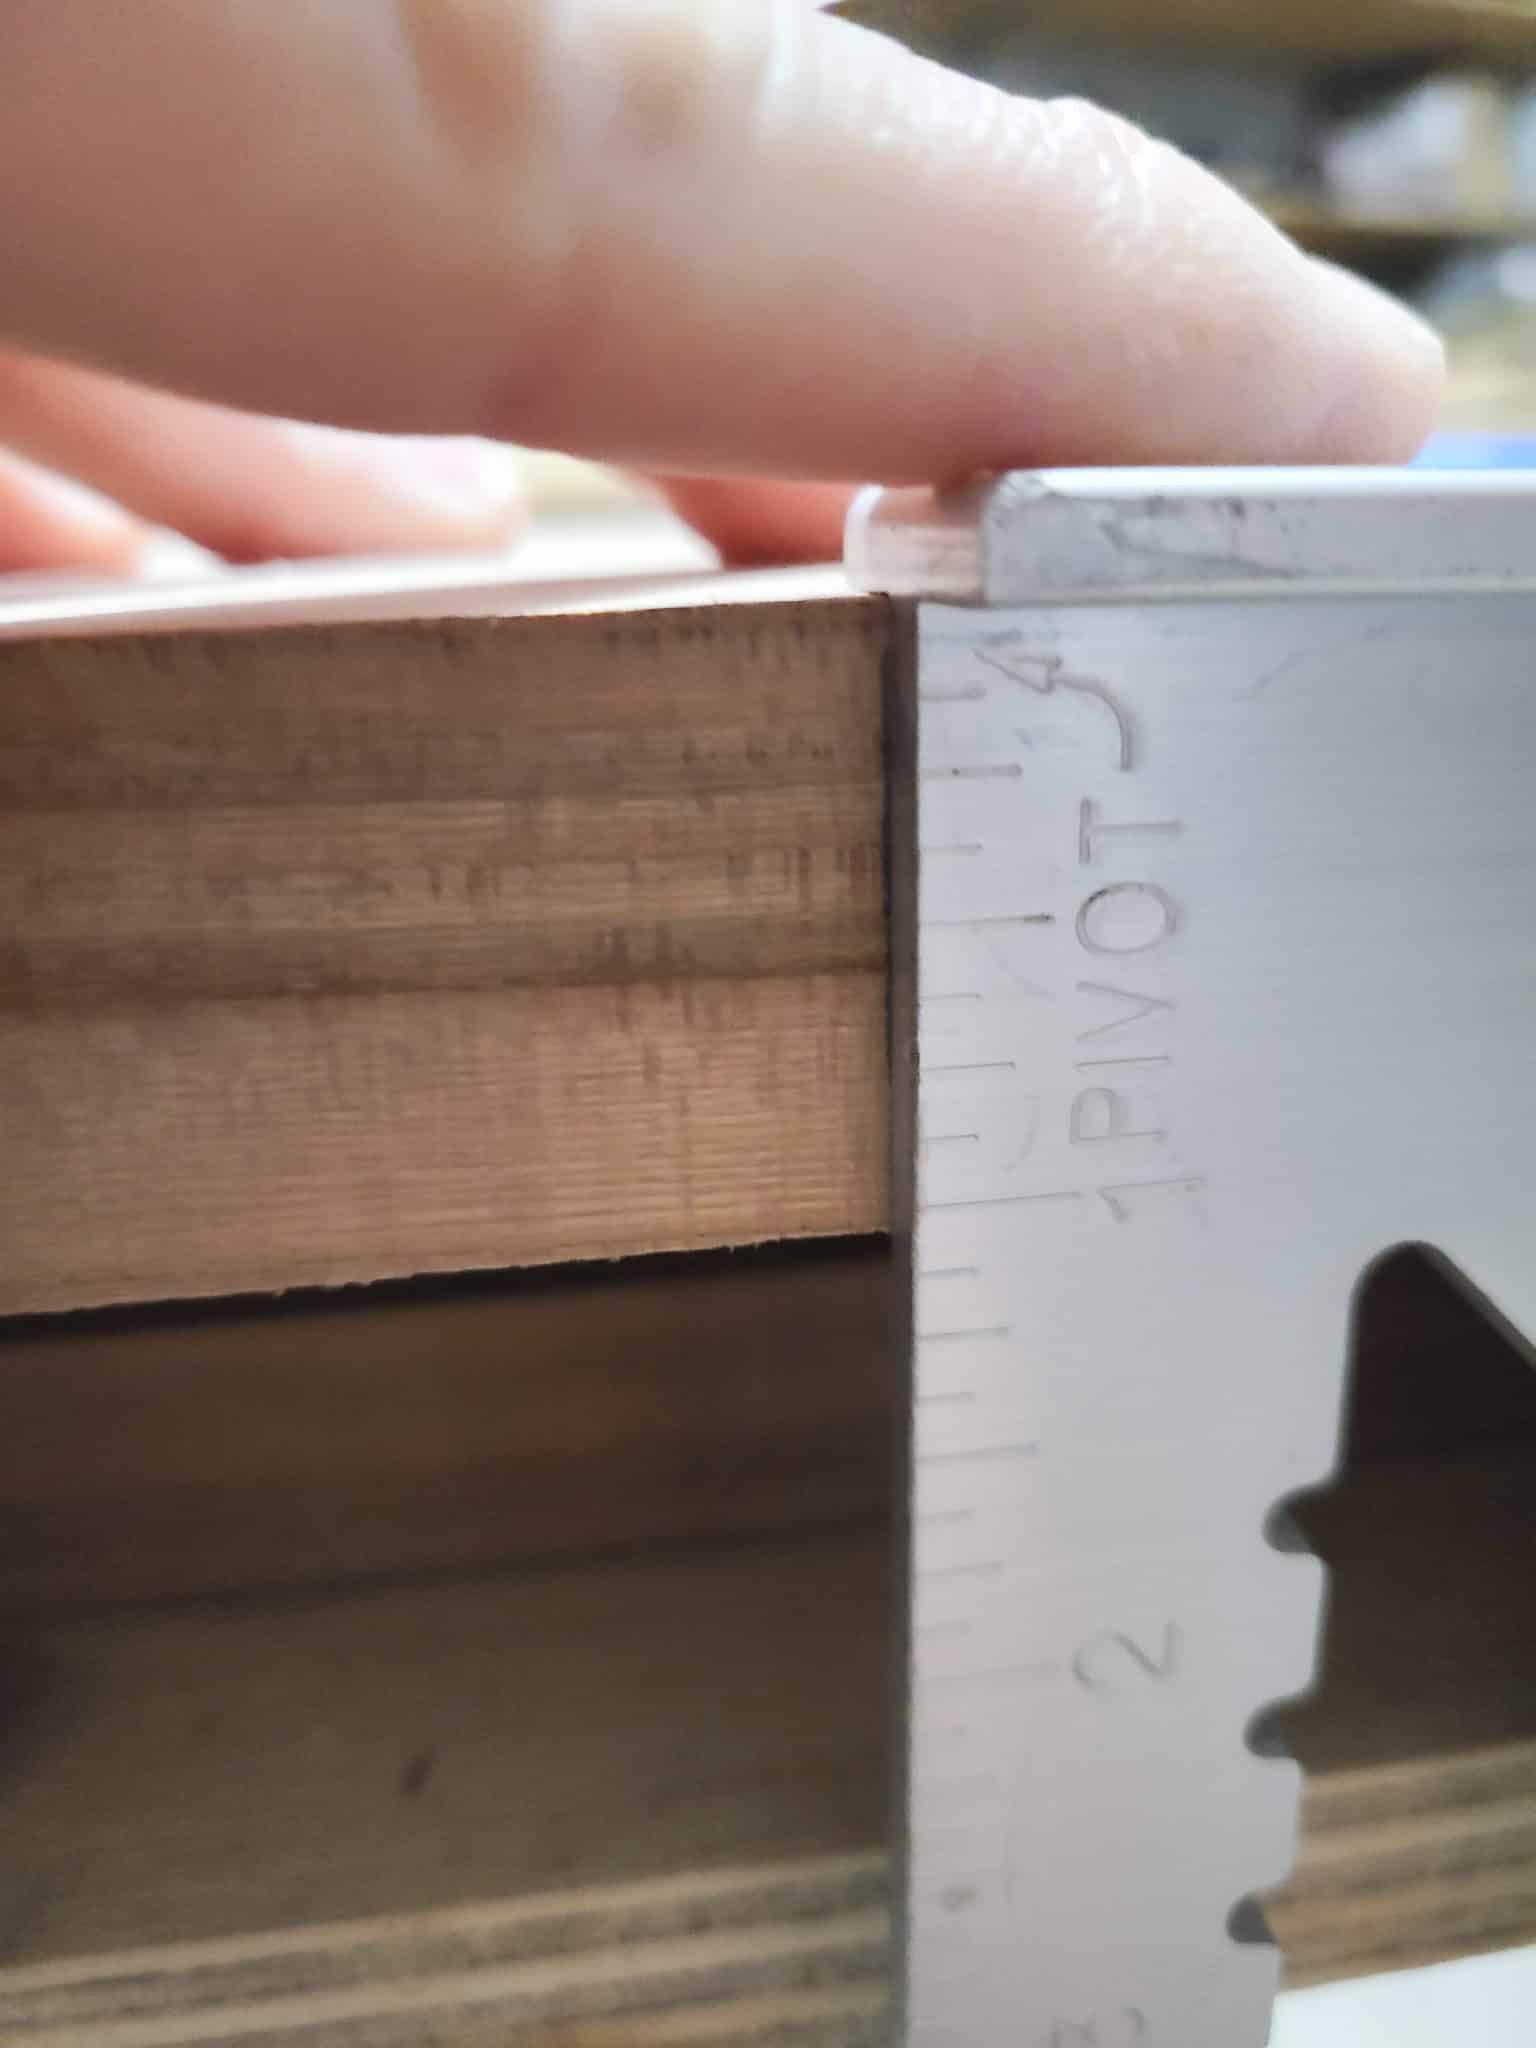
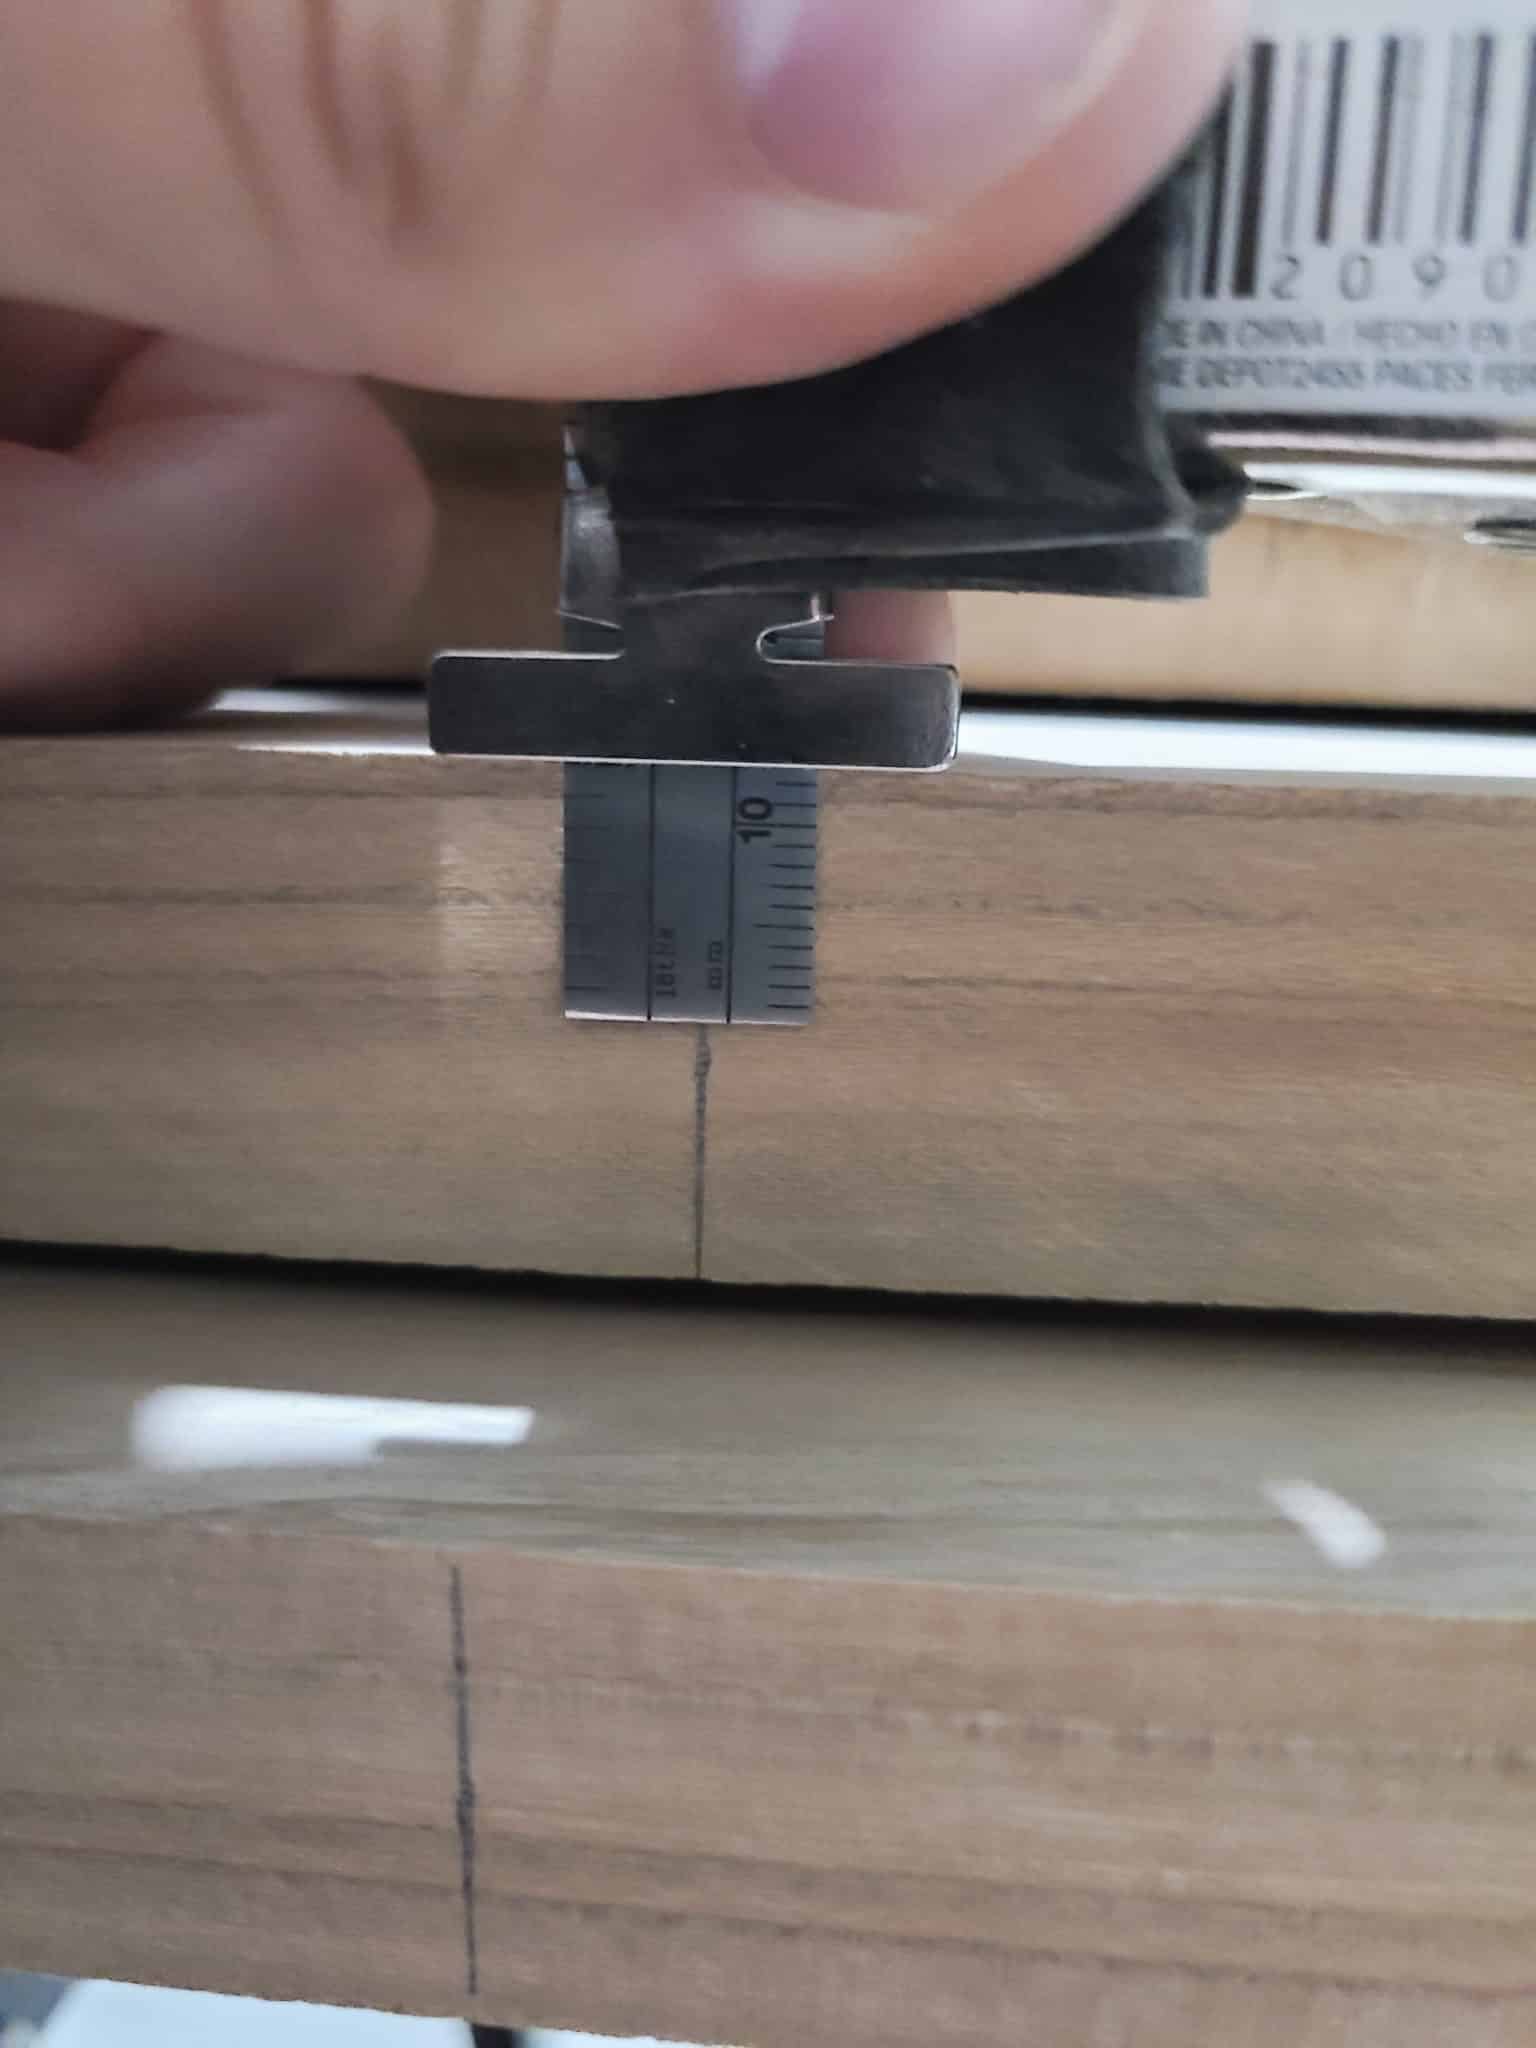
The manufacturer recommended 27/64″ holes for the brackets. However, we found that diameter to be a little loose. A 13/32” diameter was better to get the knurl to bite into the wood and engage the bracket tightly. Slowly work your way up the sizes and check the bracket each time until you find a size that feels good to you. Some drill bits are more accurate than others.
If you have a thinner board like we do, then drilling straight is critical. You don’t want to pop the drill out the top or bottom of the board. Clamp down the board so it doesn’t shift as you drill. We highly recommend using a drill block to ensure you drill straight perpendicular holes.
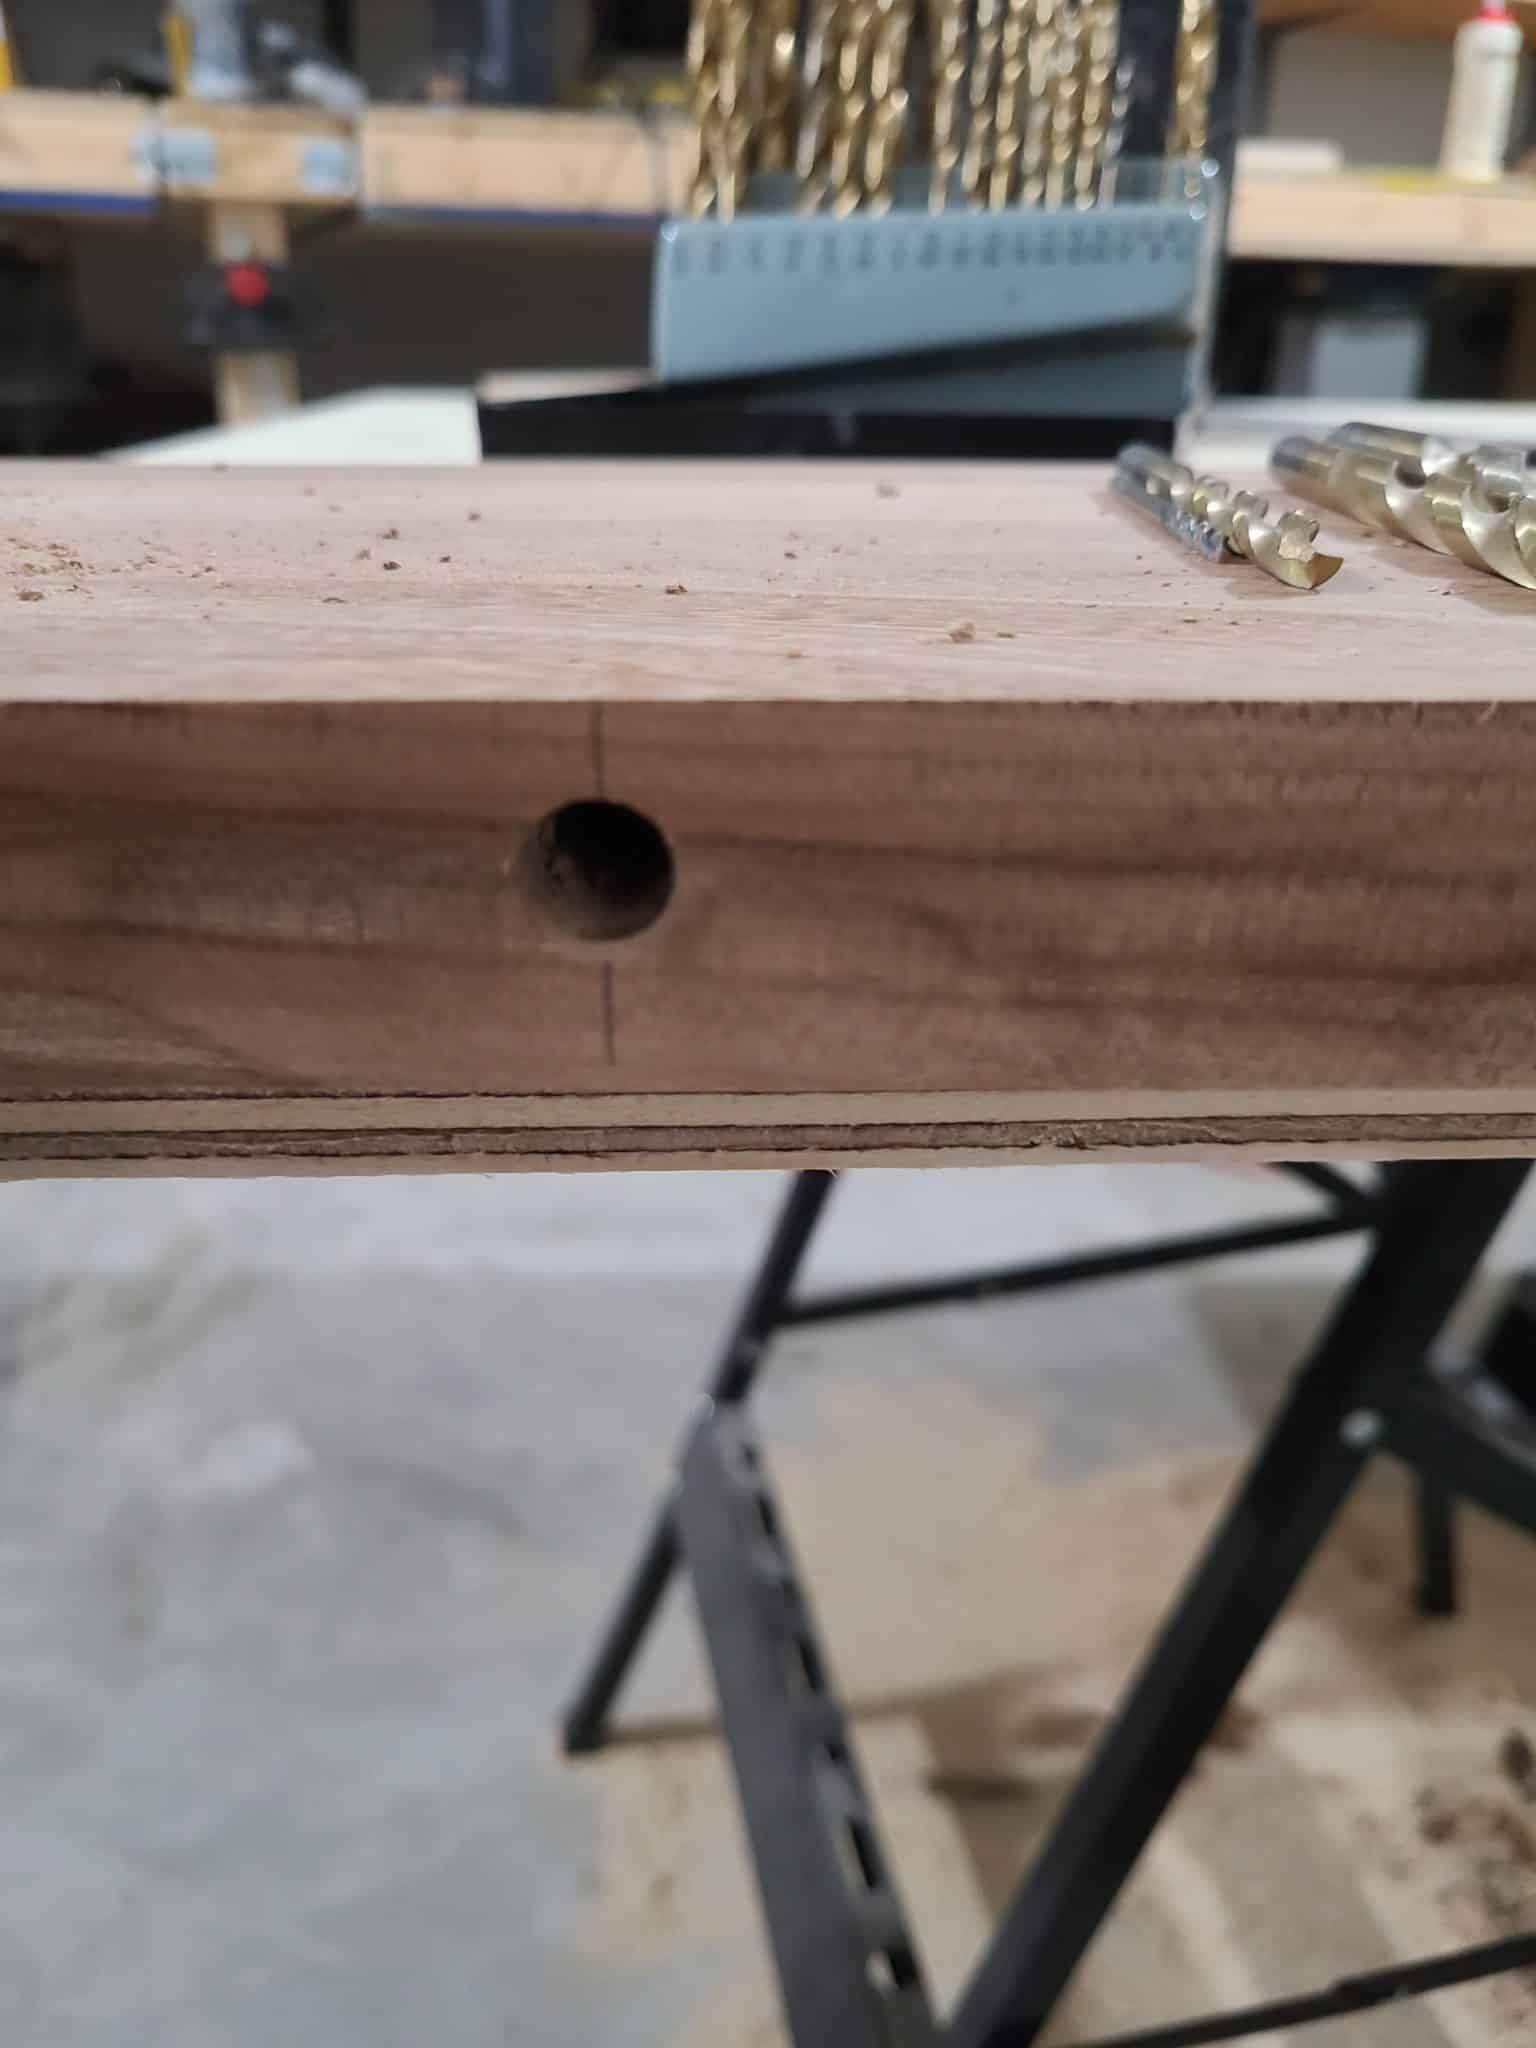
Also, mark the correct depth you want to go using a piece of masking tape on your drill as a visual of when to stop. In our drill’s case, it meant bottoming out the drill bit, so tape wasn’t needed as a visual stop.
Drilling the Holes
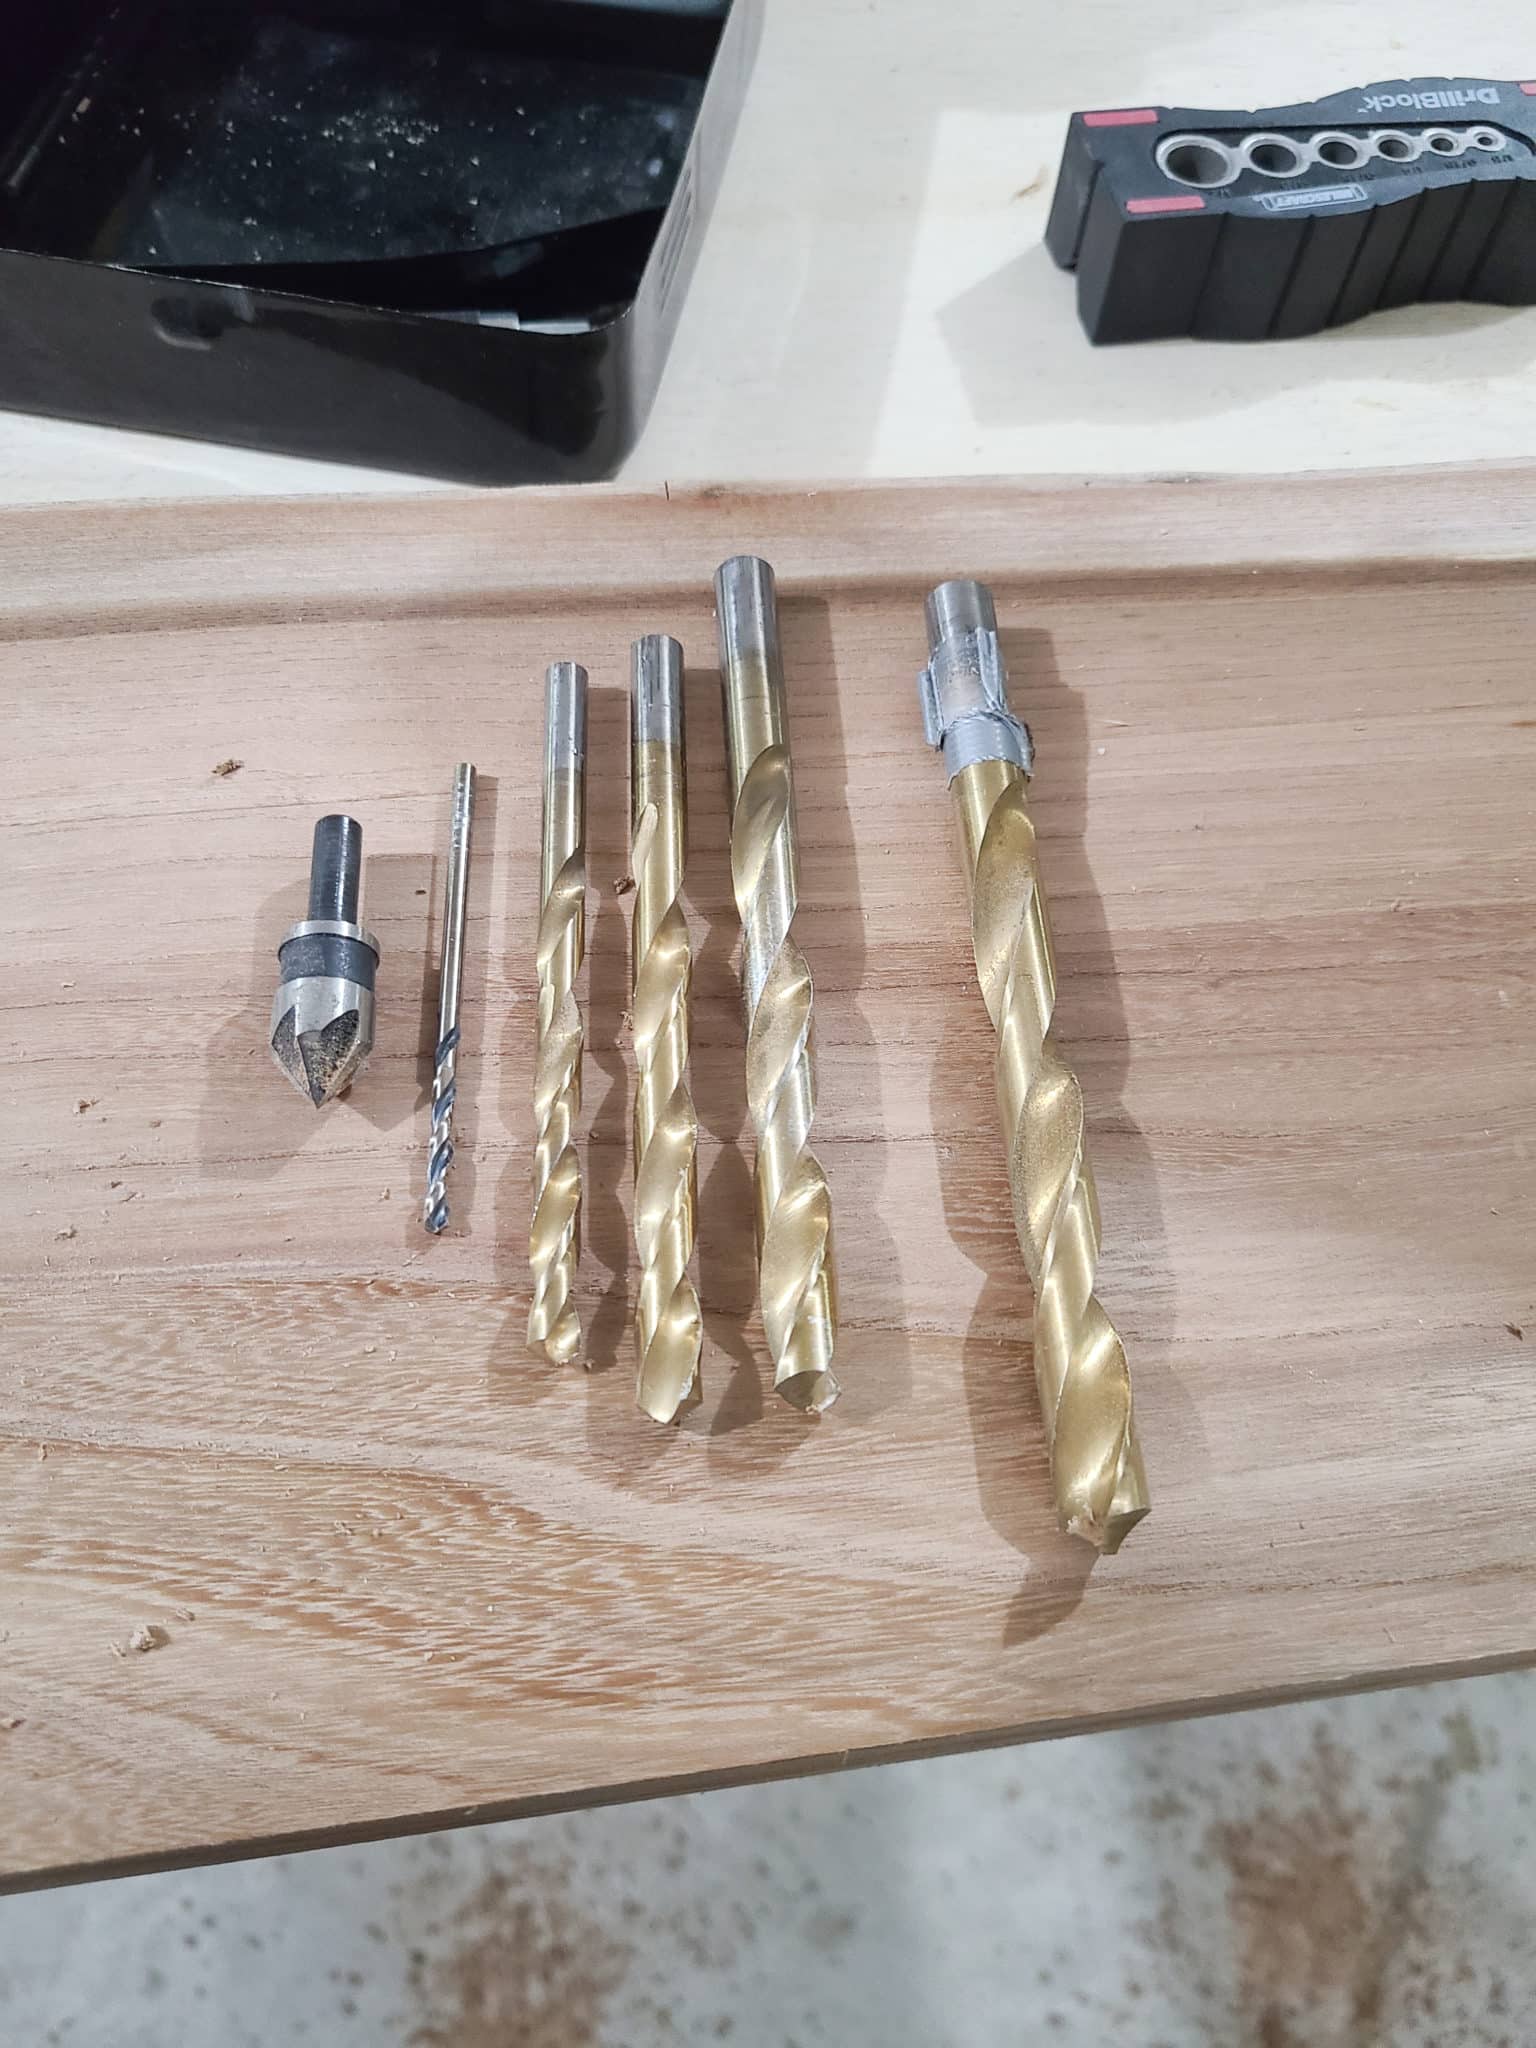
- Punch the center point with a screw tip or center punch in order to make sure your drill bit doesn’t walk, then drill each bracket location for each of the floating shelves.
- Use the drill block by incrementally increasing drill bit size to keep it from walking. Start with ⅛” drill bit and work your way up in ⅛” increments until the 13/32” diameter.
- Then go double-check they all align with the brackets you installed. Make any adjustments needed.
Step 9: Sand All The Shelf Boards
To keep the live edge look, you will have to sand the one edge by hand starting with an 80 grit sandpaper and working your way down to 180 grit.


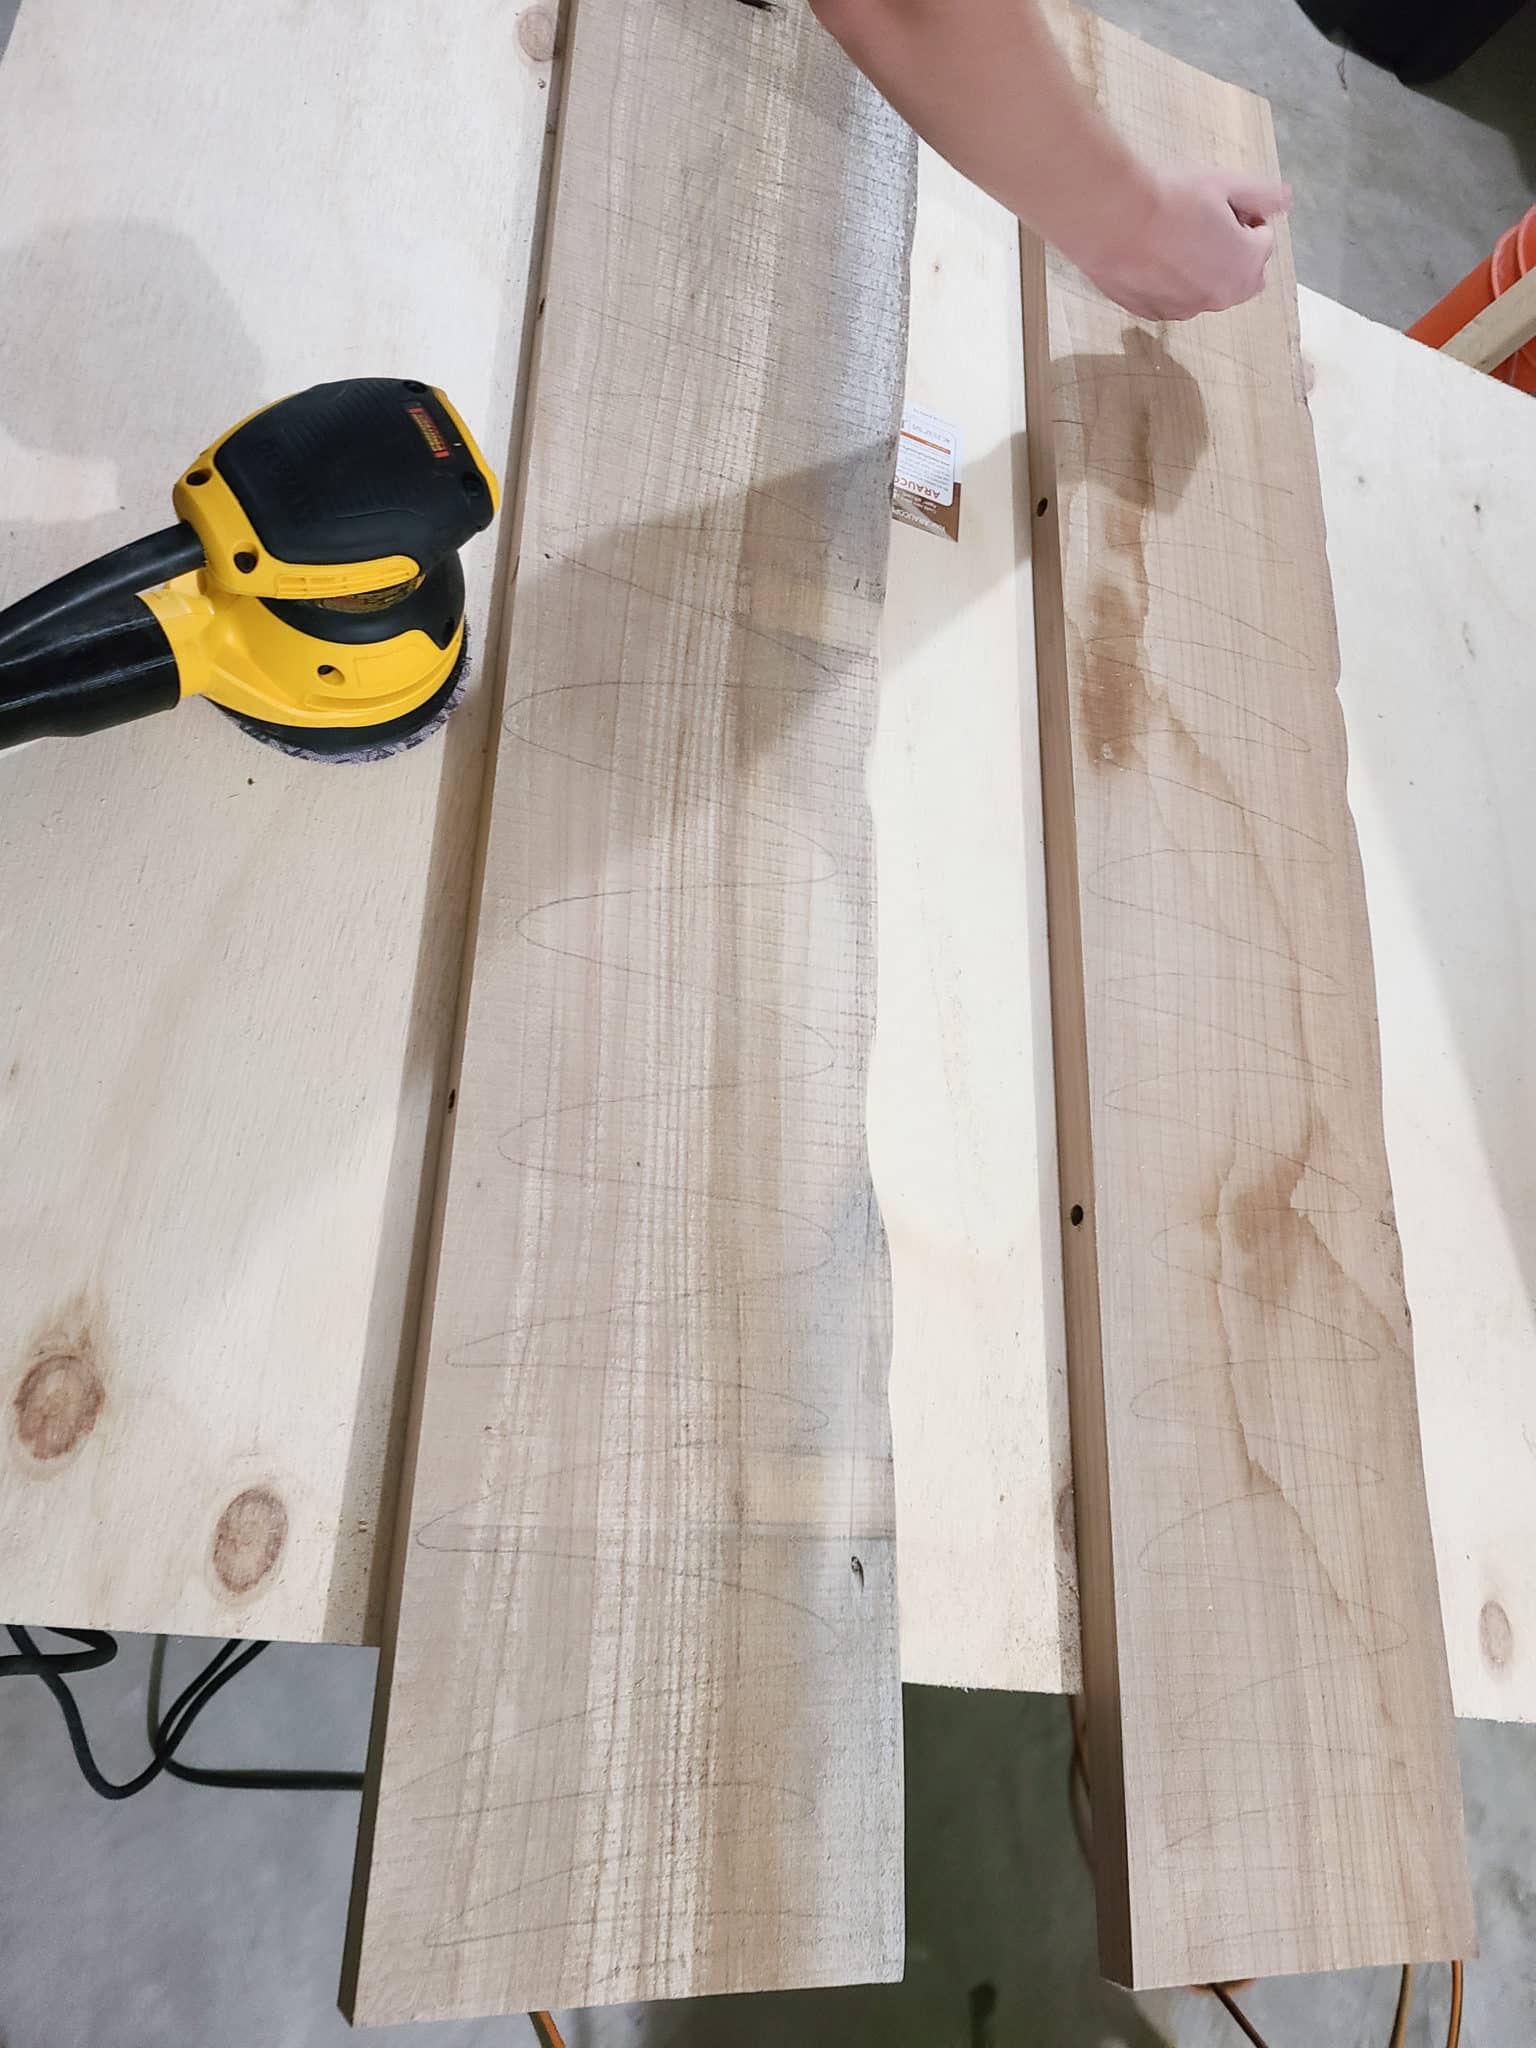
You can sand it all by hand, but I promise you, you’ll be exhausted! For the rest of the floating shelf, use a random orbital sander starting with an 80 grit sandpaper. Sand thoroughly removing any water stains, major divots, sticker residue, and imperfections.
The first round of sanding always takes the longest to get out all the imperfections. It’s crucial to get out everything here because otherwise it will show up in your finish. The higher grits will only smooth and get out minor imperfections.
DIY-er Tip – Lightly draw squiggles all along the board. It helps you tell where you have sanded already and where you need to finish sanding.
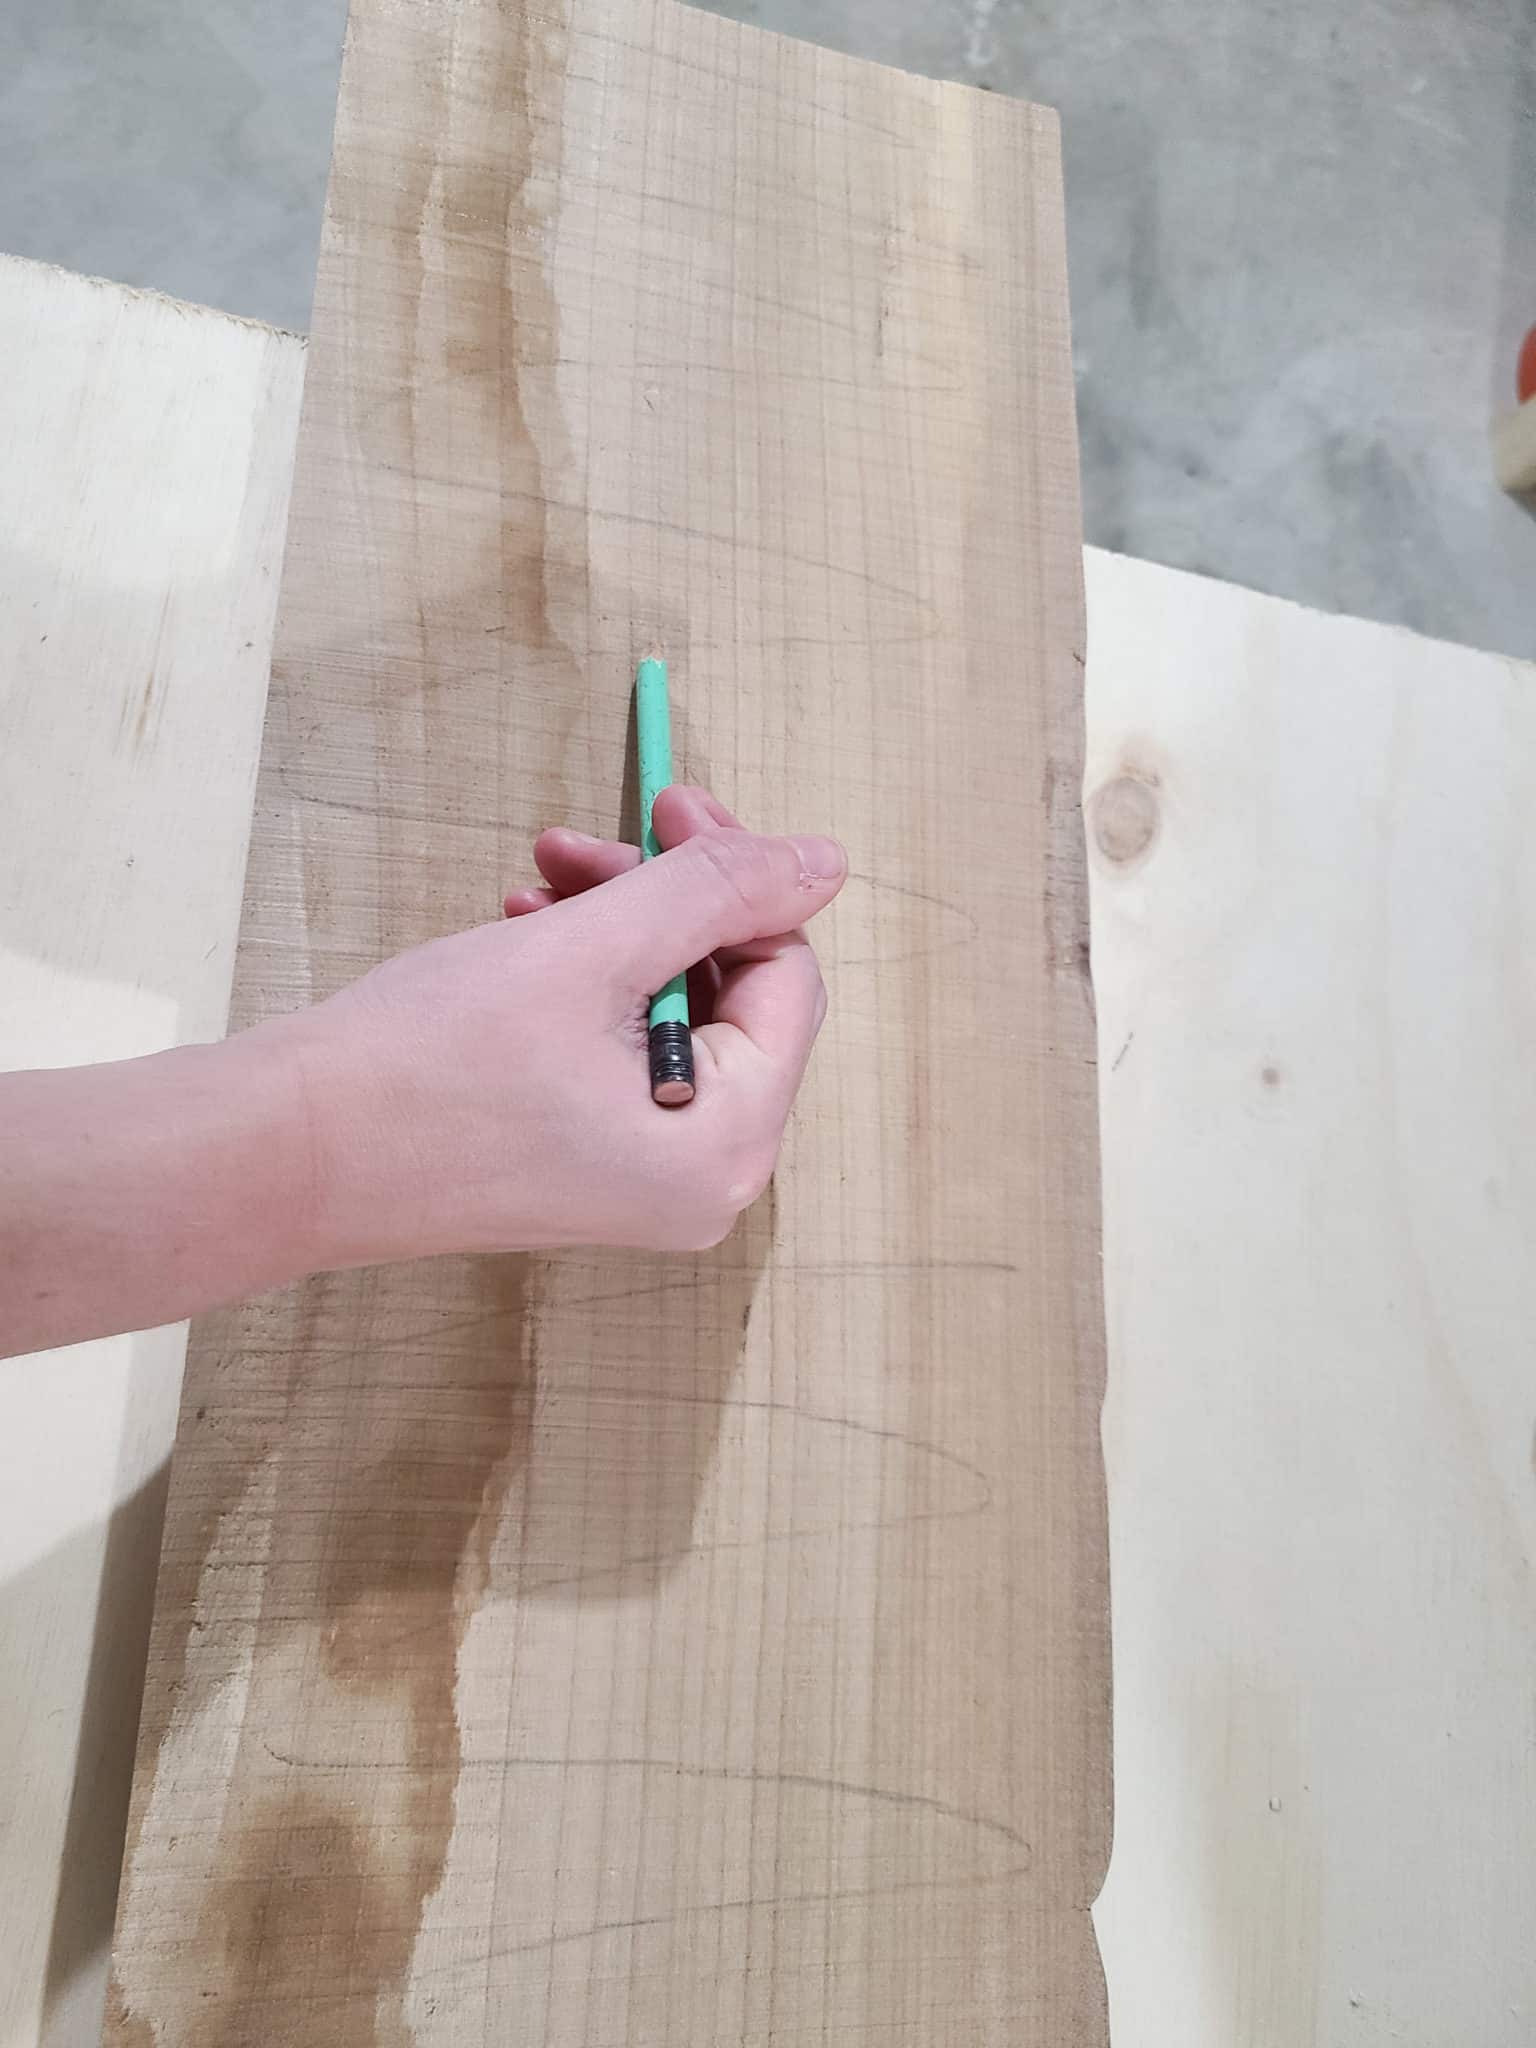
To check for imperfections that are hard to see, use a spray bottle with water to lightly spray the wood board between grits. This is called “popping” the wood. This will raise the grain to bring out more character as well and helping to relieve any water spots that might not take your finish evenly. This also helps you know where to sand more as you can often see imperfections you might not see when it’s dry, but will definitely once it’s been finished. Be sure to let the boards dry fully after water popping before moving on the the next grit.


Repeat this sanding process using a 120 and 180 grit sandpaper on all sides and for every board.
DIYer Tip – Sitting down with some great music or podcast to sand is a great trick we learned. You’ll get tired of standing!
Step 10: Clean The Boards
Once all the boards are sanded, make sure to give them a nice cleaning prior to finishing them. Wipe off all the dust and then do a final clean. With the hard wax finish we used, the manufacturer recommends cleaning with their proprietary wood cleaner, but mineral spirits work just fine. Wipe down the boards with the mineral spirits and point a fan at them. It’ll take 8+ hours to fully dry after wiping down.
Step 11: Apply The Finish
Because we wanted to keep the beautiful natural color and look of the live edge wood, we chose to use Rubio Monocoat Oil Plus 2C. It’s a little different from traditional stain and it is actually a hardwax oil wood protector that’s water and heat-resistant. It’s also a great choice for sustainable DIY as it’s a plant-based formula with 0% VOC emissions.
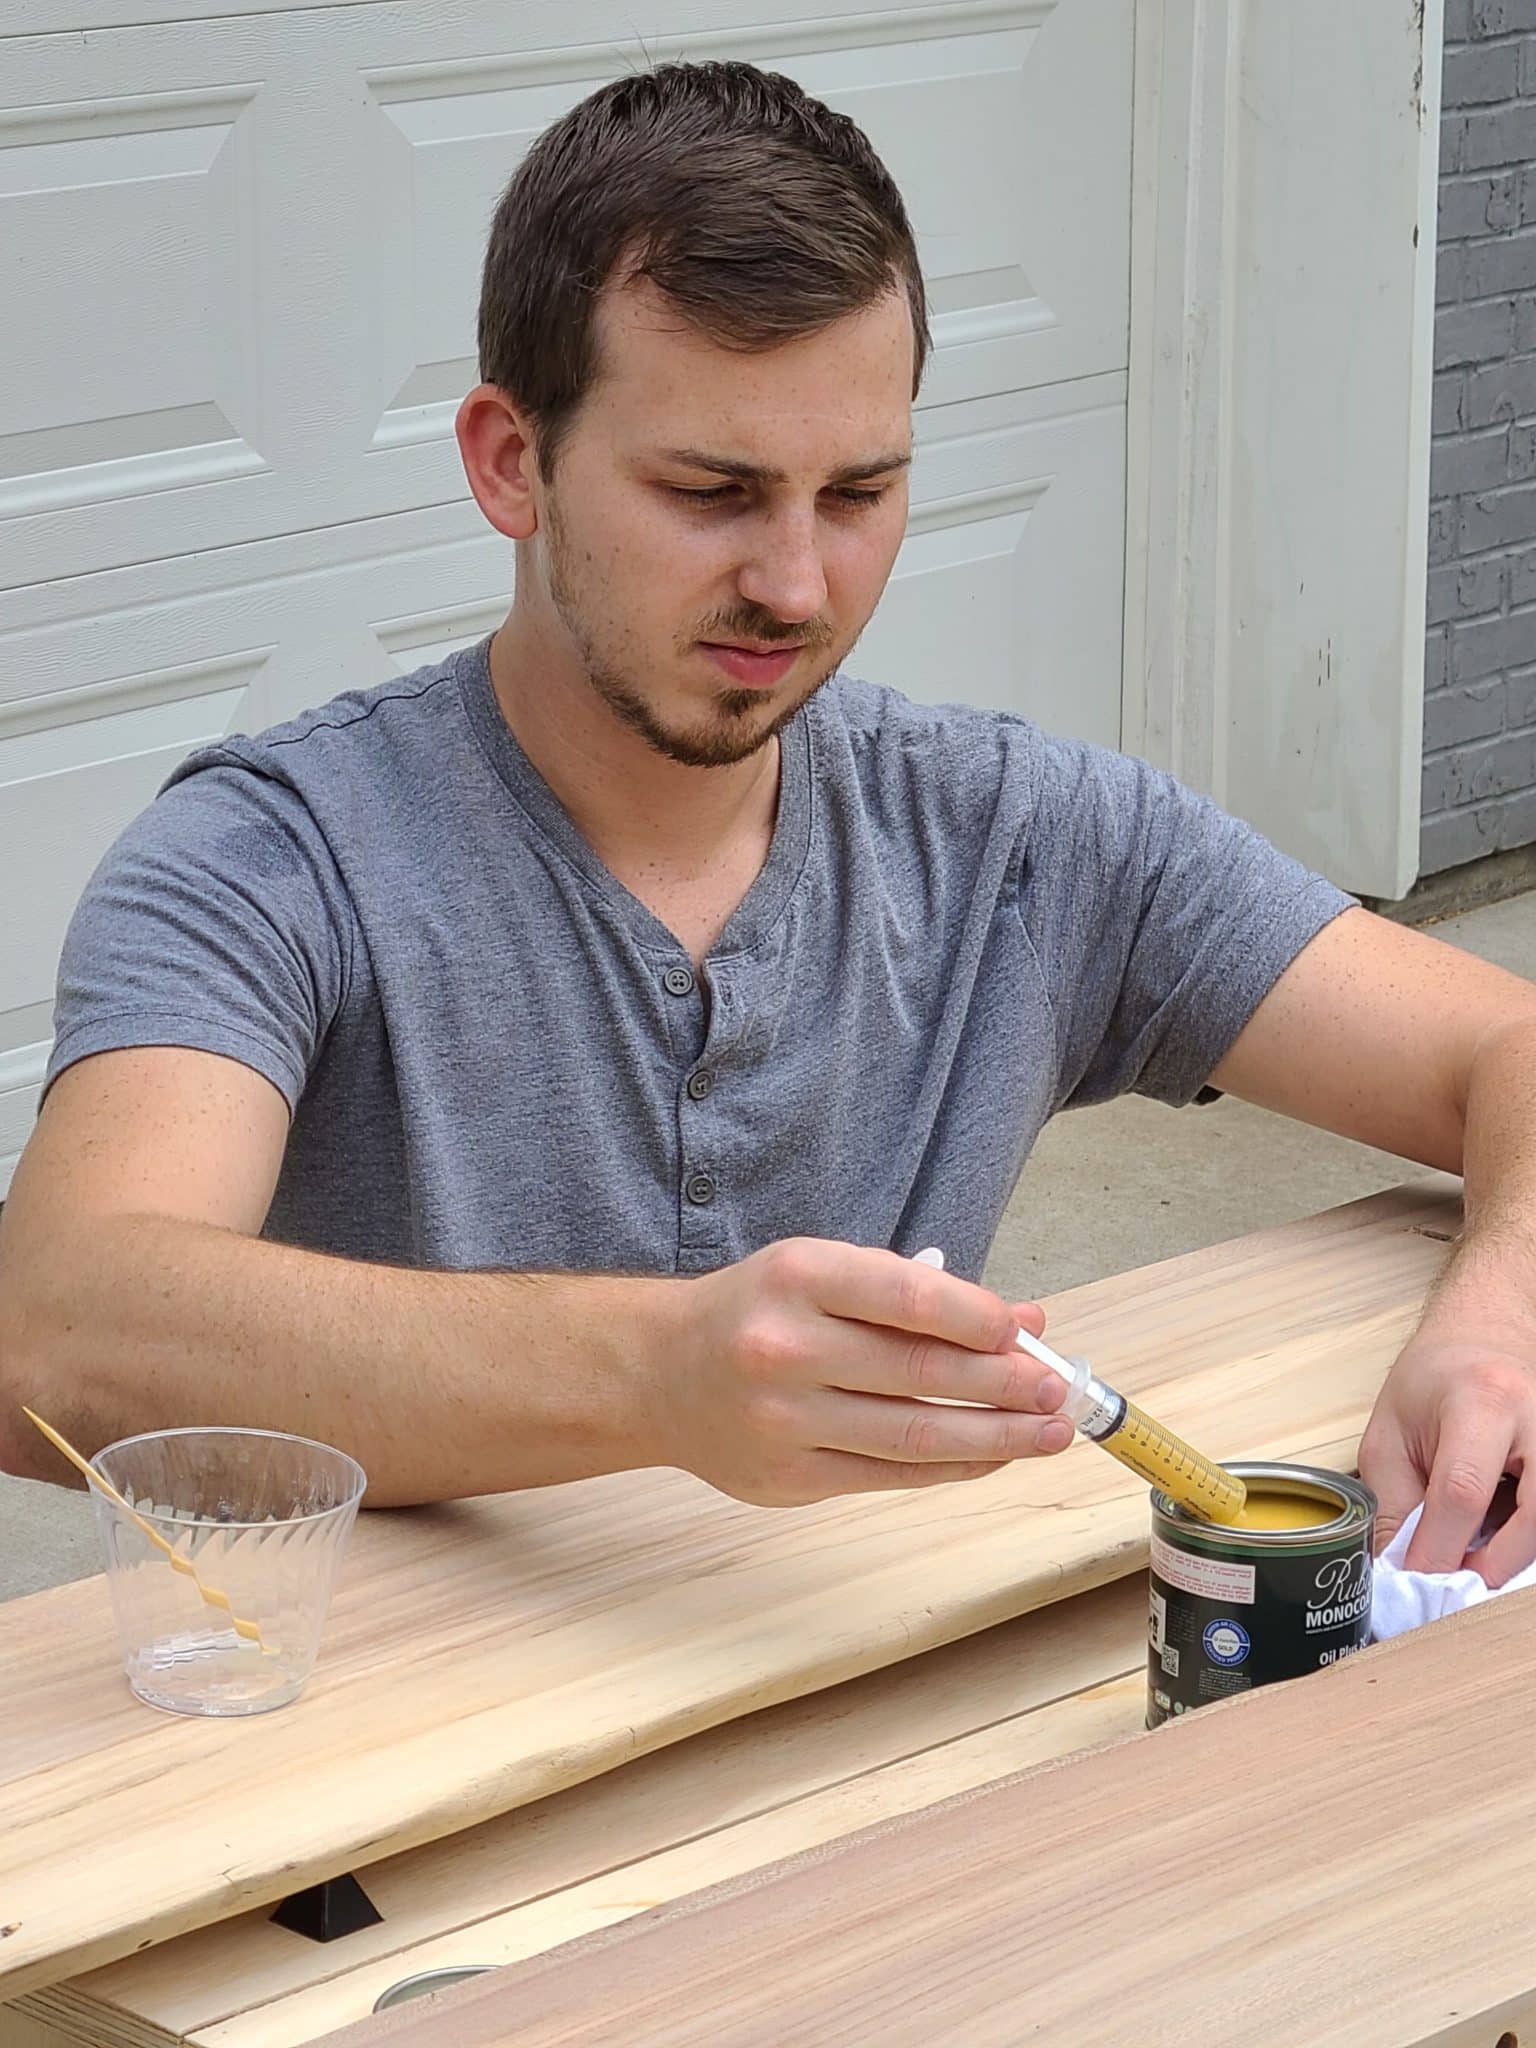
Applying Rubio Monocoat
Firstly, stir the Rubio’s oil and then mix it with the accelerator per the manufacturer’s ratio (ours was 3 to 1). Using a syringe here makes it much easier. Keep in mind that a 350 mL jar covers up to 180 sq ft of hardwood. For our 3 boards, we only need 1/10th of a container.
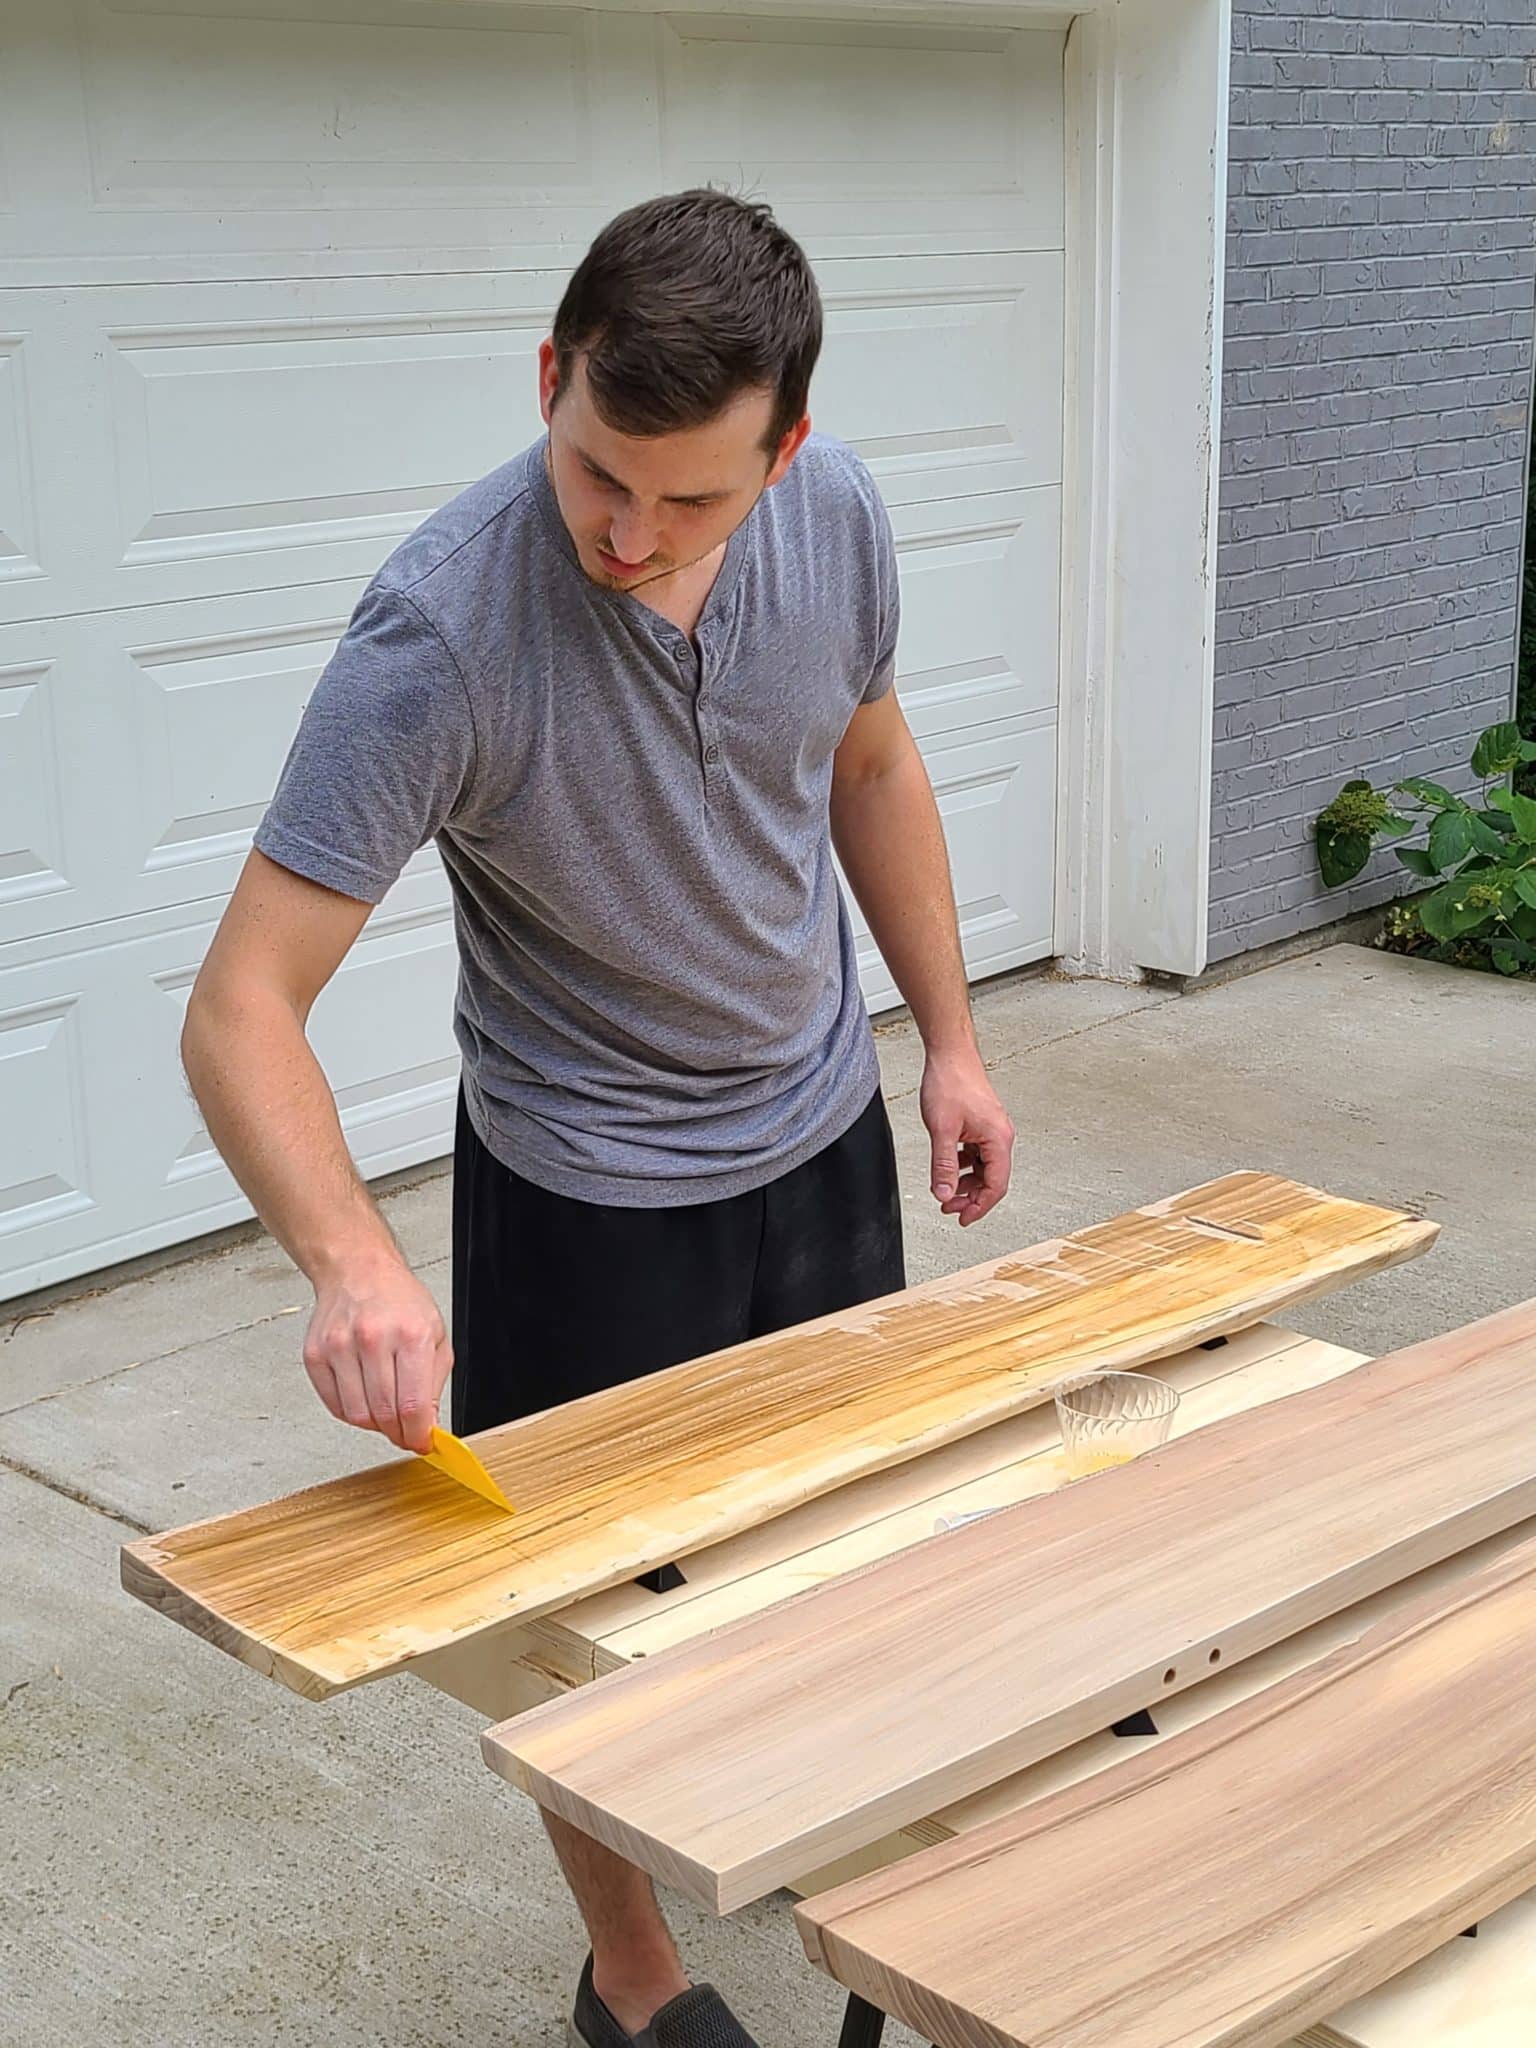
Then use the syringe to measure out and apply the needed amount along the board. Spread this out using the application blade all over the board. Don’t let the oil sit in one place too long.
Next, take either a drill with buffing pads or an orbital buffer and buff in the stain oil all over the board. It’s important to keep moving so that the oil buffs in evenly and doesn’t absorb too much in one area.
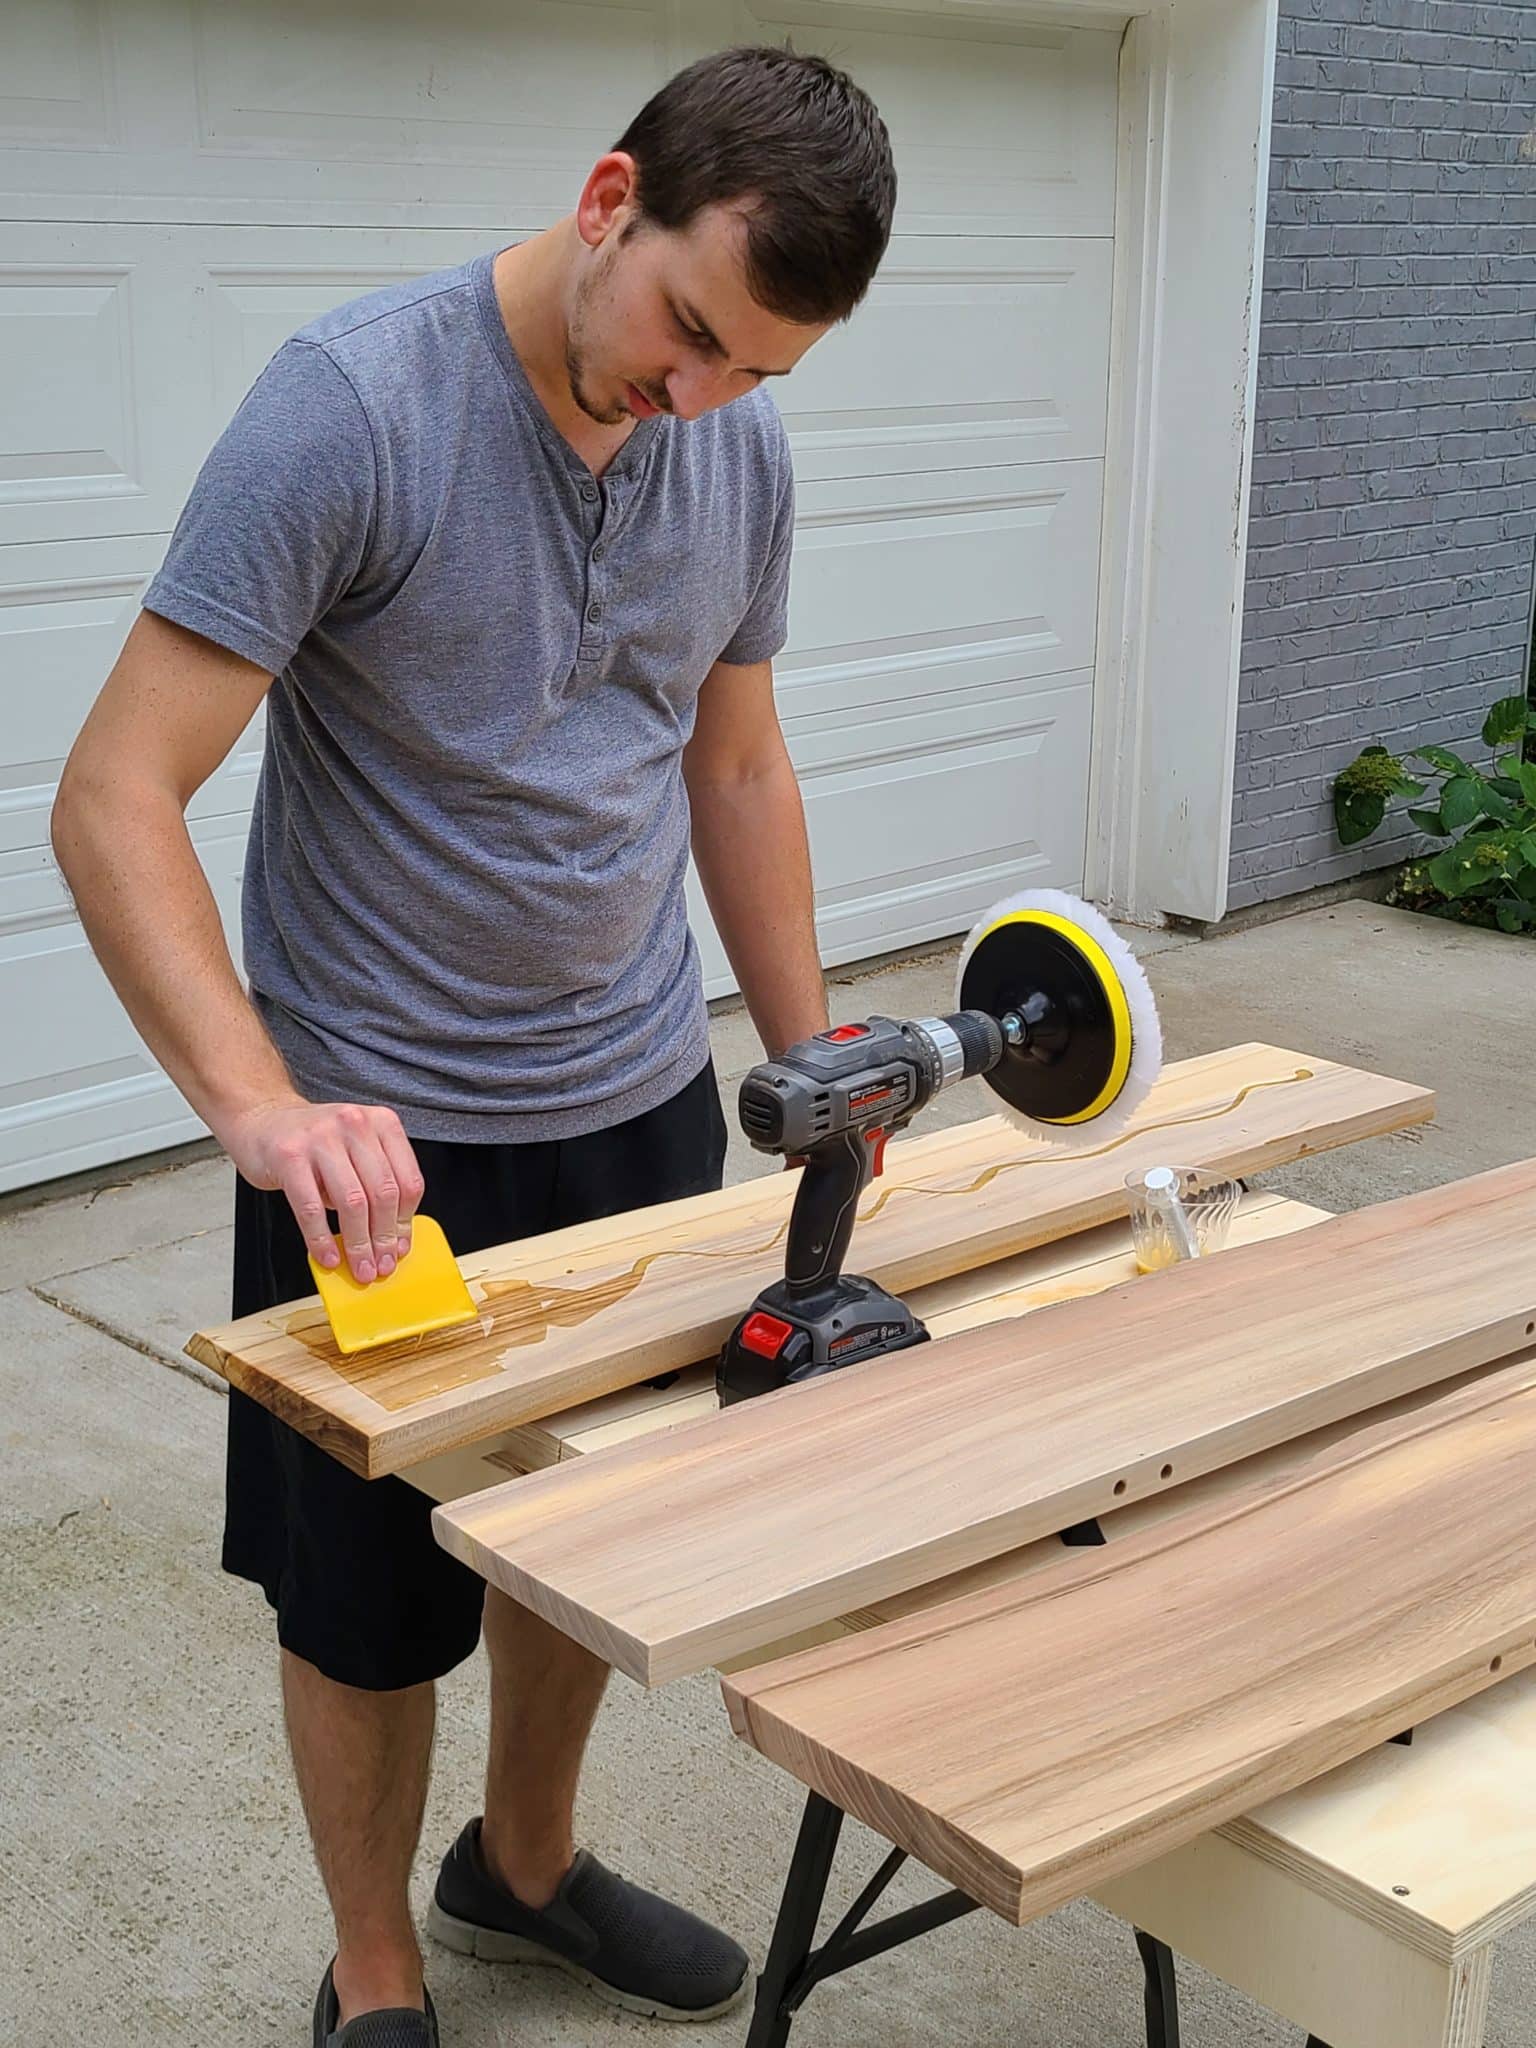
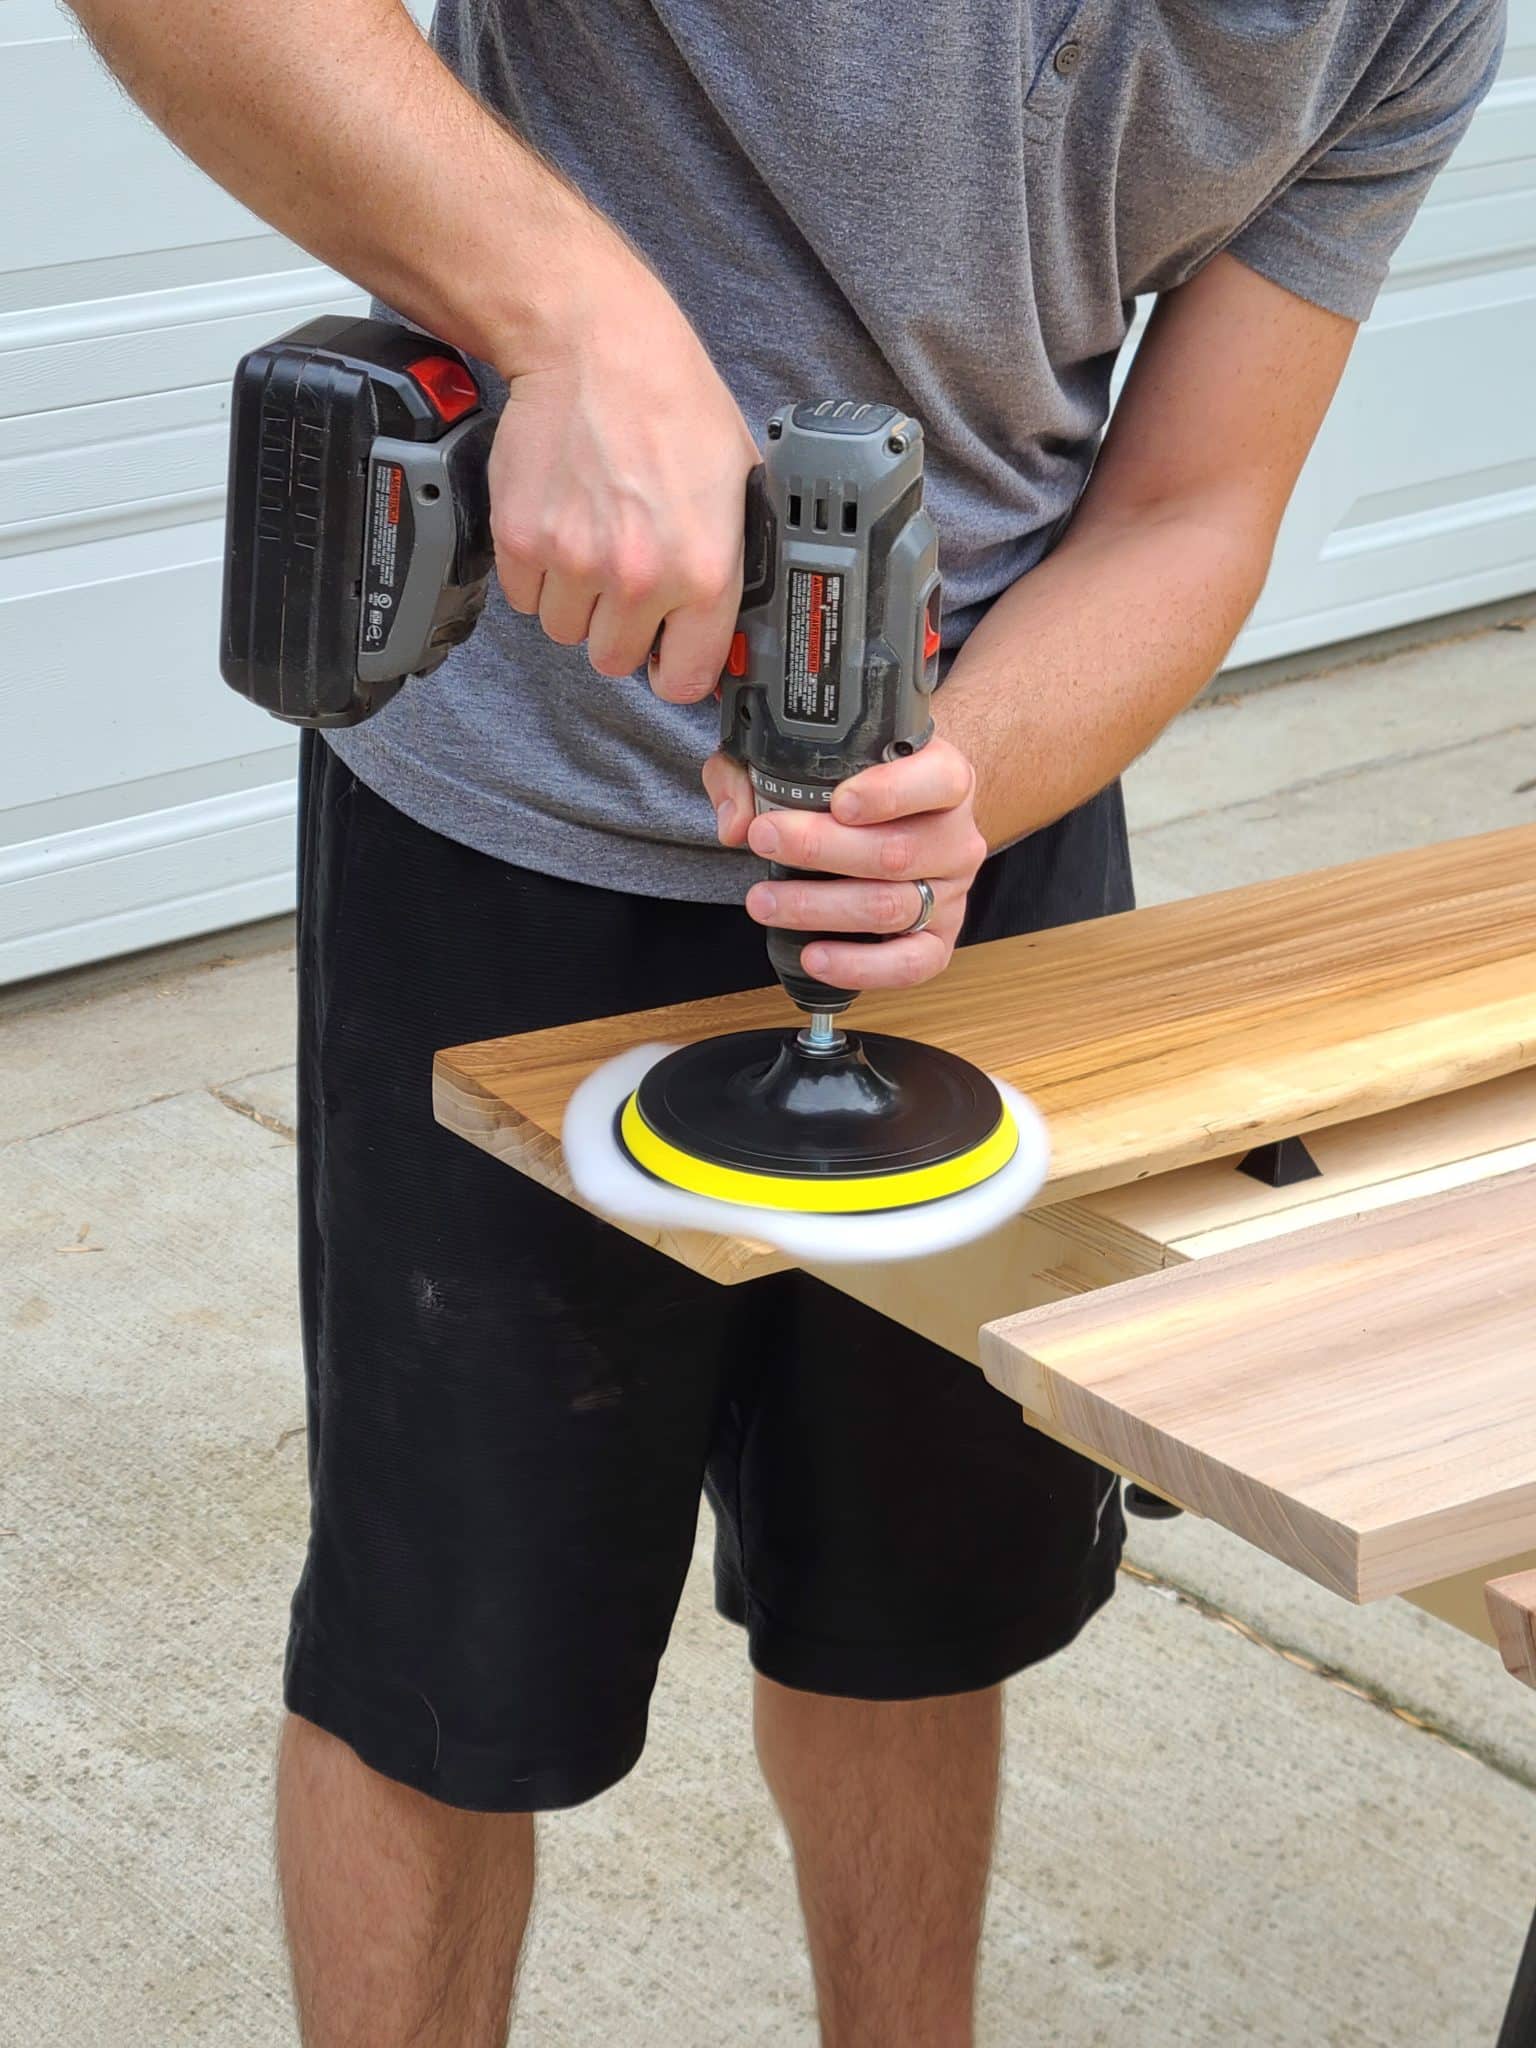

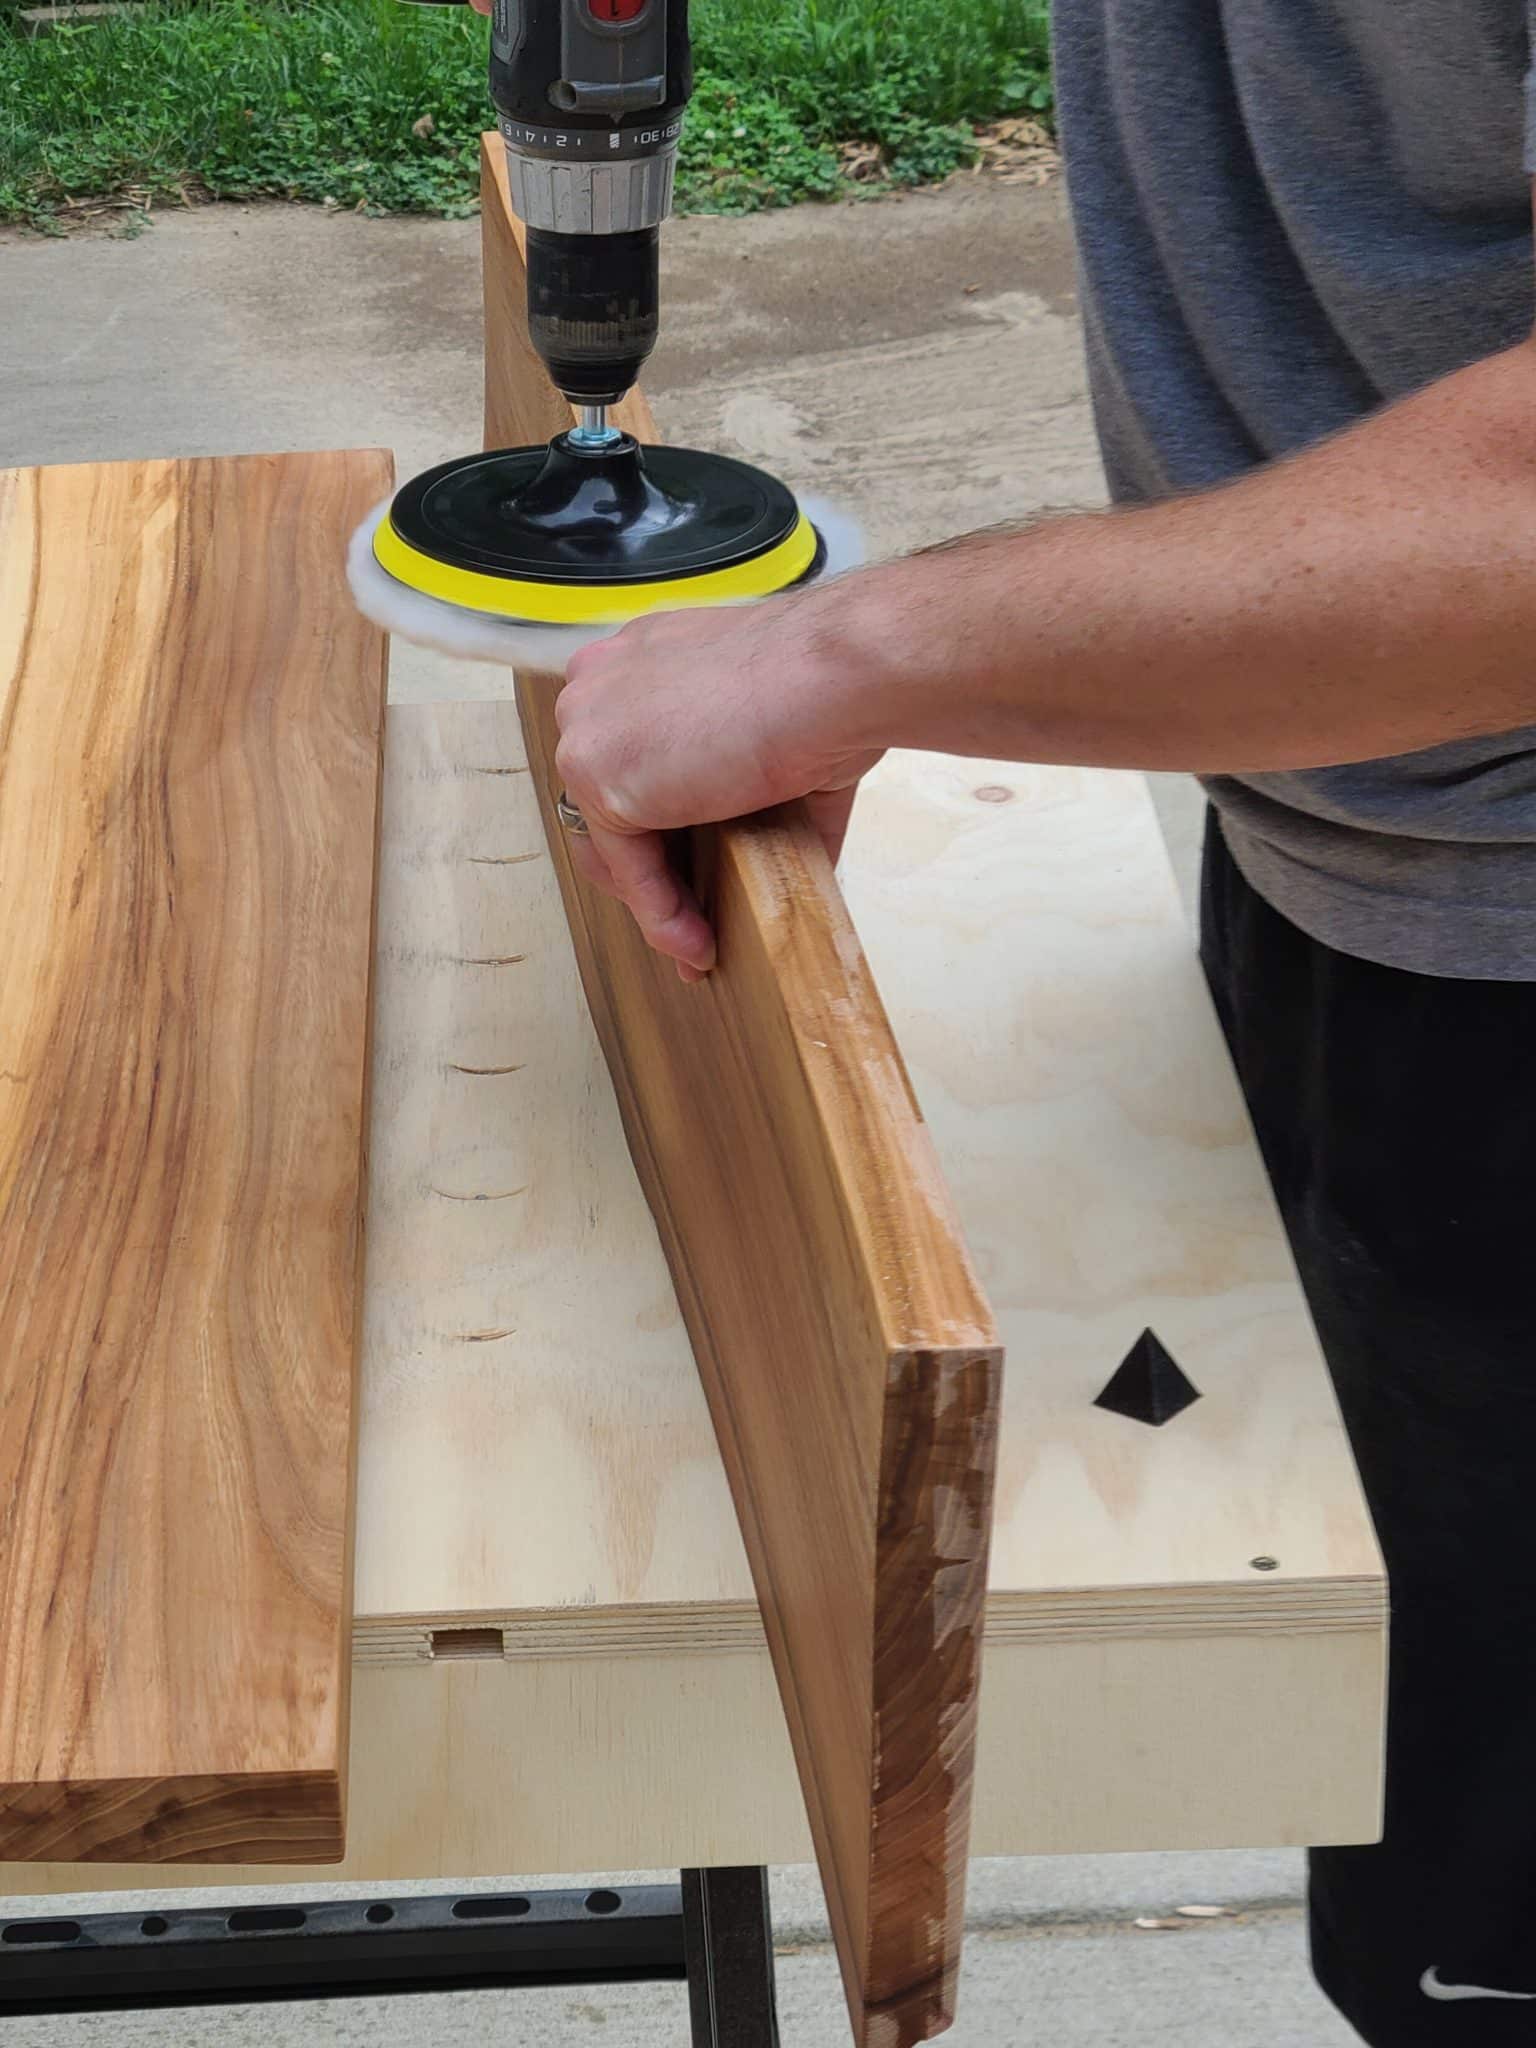
DIY-er Tip – We used a buffing pads attachment for a drill, which worked okay for a small project and surface area. It kept spinning off every time we stopped, which was annoying. If you’re going to be using this finish a lot on large surfaces, investing a little more money in an orbital buffer tool will be worth the hassle.
Unlike traditional stains where you have to wait for it to dry prior to doing the other side, Rubio’s Monocoat is buffed in and absorbed. So you can immediately flip over and repeat the process on the other side. We recommend doing this to make sure that the wood doesn’t warp from unevenly absorbing your finish.
Once you’ve done both sides and all the edges, repeat this process on all the floating shelves.
By using the accelerator, the stain oil is dry within 48 hours and fully cures within 5 days. Without the accelerator, it can take upwards of 3 weeks.
You can use whatever stain you’d like to finish the DIY floating shelves, but we highly recommend using a Rubio Monocoat for a beautiful natural finish. They have other tints as well if you’re looking for the floating shelves to be a more colored finish. It seems expensive at first, but we used a tenth of the can for all three shelves. So way less than what you might be used to with traditional stain.


Step 12: Install Wood Shelf
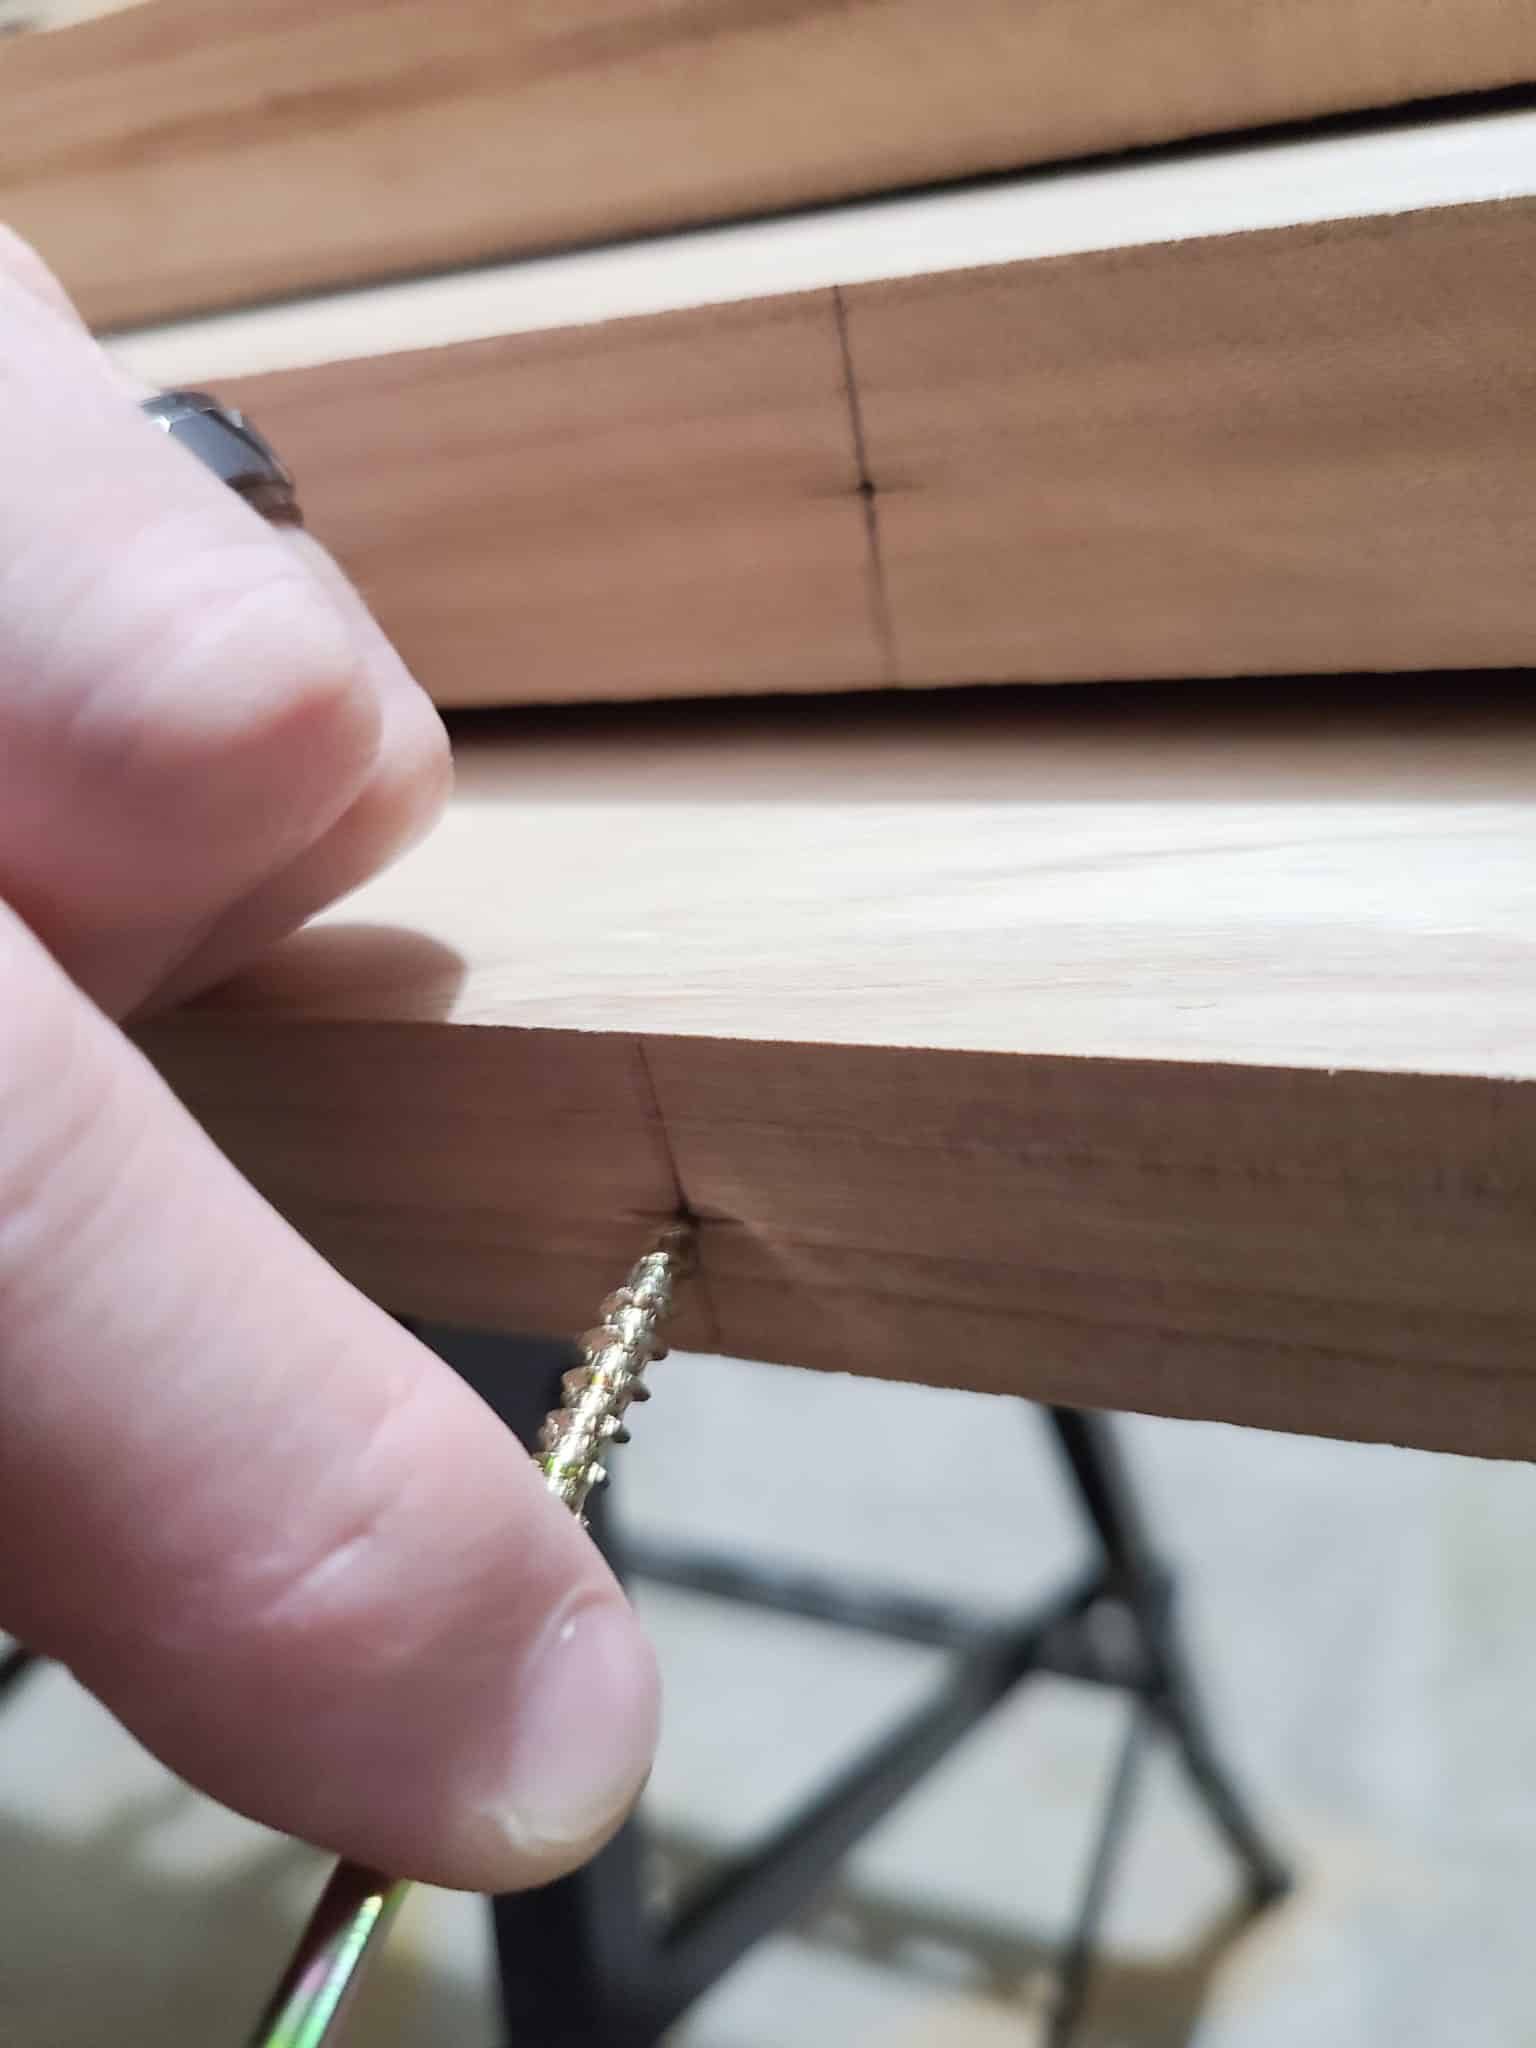
When all the wood shelves are dry, it’s time to install them on the wall. Assuming the holes align and are drilled level, the shelves should slide onto the floating hidden brackets. It should take a little muscle or light tapping with a rubber mallet to get the knurls to bite in and give you want a snug fit.

If the floating shelf is too loose, put some tape around your brackets to get a tighter fit. If you are having to force the shelf on, then chances are the brackets are not aligned with your hole. Rotate the brackets to get the right hole spacing while maintaining the level position of your shelf. This can take a little trial and error, but it is worth spending the extra time.
Repeat the process for all the DIY floating shelves.
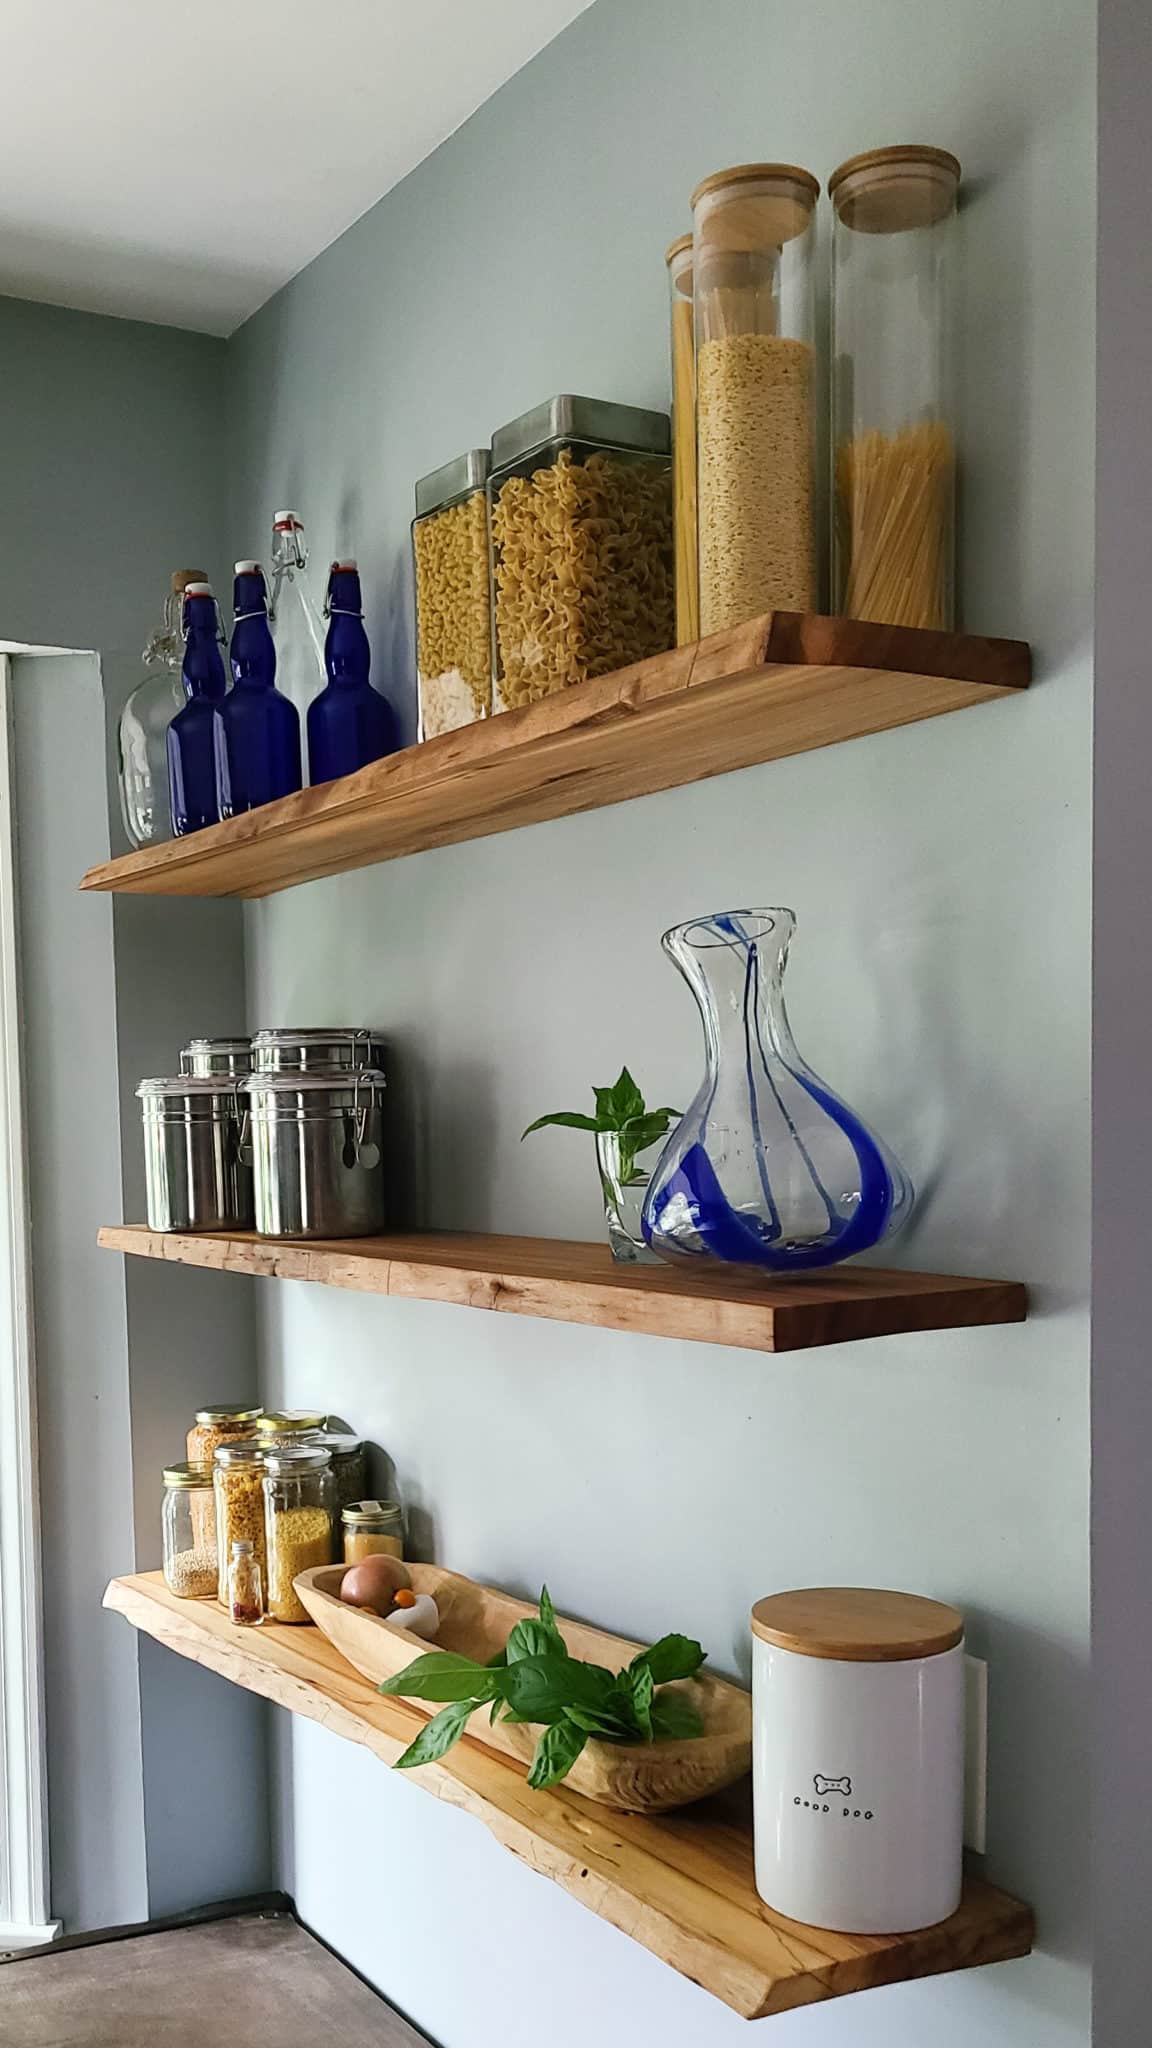
Step 13: Finishing Touches
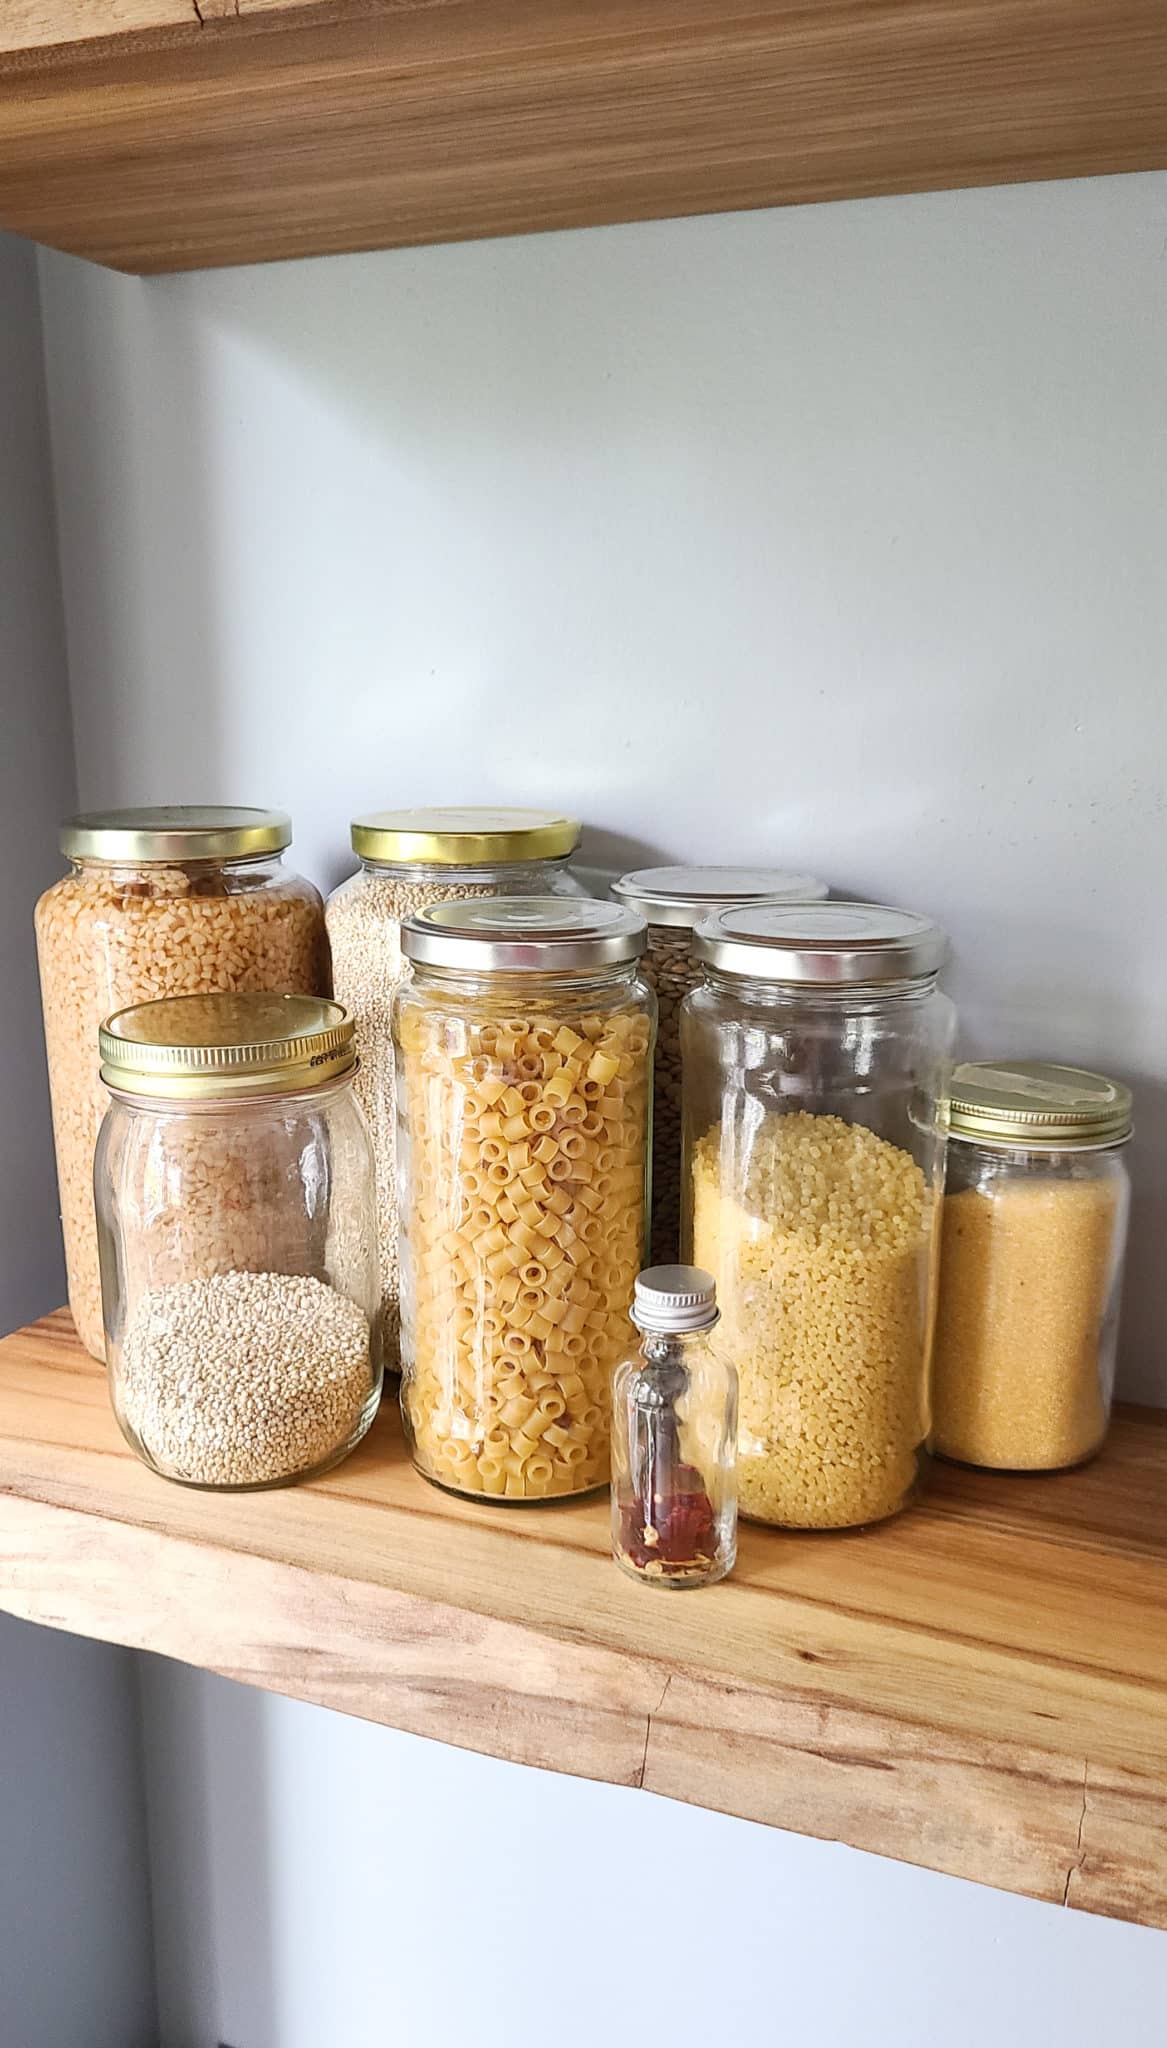
Tada! You’ve finished making and installing DIY floating wood shelves for your kitchen or whatever room you decided! Now the finishing touches are filling the shelves with items.
We used our wood floating shelves as an extension of our pantry. As part of our sustainable living journey, we try to buy pastas, grains, spices and other items in bulk and reuse/refill glass jars. Our shelves have a mix of old alfredo sauce and pickle jars, some thrifted glass storage containers, some flip-top glass soda bottles and a few new glass containers on them.


If you’re not using it to hold pantry items, a wood shelf for the kitchen is great for holding serving ware, plates, garden produce, plants or whatever fits!
More DIY Projects
Now you’ve made some beautiful shelves, so make sure to check out these 15 DIY projects at home you can do or our DIY project archives! Whether you’re looking to DIY furniture or for the perfect balance of DIY and sustainable living with a stacked rain barrel system, we’ve got a ton of resources for you.


I hope these DIY floating shelves instructions help you make a few beautiful live edge wood shelves for your kitchen (or any room!) Let us know what you think or if you have questions in the comments below!


Disclaimer: This post includes affiliate links, and I will earn a commission if you purchase through these links. Please note that I’ve linked to these products purely because I recommend them and they are from companies I trust. There is no additional cost to you.


very informative. I’m trying to make a floating mantel for a granite stone fireplace. I have live edge birch slabs from a large tree on our property. I would like to make it so that it has live edges on all 3 of the non_mounting sides. Any thoughts on the joinery or way to accomplish this?
thanks,
Glenn
Hello Glen!
If you want to continue the live edge around 3 sides, a good option would be to cut your slab with mitered corners. This way you can wrap the live edge from the front face around to the two side pieces. Hope that helps. Let us know how it turns out!
Best,
Amanda