How To Apply All Rubio Monocoat Wood Finishes For The Best Result
Curious about the application process for Rubio Monocoat’s different wood finishes? Check out this simple guide on how to apply Rubio’s Oil Plus 2C, Hybrid Wood Protector, and WoodCream.
Updated 4/04/2024

Disclaimer: This post includes affiliate links, and I will earn a commission if you purchase through these links. Read about our privacy policy.
So maybe you’re new to Rubio Monocoat finishes or maybe you just need a refresher on their individual application process. Either way, we’ve got you covered! We’re avid DIYers, who love to make anything from home decor to DIY furniture to simple toys for our child.
If you’ve seen any of our recent DIY projects, you’d know we have a love for Rubio Monocoat’s wood finishes. The single-layer application with no extra shiny polyurethane coating needed to protect our wood projects is a dream. At least for us because as busy individuals, we don’t have time for multiple coats!
We’ve used and tested these finishes ourselves. However, each product’s application process is just a little different. So you don’t have to go hunt down each one’s instructions, we made this quick guide with each product’s application. Read through all the Rubio application processes or just skip ahead to the one you need. Let’s get started!
An Eco-conscious Product
Before jumping into the individual finishes, we have to let you know one of the biggest reasons we love Rubio Monocoat (besides the high-quality outcome!). Our goal is to try to reduce our footprint on our environment, which can be harder with home improvement products like wood stains and finishes. Many of these products don’t use easily renewable ingredients and emit volatile organic compounds (VOCs) into our air. This can be damaging to both the environment and our bodies.
Additionally, there is a growing demand for sustainable materials and products, and the consequence is that countless new products with a self-declared eco-friendly claim are put on the market. We as consumers are becoming increasingly aware of this claim and are looking for products to truly trust.
Rubio Monocoat’s finishes are different. All their wood finishes are 0% VOC. Yes, ALL of them. Rubio set internal standards to be 0% VOC even before legislation regulated limits. Furthermore, Rubio products have many eco-friendly, independent certifications to back up what they state, with their Oil Plus 2C even reaching Greenguard Gold certification. It shows that successful companies can make incredible products with true minimal ecological impact.
Moreover, Rubio Monocoat now plants one tree for every order! They partner with Veritree to plant trees across the United States and amplify their commitment to sustainability. You can even partner with them to plant an additional verified tree. Not only does planting trees ensure a thriving ecosystem for generations to come, but it also sequesters tonnes of CO2 and the reforesting process provides additional work for local tree planters.
Related – Eco-friendly Building Materials & Products: A Guide For DIYers & Homeowners
Personally, companies that are proactive towards the planet and the future, and not just thinking about profit, are ones we want to support. We do that by using their product. In a world of consumption, what products you buy is a way to cast your vote for what you want to see available in the market.
Rubio Monocoat’s Oil Plus 2C
Rubio Monocoat’s Oil Plus 2C is a natural, plant-based hardwax oil wood finish that only requires one single layer to protect and finish wood. The Oil Plus 2C is made from linseed and can protect wood from heat, water, and wear making your DIY project more durable and long-lasting.
You might be wondering what the “2C” means. It simply stands for 2-component because Part A is the oil and Part B is a hardener and accelerant. You can buy Part A and Part B separately if you need more of the oil or don’t want to buy the accelerant. Purchasing the Oil Plus 2C just means you’re getting the kit with both Parts.
Now here’s how to apply Rubio Monocoat’s Oil Plus 2C to make your DIY project look stunning.

Application Process For Oil Plus 2C
Before you can apply the wood finish, make sure your wood is sanded and cleaned. The prep work is very important to how well your final finish will look, so don’t skip it! FYI, Rubio recommends only sanding up to 100-150 grit because the higher grits close the wood grain. This reduces the penetration and protection offered by the Oil Plus 2C finish. With a good Random Orbital Sander and some 3M Xtract Cubitron II Sandpaper, you’d be amazed at how smooth 120 grit can feel.
After sanding, vacuum all the surfaces and dust. Then it’s best to clean and wipe down the surface. Rubio recommends cleaning the surface with their Raw Wood Cleaner, but we’ve also used mineral spirits. Give the wood enough time to dry and let all the moisture evaporate.
It’s important to be as dust-free as possible because the oil uses a molecular bond to adhere to the wood fibers. If there’s dust, the oil might bond to the dust instead of the wood fibers, leaving you with some tiny globs of paste on the wood. You don’t have to be completely dust free like you would with polyurethane or lacquer, but you want that grain clean so the finish can really penetrate and bring out the beautiful grain and rich colors.
Once the prep work is done, you can start the super quick and easy process of applying Rubio’s Oil Plus 2C.
Application Process
First, calculate the amount of finish you will need. If you are using the accelerant (Part B), then the mixture is a ratio of 3:1 (Part A: Part B). Honestly, unless it’s a super small piece, we always use the accelerant to help speed up the cure time.
We try hard to not waste our finish, but also not to run out midway through the application. According to Rubio, you can use the finish up to 4-6 hours after mixing. Depending on the wood species, sanding, and water popping done in the prep stage, the oil finish will absorb and penetrate differently. That’s why we always do a test piece to see what the final color intensity will be for each project.
Now, applying the Oil Plus 2C only requires a few simple steps:
- Step 1: Stir the Oil Plus 2C’s Part A container to get the pigment thoroughly mixed.
- Step 2: Measure out Part A and Part B at a ratio of 3 parts of A to 1 part of B (3:1 ratio).
- Step 3: Stir and mix thoroughly.
- Step 4: Spread out a small amount of the oil mixture using a squeegee/plastic spreader onto your wood surface.
- Step 5: Immediately, use a cloth or buffing pad to buff the oil into the wood grain. It helps to work in smaller, manageable zones, if the piece is large.
- Step 6: After buffing, let the applied oil sit for 5 minutes to react.
- Step 7: Then, go over the oiled part and wipe off any excess oil. You cannot remove too much oil, but you can leave too much! Remove all excess oil within 10-15 minutes.
- Leaving excess can result in sticky areas or lines. The whole piece should feel dry to touch upon finishing wiping.
- Don’t forget to remove excess oil in any grooves by hand, if needed. If you have a lot of little grooves like in a mosaic piece, pressurized air can be really helpful to blow the finish into the grooves and remove any excess.
- Step 8: Continue to work in sections that you can finish and remove excess oil within the 10-15 minutes.
- Step 9: Now, just wait for your piece to cure and it’s ready to go! Once the oil has been buffed in, you no longer have to worry about dust getting on the piece like you would with polyurethane. Feel free to continue working in your shop like you normally would!
Don’t forget to set your application tools saturated with oil on a non-flammable surface or immersed in water. Items saturated with oil, like cloths, can spontaneously combust.


If you are looking to apply this to floors, the process is a little different and Rubio has more detailed application instructions on their site.
Oil Plus 2C Product Facts
According to Rubio, below is what you can expect for the Oil Plus 2C finish:
- Spread Rate: 300-500 Sq ft/L
- Drying Time: 24 hours, but dry to touch within minutes
- Cure Time: Within 5 days (80% in 48 hours) when accelerant is used; otherwise 3 weeks.
- Shelf Life: 36 months; protect from freezing
- Color Options: 55 different options (at the time of this article)
- Dilutable: No
- VOC Content: 0%
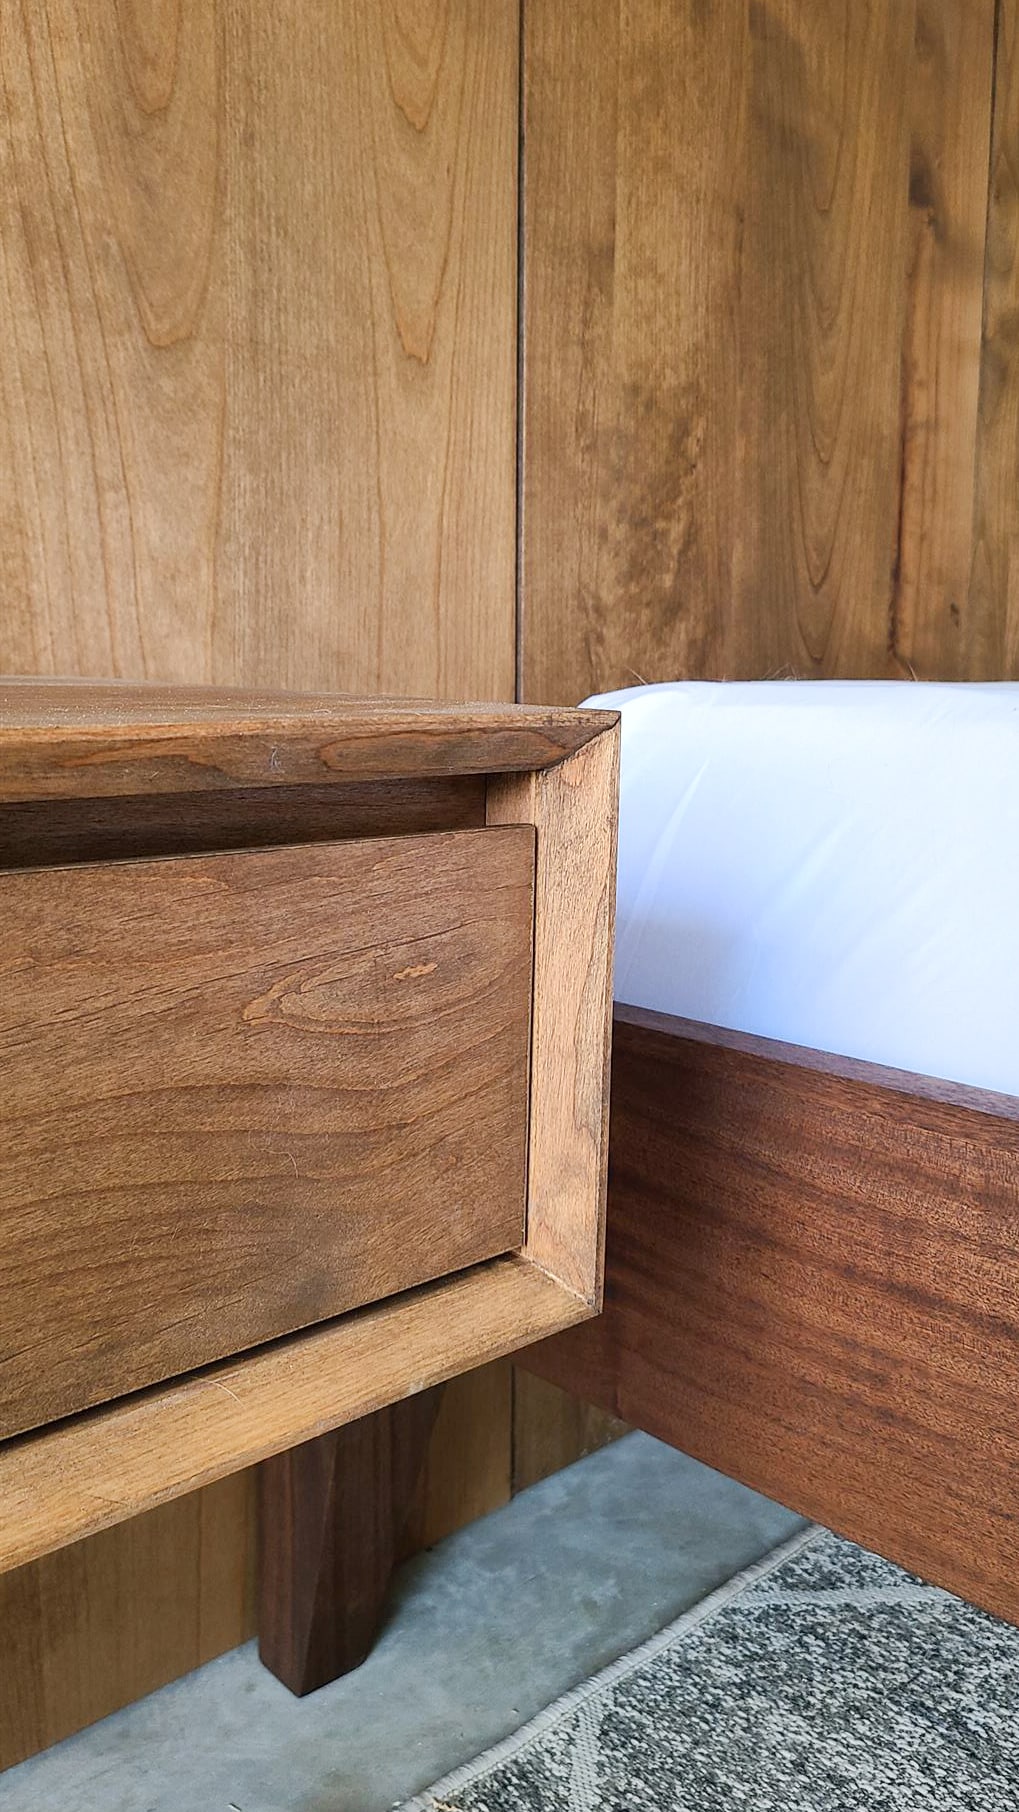
Check out how we tested 6 different colors of Oil Plus 2C on 7 different types of wood species in our product review. We’ve used the Oil Plus 2C on all our indoor DIY furniture projects like our Modern Platform Bed Frame and our Headboard with Floating Nightstands.
If you want a satin finish instead of the matte finish, consider using Rubio’s SheenPlus to give it a little shine boost!
Rubio Monocoat’s Hybrid Wood Protector
Rubio Monocoat’s Hybrid Wood Protector is also a genuine monocoat finish protecting wood surfaces with a single layer. It’s a great exterior finish as it uniquely inhibits mold and mildew growth, and has an integrated UV stabilizer to keep wood from discoloring over time. It also allows the finish to not peel or flake over time like some other exterior finishes do.
The cool part about the product is it makes the wood hydrophobic. This means the finish repels water so that it beads up on the surface in order to protect the wood from being oversaturated with water. Oversaturation can make exterior wood age faster, so this is a great added component for exterior uses.
Most people will utilize it for exterior projects, but Rubio notes it can be used for interior applications as well. It’s meant to be used on new, raw wood surfaces and is available in 22 colors at the time of this article.
Application Process For Hybrid Wood Protector
If you’ve used Rubio’s Oil Plus 2C, then the process of using the Hybrid Wood Protector is a little different but still super easy!
First, always do the prep work on the wood surfaces. Everything needs to be sanded down to a fine grit (Rubio recommends no higher than 120 grit). Then clear the dust off, and clean the wood. Also, make sure the wood is completely dry from whatever you use to clean it. Rubio has an exterior wood cleaner and interior raw wood cleaner they recommend. We simply use mineral spirits, but give it a full 24 hours or more to dry before application.
Application Process
Applying the Hybrid Wood Protector only requires a few simple steps:
- Step 1: Stir the oil thoroughly and measure out the amount needed.
- Step 2: Mix in 10% accelerator (Part B) and stir until combined.
- Rubio recommends adding 10% accelerator (Part B) for most exterior projects with horizontal surfaces, like furniture. For vertical only surfaces, like fencing and siding, Rubio notes the accelerator is not necessary. You can use some Part B from an Oil Plus 2C kit if you have it or buy the Part B separately.
- Step 3: Next, apply the Hybrid Wood Protector with a flat brush on the wood surface.
- Step 4: Let it sit for 10 minutes (set a timer as that’s the easiest way to remember!)
- Step 5: Then, use a dry flat brush to smooth the surface again without applying any new product.
- Step 6: Let it sit again for 5 minutes and then wipe off any excess product with a rag.
- Step 7: Repeat and work in manageable sections to apply on all surfaces.
- Step 8: Leave the finished piece to dry. It will be dry in 24 hours and fully cured in 7 days.


Don’t forget to set your application tools saturated with oil on a non-flammable surface or immersed in water. Items saturated with oil, like cloths, can spontaneously combust.
You can touch it and work with it after the 24 hours, but it’s best if you don’t. For example, we could have assembled the DIY planter box after 24 hours, but definitely didn’t want to fill it with soil and plants until it was fully cured.
Hybrid Wood Protector Product Facts
According to Rubio, below is what you can expect from the Hybrid Wood Protector:
- Spread Rate: 250-300 Sq ft/L
- Cure Time: 7 days
- Shelf Life: 36 months; keep from freezing
- Color Options: 22 different options (at the time of this article)
- Dilutable: No
- VOC Content: 0%
Note – The Pure color is not pigmented and lacks UV stabilizers. According to Rubio, it will not provide the same level of color stability against natural aging of wood as our color options. This means the wood will grey if you apply the Pure color, so consider that as a design choice.
If you want to know even more about Rubio’s Hybrid Wood Protector, then check out how we used it on our DIY Hanging Daybed or our full product review.
Rubio Monocoat’s WoodCream
Rubio Monocoat’s WoodCream finish is a hydrophobic wax-based finish instead of an oil-based finish like their other products. It’s a moisture-regulating cream that absorbs into the wood to make it water-repellant, while still allowing for the wood natural moisture balance and structure to be maintained.
The biggest difference with this Rubio finish is that it has a more semi-transparent (opaque) appearance and it’s only meant for exterior surfaces that are not likely to get worn down. Vertical surfaces like fencing or a trellis is ideal. Horizonal surfaces like the beams of a trellis or pergola would be fine too, but don’t use this on decking or furniture.
Also, while it can technically be a single-layer application, you can apply more layers to add color intensity and reduce the visibility of wood grains. It comes in 27 colors and is great for exterior wood that needs a refresh. It’s key advantage comes from the minimal prep work required.
Application Process For WoodCream
The application process for Rubio’s WoodCream is fairly similar to painting, which makes it pretty easy for anyone to do.
Prepare The Wood
Prior to starting to apply the finish, you need to prep the wood surface properly. WoodCream can be applied either on new wood with no finish or on older wood with a different product finish on it (aka a renovation as Rubio calls it).
With new wood, simply prepare the surface to the desired look. It can be planed, sanded or even wire brushed to achieve whatever look you desire. Then remove any dust and wipe the surface dry. Ensure the wood is dry prior to applying the WoodCream finish.
With older wood that has a different finish on it, start by cleaning the surface of any dirt or mildew with water. Rubio recommends a 10% mixture of their Exterior Wood Cleaner and water to thoroughly clean the surface. Then remove any loose fibers or finish coating by sanding, a steel brush, or a brass brush. Lastly, wipe the surface free of dust and let it dry.
After the prep work, it’s time for the application.
Application Process
Applying the WoodCream only requires a few simple steps:
- Step 1: Open the can and stir well before applying to ensure a good color mix.
- Step 2: Then, use a brush to apply evenly to a section. Work in smaller areas to keep a wet edge while essentially painting the surface.
- Step 3: In one motion, use the brush to take a final pass to help ensure there is an even and consistent application of the WoodCream. Try to eliminate any lines or overlap marks.
- Step 4: Let dry 12 hours prior to touching, or apply a second layer after 3 hours.
- The water-beading effect starts after 3 hours (make sure it’s not going to rain immediately).


Rubio notes that the second layer won’t adhere as easily since the first layer is already hydrophobic (water-repellant). So they recommend spreading the product with a brush in one smooth movement onto the first layer and going over it several times.
WoodCream Product Facts
According to Rubio, below is what you can expect for the WoodCream:
- Spread Rate: 120-200 ft²/L
- Cure time: depending on climate – ± 12 hours
- Shelf Life: 24 months; protect from freezing
- Dry to touch: 30 minutes
- Second layer: be applied after 3 hours
- Water-beading effect: starts after 3 hours
- Dilutable: Up to 1:1 using WoodCream Softener
- Color Options: 27 different options (at the time of this article)
- Application temperature: 50°F – 80°F (10°C – 30°C)
- VOC: 0%
You can read our full detailed review on Rubio’s WoodCream or see how we applied it to our DIY Tomato Trellis
Where To Buy Rubio Monocoat Products
Like most products, you can get Rubio from multiple places, both online and in some stores.
Online from Rubio Monocoat
The easiest place to purchase Rubio finishes is directly from them. Their online store makes it super easy. Also, we’re all for buying direct from a company when we can. Buying direct supports the business and helps reduce the footprint of the product.
Rubio used to charge shipping on orders under $49, which made getting samples feel expensive. But now, Rubio has free economy shipping for the contiguous U.S.! At the moment, they do not offer international shipping.
Online Retailers & Stores
- Amazon – If you need a faster option, most sizes and colors are available on Amazon. Just make sure you are buying only from the Rubio Monocoat Store on Amazon as they are the only licensed seller for their product on there.
- Green Building Supply – an eco-friendly online building supply store that carries Rubio products, including sample sizes, in all the colors. The products are more expensive than on Rubio’s website, and you will have to pay for shipping. Rubio’s WoodCream isn’t available.
- Special Hardwoods Products – a wood care product distributor with shipping free on orders over $49, and all product colors and sizes are available. Again, products are slightly more expensive versus those from Rubio directly.
Local Dealer
Rubio Monocoat is physically in stock in a few stores in some cities. However, not every dealer will have all the colors at varying sizes available. You can find local dealers near you through Rubio’s website.
Additionally, Rubio isn’t available in your standard big box home improvement stores like Home Depot or Lowe’s. So you will need to plan ahead either checking at your local dealer or allow time for shipping.

Tools We Use To Apply Rubio Monocoat
Below is a quick resource list for you on the items we use during the application process of Rubio’s finishes.
- Random Orbital Sander
- 3M Xtract Cubitron II Sandpaper
- Interior Projects – Rubio’s Raw Wood Cleaner or Mineral Spirits
- Exterior Projects – Rubio’s Exterior Wood Cleaner or Mineral Spirits
- Orbital Buffer
- Plastic Spreader or Squeegee (for Oil Plus 2C)
- Paint Brush or Foam Brush (for WoodCream & Hybrid Wood Protector)
FAQ – Rubio Monocoat Finish
Other DIY Projects
Now that you know how to apply all of our favorite Rubio Monocoat finishes, check out some of the DIY projects we’ve used them on!
- Hubby How To: DIY Planter Box
- How To Make DIY Floating Shelves – Live Edge Wood Shelves For Kitchen
- Hubby How To: DIY Hanging Daybed Swing Plans
- Hubby How To – Modern DIY Platform Bed Frame
- Hubby How To – DIY Modern Headboard With Floating Nightstands


Hope this guide helps make it easy for you to apply any of Rubio’s wood finishes! Let us know what you think of the Oil Plus 2C, Hybrid Wood Protector, and WoodCream in the comments below. Or better yet, what DIY or home improvement projects you’ve used Rubio on.


Disclaimer: This post includes affiliate links, and I will earn a commission if you purchase through these links. Please note that I’ve linked to these products purely because I recommend them and they are from companies I trust. There is no additional cost to you.


