Hubby How To: Hanging Daybed Swing Plans
Need a place to lounge and create an oasis outdoors!? Well, we built a beautiful hanging daybed swing and created plans to share with anyone who wants one for their oasis! This post covers the tools, materials, and how-to for your own hanging daybed swing plans.
Updated 3/14/2024

This post may contain affiliate links. Read about our privacy policy.
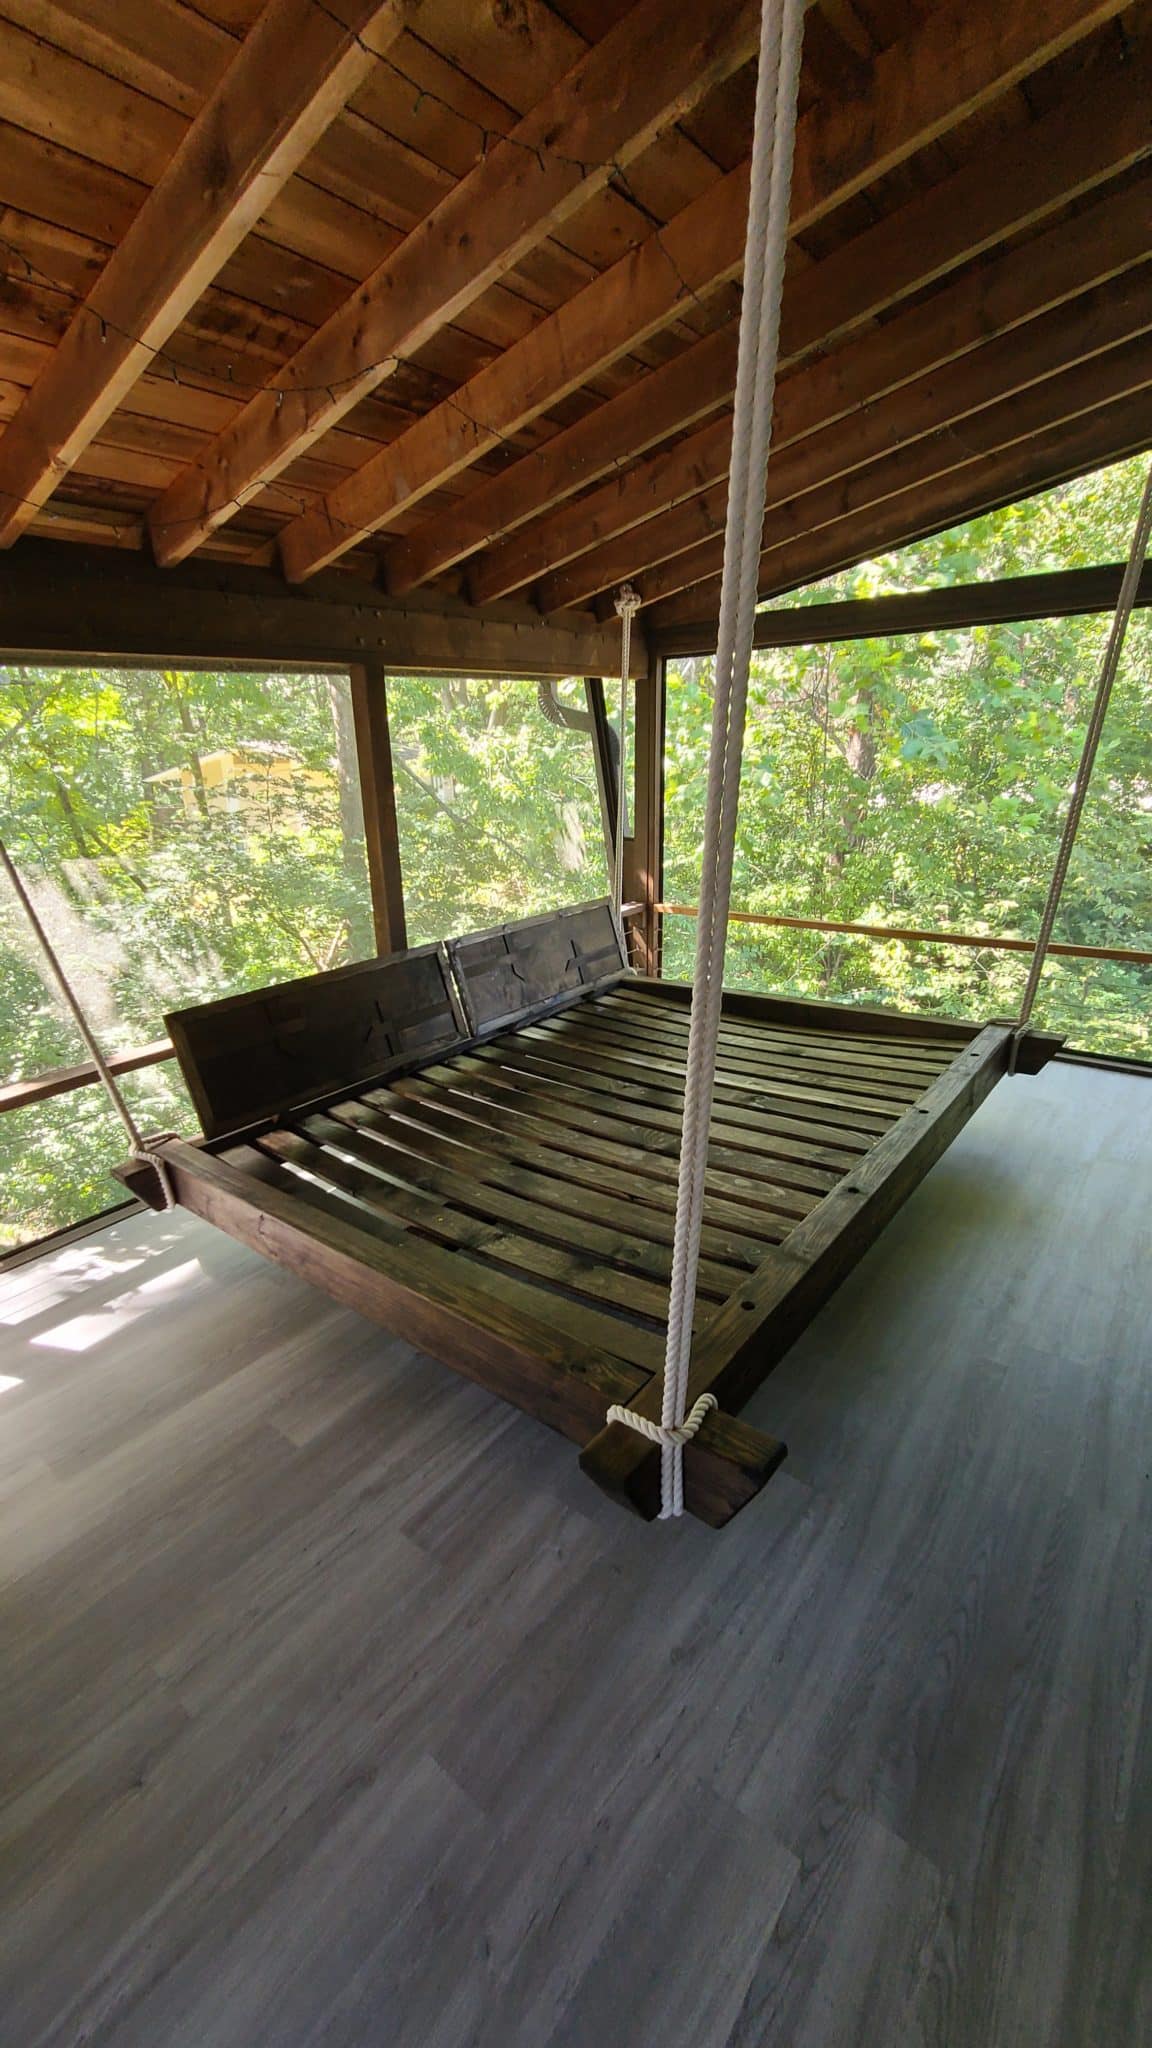
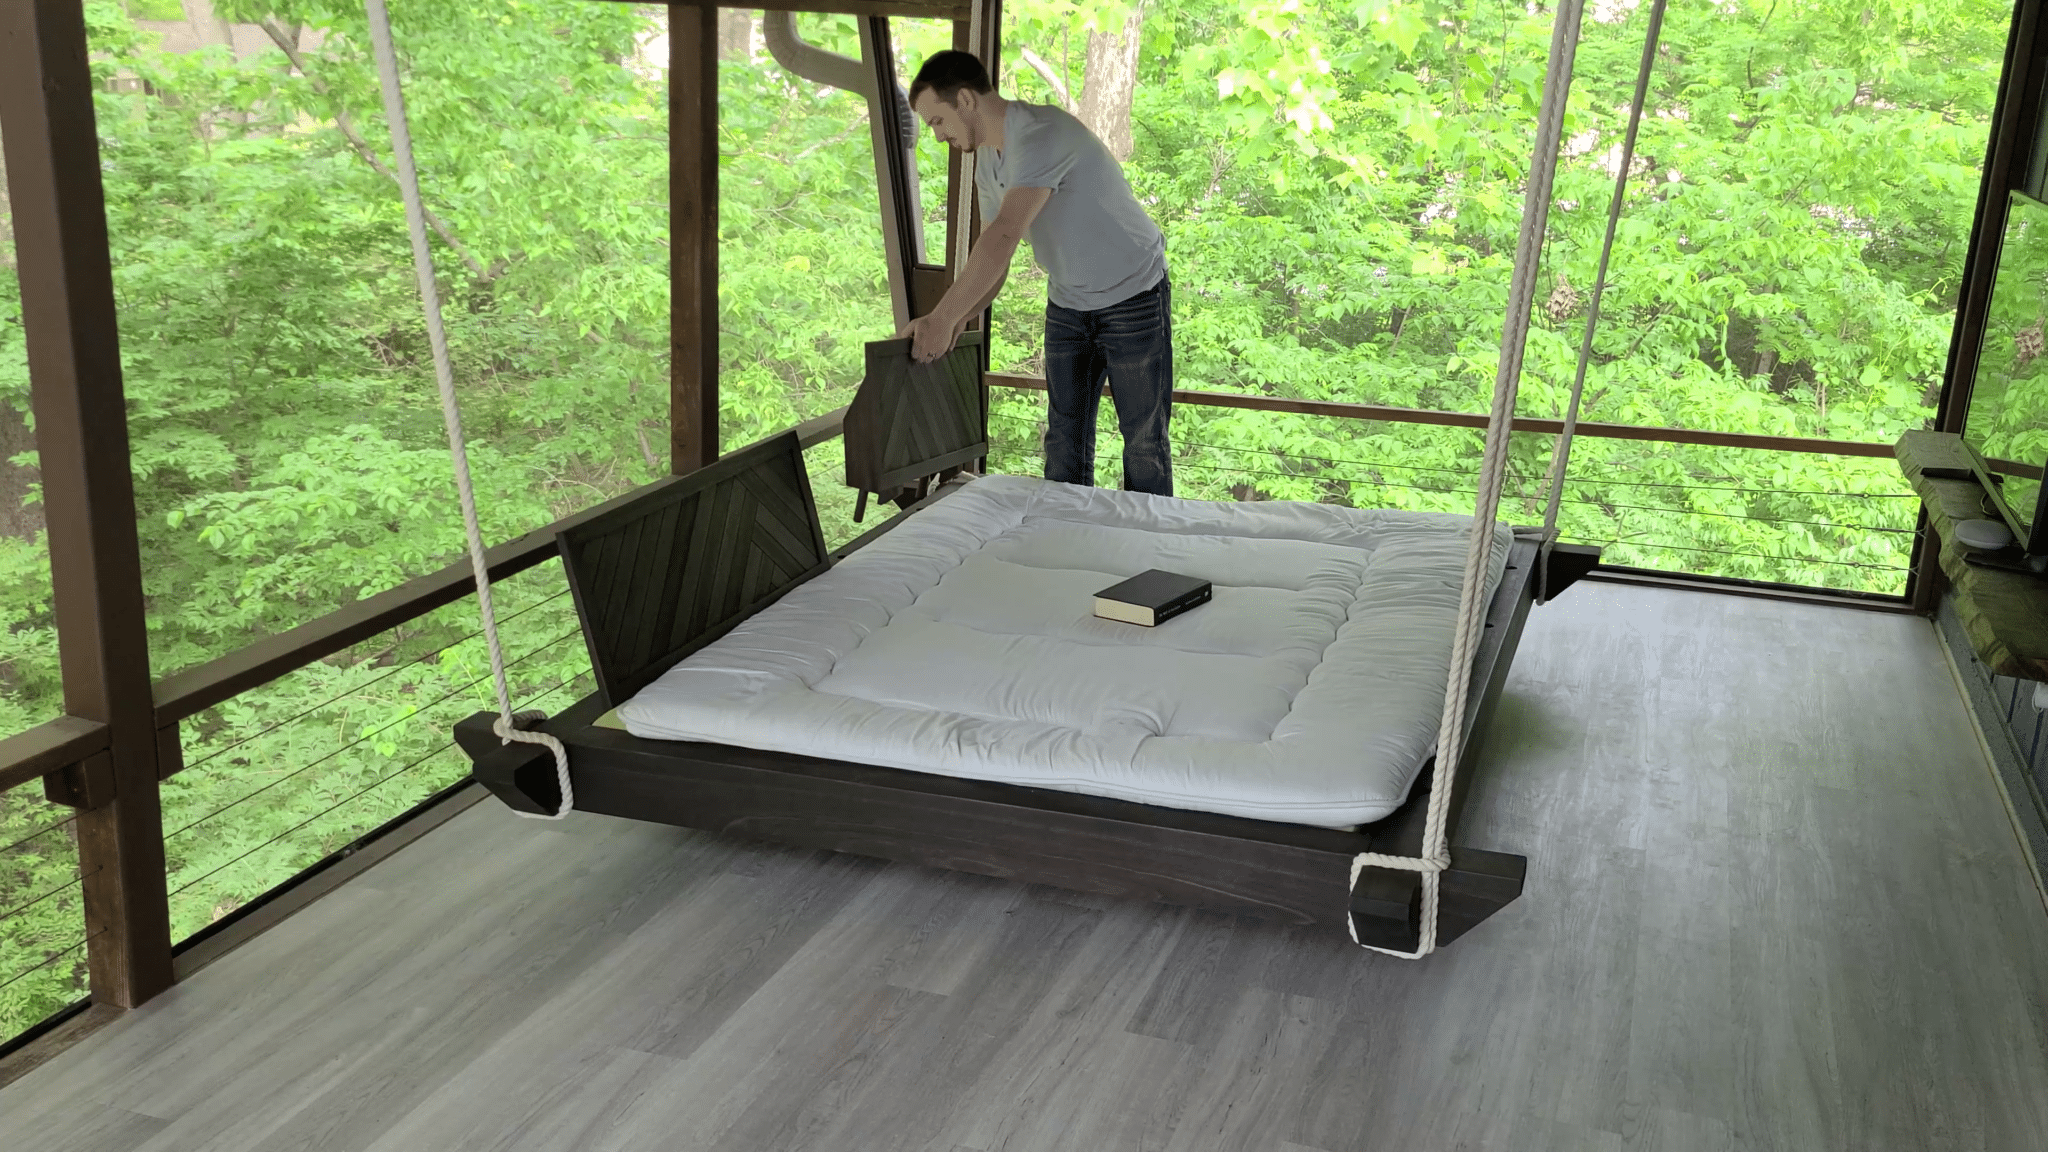
Many of us are spending more time at home, which means many of us are trying to create an oasis at home. In this post, we are going to show you how to build a simple, clean line hanging daybed swing. Outdoor hanging beds are the best for several reasons. Firstly, there’s the wow-factor of this daybed with clean lines and a little Japanese joinery flare. Secondly, the beds are the best for taking naps, reading books, or just overall relaxing. We especially love to spend time looking out at the trees and our little one loves to use the frame as a balance beam!
This Hubby How To shows the rotated queen sized daybed swing plans . If you’re going to build this hanging daybed, I recommend you grab our printable drawing plans to make building this much easier! You can also get the daybed swing plans for the following sizes: twin, full, queen, and king. All the sizes to fit your space and needs! Check out our Site Shop or our Etsy Shop, if you prefer, to get the DIY plans.
For this design, we wanted a very clean line platform with a little Japanese feel to how the edges joined. Also, we wanted the option to move the headboard around and face different directions or even remove the headboards altogether. Obviously, the price will vary based on what wood you choose, where you get your wood, stain, and cost of purchasing a futon/mattress. Now let’s get into the DIY build process for these daybed swing plans!

Original Build vs. Rebuild
We built this hanging bed in our screened-in deck a few years ago, and absolutely loved it. The design grew in popularity, and our DIY and woodworking skills improved over time as well. So we decided to sell the original build and rebuild a new hanging daybed putting our new skills and tools to the test!
Thus, we’ve updated this How-To article to reflect both builds and the techniques we used. As many of you might know, there are always multiple ways to accomplish the same finished product. The exact way you DIY and build this hanging bed is up to you and what resources you have available. For example, we didn’t have a router the first time we built this, so we used other tools to cut the joints. We hope showing both builds helps you find the best way to DIY this hanging bed for your space!
 Original Build – Pine Wood
 Rebuild – Red Grandis Wood
Hanging Bed Tools & Materials
Below is a list of all the tools we used on either the original build or the rebuild. You won’t need every single one of these tools, so don’t freak out with the long list! Use the method and tools that work for your situation.
Additional Tools From Rebuild
Materials
- (2) – 1x2x8 Board
- (1) – 1X2X6 Board
- (16) – 1x4x6 Board
- (2) – 2x4x6 Board
- (1) – 2x6x6 Board
- (1) – 2x6x8 Board
- (4) – 4x6x8 Board
- (1) – 1/4″x2x4 Plywood (Matching wood)
- (1) – 1″ Diameter x 4′ Dowel
- ¾” Cotton Rope
- 2 ½” Screws (Exterior Rated)
- (4) 1/2″ Eye Bolts
- Preferred Finish – we used Rubio Hybrid Wood Protector in Black
- Super Glue
- Exterior Wood Glue
- Rafters or Trellis to hang and connect bed from
Bedding
You will also need a method of hanging the bed. For our bed, we chose to go with ¾” Cotton Rope doubled up around each corner to hang it from the rafters. You could choose to use a thicker rope and drill a hole through the center of 4×6’s. Or have a chain connected to eye bolts at each corner, or even cable if you have the tools for it. There are plenty of different methods available. Just make sure that you are considering the weight that will be on these ropes, the hardware to connect it to the structure (we chose to use ½” Eye Bolts), and the actual strength of the structure.
We’ve shared an example of a load analysis next, and we’ll discuss the actual hanging process we used in more detail later on so be sure to keep reading!
Load Calculations To Consider
Before you get too far into building this awesome hanging daybed, we’d recommend you do a little math. I know that’s not always fun, but you need to consider if where you are going to hang this bed can support it. Wood furniture itself can be quite heavy, but there are additional loads and stress added to a hanging piece of furniture.
You’ll need to consider the weight of the bed frame itself plus the maximum weight of people (or pets) that might be on it at the same time. Then ensure the structure you’re hanging it from as well as the hanging hardware and rope can support these live loads. Below is an example of how, as an engineer, I did our load calculations to ensure we felt safe (it’s a little lengthy, which is why it’s collapsed here).
Hanging Daybed Swing Plans – Build Process
If you haven’t already grab our DIY plans to start from our Shop or our Etsy Shop, if you prefer. For this How-To article, we are showing the rotated Queen Sized Daybed Swing Plans and how we built it.
-
 Hanging Daybed Plans$12.00
 -
-
DIY Planter Box Plans$9.00

Wood Material Selection
Next up, it’s time to buy the materials. If you plan to put this hanging daybed swing somewhere exposed to the elements, make sure you consider using rot-resistant wood. Cedar is always a great option, though it can be pretty soft. We opted to build our second bed out of Red Grandis Eucalyptus which we got from a hardwood dealer. You can also consider pressure-treated wood. Just know that pressure-treated wood will be significantly heavier and you can’t stain it for 6-12 months or it will rot prematurely. You have to wait for it to dry out naturally first, and it does tend to warp a little as it dries. Assuming your daybed will be under an awning or indoors, you can go with much lighter wood and finish it to protect it from humidity and the like.
Be sure to review your drawing set for the daybed swing plans prior to shopping, so you are familiar with how much of each board you will use. If a board is good except for a split or knot at the end, you could still get that board and just make sure that you cut the bad end off.
Original Build Wood Choice
For the original build, we purchased the 4×6 Pine Timbers from Menards online and had them shipped to our local store. They were the only source that had them in stock due to the lumber shortage that year. That said, we’re not a fan of the process of buying lumber from Menards, so we bought the rest of the boards from Home Depot. Make sure you check every board for splits and knots. And look down the length of them to make sure they are straight. A certain amount of bowing is practically unavoidable, but the straighter you can start off the better.
We also recommend buying nicer, sanded plywood since the plywood will be in a visible location. Try to select wood that is similar in color. Even with a dark stain, this difference can be quite obvious if you mix Pine with Oak or something like that. Earlier in our career, we tended to stick to cheaper white woods as we were still honing our skills. If you want this to be a piece that you have for a long time, then you should definitely choose a nicer wood and finish. Think about how you want your end product to look and plan accordingly.

Rebuild Wood Choice
When we first built this bed, we used 4×6 Pine timbers since those were readily available. But this bed does have some minor exposure to the elements and we wanted to make sure it lasts a lifetime, so we needed something more rot-resistant and durable.
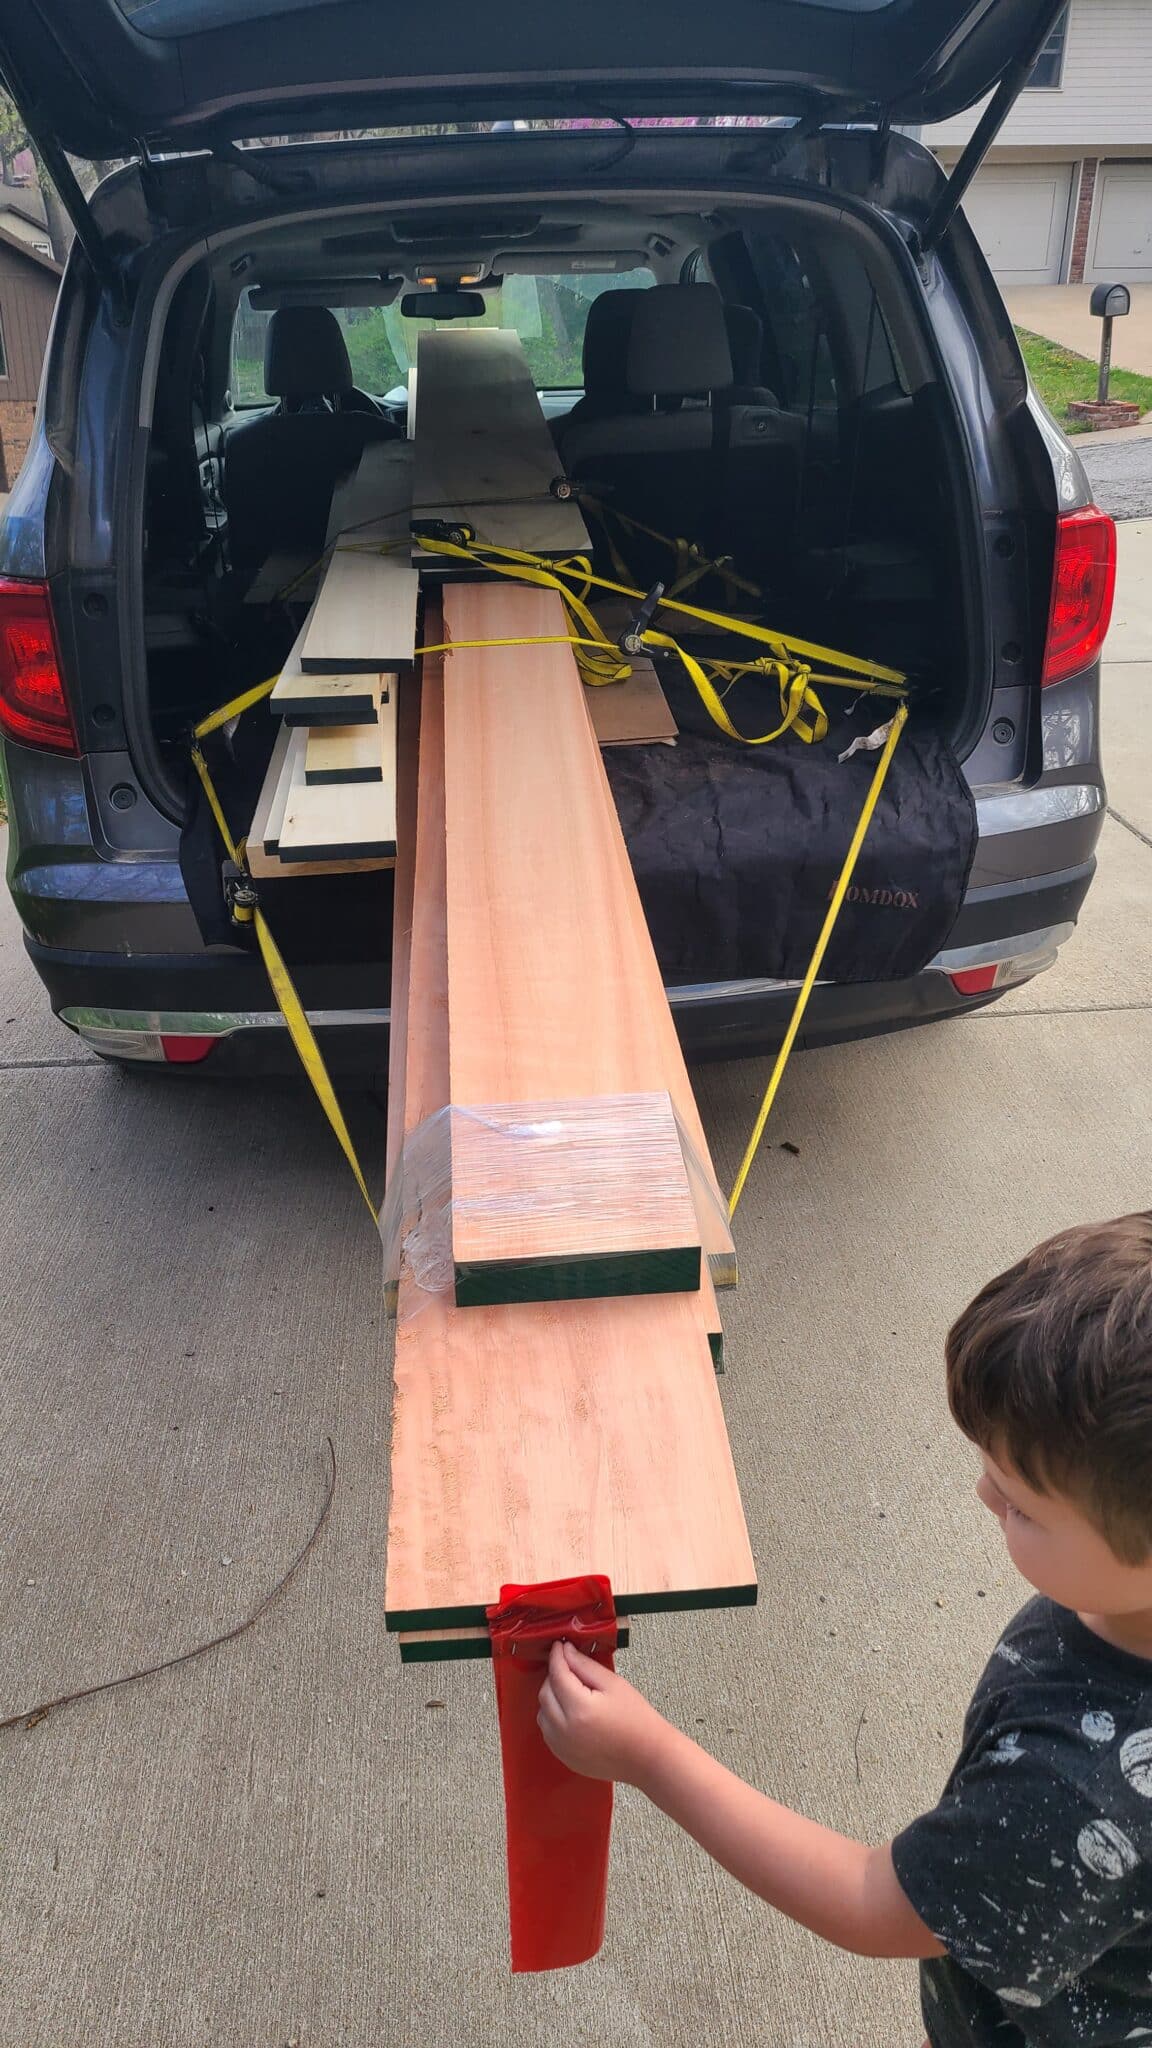
We chose Red Grandis Eucalyptus, also known as Rose Gum, from our local hardwood dealer. It’s an FSC Pure Certified hardwood that is native to Australia, but is also grown on plantations in tropical areas like South America. We strive to choose more eco-friendly building materials, and we chose Red Grandis as it’s been awarded as a product leader in green/environmental leadership by AWFS.
The one downside is that since this tree grows so straight and tall, the boards from it can be quite long and wide. Luckily, our hardwood dealer helped us size everything pretty well to minimize our waste, but we will have to cut and laminate our hardwood boards to create the standard construction-size lumber the DIY plans call for.
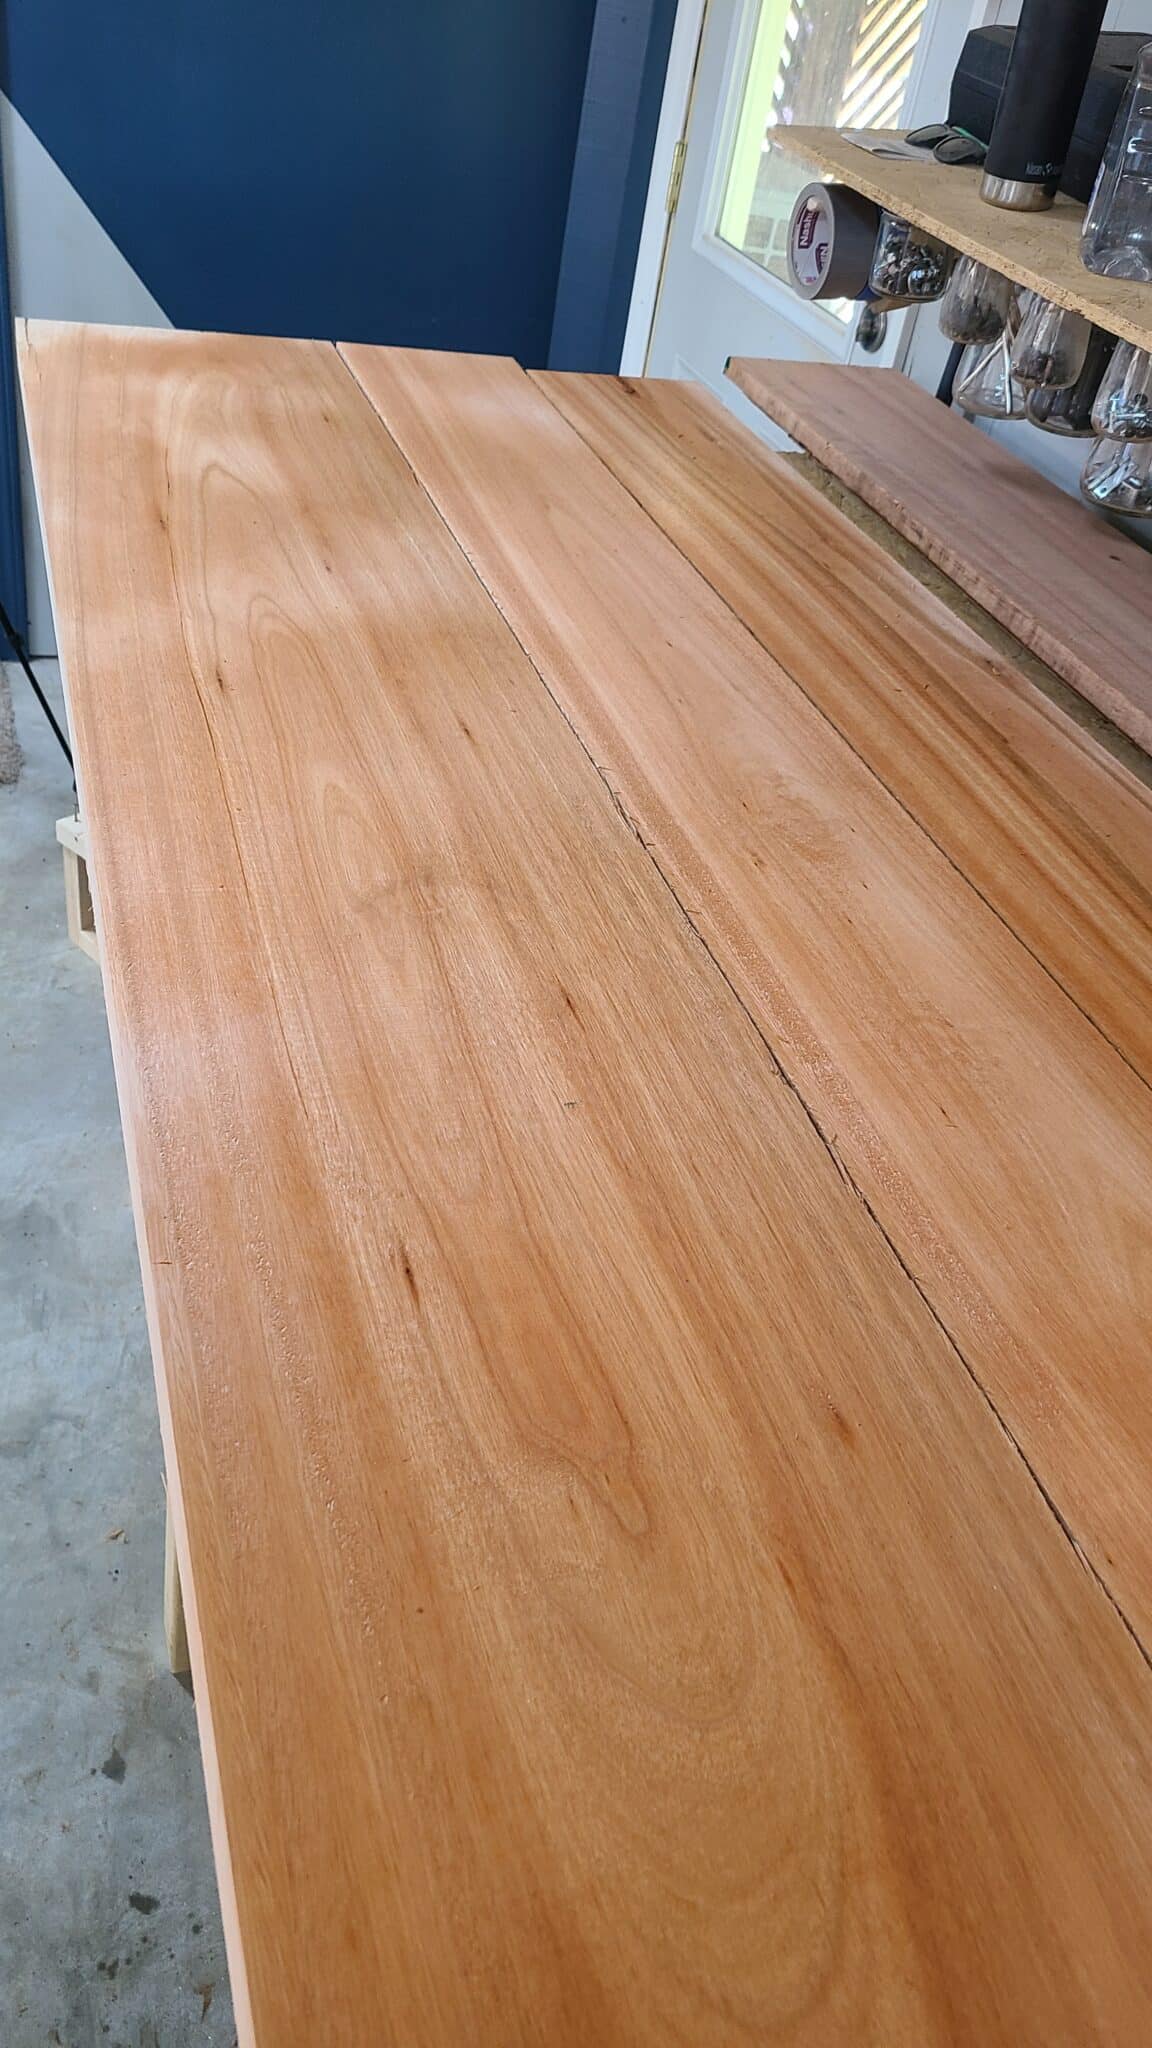
Step 1: Cut, Layout & Breakdown
To begin, lay out your boards and associate them with their corresponding drawings. If there are any defects in the boards, mark them now and orient the boards so that the defects are facing up so you don’t forget about them later. Go through with your speed square and measuring tape and mark your cut lines so that you are removing as many defects in the boards as possible. Also, consider the wood grain patterns. We find our favorite pattern and make sure it faces outwards so it becomes a feature on the hanging bed frame.


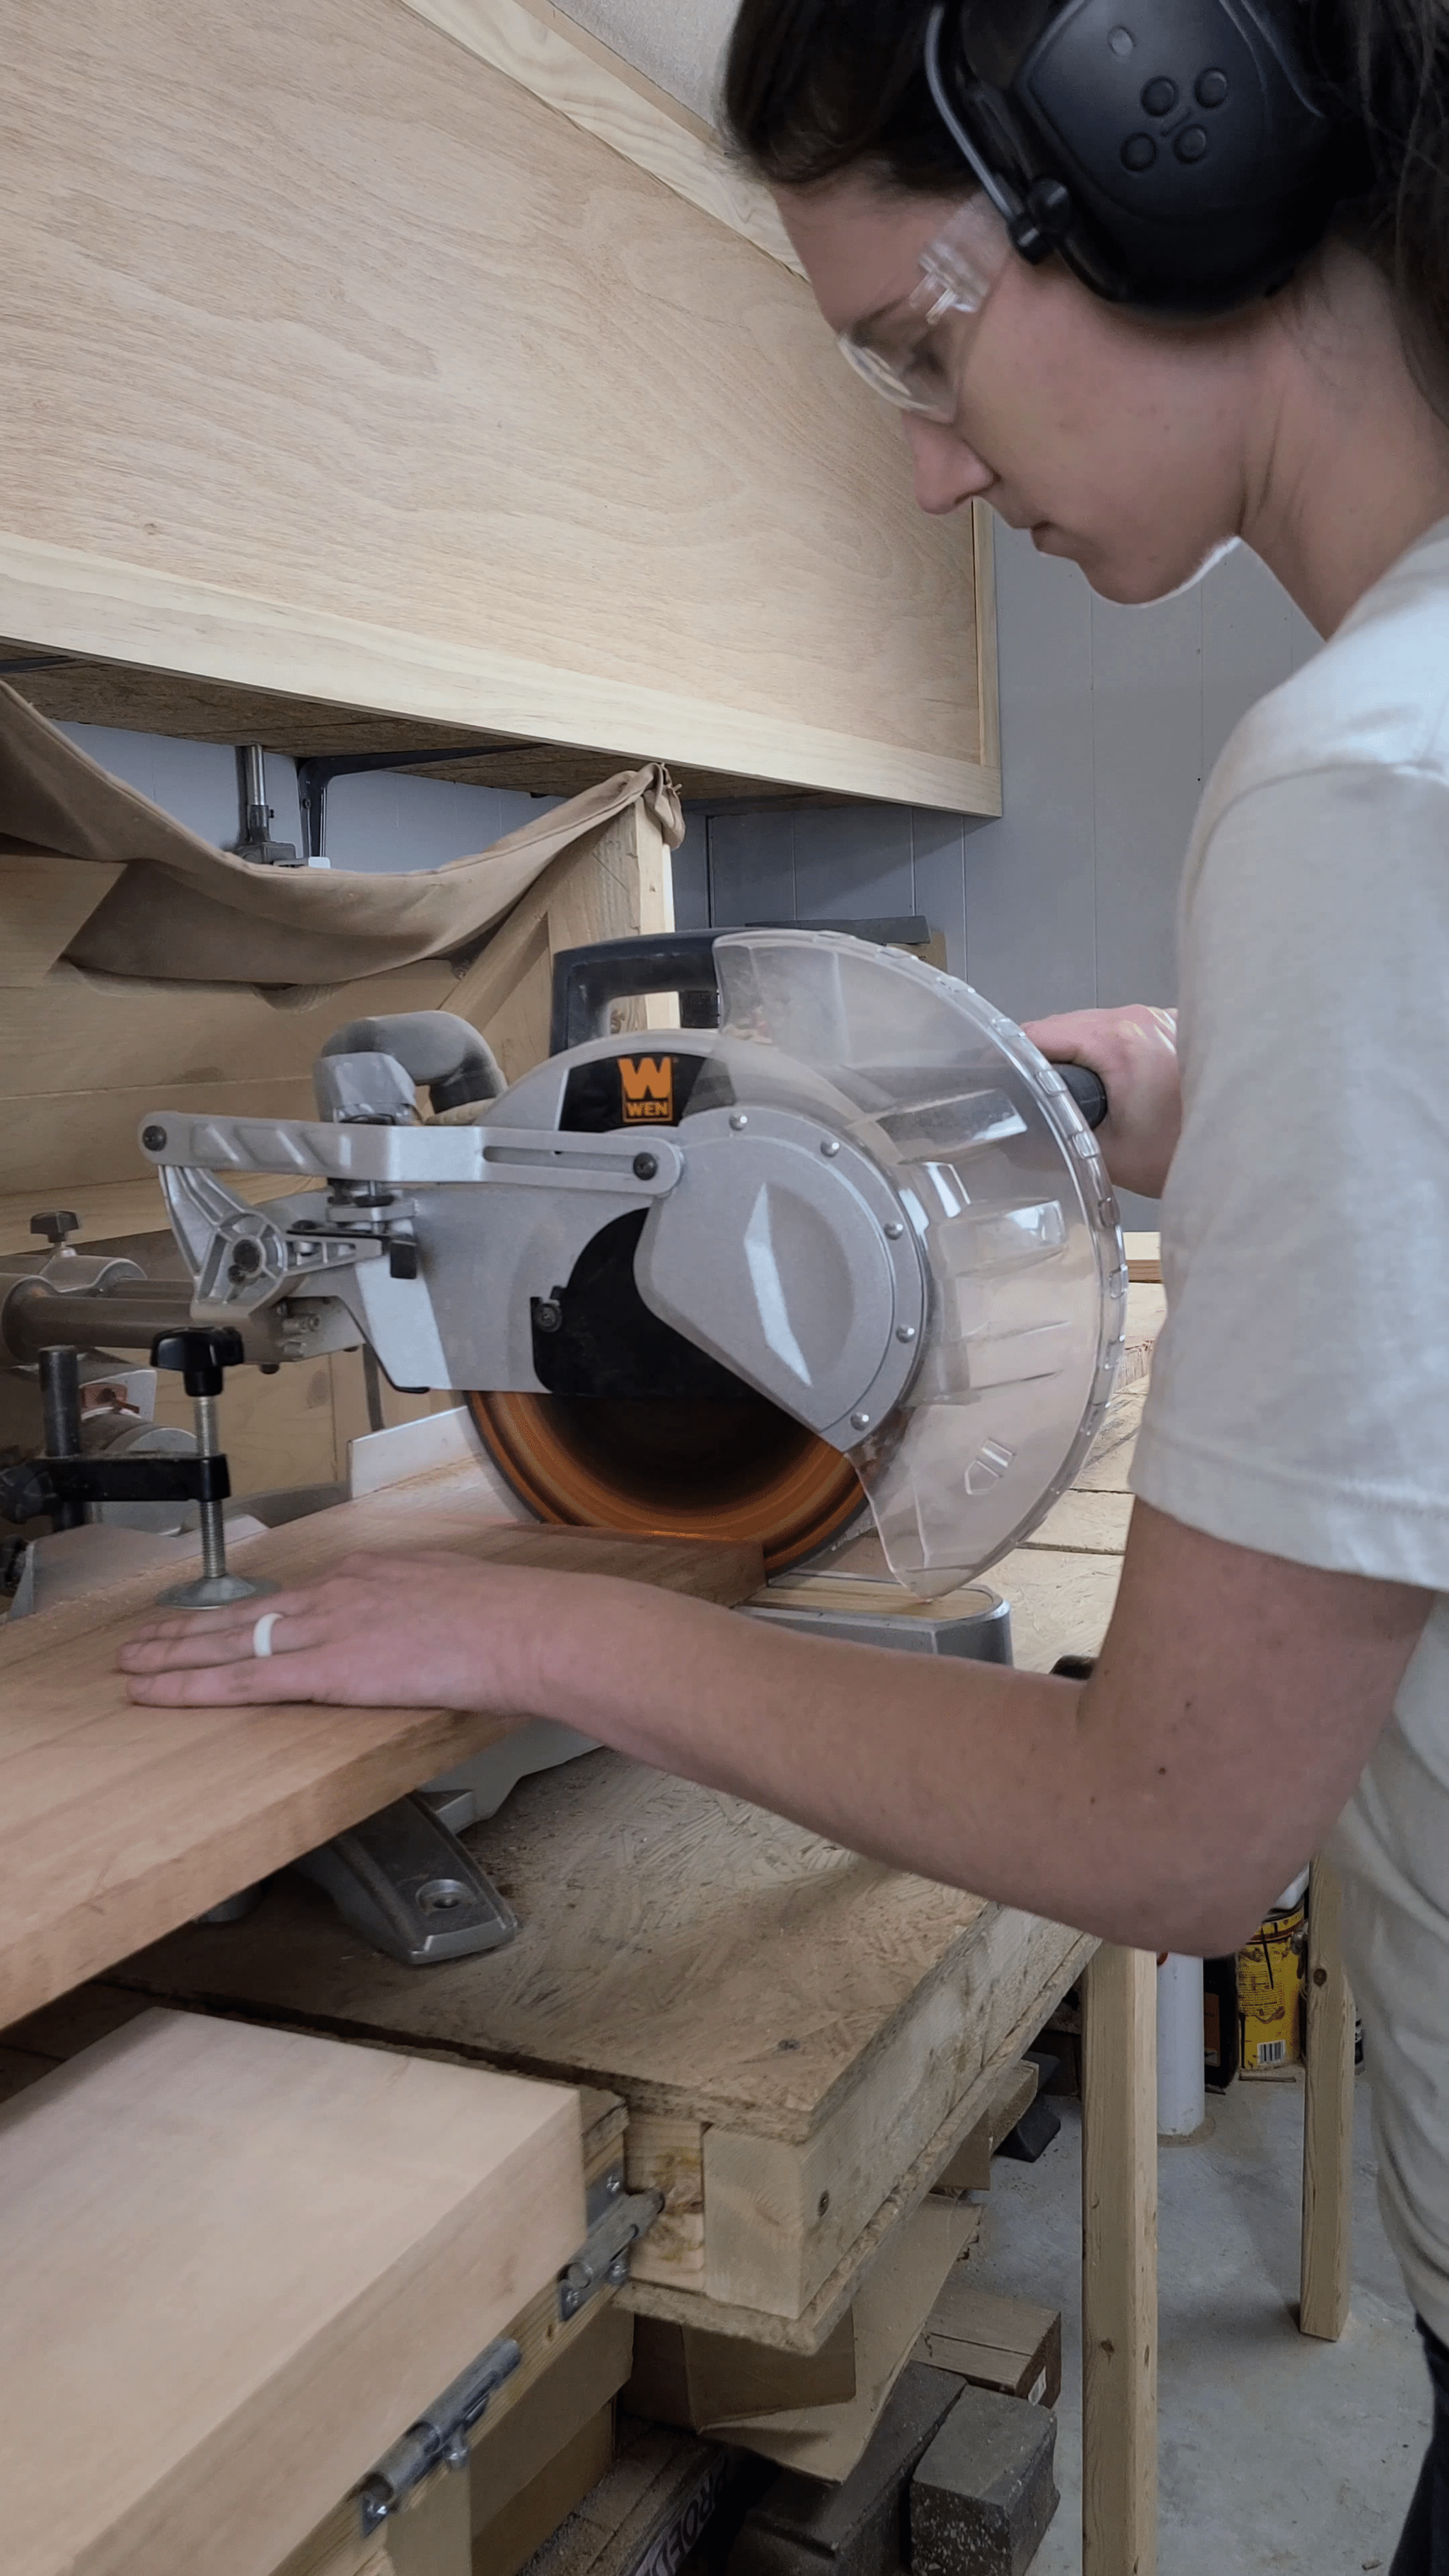
Rough Cut Frame Boards
After you’ve laid out your basic cuts, the first order of business is to cut them to rough length. You want to leave each board at least 2” longer so you can clean the ends up later. With the cuts marked, bring them over to the Miter Saw and cut them to their rough length. If your board is wider than your miter saw, then we’ve found this pull saw to be super handy to finish cutting it off.
If you need to rip the lumber down to width, then head over to the table saw. Rip the board to its final width if you’re not laminating two boards together. On the rebuild, we laminated boards together, so we left the boards about an inch wider than needed as it will be cut off after the glue up.
Breakdown of Bed Slats and Supports
The bed slats that go between the frame and support the mattress can just be the 1x4x6s construction lumber from a home improvement store that are cut to final length as shown in the DIY plans. This is how we did it with the pine wood on the original build.
For the rebuild, we opted to get varying widths poplar common boards from the hardwood dealer. We started by trimming one end and then cutting each board to length. Since these are common boards, they had a lot of defects to work around, so try to plan the cuts to remove the worst bits of each end. If we were doing this again, I would skip the common boards and pay a little more money for a nicer grade of poplar.
One advantage of buying from the hardwood dealer is that we’re always left with a fair bit of off-cuts that we can use for things like jigs or DIY toys like our kid’s salt writing tray.
Once the boards are the right length, bring them over to the table saw to rip them to width. Since the boards are various widths, you can deviate from the plans a bit here like we did. Rather than cutting each board to 3.5 inches and wasting a lot of material, we vary the thickness of the slats to maximize the usage of each board. On this rebuild project that tended to mean we were cutting the slats around 2.5 to 3 inches, and we ended up with 19 slats when we were done instead of 16.
Lastly, you might wait to cut the boards to their final length until after you can dry fit the bed frame together. This is in case you have to make some adjustments, so you don’t end up with boards that don’t fit.
Step 2: Laminate Boards (Optional)
If you already have the correct lumber sizes, then you get to skip this step! With the rebuild of the hanging daybed, we needed to laminate several 2x6s together to create the 4x6s needed for the main bed frame. Laminating boards is just a fancy term for gluing the boards together to make a thicker board overall. Just remember to use the correct exterior-rated wood glue if your bed will be outdoors (it might come unglued otherwise and that would be bad!). Otherwise, you can use the slightly cheaper interior-rated wood glue.
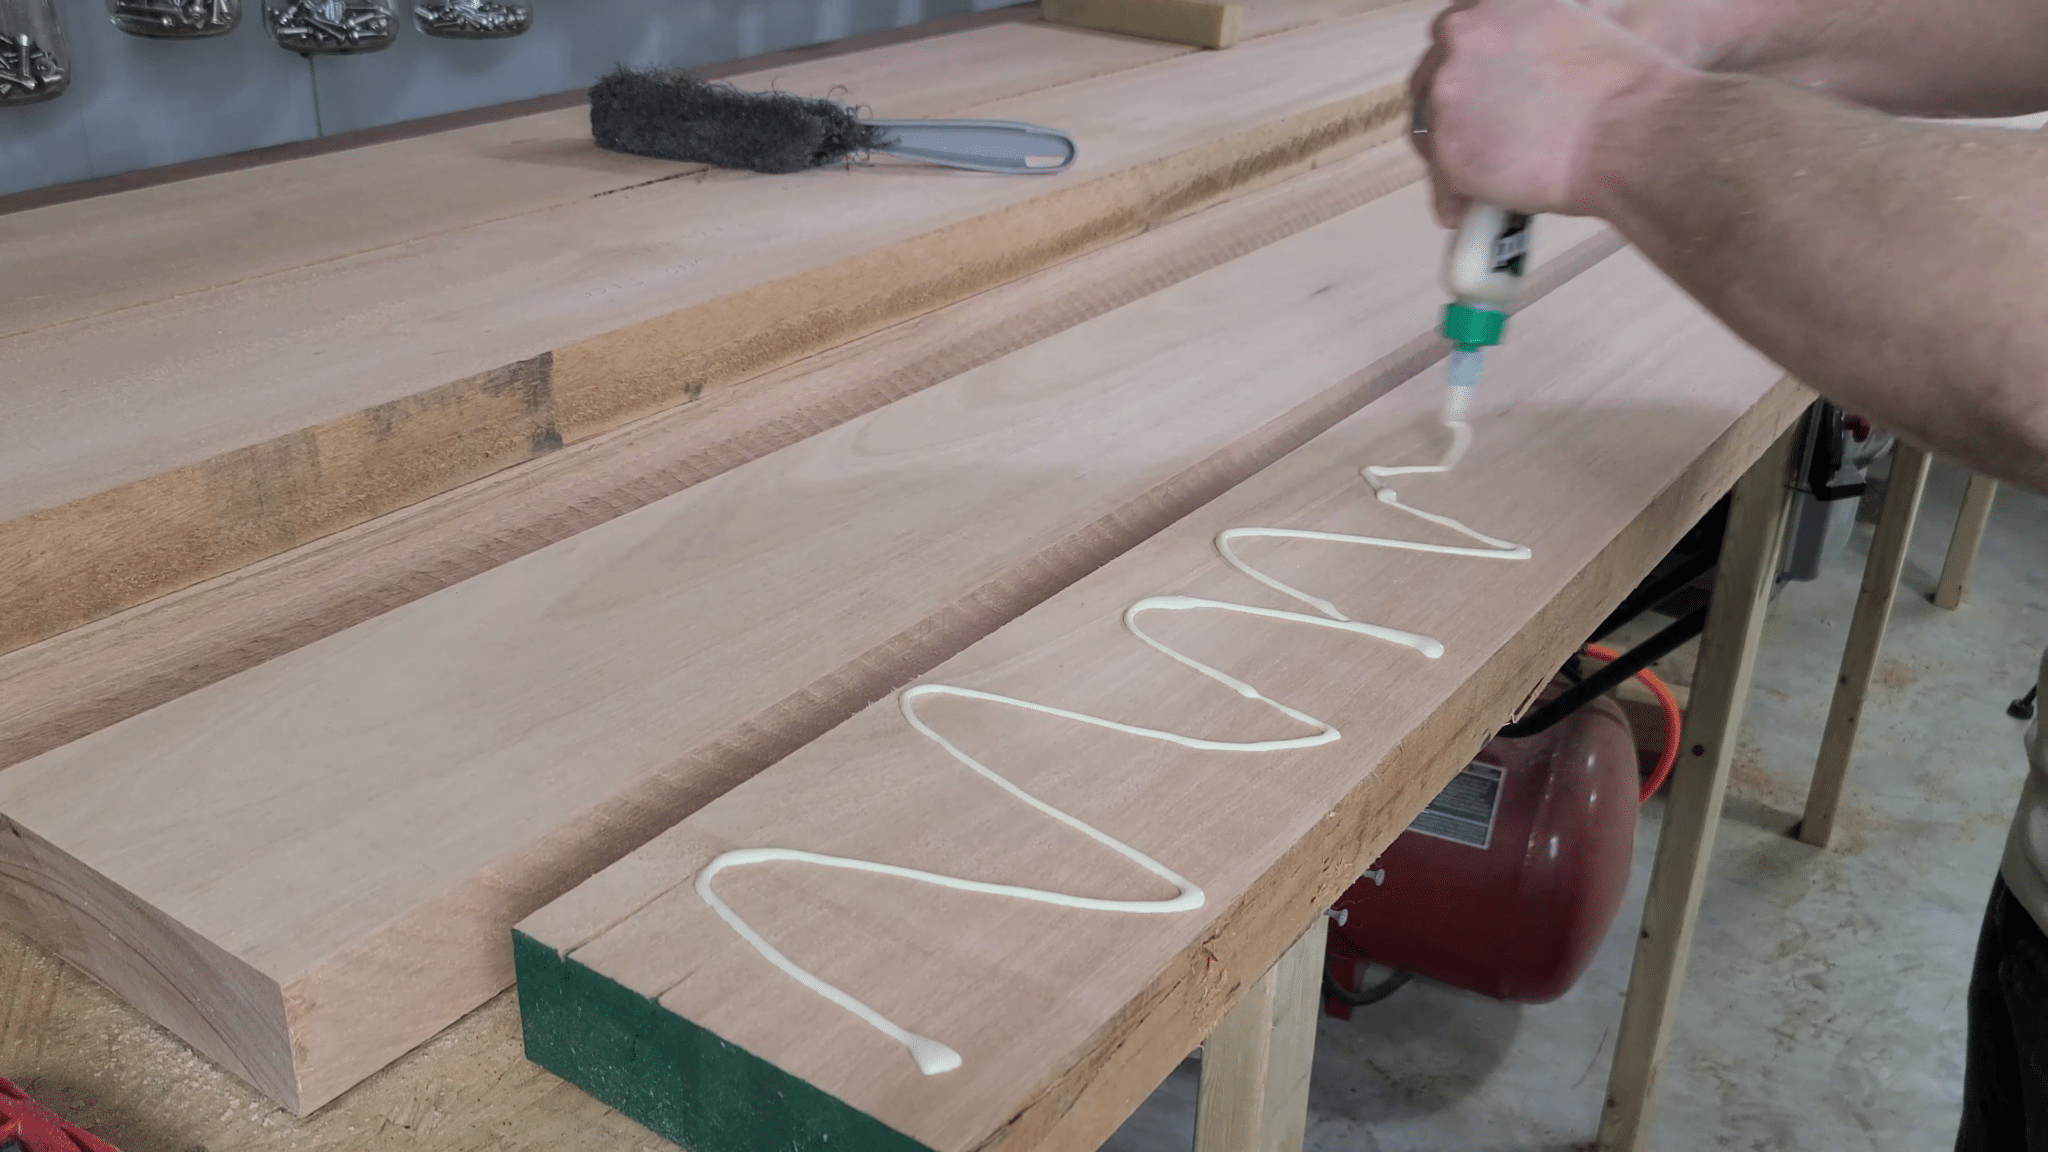
Glue Up The Boards
- To laminate the boards, start with using a sanding block with 120 grit sandpaper to quickly knock off any high points and ensure you get a good glue joint.
- Next, break out a LOT of glue and spread it out evenly along the board.
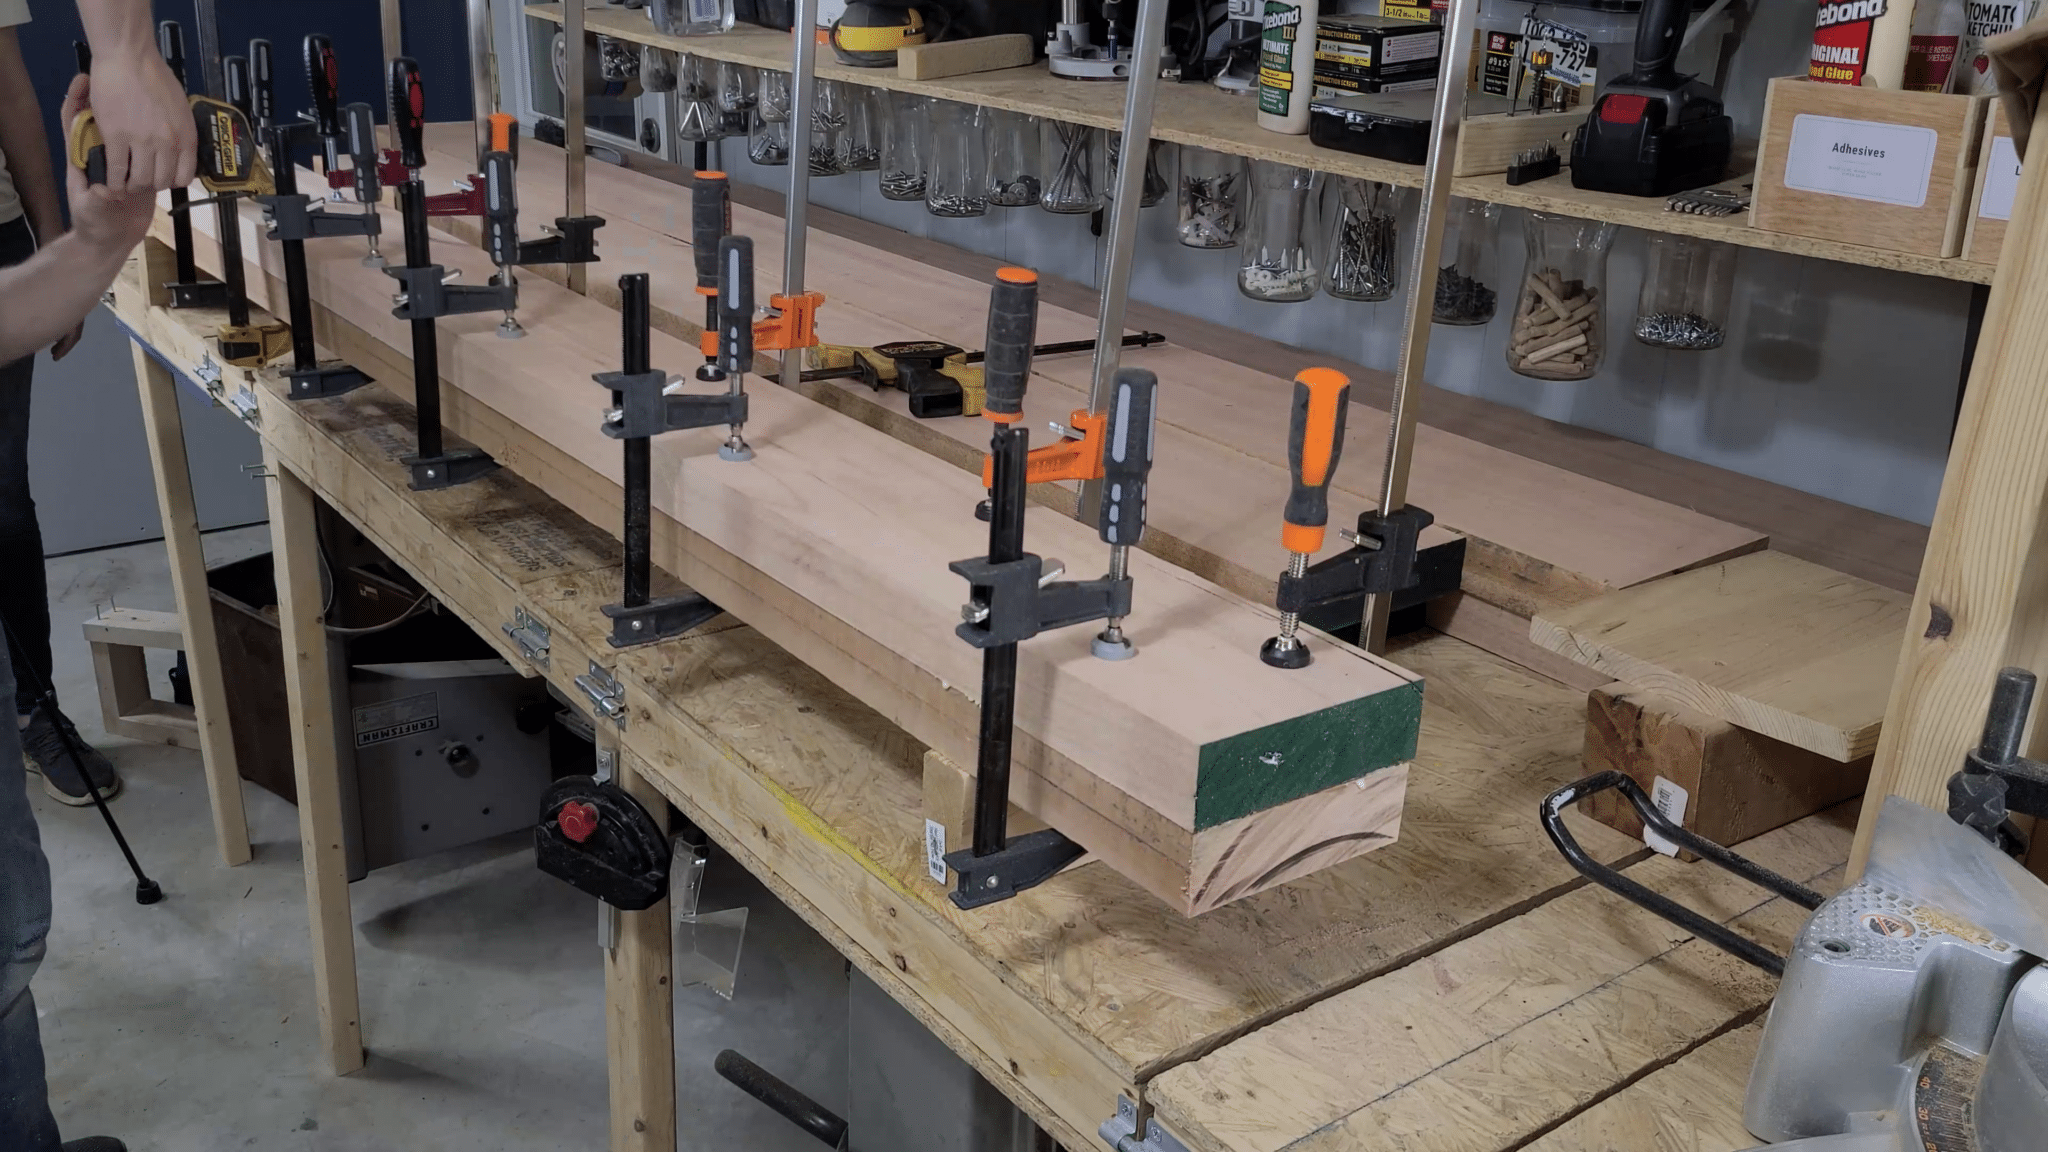
- Then place the boards together and clamp them down. It requires a lot of clamps for a large glue up like this, and honestly, we could have used even more (ask for clamps as gifts…you won’t regret it!).
- Clamp until there’s a good squeeze out along the board and there’s no visible gaps.
- Scrap off any glue on the boards sides before the glue completely sets
- Let the boards fully dry (see your wood glue’s recommended cure time).
Trim Laminated Boards
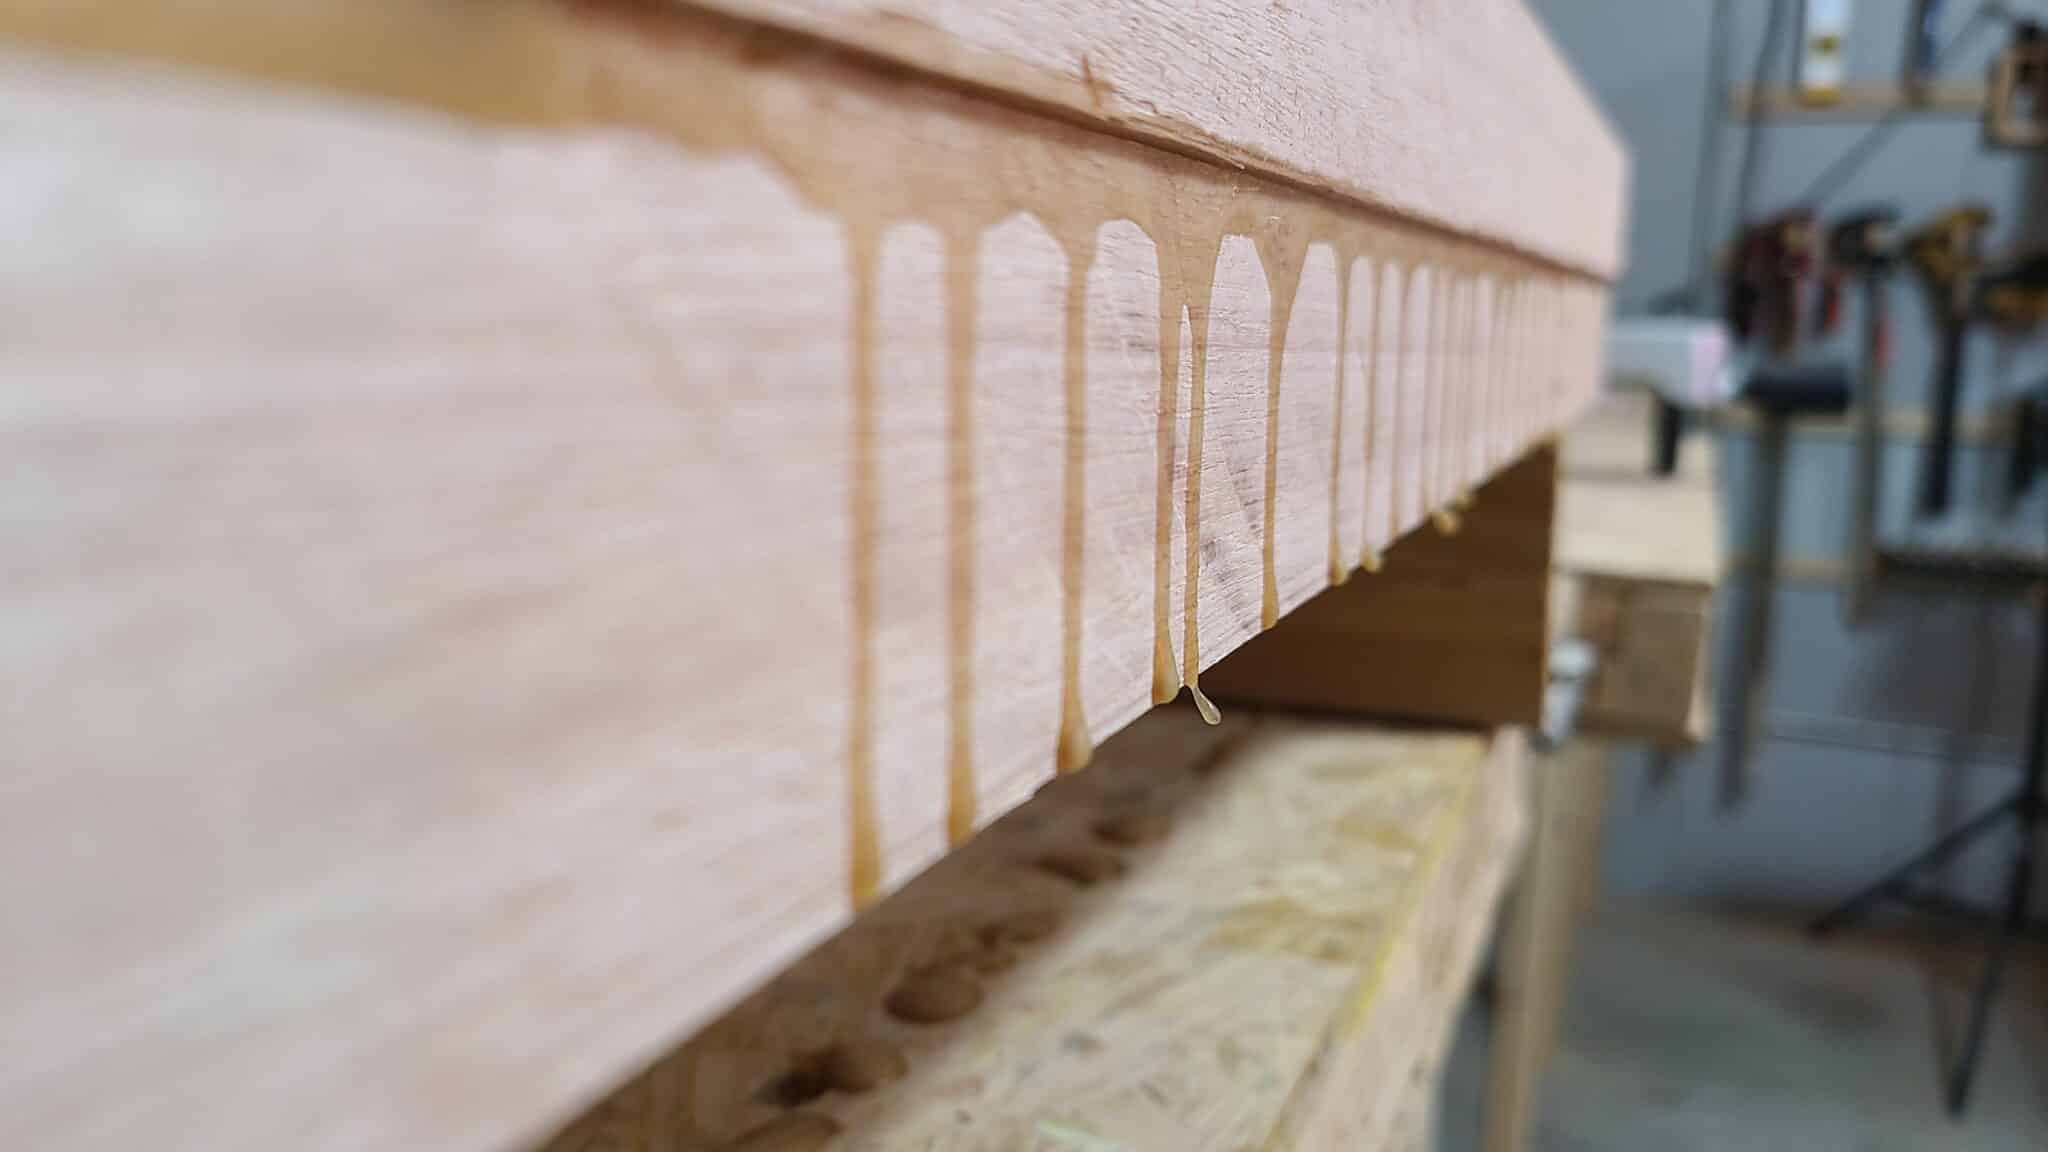
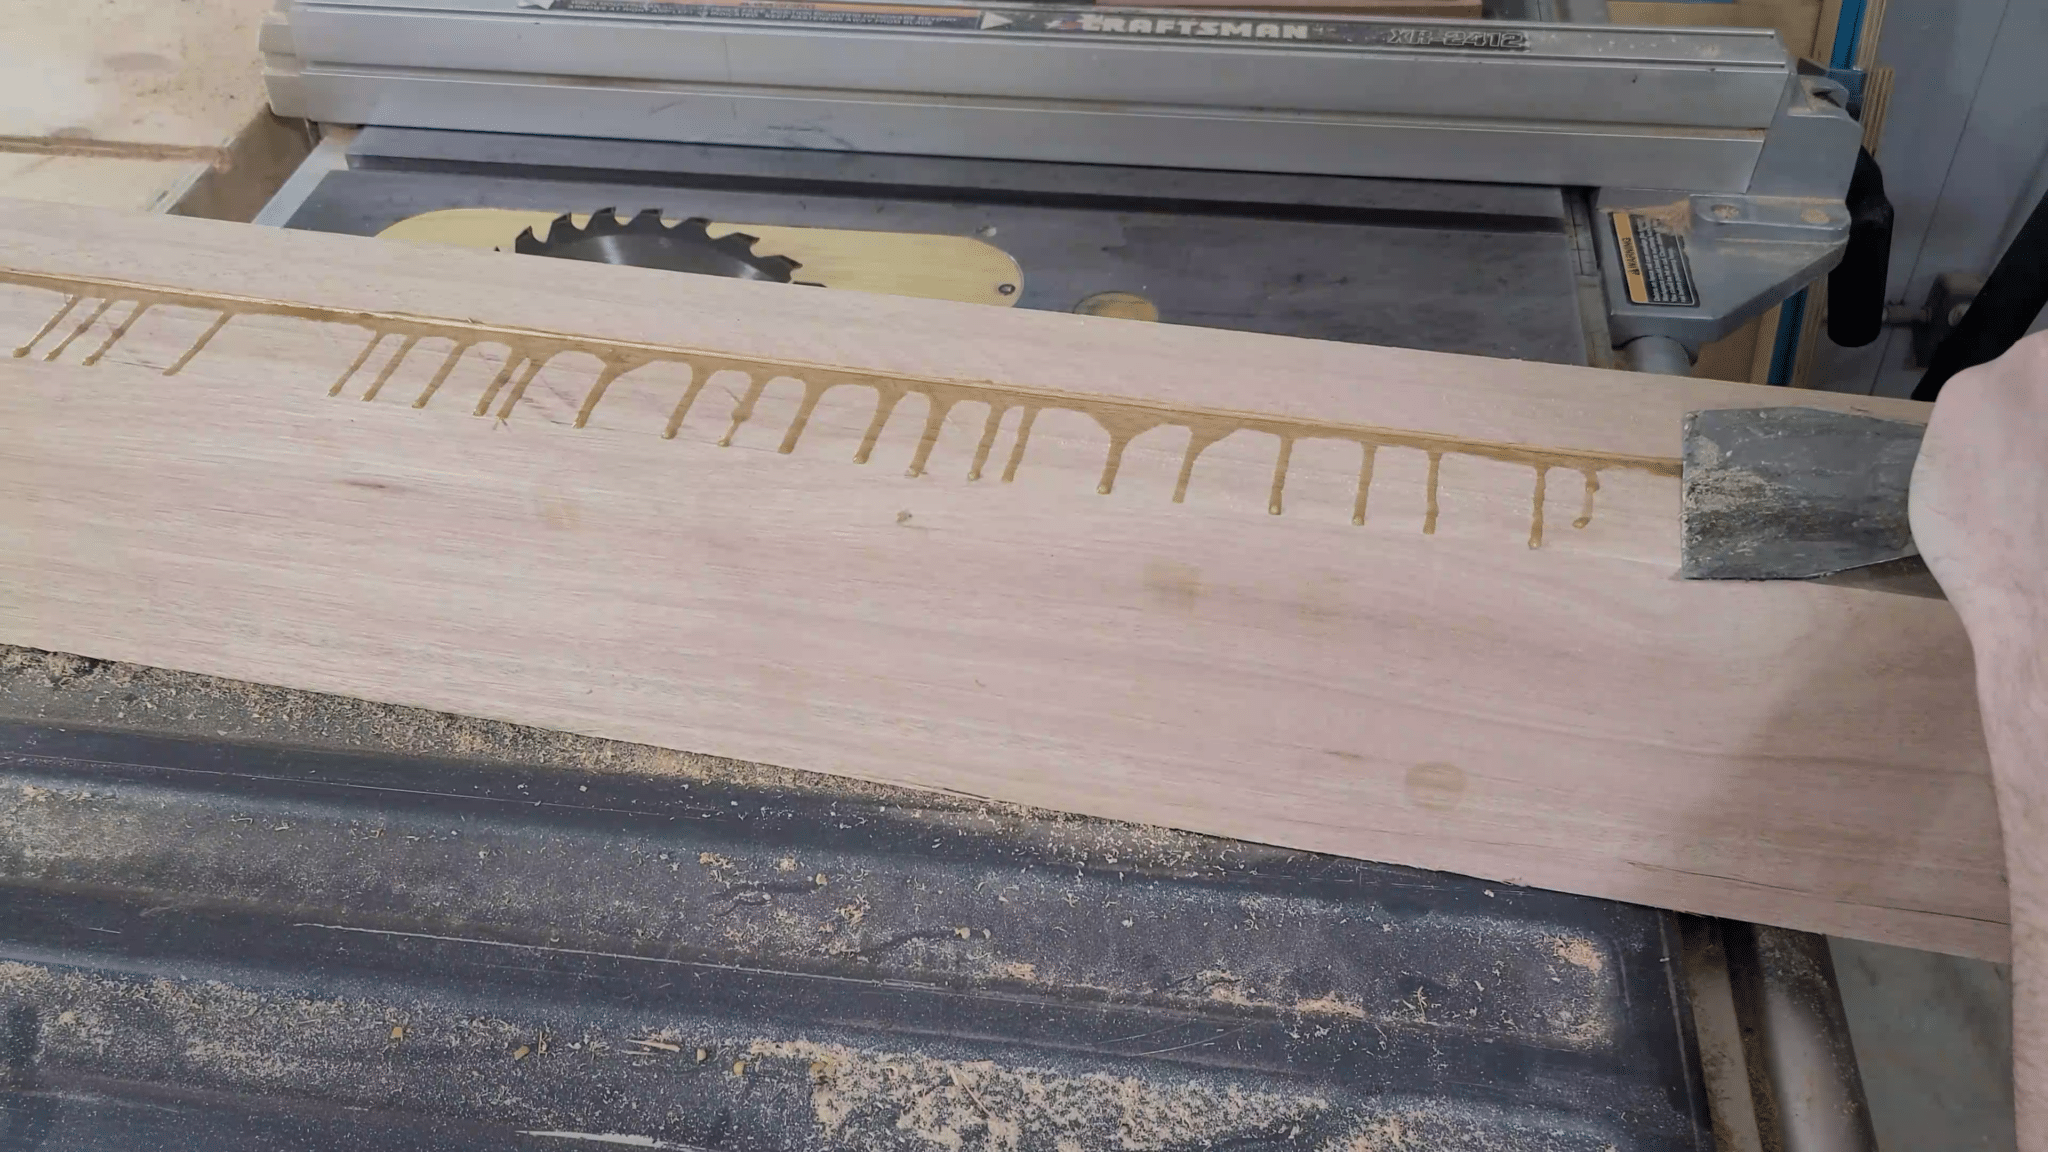
By the next day, the glue is dried and these boards are ready to be trimmed down to their final size. Before you cut these boards down, first you need to make sure you have a straight edge to reference. Unfortunately, if you forgot to scrap off the excess glue or didn’t get it all, this means scraping off dried glue. We intentionally left one edge overhanging the other so we had a good straight edge, but didn’t think to scrape off the glue while it was still setting up. All of these drip bumps will hit our table saw fence, so they have to go. Learn from our mistakes!
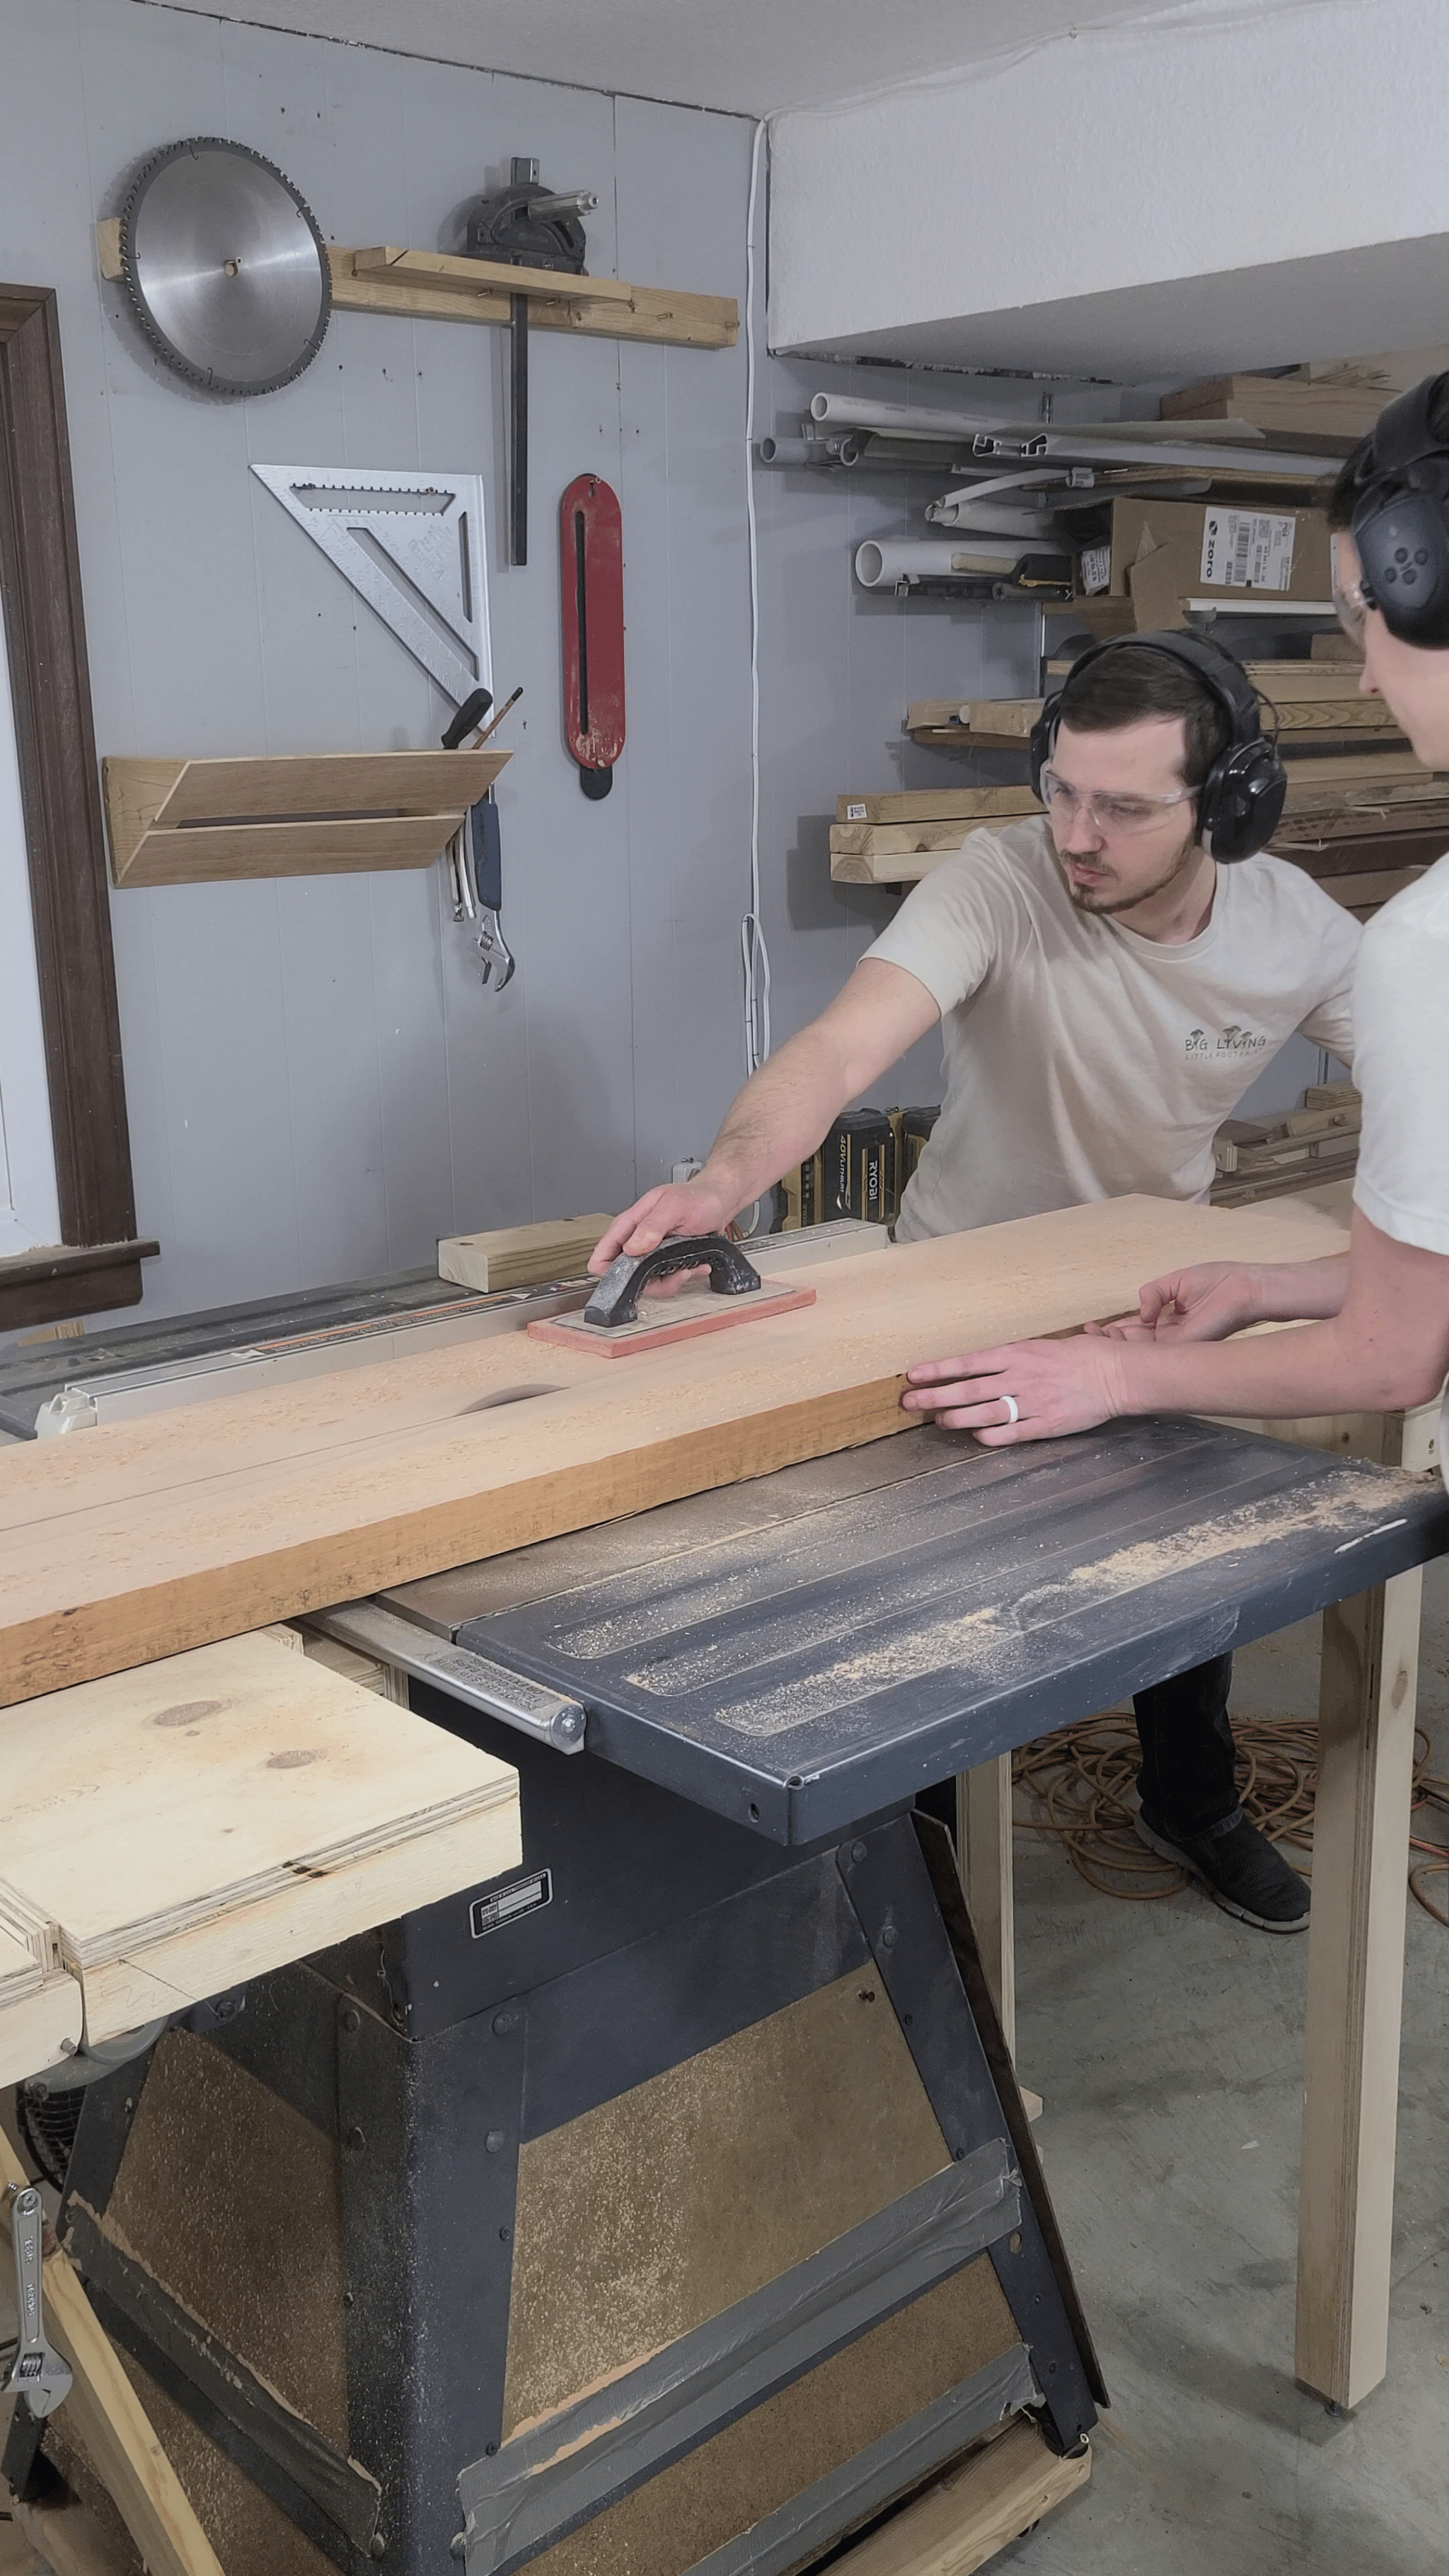
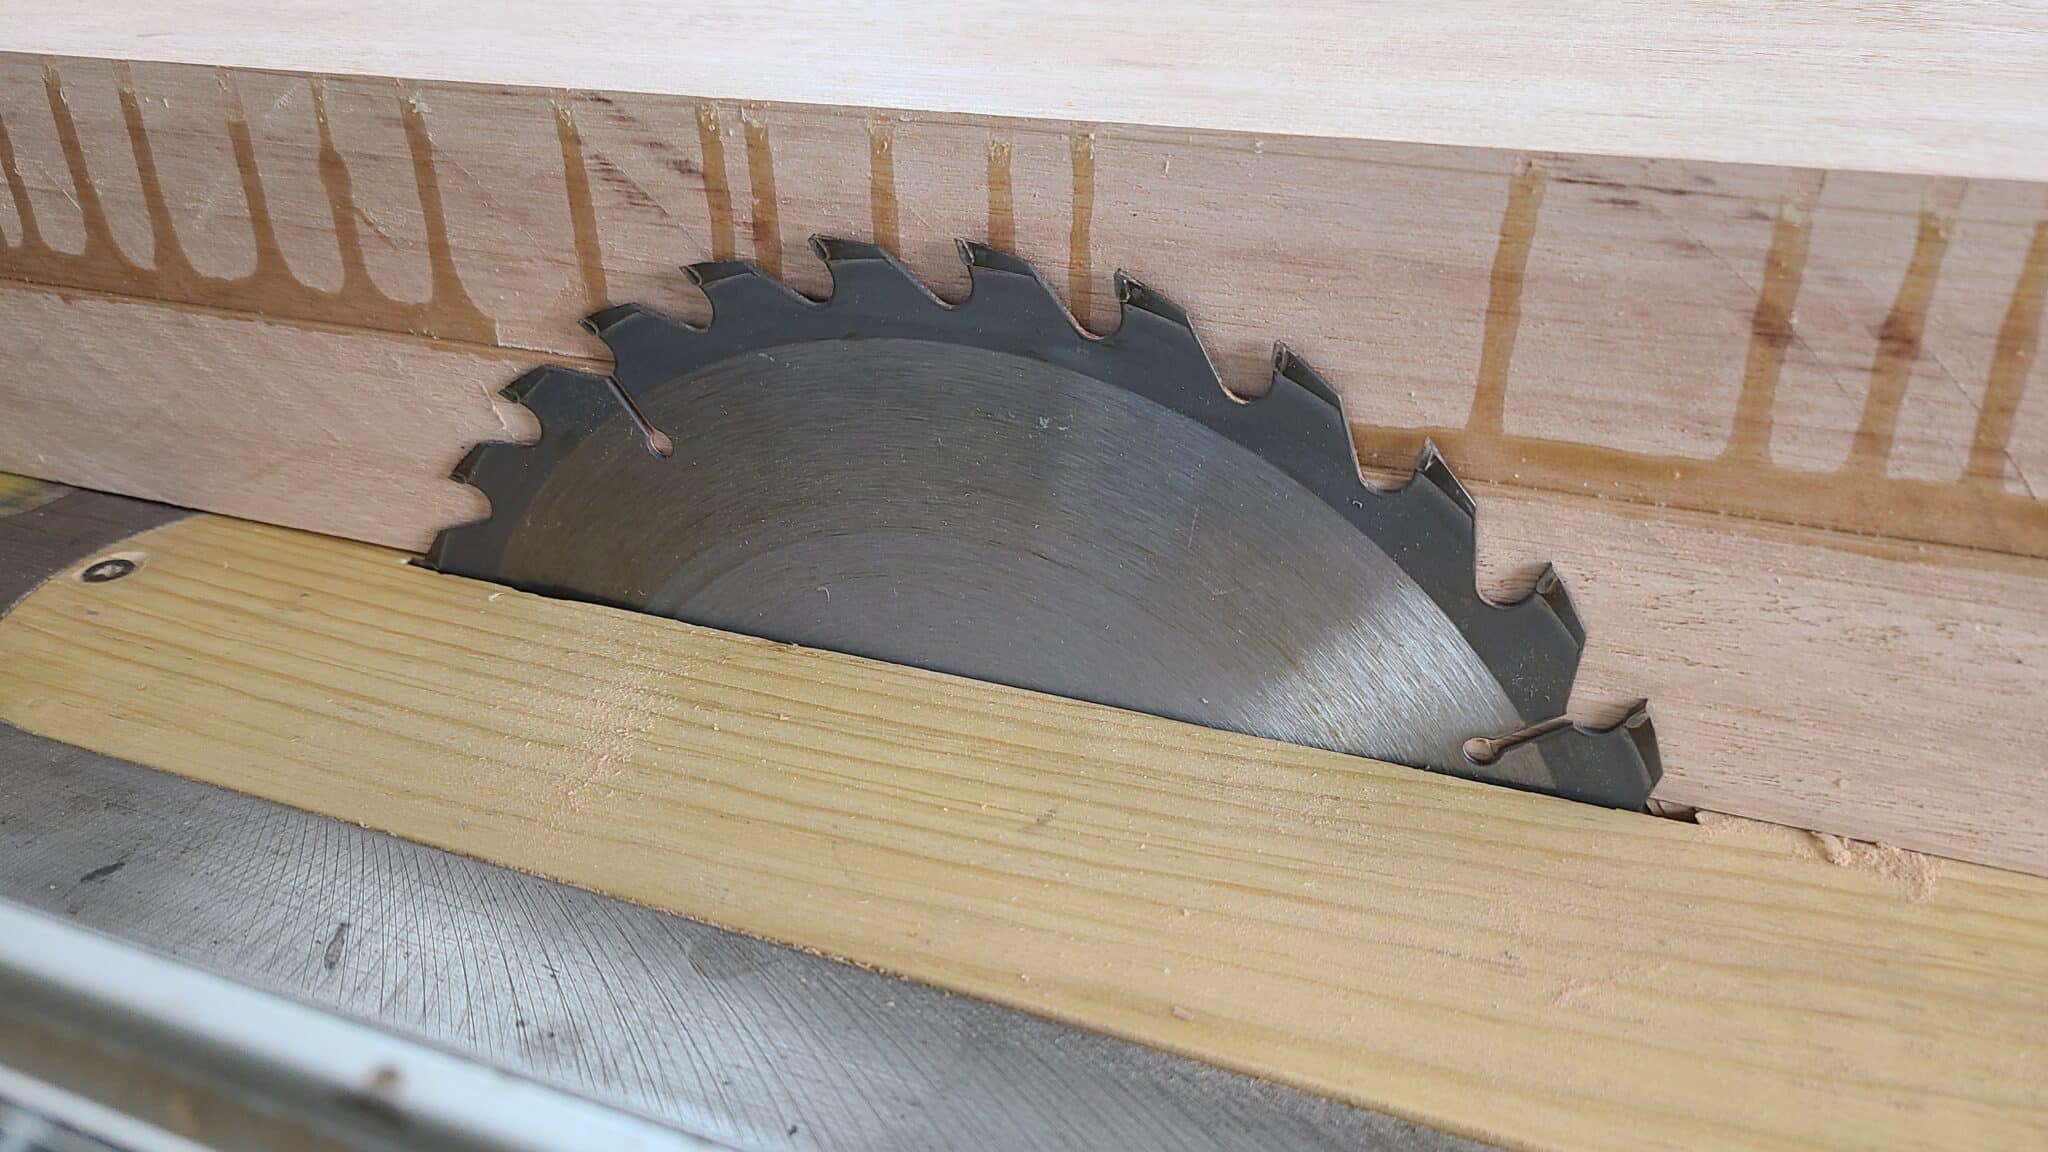
With the non-glue straight edge, it’s time for one of the most nerve-wracking parts of the whole build. Our table saw blade isn’t tall enough to go through the entire board in one pass, so we have to make two passes. That meant cutting the board, then flipping it over and cutting again. Our cuts had to be pretty perfect to ensure they line up, and with these being massive boards, that can be pretty tricky.
We’d recommend having a second person as it makes a huge difference. One can press the board tight against the fence while the other feeds the board through the blade. Then flip the board over and run it through again. Eventually, you’ll make it all the way through the board and reveal the lamination line. With a little sanding, it usually turns out beautifully! Then repeat this same process on the other 3 boards for the main bed frame.
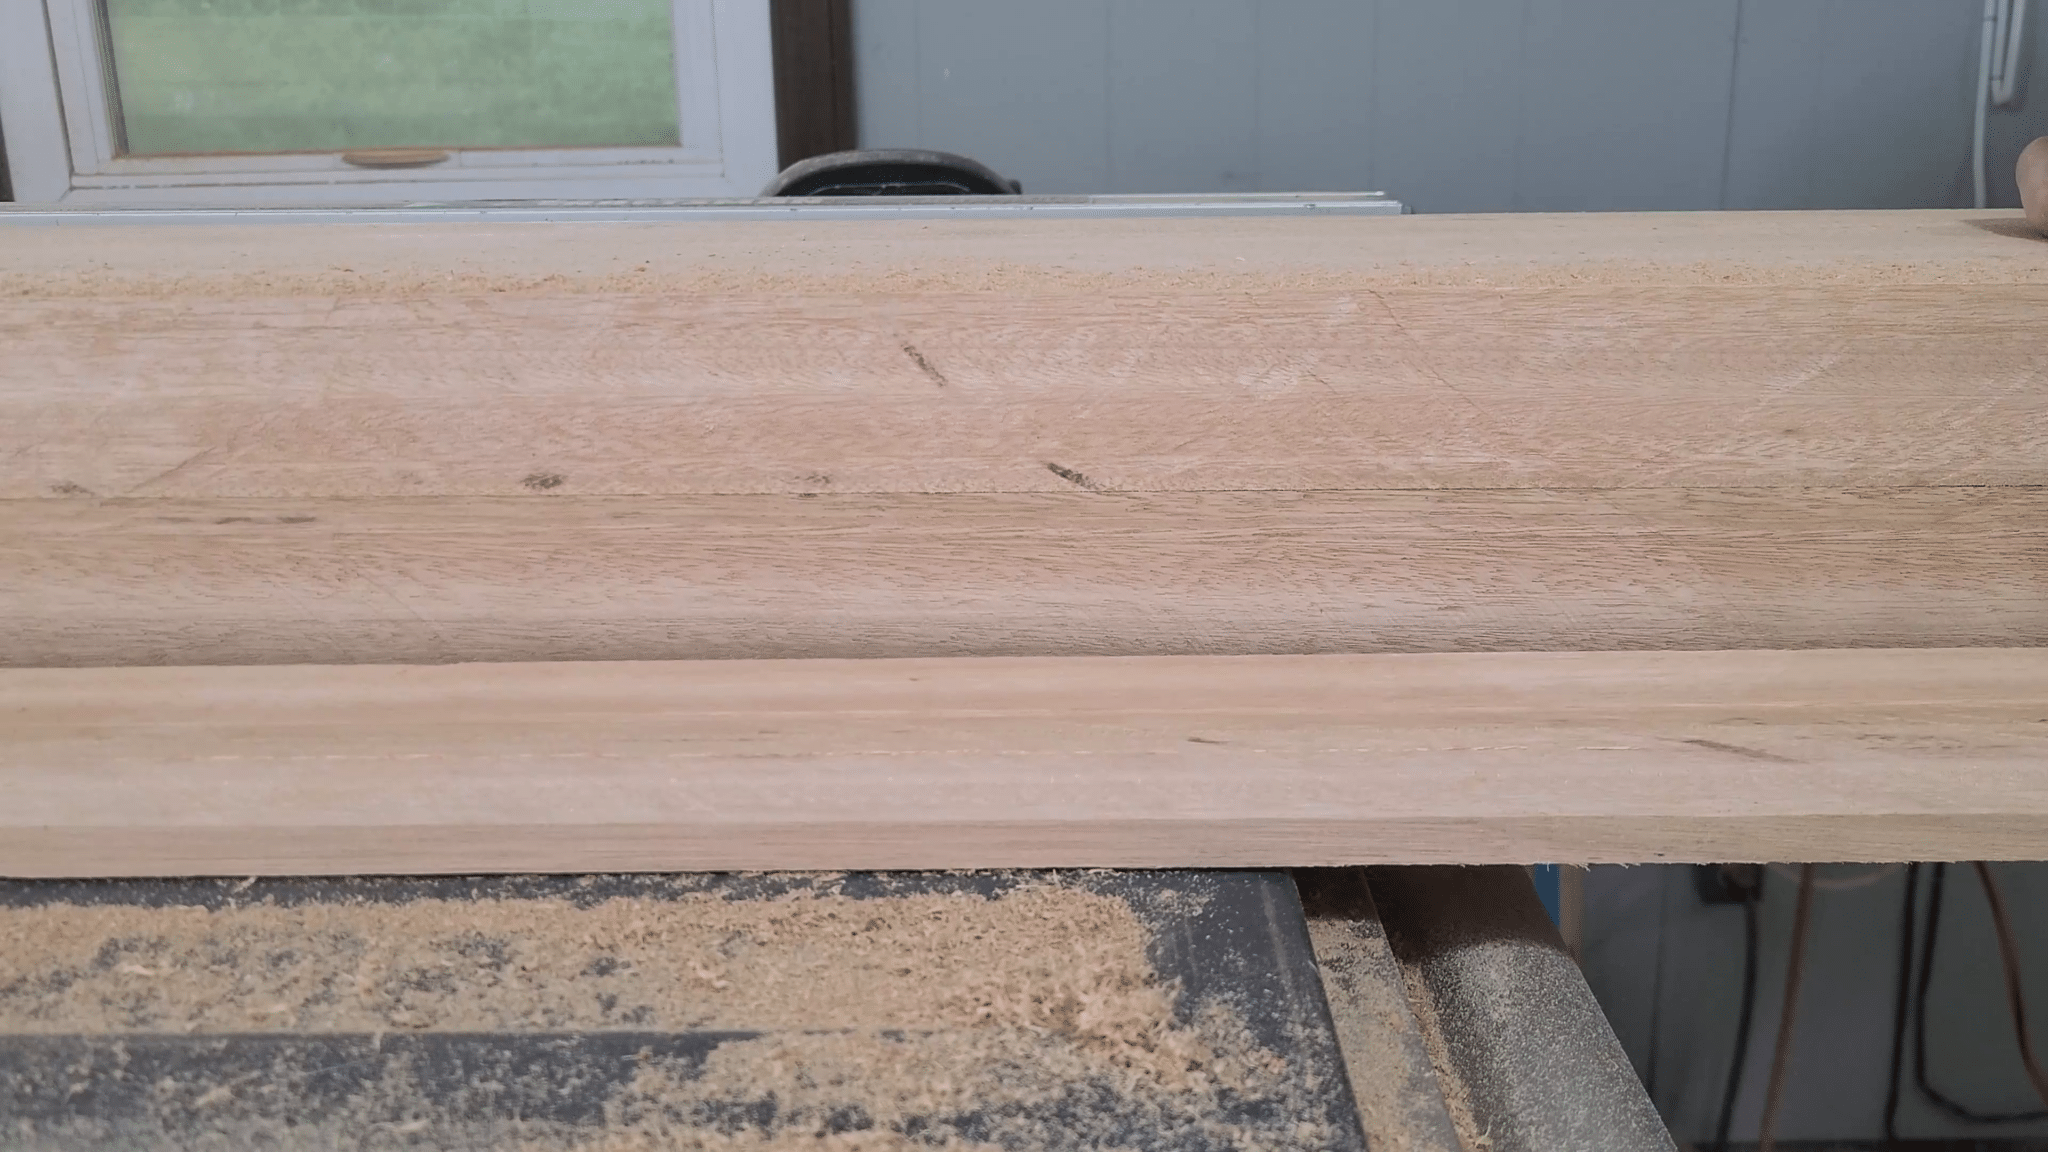
Next, move the fence to the final width for these boards. Using the face you cut previously as the reference surface, cut each of the boards to their final dimension. Tada! You now have 4×6 boards that are the correct size to match the construction lumber from the plans.

Step 3: Cut Decorative Chamfers
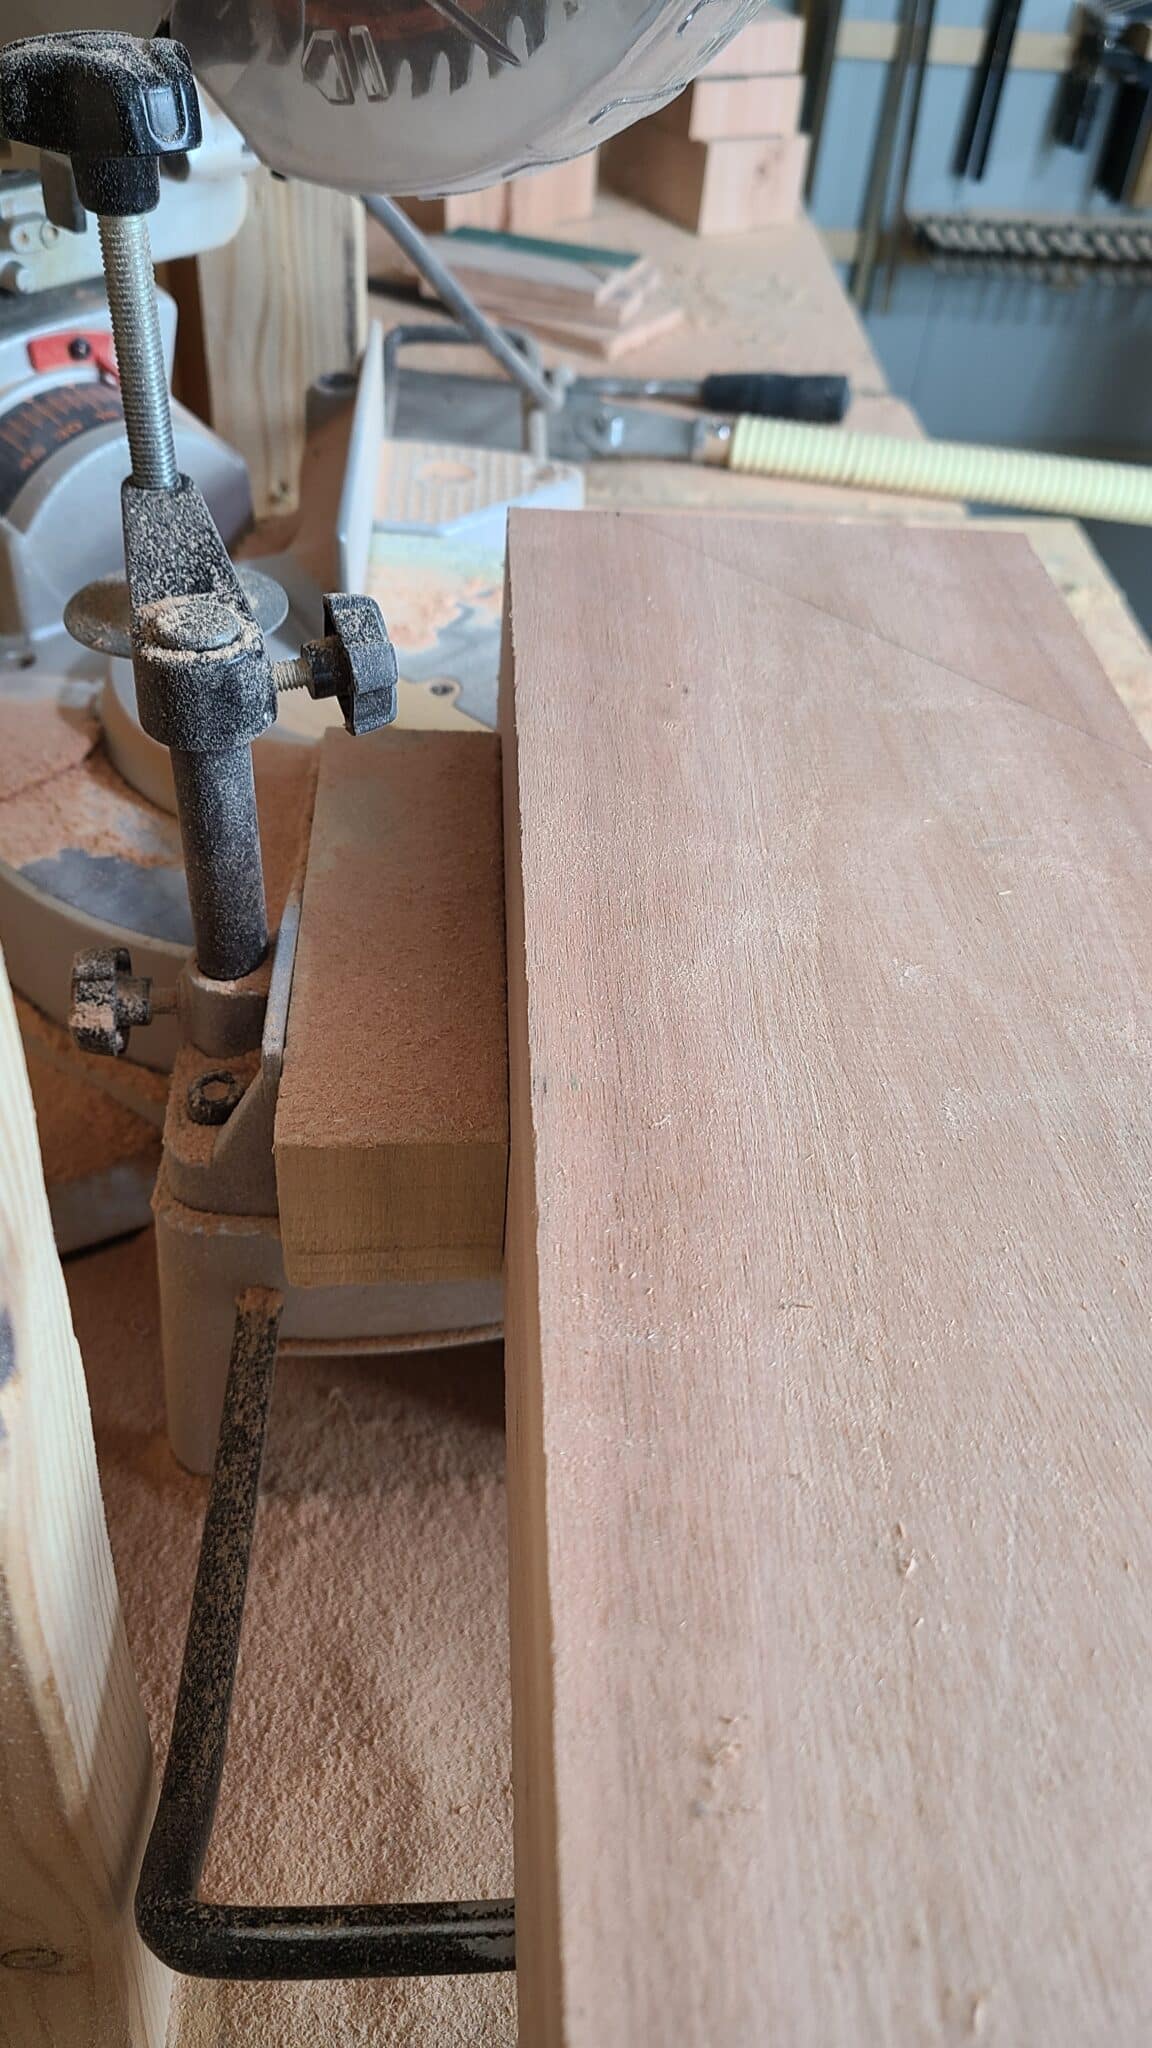
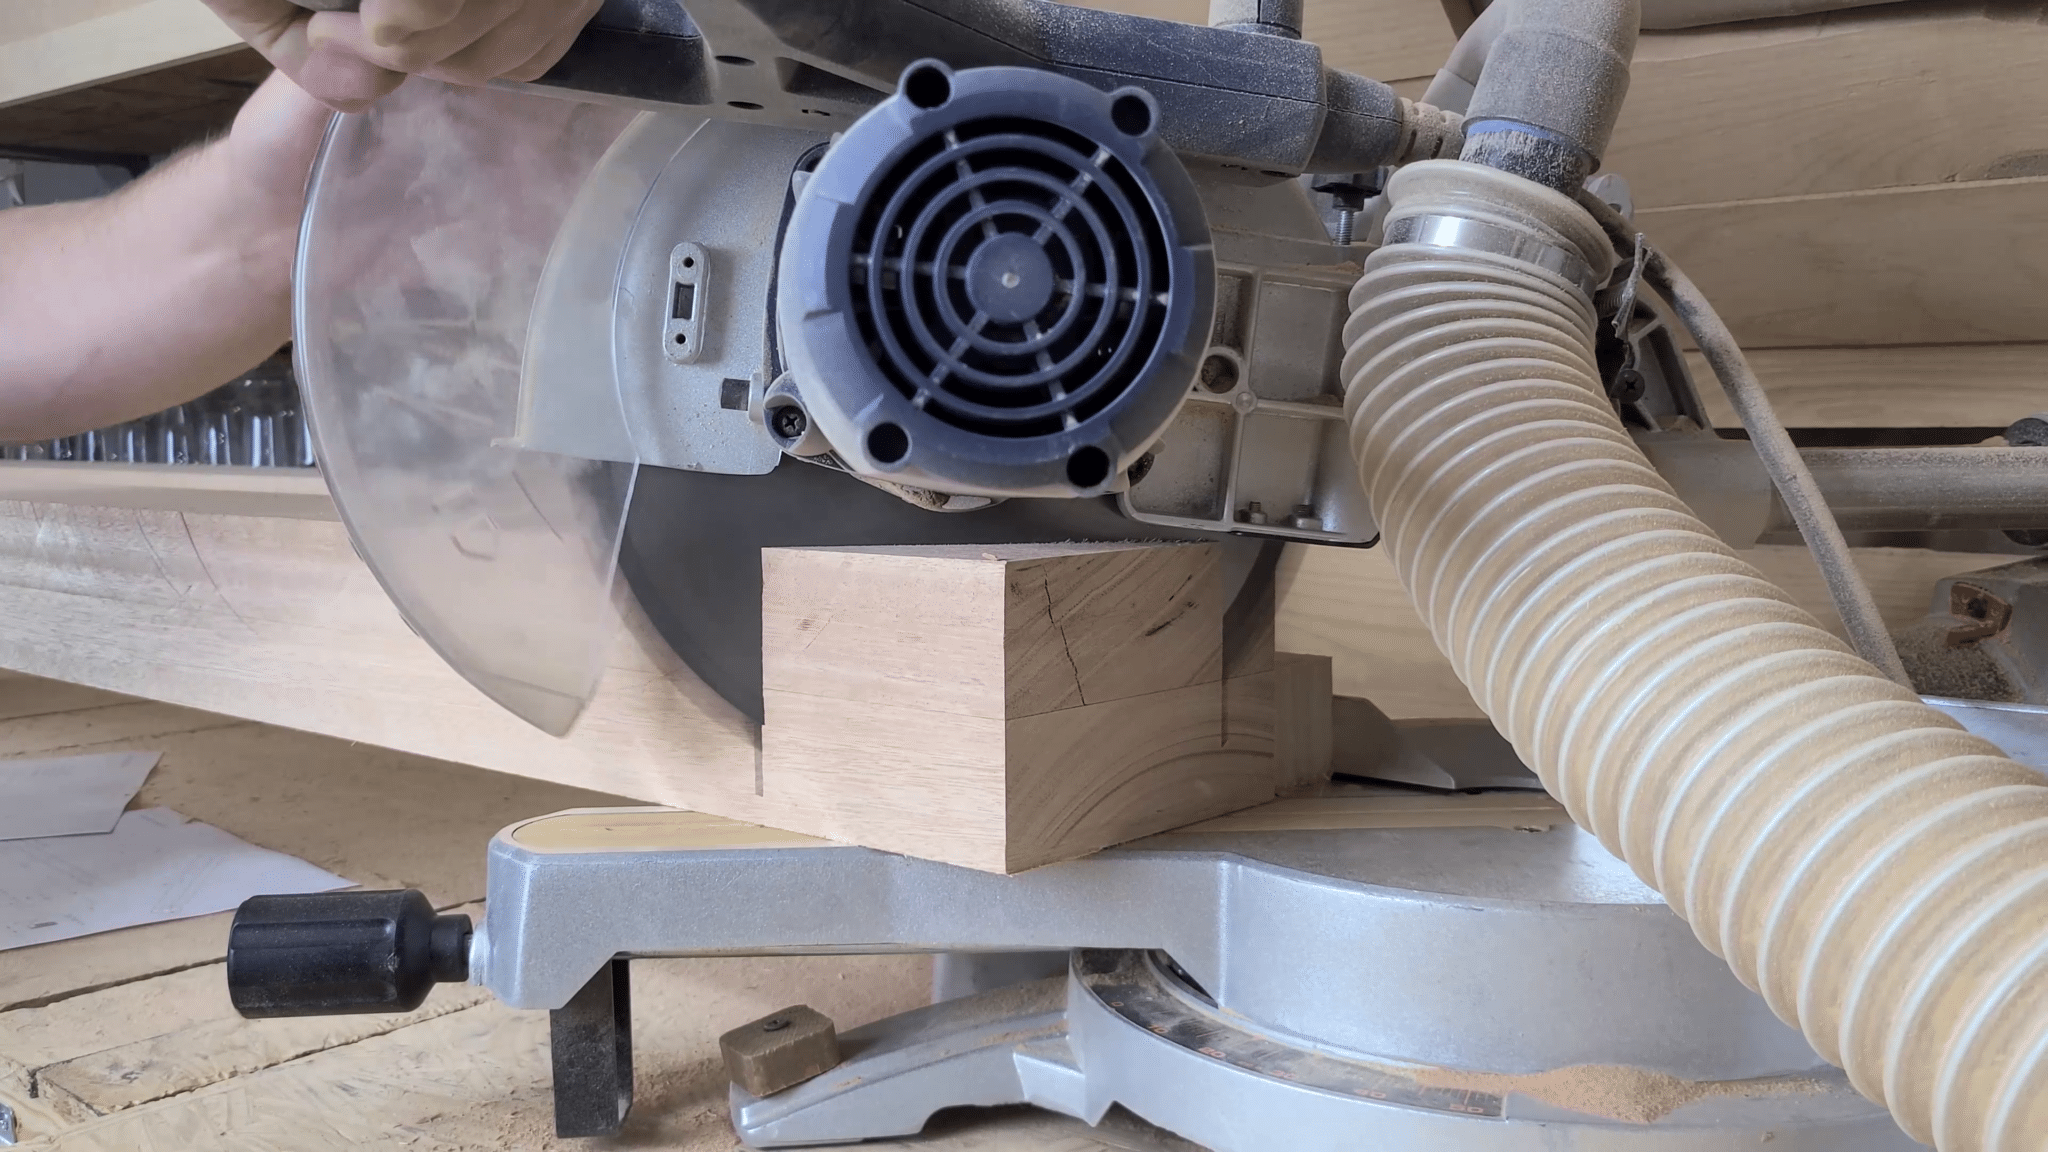
We’re going to start with the hardest boards first: the 4×6 boards for the frame. You will be adding a decorative chamfer to the ends of the 4 x 6 boards, but first, you need to cut them to the final length. Since this length and chamfer aren’t functional, they don’t have to be perfect cuts, so we do them on the miter saw.
Now it’s time to cut the angles on the bottoms of each of these boards. This angle is purely aesthetic, so it doesn’t have to be extremely precise. The only important part is to make sure that it is not too steep or it will get too close to the ropes we are wrapping around the corner and allow them to slip off. If you stay close to the dimensions in our daybed swing plans you will be okay.
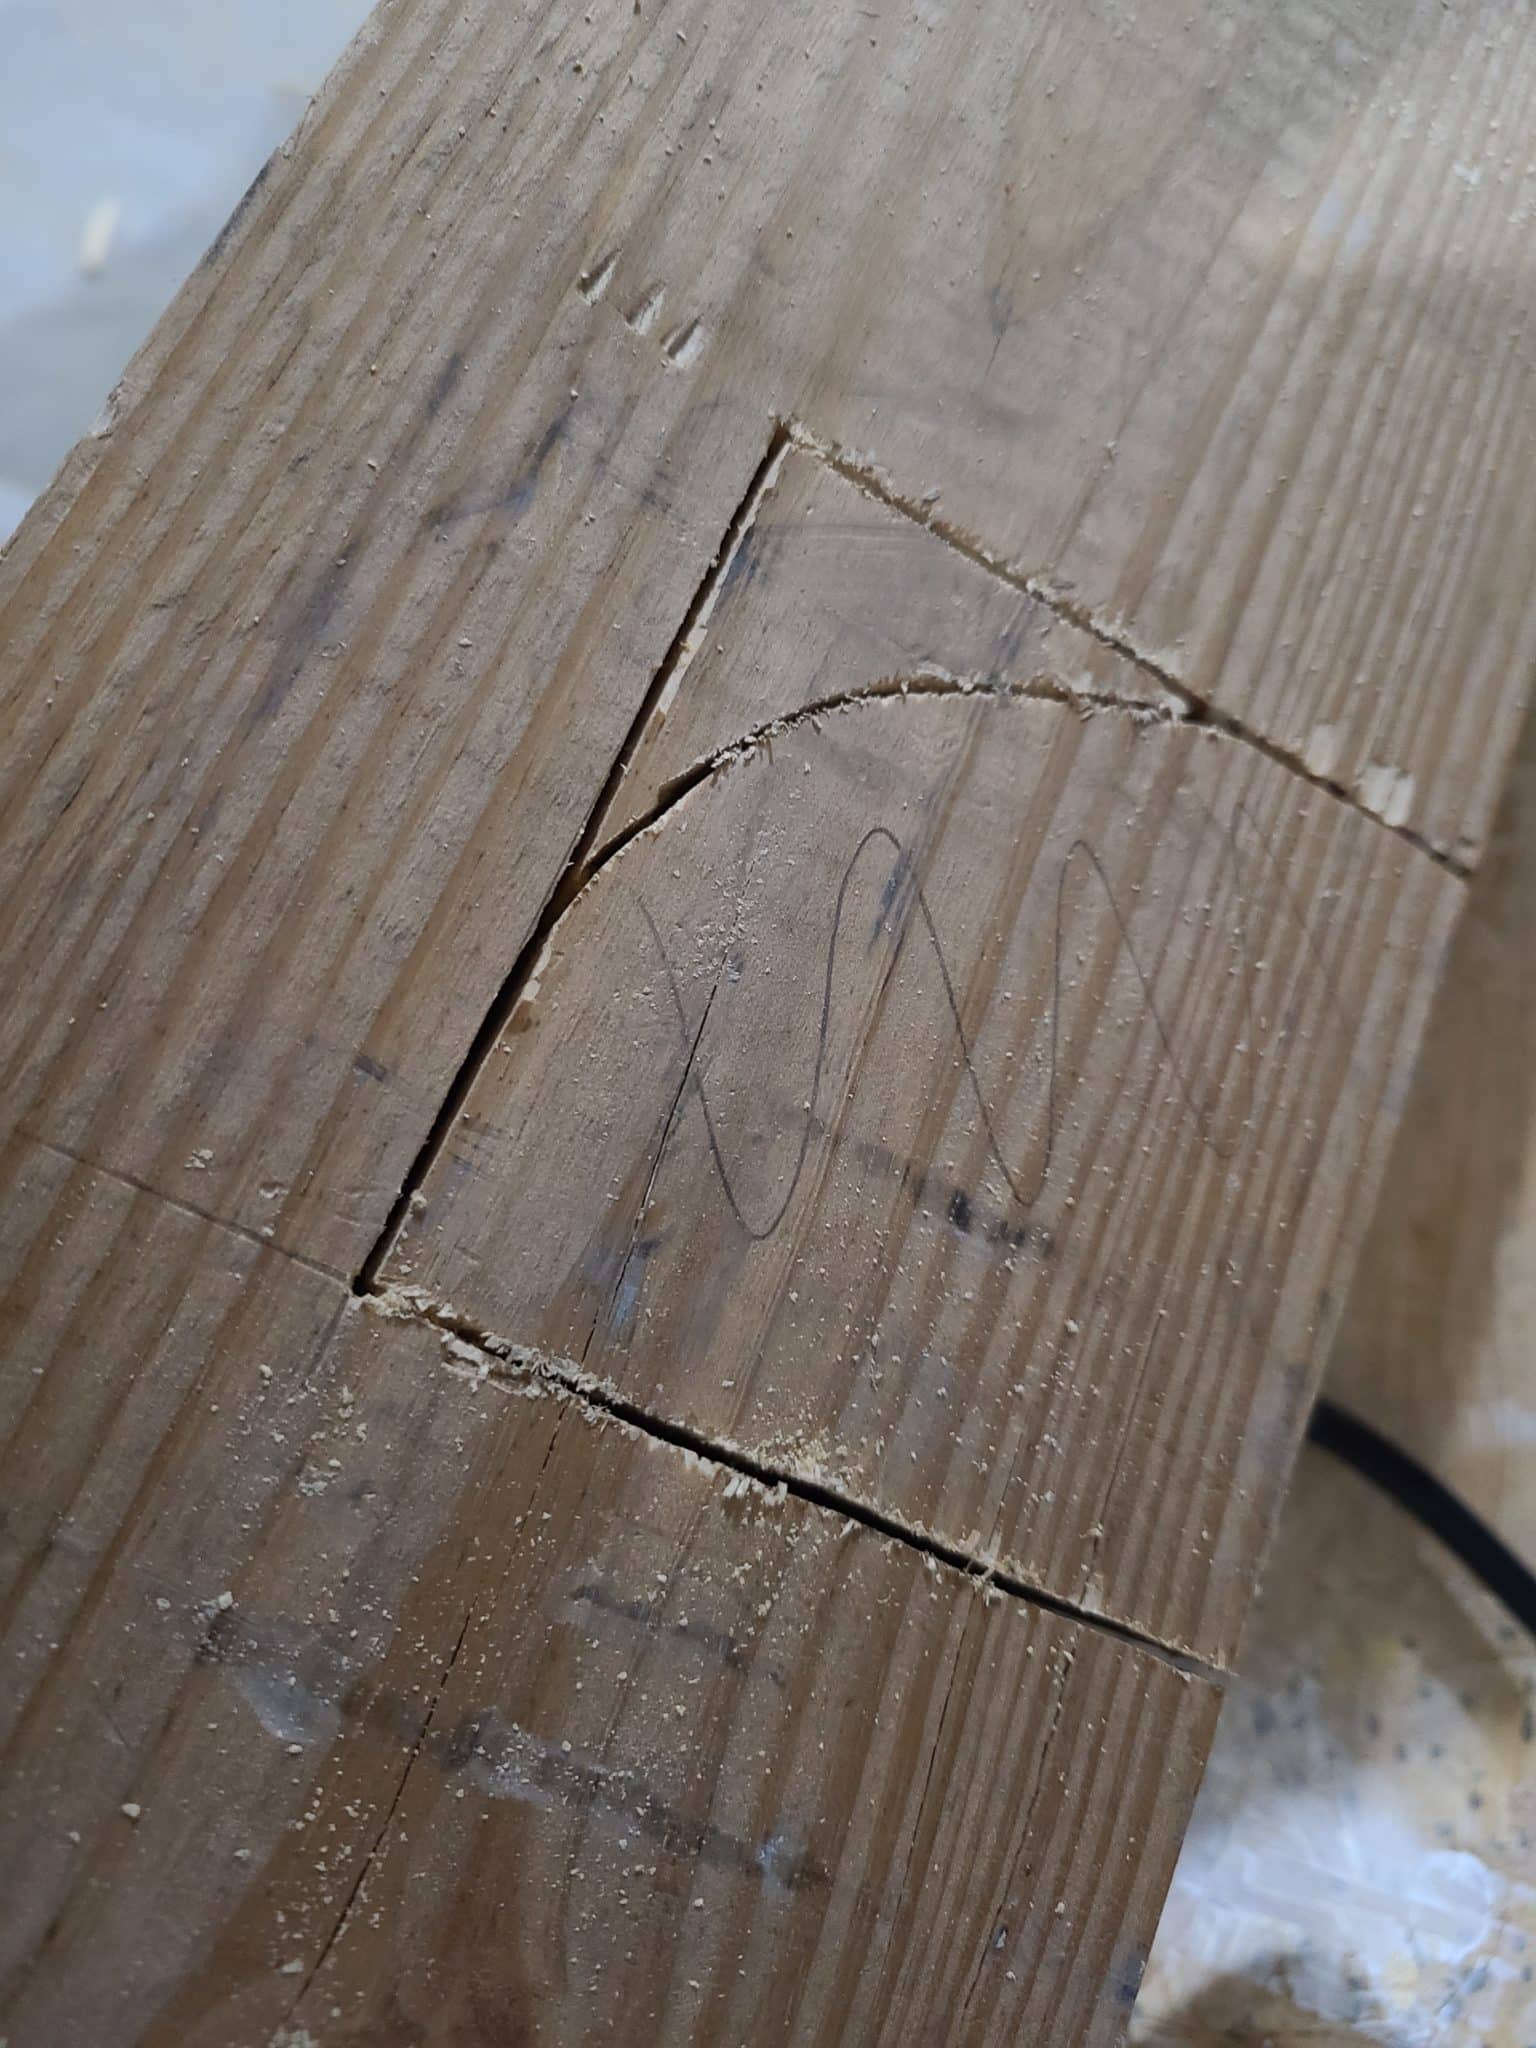
To make this more repeatable, first mark out where the chamfer falls and then add a clamp to a Speed Square to act as a stop block. This allows you to quickly mark the same chamfer on each of the next boards. Then position the board on the saw so that our drawn line matches up and make the cut. These boards are thick and wide, so you may need to utilize a pull saw or other tool again to get through the rest of the material.

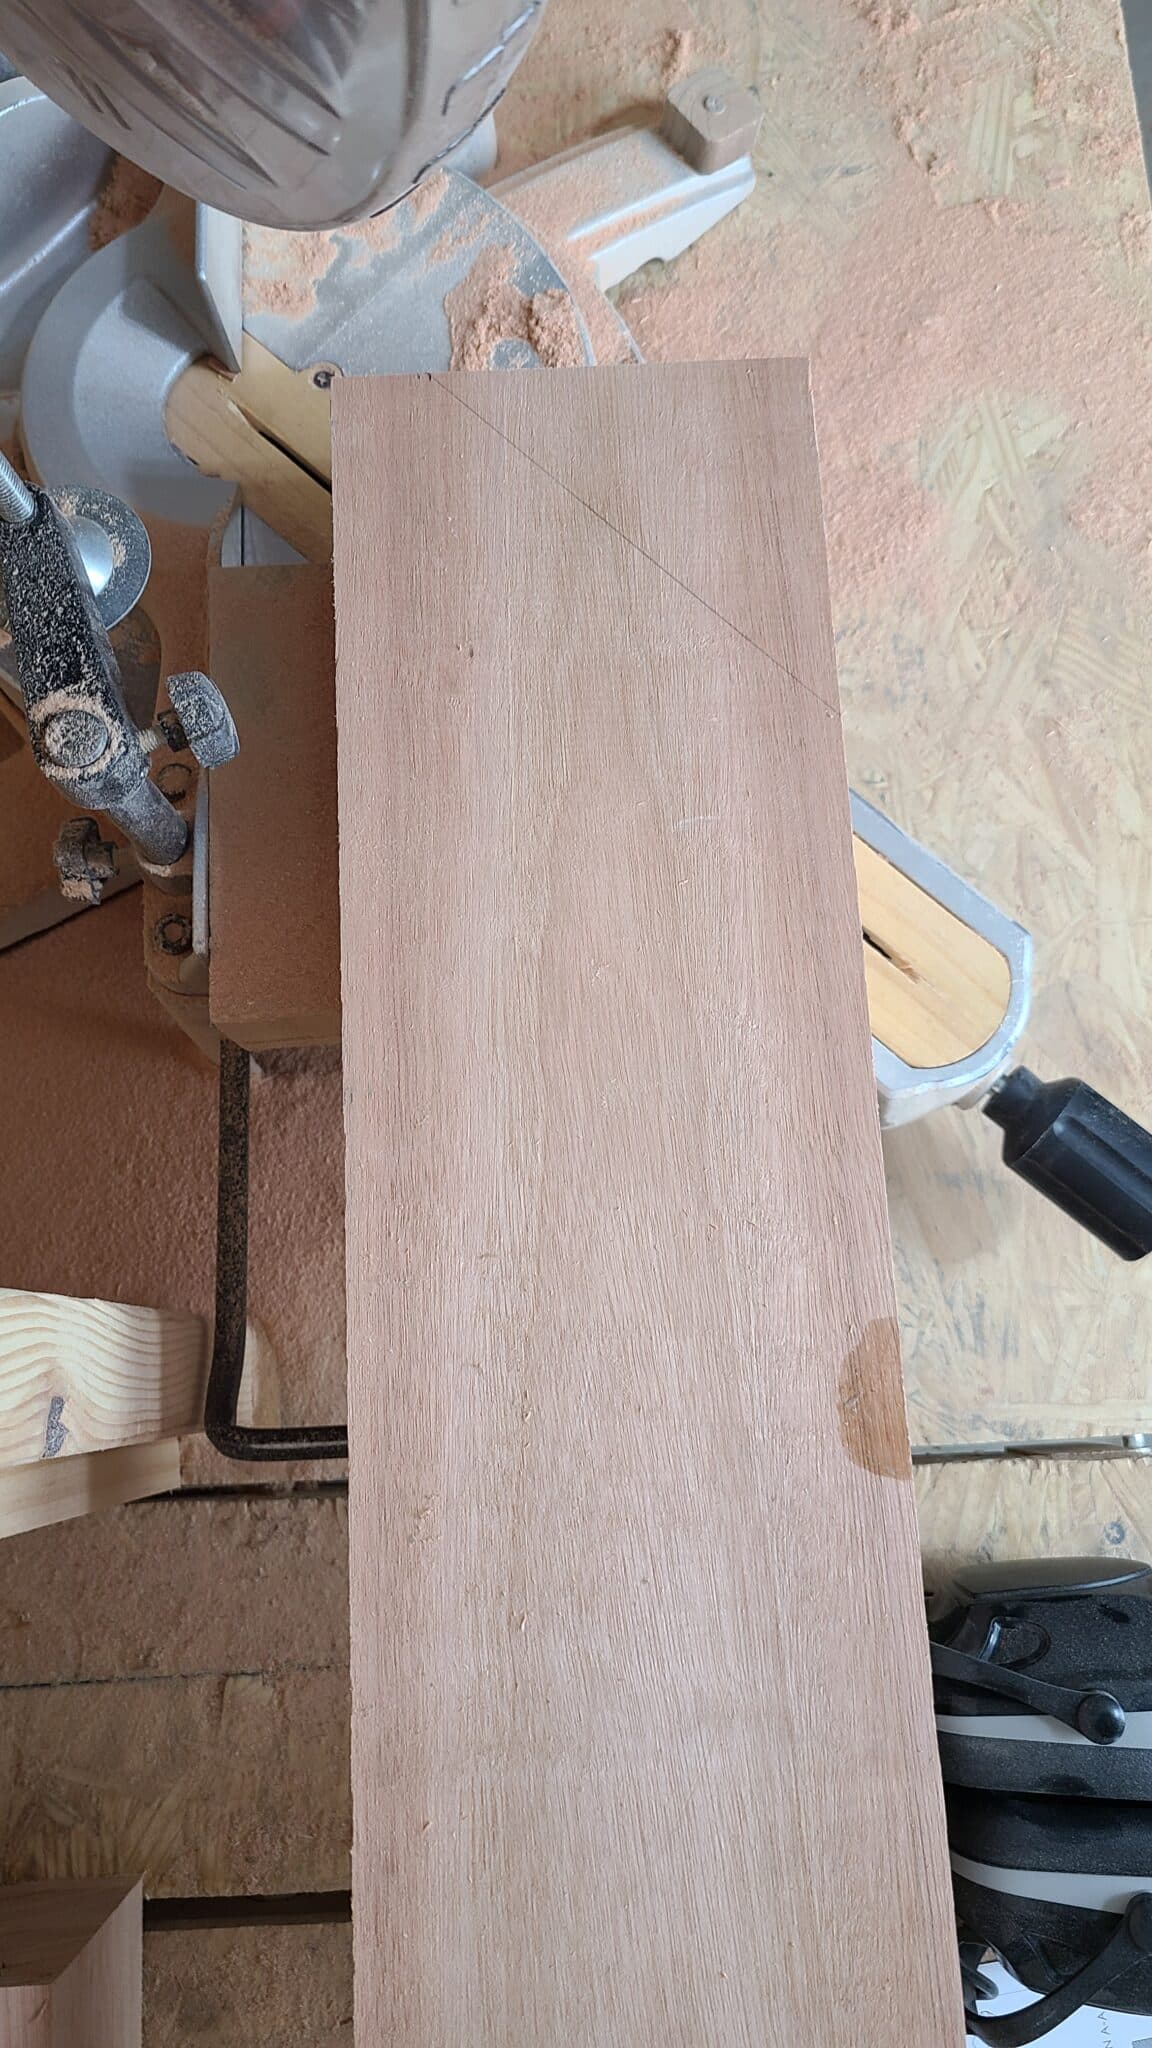

Now flip the board around to mark the other side. With the speed square set up, this takes seconds and you’re ready to cut. Just repeat the process to cut the other corners. One of the things to keep in mind is that removing these corners gives you the opportunity to remove defects. We had a few checks in the ends of a couple of the boards that we were able to cut out when we cut off these corners.

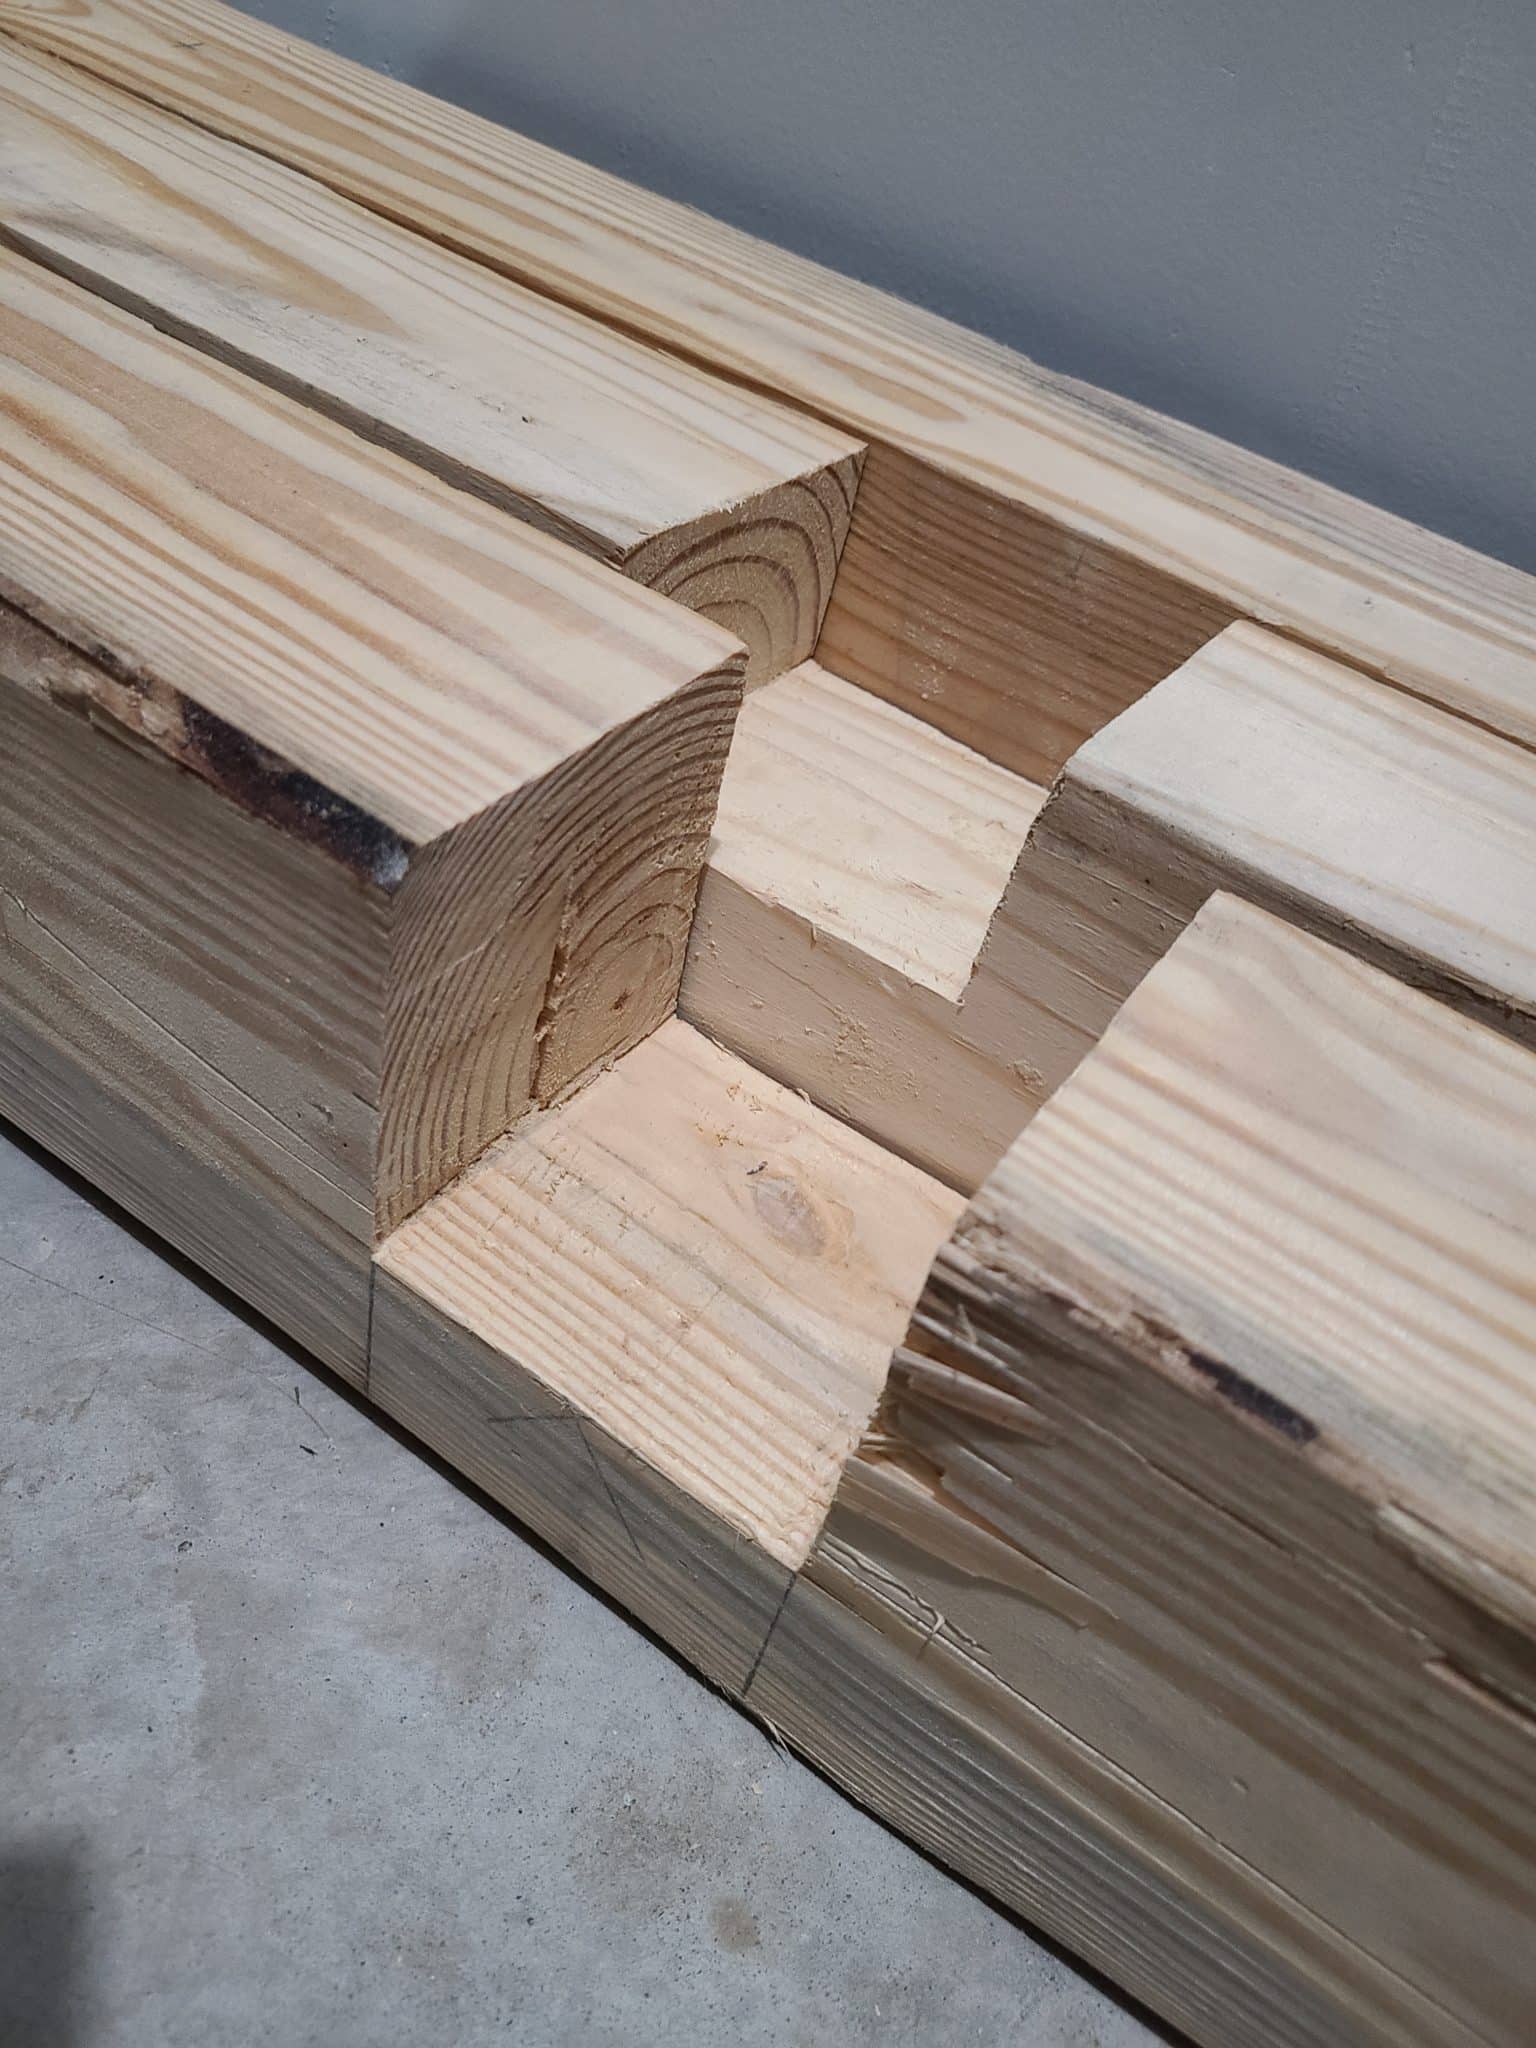
Step 4: Make Half Lap Joints
Now is where things get more complicated. We are going to cut the half-lap joints (aka notches) in the boards to join them together.
Be sure to trace the pattern all the way around the part using your speed square. You will have to cut from both sides and you want them to be aligned when you’re done. In the event that they are off after cutting, use a hammer to knock the piece of wood out and then clean up the inside surface of the cuts so that no material extends further into the cavity than the edges of your cut. By this, I mean make sure that nothing would stick out far enough to hit the 4×6 board you are going to fit into this notch. You can use a scrap piece of 4×6 and test fit it into the notch. If it binds, identify where it binds and then remove some more material there. You want a snug fit here.
To actually cut the notches, there are multiple ways to go about making the half-lap joints. We’ll show you each way we did it for the original build and the rebuild. They each use different tools and methods, so choose one you can do and have tools for.
Method 1: Multi-tool or Jigsaw
This first method uses more basic tools that most people might have experience with. This is what we did on our original build as we hadn’t used a router before. The plunge-cutting blades on an oscillating multi-tool are perfect for cutting each notch for these half-lap joints. Or if you don’t have an oscillating multi-tool, your next best option would be a jig saw. You can cut down each side and then sweep a wide corner to get to the back face. From there, you can turn around and complete the cut on the back face like we show below.
Repeat this process to cut out all of the half-lap joints in the 4×6 boards.
Method 2: Router
If you own a plunge router, then this is another great method for cutting the half-lap joints. This is the method we used on the hanging daybed rebuild, and what we prefer when using harder and higher quality wood. To start, you’ll need to make a template to use as a cutting guide.
Making a Template
A template can simply be made with some scrap wood or offcuts from your project.
- Start by cleaning up one face of the scrap board. Rip it on the table saw to be just as wide as one of the 4x6s.
- Now cut a few more pieces to go on either side of the board. Leave one board longer so you can attach more offcuts to it as reference features in order to get repeatable cuts.
- Bring the pieces over to a 4×6, then measure and trace out the cut pattern using a speed square.
- Then put the template piece in position and clamp it down. Now spread some super glue along the edge of one of the other pieces, spray the clamped piece with the accelerator, and then press them together.
- On the other side, start by gluing one of the offcuts to the edge of the piece. This gives us a reference for the top face of the board. Then we glue that piece to the clamped piece and we now have a template that references our top face


Routing the Half Lap Joint
With a template in its position and clamped down, bring over the plunge router with a template bit.
- Next, set the first depth so the bearing rides along the template and make the first cut.
- Then plunge deeper and make the second cut. Since this half-lap cut is going to go all the way through the board, you don’t need to remove all of the material. You can just trace the outer path and then cut out the rest of the material.
- Now remove the template and place the plunge router directly on the piece. Again, you should follow the perimeter and increment the depths until you bottom out the travel of the plunge router. This was about halfway through the boards for us.
Hubby Tip: When you are routing pieces like this score your wood with a utility knife. This helps to prevent any chip out when the router gets to the end of the cut.


- Flip the boards over and trace out the template pattern. You could repeat the same process with the template bits, but it’s hard to perfectly align the cuts. Instead, you can cut out this portion and then use a flush trim bit to clean it up.
- To make this easier, drill out the corners with a large drill bit, and then use a jigsaw to cut just inside of the template line. The drilled holes make it easier to turn the jig saw and cut the back of the pocket.
- Now it’s time to trim the joint flush. Since these boards are so big, you may need to get a new flush trim bit. This 2 inch long monster did the job for us, but we had to be very careful about kickback.
- Carefully lead the bit into the cut and work your way around. Take shallow passes here and slowly lead the bit into the material so it doesn’t grab. As you get to the end, back off and leave some extra material. If you try to cut the end it is likely to blow out.
Hubby Tip: Scoring the wood isn’t enough when you’re dealing with a super long bit. You can try climb cutting this edge, but that doesn’t always work out. The best way we have found to deal with this scenario is to clamp a piece of wood to the end of this cut to help reinforce our boards. Then we can slowly work our way through this last chunk of material until everything is nice and flush.


All that’s left is to clean up the corners of these cuts so the boards will fit together cleanly. And just like that, the giant half-laps are complete with this method!
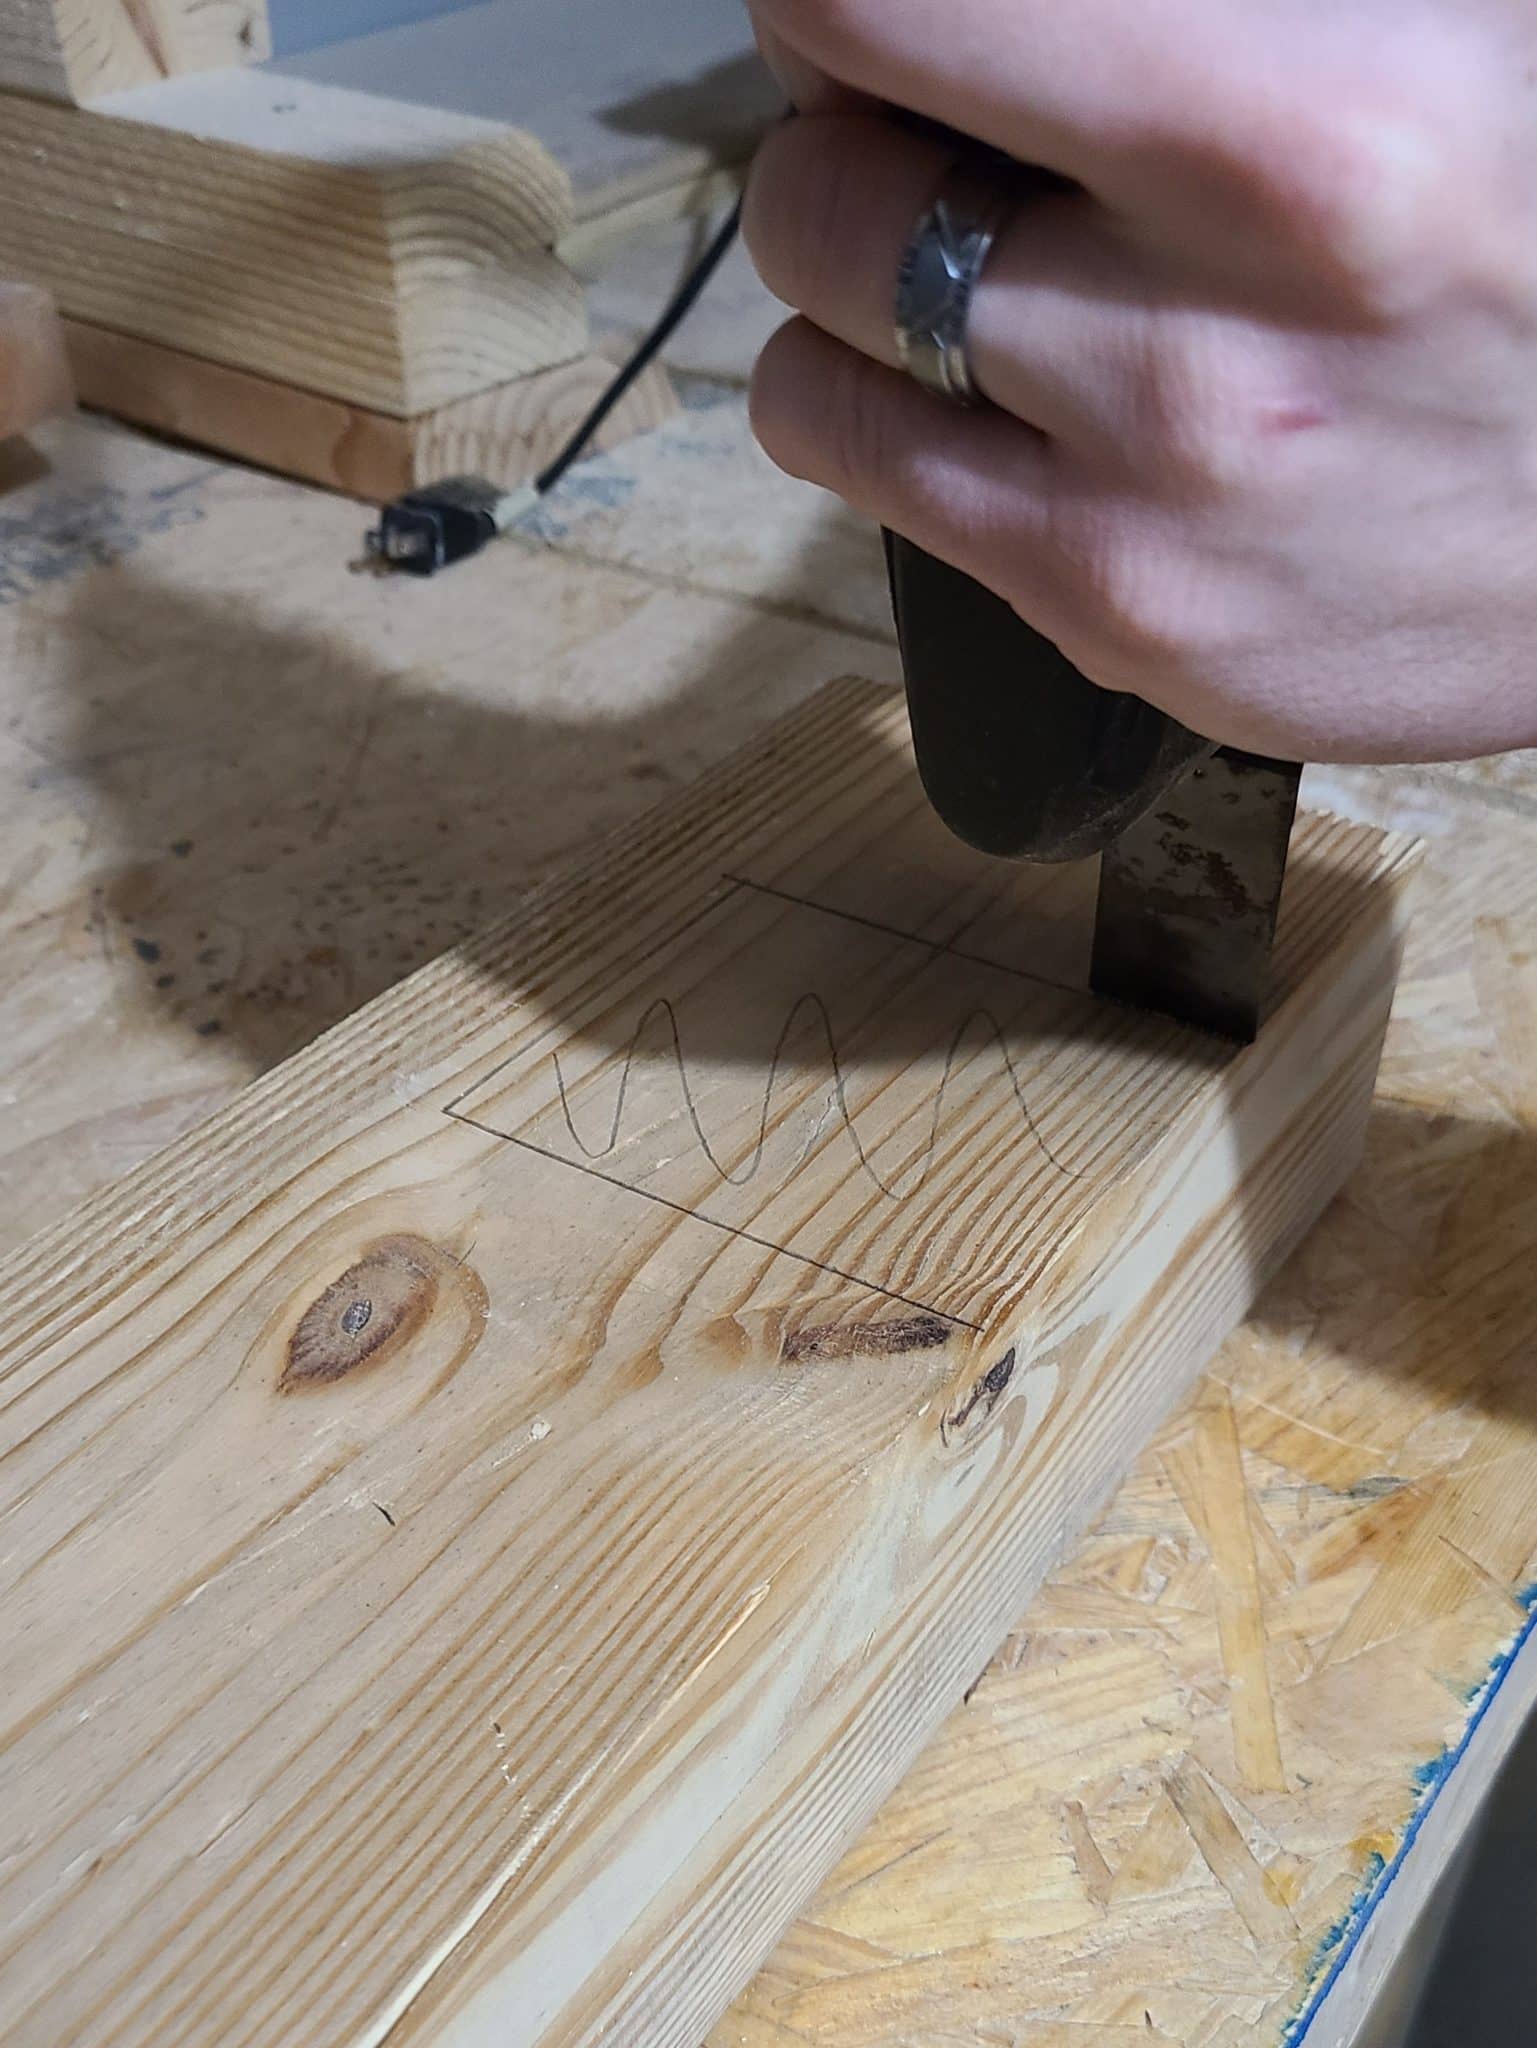
Method 3: Chisels
If you don’t have any of these tools, then you can go back to traditional methods and use chisels and a hammer to cut out the notches. This is definitely more time-consuming and didn’t produce quite as nice of a cut when I was done (I probably need to sharpen my chisels!). That said, it definitely left me with a sense of confidence when I was done. Be sure to practice on a piece of scrap wood first if you aren’t used to using chisels.
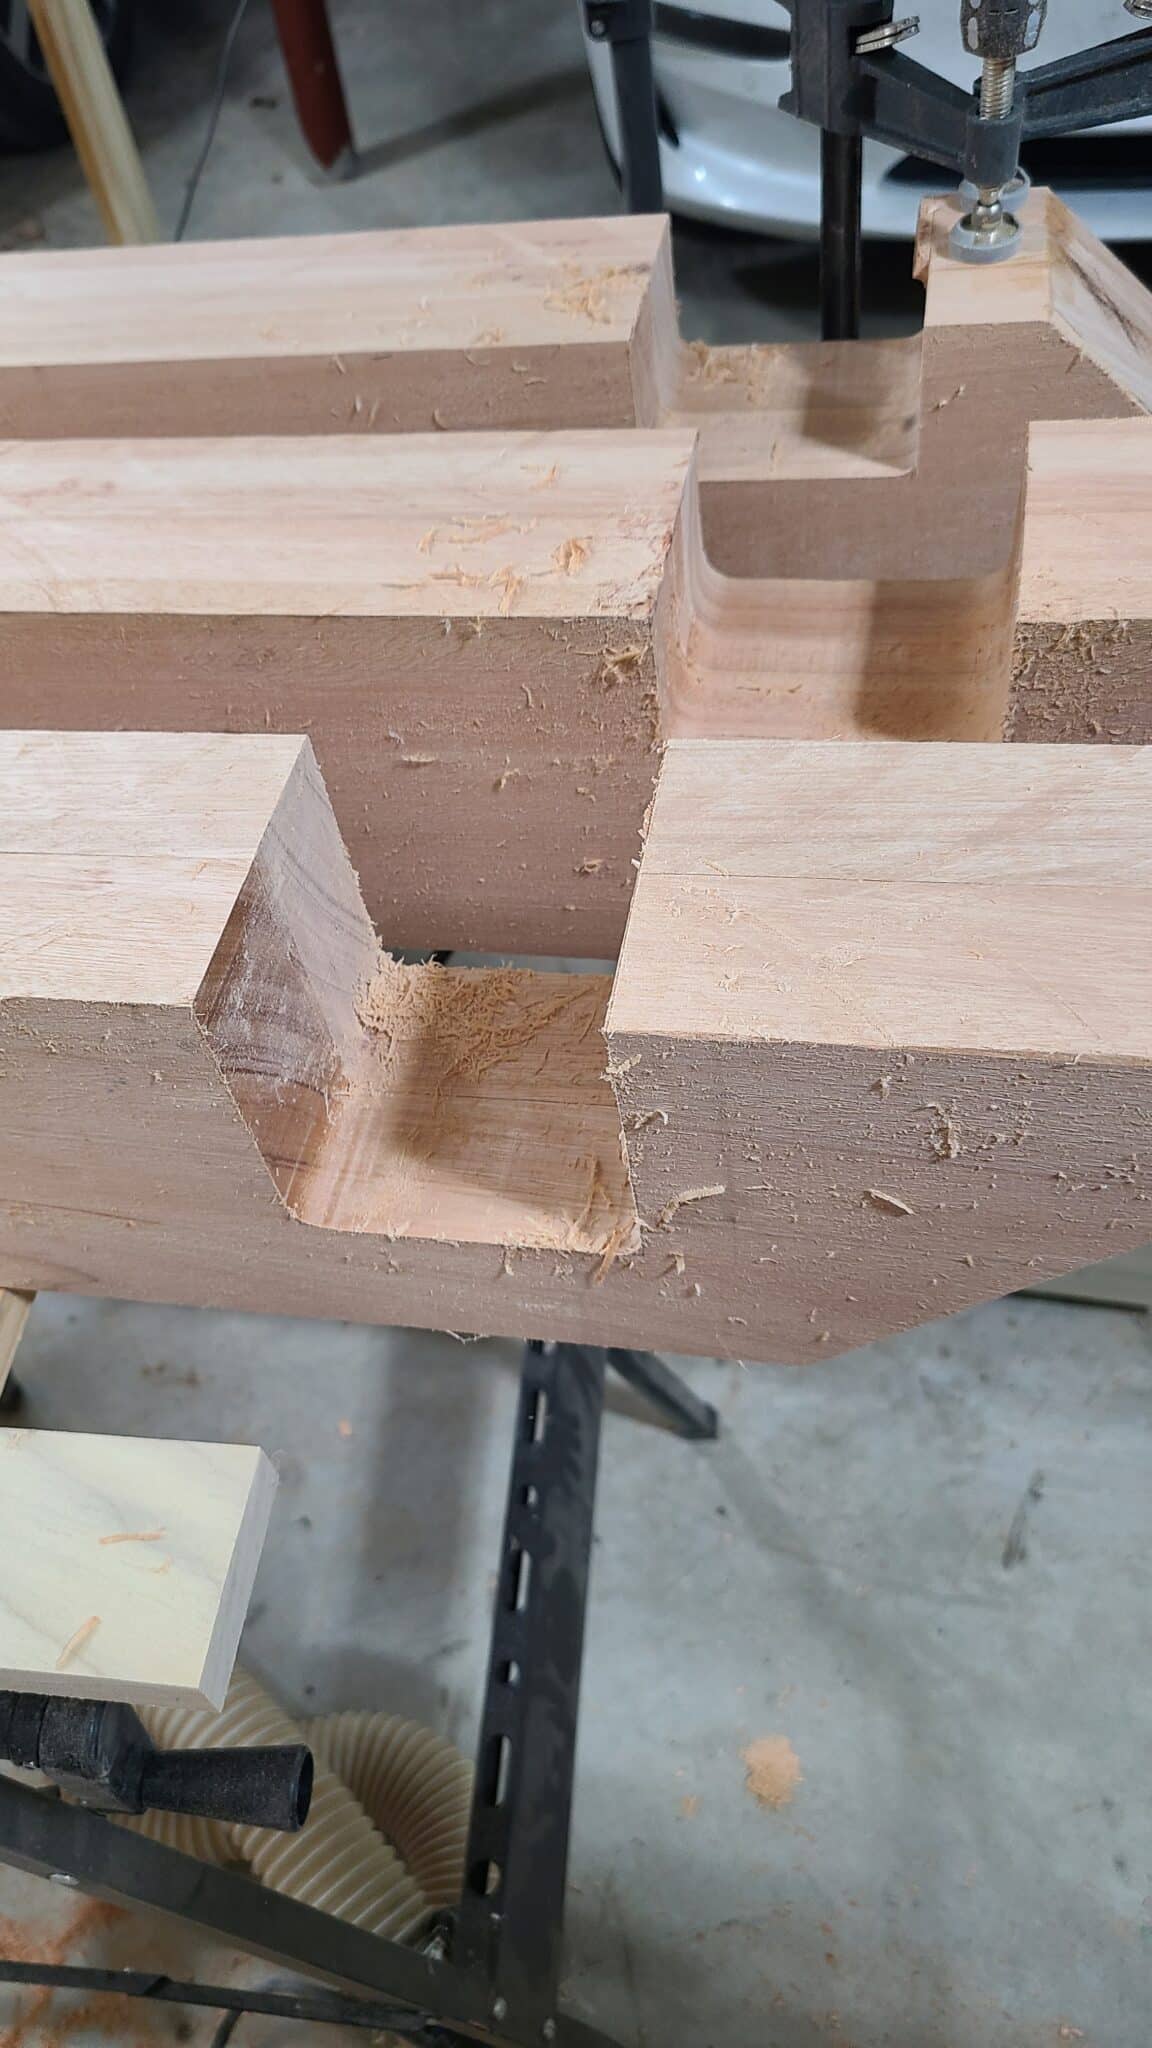
Step 5: Create Support Board Pocket
There is just one thing left to do on these 4×6 boards and that’s to make a pocket for our bed support board to sit into. This can be done using any of the cutting methods shown previously. However, the notch for this pocket is smaller and doesn’t remove material all the way through both sides like the previous notches. Instead, it makes a pocket to hold the support board.
This notch in the bottom of two of the 4×6 bed frame pieces will hide the 2×6 from sticking out under the board while giving us a good surface-to-surface contact for the 2×6 in order to screw it to the 4×6. The oscillating multi-tool or chisels will work well enough here, but we recommend using a router if you have one.
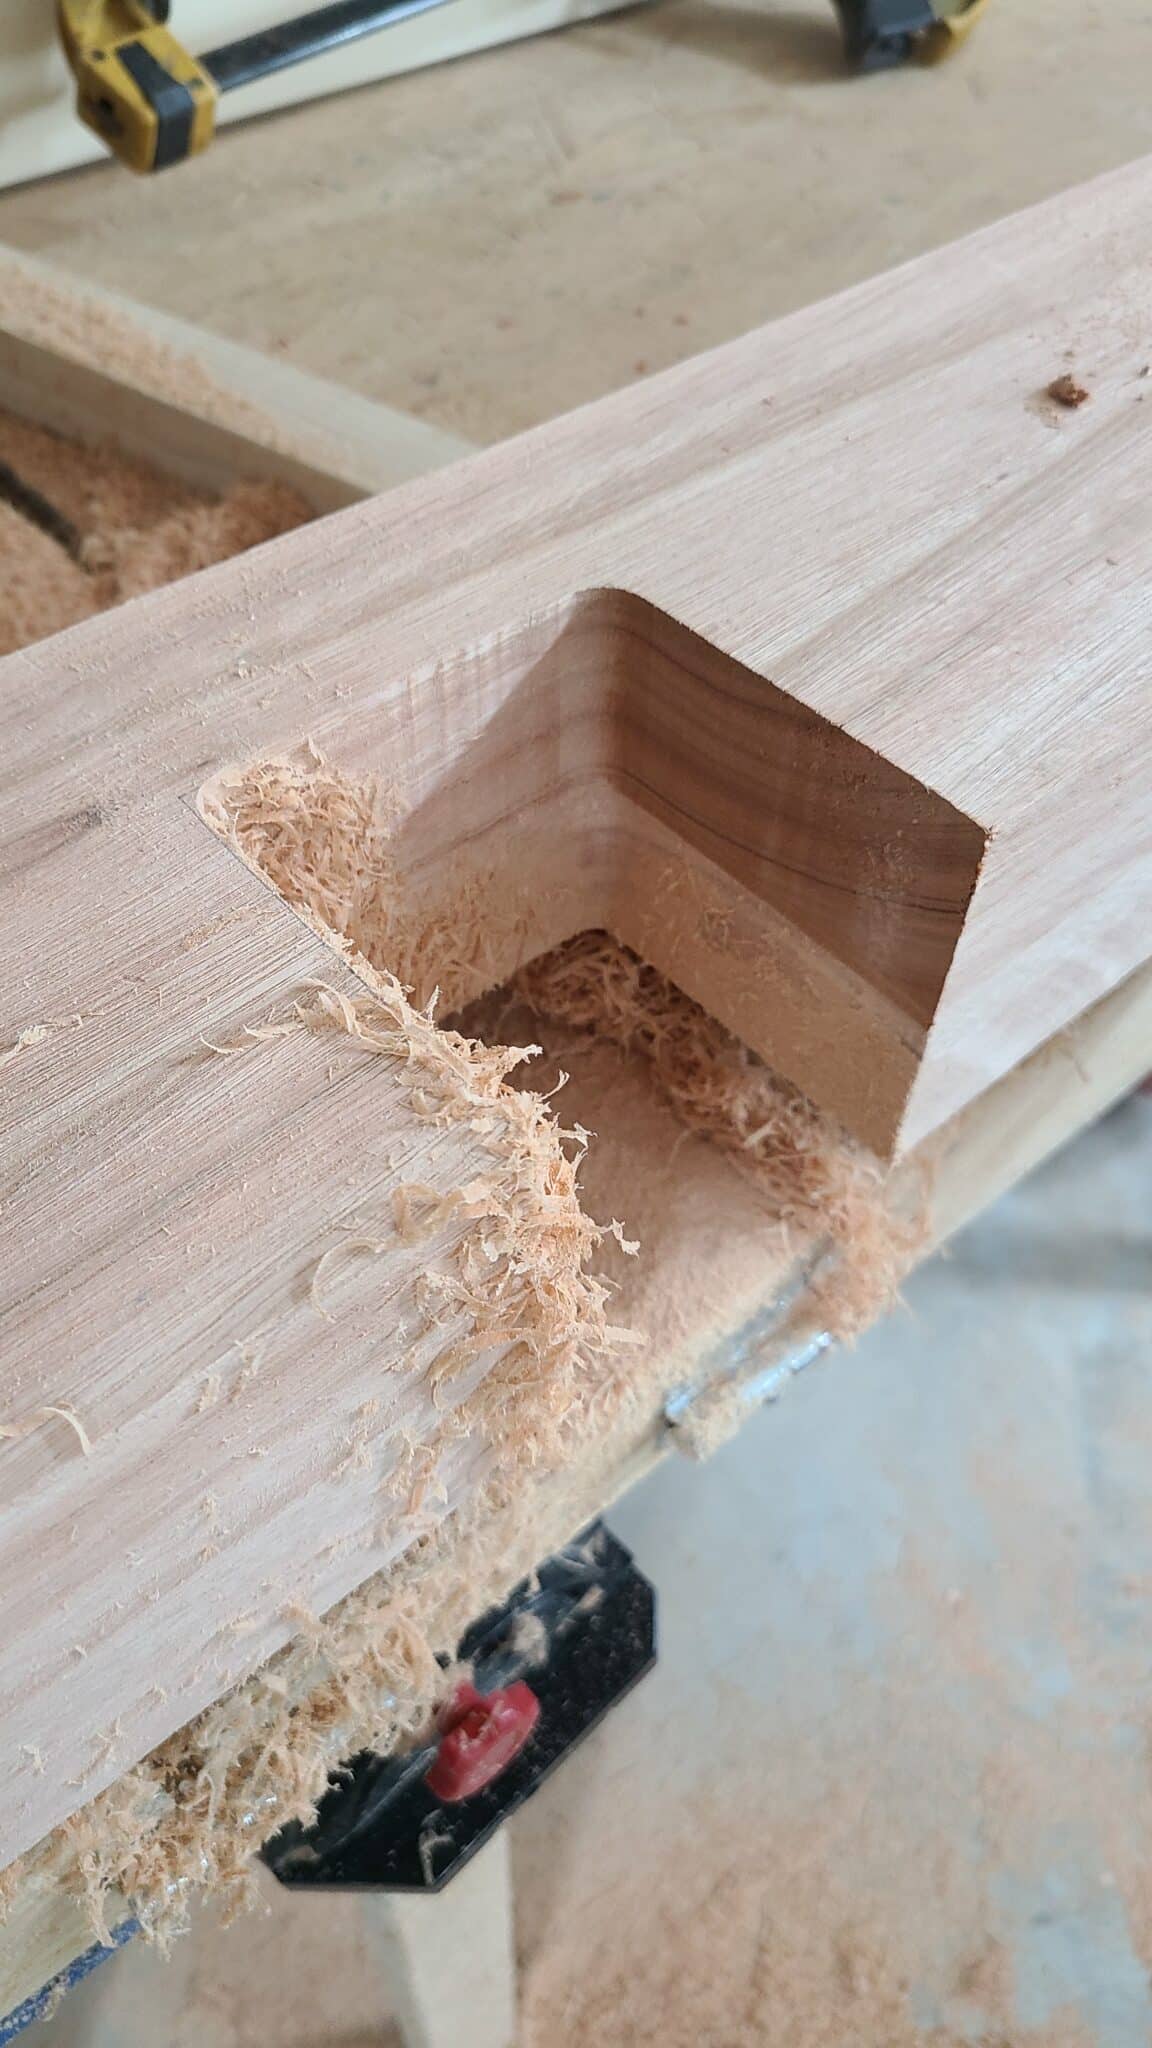
Router Method
You can create a template and use a plunge router to cut out this notch too, which is what we did for the rebuild. After you learn to use a router, it’s great for precision and quickly removing a lot of material. To start, mark the center of the template and the center of the boards. Then you just have to line up the marks, clamp the template in place, and get to routing. This is very similar to the half-lap joint process, but the cut is much shallower so you only need to use the template bit. It does mean that you have to remove all of the material with the router bit though, but this still goes quickly and you will have a perfect pocket in no time. This is so much faster than using the oscillating multi-tool like we did last time we built the bed!
You can manually chisel out the rounded corners created by the router to fit the support board or simply add a roundover to the support board so you don’t have to use chisels. For example, we used a ½” diameter bit to make this pocket, and then we put a ¼” radius onto the support board’s two corners. Then we could just drop this piece in perfectly without having to chisel out the corners. Hooray for time savings!


Step 6: Cut Platform Support And Slats
Assuming you broke them down to width in the beginning or are just using standard lumber, the next step is cutting the final lengths of the platform supports and slats for this hanging bed.
Before you cut them to length though, first dry fit the 4×6 timbers together to form the bed frame. Once the timbers are all together, bring the platform support boards over to the bed frame and mark their length. We’d recommend cutting these about an ⅛” short just to give us a little play during assembly.
Once the supports are in, you can also check the fit of the platform slats. The design has the slats curve to meet the support boards so the fit is a little more difficult to gauge. You can press a board into place, mark it, and then adjust its length until it drops into place. Once you’ve dialed in the length for one, it’s easy to adjust the lengths for all of the rest of the boards. So take all the boards over to your miter saw, set up a stop block, and cut them to their final length.


Step 7: Drill Holes For Headboard Panels
Next, you’ll drill the holes in the 4×6 board(s) for the dowel rod of the headboards to fit into. If you want the headboard to be movable, you will be drilling holes in both boards and you’ll want to upsize the holes to be 1 ⅛” so there is extra play to account for misalignment between the two sides. If you only want the headboard to be set in place, then you can just drill 1” holes in one of the two boards.
What is most important here, is that you try to make the hole as straight and perpendicular as possible. For the rebuild, we bought a portable drill press. It ensured that our drill stayed plumb to the face of the board, and it was much easier to manage than trying to bring our massive boards over to a drill press.
- First, carefully measure and mark the hole locations. Accurate spacing between each set of two holes is important to ensure that you can reverse the headboard later.
- Next, use an improvised center punch to mark the center location for these holes and keep your bit from wandering (we just use a screw tip!).
- Now chuck up an ⅛” drill bit and drill a quick pilot hole on the punch mark. The portable drill press ensures this pilot hole is plumb to the boards.
- With the pilot holes in place, chuck up a Forstner bit and get to drilling.
- Set the drill speed to low and only pull the trigger partially so you get a good cutting action.
- Progress deeper into the hole and repeatedly pull the bit back up. Then use a vacuum to clear out chips a this keeps the bit running cooler and ensures it stays sharp longer.


To get as deep as possible, we removed the spring and depth stop from this drill press and just drilled until the chuck almost touched the board’s face. Then we repeated this process for the rest of the holes.
If you don’t have a drill press, then use a speed square to help with alignment. Start with drilling a smaller pilot hole to set your path and make sure your bit doesn’t walk away from your mark. When drilling the larger hole, use a piece of tape on your bit as a depth gauge so you know how deep it needs to go.
Step 8: Create Headboard Supports
Next, it’s time to tackle the most complicated piece: the support for the headboards. This piece has some slightly complicated geometry associated with it. To make this easier for you, we’ve provided you with a page from our daybed swing plans you can print out and place on your piece of wood to use as a pattern. Just make sure it is square.
Once you have the pattern traced out on each of these parts, cut them out as accurately as you can. Just like previous steps, there are multiple methods to do this. We personally used a tapering jig to cut the larger taper on the table saw, and then a combination of tools to cut the complex geometry. However, you could shape the entire piece with a bandsaw, a jig saw, or an oscillating multi tool.
What’s going to be important is the location of the hole for the dowel rod in relation to the corner of the 4×6 and the angle of this surface. If your angle is slightly off on one, it isn’t the end of the world, but it will cause your headboard to be a little crooked. If your hole is too far away, you’ll have a gap, but if it is too close you’ll hit your 4×6 and won’t be able to get it to fit. Measure three times and cut once.
Original Build Method
Once you’ve got the pieces cut out, give them a good sanding and then prepare to drill the hole. To do this, clamp the piece down to your work surface and mark your hole location in relation to the corner we mentioned earlier. Start with drilling your pilot hole. Use a speed square to ensure you are drilling perpendicular to the surface. Then use a spade bit that matches the side of your dowel rods to drill the full depth.
HUBBY TIP: It is helpful here to have someone stand to the side of you so that they can judge the vertical orientation while you judge the horizontal orientation. Stop and check this position a few times while drilling to make sure that you don’t walk. If you are off slightly, you can account for this later. But if you are off too far then you may end up breaking through the side of your piece.
Did you do it? Did you make it through all 4 pieces without ruining one? If so, you did better than I did the first time. If you did break through, don’t sweat it. Just cut a new piece of wood and give it another shot. You should have enough left over in your 2×6 to try again. If you got a little too close and the wood failed slightly, you can repair it with some stainable wood filler after you get those dowel rods in.
Rebuild Method
For the rebuild, we used a few more tools and methods to make it more repeatable and accurate.
First, mark out where the taper needs to be on one of the pieces and then position it on the the tapering jig. To make this cut repeatable, clamp some blocks to the jig so you can put the next wood piece in the same spot to quickly make the same cut. This larger taper is really just decorative, so it doesn’t have to be exact, but setting up these stop blocks helps keep the parts the same shape.
Drill Holes
Next, trace the template page pattern onto the wood pieces. Before you start cutting the pattern, go ahead and drill as much of the hole for the dowel rod as you can. This will be much easier to do if you have a flat surface to reference. So start by chopping a flat, angled surface on the end of each of these boards.
Now clamp these pieces to the side of the table and align the cut edge with the surface of the table. With the addition of a secondary board, you can have a mostly solid base for a portable drill press to reference. Now just mark the hole location, drill the pilot hole, and then drill the large hole for the rod as deep as possible. We won’t be able to get to the full depth here, unless you can extend your bit or you have a long bit, but it will at least give you a good reference later on.


Cut With Bandsaw
Next, use a band saw to remove some more material from these pieces. You could cut right on the line, but we want to make the pieces uniform and don’t want to spend a bunch of time sanding out bandsaw marks. Instead, cut right up next to the line to remove as much material as possible. This way you can clean it up with a router next and minimize the risk of kickback.
The unfortunate thing about this process is you can’t drill very deep earlier due to extra material on the board and the secondary board used for support. So after cutting off some of the extra material on the bandsaw, you’ll want to clamp each of these boards to a workbench and drill out the last few inches needed by hand. Stop periodically to check your progress and make sure you aren’t veering up or down.
Create Template & Route Edges
With those holes done, you are ready to finish off the fancy end of these pieces with the router. Next, use the template page from the DIY plans again and glue it to a piece of scrap for this complex geometry end piece. Then cut along the lines and you have a template. Leave a little extra material on the top part of the template so you can glue blocks to it and give yourself a reference surface.
Put the template back onto each piece and clamp it to a workbench. Chuck up a flush trim bit, set the depth, and get to work. You are cutting into end grain here, so be very careful with the process. The more material you removed earlier with the bandsaw, the easier this will be. Then repeat the process until all the headboard support pieces are done.


Cut Dowel Rods
Alright, it’s dowel rod time! The last thing you have to cut is the dowels for these headboard supports. Our Forstner Bits weren’t quite long enough to drill as deep as the spade bits we used the first time we made this project, but they made much nicer holes.
Start by measuring the depths of the holes in the headboard supports and the holes in the bed frame and then cut the dowels to be just short of the smallest combination of holes. This way, the dowels never bottom out when the headboards are installed. Remember to clamp the dowels when cutting them on the table saw and keep your hands clear. The blade can catch and roll the dowels, so you don’t want to be holding them by hand if they move.
Then set everything aside for sanding and finishing.


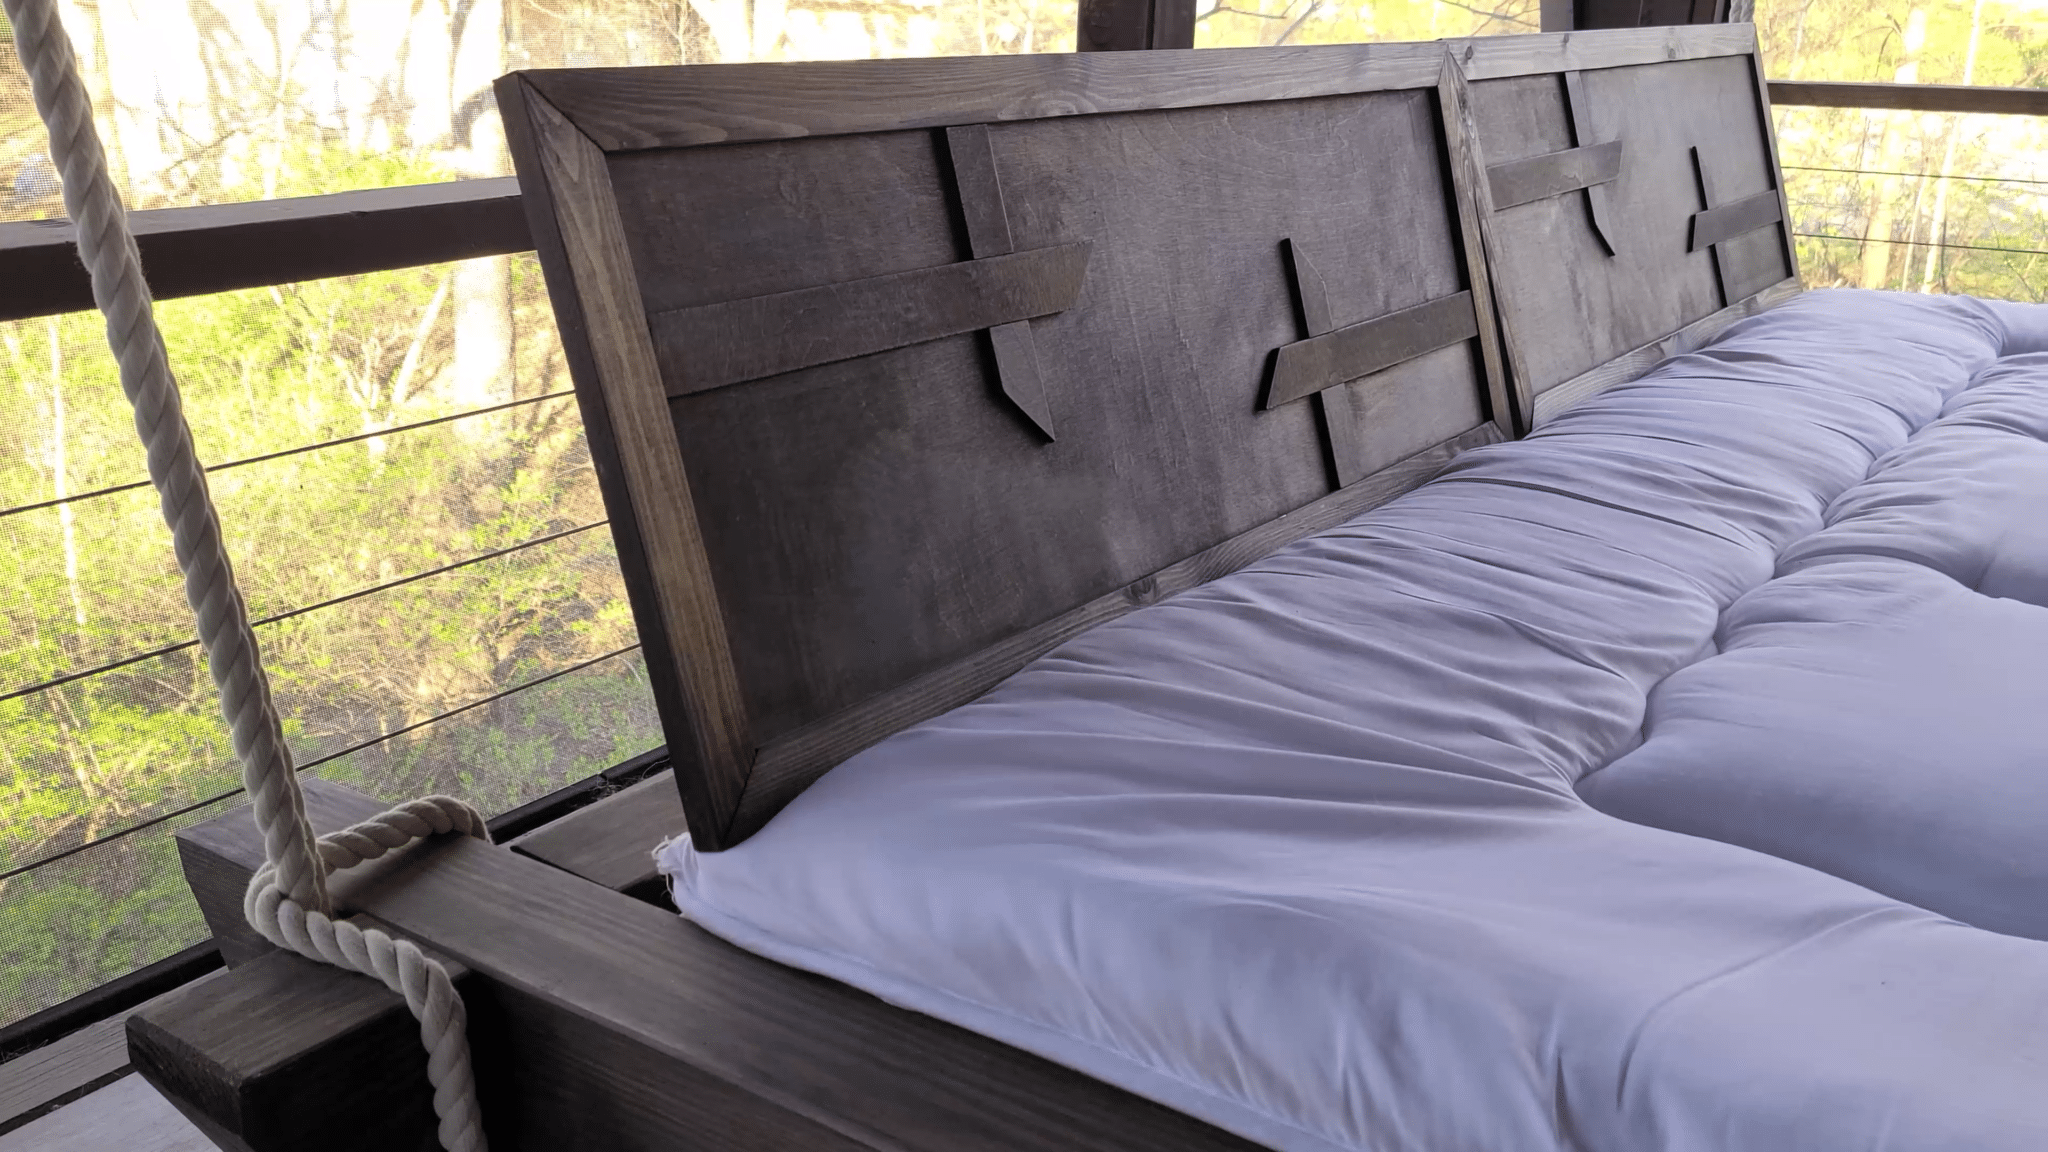
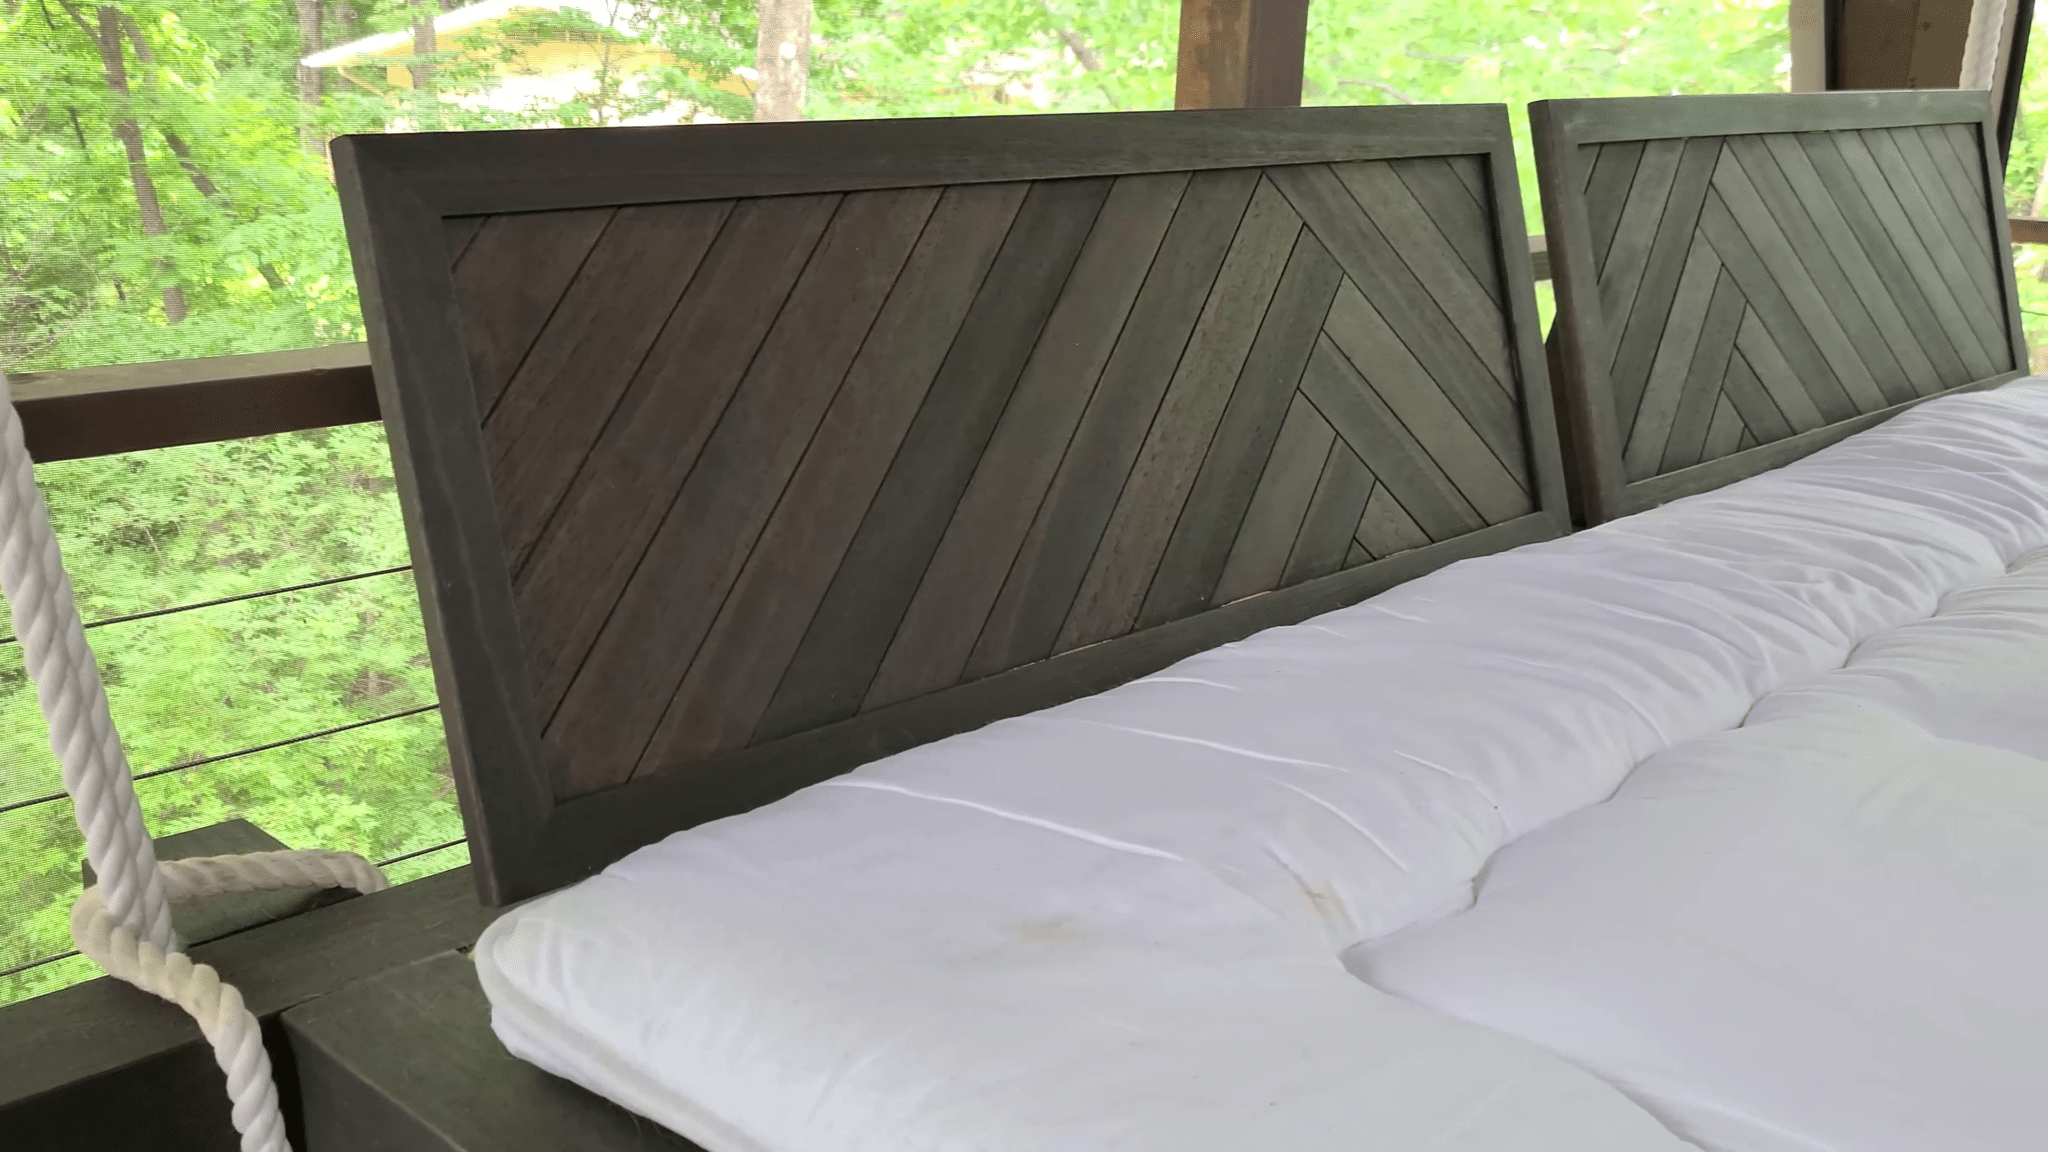
Step 9: Create the Daybed Headboard Panels
These daybed swing plans and our original build show a simple plywood panel headboard framed out with a few decorative pieces. For the rebuild, we actually created mosaic panel inserts to elevate the piece even more, and because we couldn’t find plywood in the same species of wood as the rest of the project. If you want to elevate your headboard and create a beautiful mosaic panel instead, then check out this separate How-To post to make it. That’s the best part about DIY. You can change up a few small elements and be creative to fit your style!
- Original daybed headboard panel design
- Rebuild daybed headboard mosaic design
If doing a plywood insert, then cut the plywood out on the table saw according to our cutting guide, and then cut the angle on the decorative pieces out on either the table saw or the miter saw.
Next, you will need to cut all of the remaining frame boards. If you’re not using construction lumber already to size, start by ripping the boards into a couple of strips that are slightly wider than you need for the frame. Then move the fence in a bit and rip each strip to its final width. This allows you to clean up both sides on each strip and ensure you have perfect edges.
Then using a miter saw or table saw, cut each strip into the four pieces needed for each frame. Leave these a little long so that you have extra material for the mitered corners.


Cut Mitered Corners
With the individual pieces cut, you need to miter the corners. Ironically, we don’t trust our Miter saw to do this accurately, so we did it on the table saw and will explain how to do this. However, you can totally cut these mitered corners by simply setting your miter saw to a 45 degree angle if you have a good Miter Saw.
We used a block of wood with a slot routed into it to use as a guide with our cross-cut sled. We secured it with a couple of carriage bolts into the T-Track we have and it works pretty well!
Next, use a speed square to hold the bar at 45 degrees and lock it down. Then you can place the wood pieces against this bar, clamp them down, and cut the first corner. Since this bar is locked in place, you can easily repeat this cut on the rest of the pieces and know that they are all at the same angle.
Then flip the pieces around to cut the second corner. Start by measuring the piece, marking where the cut will go, and then carefully line that up to the blade and clamp that piece down.


To help ensure the rest of these pieces end up the same dimension, set up a stop block for them to reference. We find that if you are trying to have a stop block touch a mitered surface, you get more accurate results if you cut the same miter into that stop block. This way you get good face-to-face contact on the surfaces.
Repeat this same process on the longer frame pieces as well with one minor change. After cutting the first corner, you’ll need to cut the second corner and have all of the pieces be the same size. For us, unfortunately, these pieces are longer than our block, so we had to get a little creative with the stop block. We lucked out and the pieces were just about as long as our cross-cut sled. Using a small spacer, we clamped a block to the back side of our sled and used that as our reference surface for these pieces to touch.
You can also angle the table saw blade to 45 degrees and do these the same way we did the floating nightstand mitered boxes for our headboard build.
Cut Notches in frame
The last thing you need to do for these frame pieces is cut a slot in the center of them for the panel to fit in. The plywood or mosaic panel will slide into this notch to form your headboard. Our preferred method for making this notch is to cut it out on the table saw.
This is done easily on the table saw by setting the height and fence so the blade rips through the center of the board. Then flip the board around and repeat the cut so that the cut is perfectly centered. After repeating this same rip on the rest of the pieces, shift the fence slightly closer to the blade and run both sides through again. Then repeat this process until the slot is just wide enough to fit the plywood panel.
HUBBY TIP: A good way to dial this in is to cut out the very center of a scrap piece first and then slowly adjust your fence out. Run your board through then flip it around and run it through again. This will keep the cut centered as you slowly expand outward. After every series of cuts, test inserting your plywood board. You want it to be snug but able to be assembled and disassembled without a hammer. Once this position is set, you can run all of your real pieces through the saw and then come back and remove any extra material that might be left in the center.


Alternatively, you can run your boards through a router table with a ¼” straight bit. We find this to be a lot slower, and we have a harder time making sure everything is centered and straight.
Assemble Headboard Panels
Now that all of the frame boards are cut, it is time to assemble the headboard panels. We highly recommend that you use exterior-rated glue for these joints. But before you do that, we want to sand the inside faces of the frame boards up to 120. This face will be almost impossible to sand later so it’s best to do it now. To make this easier and keep your sanding even, clamp the frame pieces together and sand them all at once.
Now start with a dry fit of each frame to make sure the corners come together. If anything needs to be trimmed down, now is the time. If everything looks good though, go ahead and put glue on all of the edges. Then press the frames back onto the panel.
Once all four frame pieces are on, grab some clamps and tighten everything down. We like to use our strap clamp and corner blocks. We personally don’t glue the inner panel since it is bound to move differently than the frame boards do. It’ll be free to float, and you can always secure it with a trim nail if it rattles.
Finally, clean up any glue squeeze out and then repeat this same process for the second headboard. A few hours later, the glue will be set and these panels will be ready to sand.


Step 10: Edge Profiling (optional)
Now, you don’t have to round over all the edges on your pieces, but we’d suggest at least taking some sandpaper to the edges to knock down any sharp corners and remove splinters. We personally prefer to use a router to round over all the edges as it gives it this nice little touch that makes it feel more like high-quality furniture and keeps the edges from getting chipped as easily.
Starting with the platform boards, we added a nice big ¼” round over bit in our trim router on all of the edges to really soften them up. For the platform support boards, we put an ⅛” round over on most of the edges. However, if you didn’t chisel out the corners of the notch for this center support board in the 4×6 timbers, then a few edges will have a larger round over. You likely already put ¼” radius onto these two corners to drop this piece in perfectly like we mentioned previously.


Next up, is the dowel rods. To make their installation easier, you’ll want to round over the ends with a ¼” Roundover bit to give them a gentle lead-in. The best way to do this is by using a router table. You set the table fence so the center of the dowel hits the center of your bit. Then you place a second fence on the other side of the dowel to capture it. Now start up the router and slide the dowel up to the bearing on the bit, and then roll the dowel between your two guides to put the round over the whole way around. Or if you don’t want to use the router method, then you can always use a sander on the dowel rods to add a taper to the ends.
On everything else, we just put an ⅛” round over on every edge. It’s a small detail, but it really elevates the piece. The moment you touch it, you go, oooohhh, that’s nice! It just gives the piece a quality tactile sensation that we have fallen in love with. Make sure to do it on the headboard frames for sure as it will feel a lot better every time you handle them to move the headboards around. And our trim router makes it so easy and consistent. It has quickly become one of our favorite tools!

Step 11: Sanding
With those headboards and round overs complete, all of your boards and sub-assemblies are now ready to sand and finish. You always want to sand starting with a coarser grit (60-80) and then work your way up to a finer grit (180-240). Take a look at the manufacturer’s recommendations on your chosen finish as well. We went with Rubio, who recommends sanding everything to 120 grit. This is especially true if you using a wood species that doesn’t absorb moisture easily like the Red Grandis we used for the rebuild. It’s also known as Rose Gum because its pores are naturally filled with resin. While this makes it great for outdoor furniture, it makes it difficult to finish.
We started by sanding everything using 80 grit. We love using our random orbital sander with 3M Xtract Cubitron II Sandpaper as that sandpaper seems to get everything done in a fraction of the time compared to when we used our belt sander on the original build. After everything is sanded, water pop it to raise the grain and check for imperfections.


HUBBY TIP: Water popping is simpy using clean water sprayed on unfinished wood to open (aka “pop”) the smoothed and closed wood grain. It can help you see uneven sanding spots, missed glue spots or other imperfections before moving onto the next sanding grit. It also helps open up the grain for better penetration of the stain or finish.
After the water popping, sand to 120 grit making sure to get even and thorough coverage. Then blow off the dust and wipe the pieces down with mineral spirits to remove any dust.
If you want a smoother finish and are okay with a lighter color, then go ahead and take all the pieces up to 180 grit, but I wouldn’t go past that. The Rubio finish only recommends 150 grit max, but we have gotten good results with 180 on other projects. It’s nice that they give you an excuse too to stop sanding as I feel like most of us are so over sanding by this point!
HUBBY TIP: This is a lot of sanding, so be sure to do it in a well ventilated area and wear a mask or respirator to protect your lungs from the saw dust. It was too hot outside to open up our garage door, but I opened the window and set a fan to blow out and hooked the shop vac up to my sander.
Step 12: Add the Finish
After all that sanding, do your best to clear out the dust before moving on to staining. If your workshop is in the garage, then open up the garage door and grab your leaf blower to clear most of it out. Then wait for the dust to settle and come back and do it again. If your shop is elsewhere, then wait for the dust to settle before grabbing a shop vac.
Once most of the dust is gone and what’s left has settled it is time to finish all the boards!
Hanging Daybed Rebuild Finish: Rubio Monocoat
For the rebuild, we used our favorite exterior finish: Rubio Monocoat’s Hybrid Wood Protector. This finish isn’t quite as easy to apply as their Oil Plus 2C, but it is still very straightforward, and Rubio makes it easy to get a good result.
Since this piece will be heavily touched, start by mixing 10% hardener with the finish. Then it’s just a matter of brushing it on. We opted to use the Black color finish. It looks incredibly dark going on, but much of this will soak in and it will produce a beautiful dark brown once it’s wiped off.
Once the piece is fully brushed, you set a timer for 10 minutes while moving on to the next piece. After that timer goes off, come back and back brush the piece, and then set a new timer for 5 minutes to let it finish soaking in. Once that timer is done, you come back with a rag and buff off all of the excess finish.
Now you can flip the pieces over and repeat the process on the other side, before setting these aside to dry. You don’t really have to worry about lines when you set these to dry, but we always try to minimize contact on visible surfaces and set them on some scrap wood. It’s also a good idea to come back later in the day and shift them so that a new point is touching and the original point can get air and finish curing.
You can read our reviews and more about the finishing process on all Rubio’s products. It’s truly our favorite finish for almost all applications!


Original Build Finish: Basic Stain
For the original hanging daybed swing project, we chose a dark stain for our bed. We used a dark interior stain because our daybed swing is undercover in a screened-in porch. If your daybed will be exposed to the element, I’d recommend using an exterior stain.
Throw some scrap wood on the floor to raise your pieces up off the ground and then grab a pair of gloves and a rag or a sock and get to work. Remember to rub the stain in and wipe up any excess. You don’t want to leave a thick wet edge on your piece or you will end up with a line later on that will be tacky to the touch and will never really dry. In most cases though, you can come back with a slightly damp cloth to wet the edge and then use a dry cloth to rub it away.
Let the stain dry the full time that’s noted on the instructions prior to assembling the bed.
Step 13: Glue Dowels Into Headboard Supports
The first thing to do after the finish is cured is glue the dowels into the headboard supports. We intentionally left half of these dowels unfinished so that we could get a good glue joint. Put on some glue and push the dowels into the holes of the headboard supports, using a rubber mallet, if needed. Double-check how much is sticking out to ensure they are in all the way prior to moving on. Let them dry and then you’re ready for the final assemblies!


Step 14: Assemble Hanging Daybed Frame
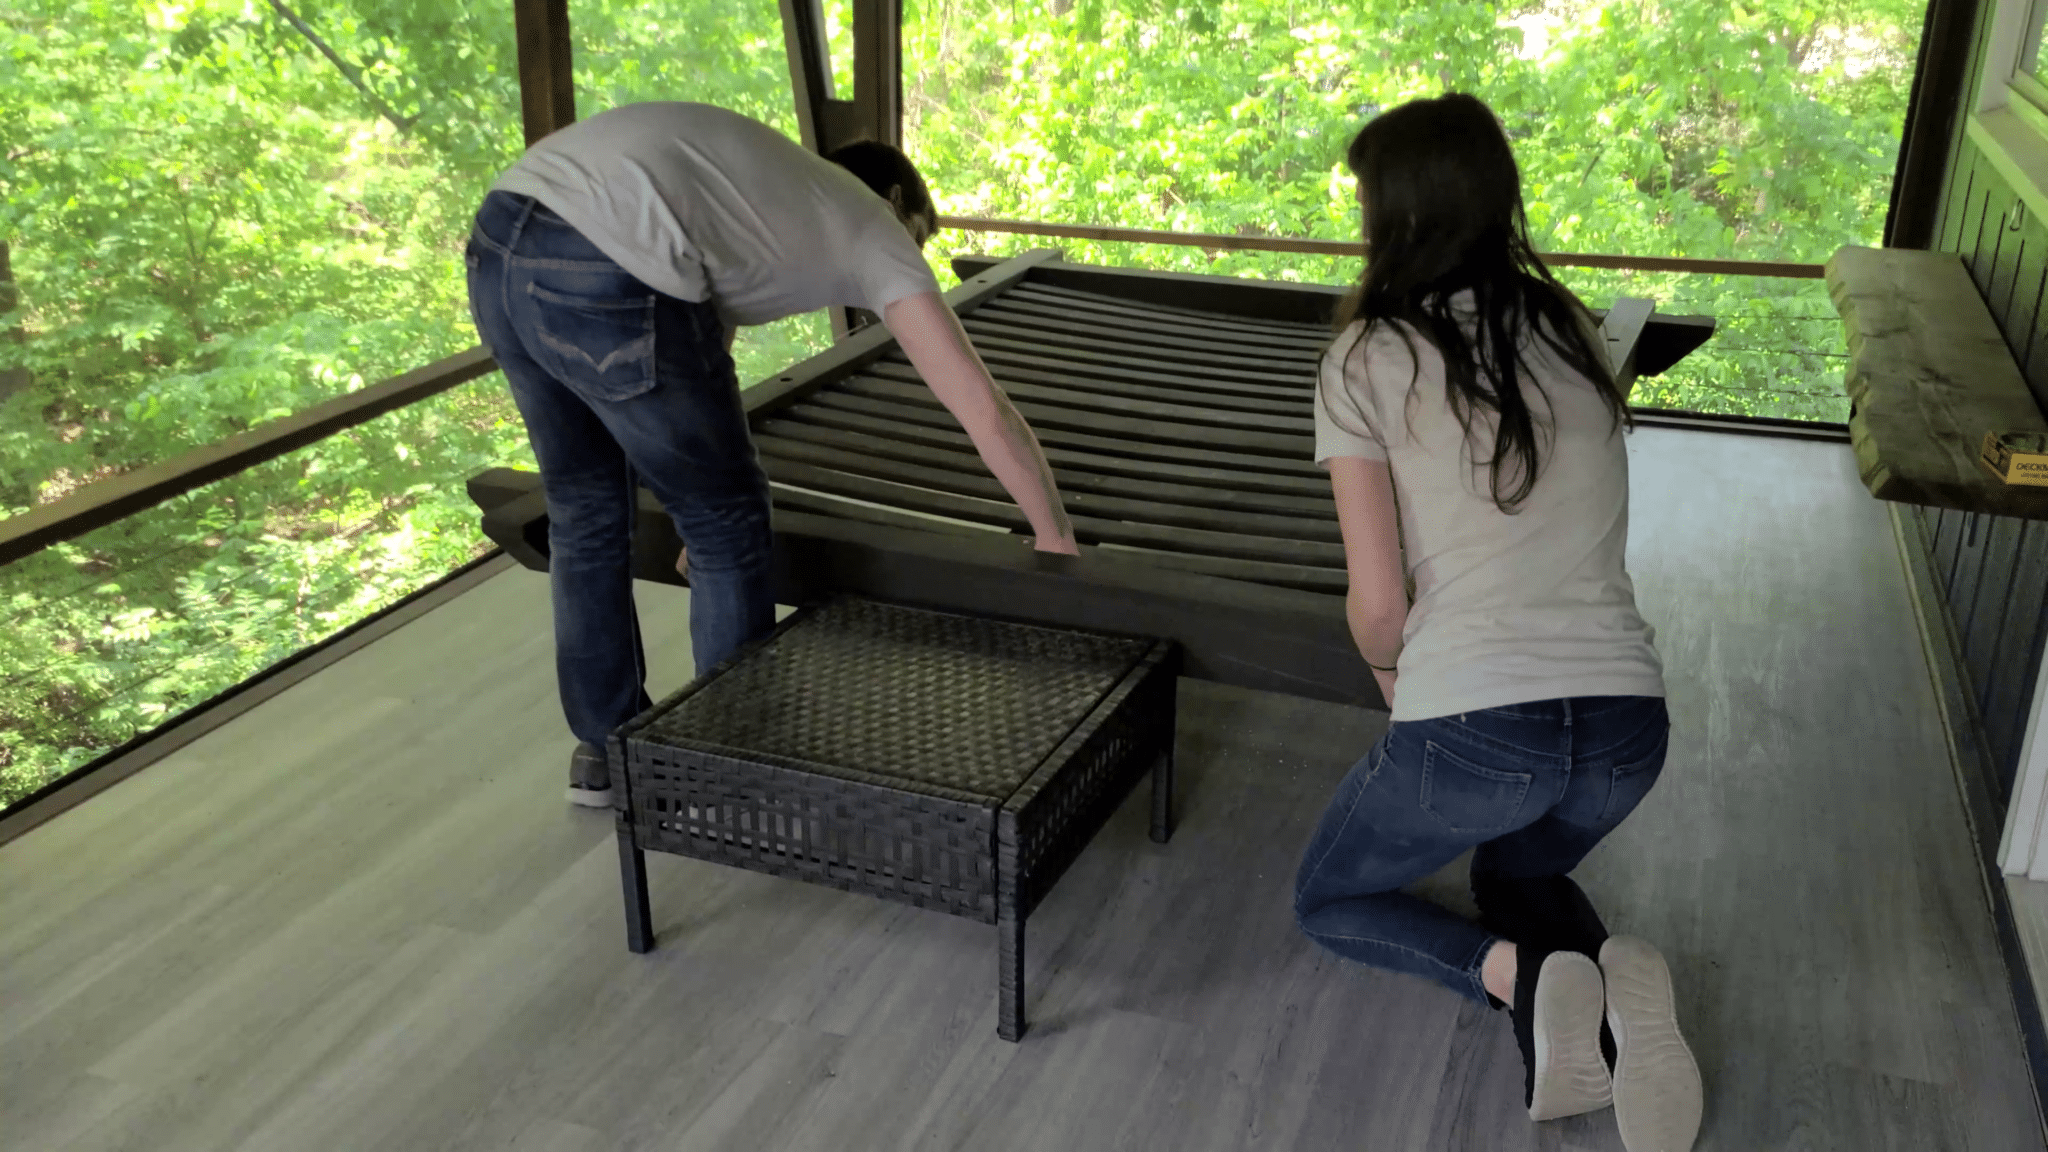
After all the pieces are finished and fully cured, it’s time to begin assembling the hanging daybed! You’ll want to do the assembly in the final location where the bed will be as it will be far too heavy and large to move easily later.
First up, you are going to assemble the 4×6’s upside down. Carefully align the notches and get the boards positioned. Check to make sure you have them laid out square, and then press them together. If you got your notches sized well, then they should go together with slight to moderate force. You may have to break out the rubber mallet to get them fully seated, but don’t get carried away pounding on them. If they are too tight, then the last thing you want to do is force it and accidentally split your board. Instead, find out where it is binding and remove additional material if needed. You can touch up the stain at the end.
HUBBY TIP: Consider assembling this daybed swing where you plan to hang it. I’ve designed the queen size to fit through doors on it’s side, but it is close and it is quite heavy when assembled.
Once the boards are all pressed together, pre-drill a countersink for two screws in each corner. Then switch over to a longer drill bit and check to make sure each corner is square. Once everything is squared up, predrill the holes to their full depth. You want to make sure the screws that go in don’t push the boards out of square. So, with the holes ready, all you have to do is drive two screws into the bottom of each joint to pin them together.
Next, fit the 2×6 Bottom Platform Mount into its corresponding notches and place 3 screws at each end. If you find that the 2×6 is too long you can either cut it shorter or deepen its notches.


Now, flip the bed over and place one 2×4 Side Platform Mount on each side. These just press up against the bed frame and get screwed into place. Screw these into place with approximately 1 screw every 12 inches or so. These boards will transfer the weight of the people on the bed to the 4×6 boards, so make sure they are secure.


You’ll notice that by installing the 2×6 long side down and the 2×4’s long side up, you have created a 2” offset between the ends of the platform and the center. This allows you to achieve a slight curve to the platform boards of the bed which makes lounging more comfortable. To do this, place each of the platform boards so one side is on top of a Side Platform Mount and the other side is sticking on top of the 4×6. Adjust their spacing until they are all approximately even or refer to your plans for an exact number.
Then, one by one, flex the boards and drop them between the frame so that they touch the middle platform support board. Standing on the board to keep it flexed, drive a short screw through the middle of the board and into the platform support board.


Repeat this process for all of the boards to create this relaxing curved surface. And then go through and screw down the boards on each end as well with a longer screw.
Tada! You have a bed frame!


Step 15: Hanging Daybed Headboard Installation
Now it’s time to assemble the headboard pieces. You waited until now to put the headboard panels on the headboard supports that way you are able to make any adjustments needed based on how the bed frame came together. Now if you are opting to not make the headboards movable you simply need to test fit your support pieces, attach the headboard panels, and you can even glue the dowels in place in the holes.
Test Headboard Support Combinations
With the design’s movable headboards, the first thing you are going to want to do is test fit all of your headboard supports. Due to potential variation in the location of the hole to the corner of the 4×6’s you may find that one support fits well on one side, but once it is reversed it won’t fit on the other side. Experiment with different combinations of headboard supports until you find a good match. If you can’t find a combination that works, then you may need to remove some material from the corner of your headboard supports to get them to fit. Don’t worry if there is too much gap in some positions as the futon will cover a lot of that.
Attach Headboard Panels
Now that you know which headboard support goes where, it is time to fit them and attach the headboard panels. To start with, make sure the dowel rods are centered in their holes. If your dowel hole isn’t perfectly perpendicular in the headboard support then installing the support into the 4×6 might put it at a bit of an angle. This isn’t a big deal so long as the dowel is straight in the hole. If you try to straighten the support too much then you’ll push the dowel crooked and you’ll have a hard time getting it in and out of the 4×6.
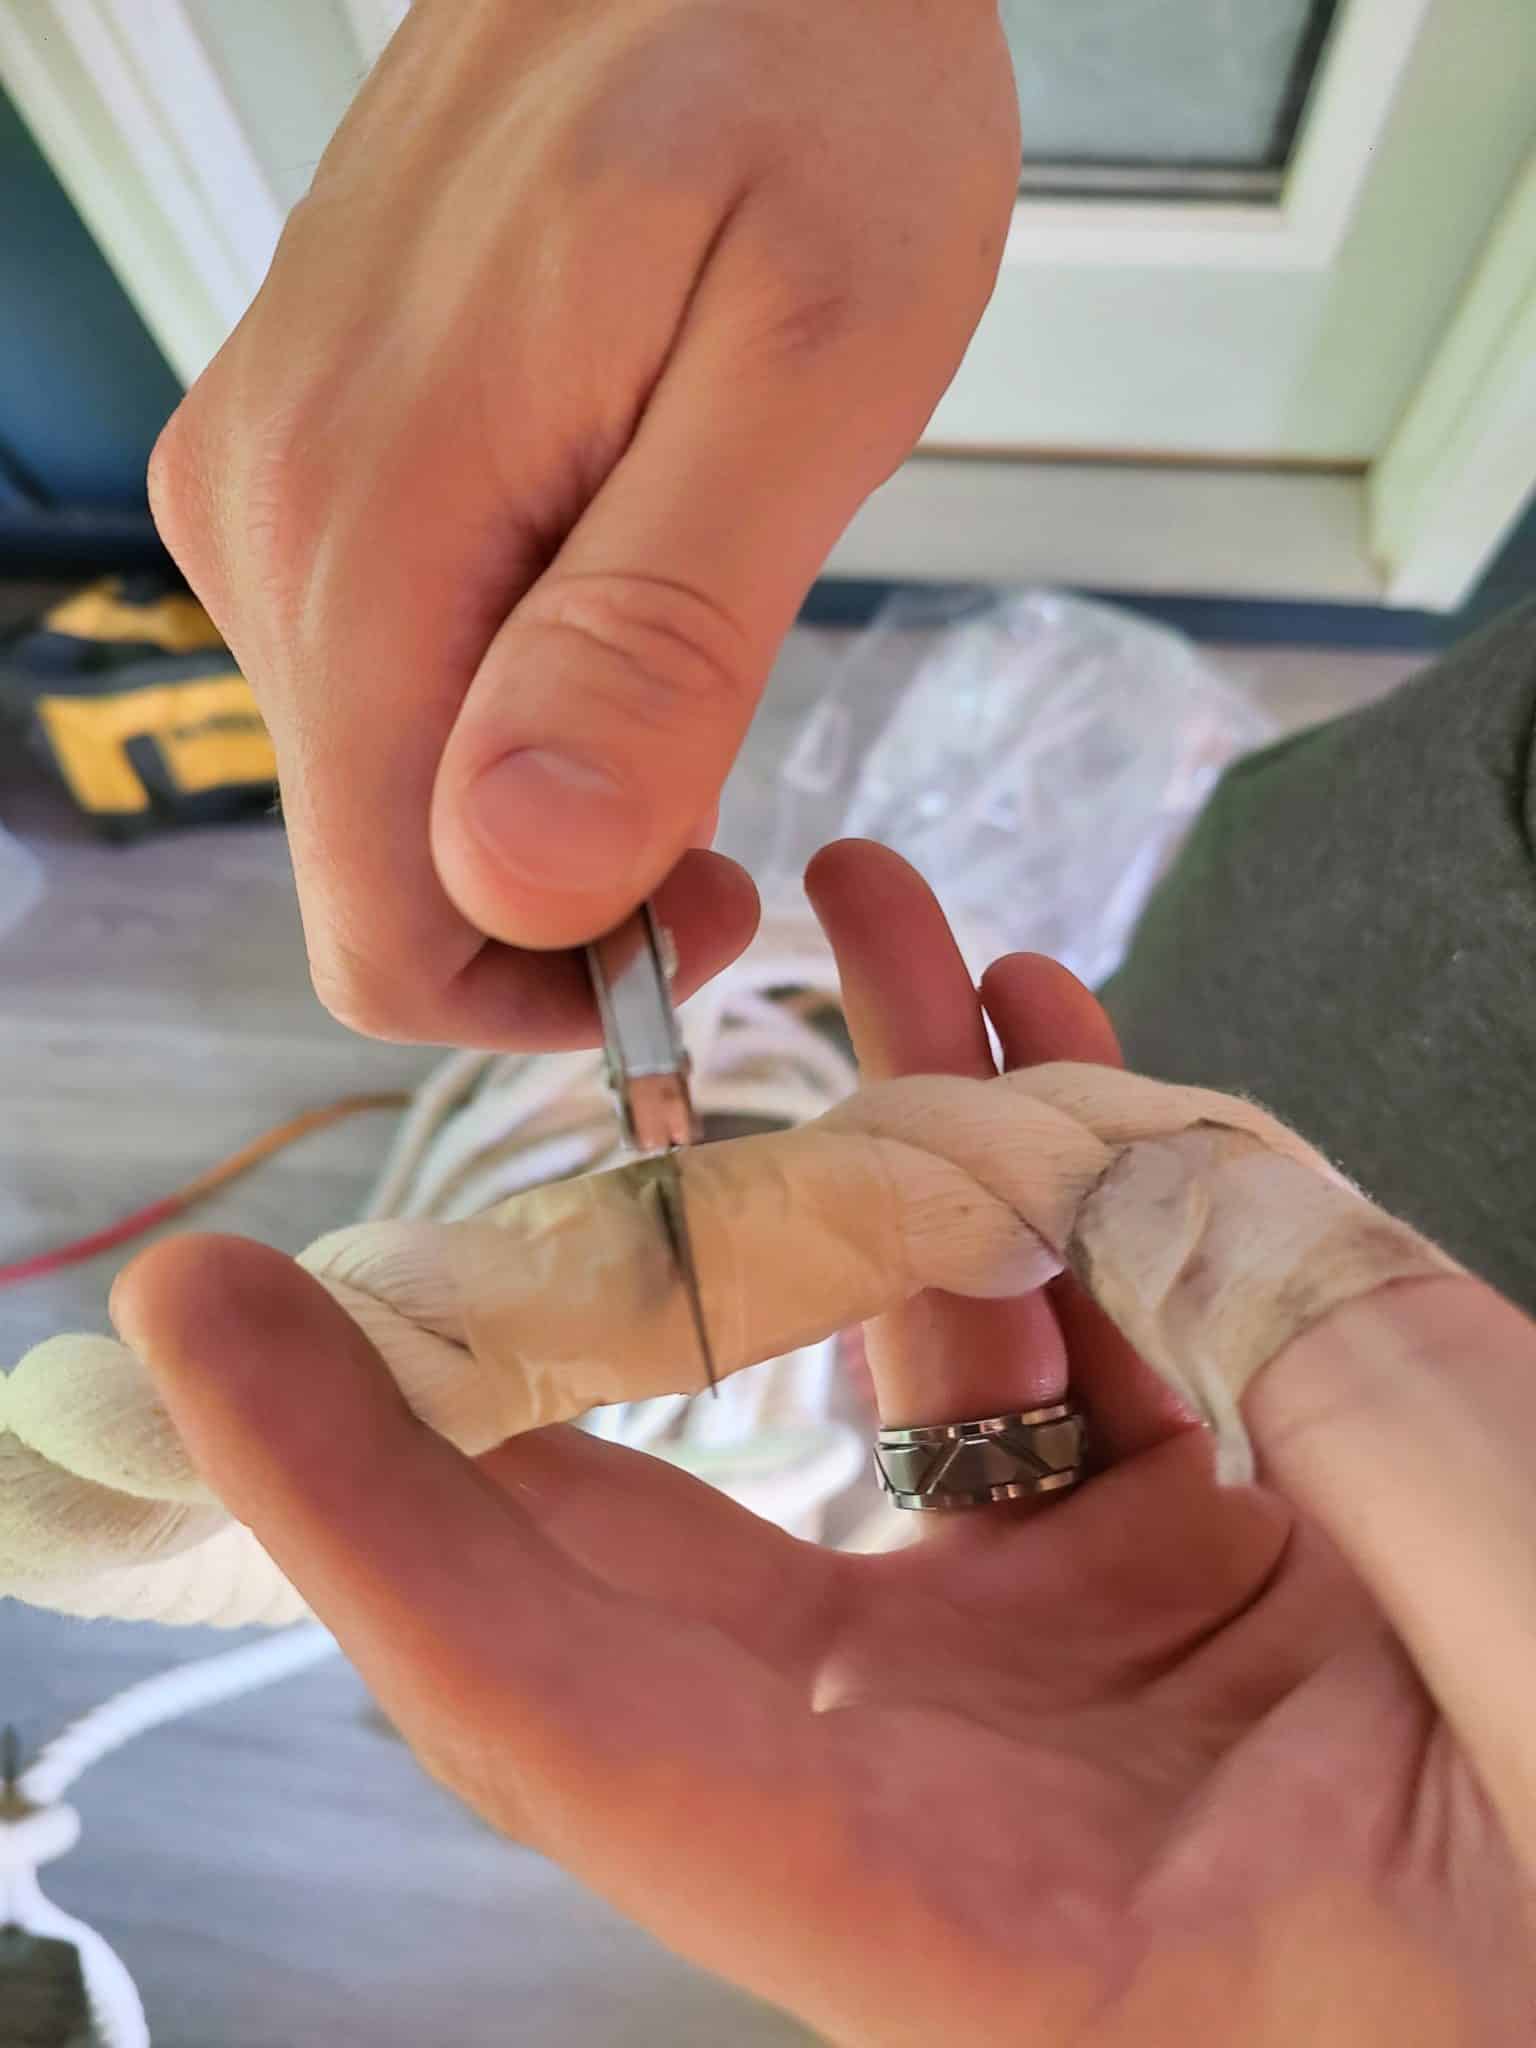
A quick and effective way to center the dowels is to wrap them with strips of paper. Keep adding layers until the dowels feel tight and you can hardly wiggle the headboard support. Repeat this for the other three supports.
Now you need to attach the headboard panels to the supports. You know what the measurement is supposed to be from the plans, but this is a handmade piece of furniture. The holes in the bed frame aren’t likely going to be perfectly accurate. Whenever possible, it’s better to use the pieces themselves in order to set the spacing. There are two methods to attaching the panels: exposed screws vs. hidden hardware


Method 1: Exposed Screws
Position your headboard panels centered on the supports. Once you have it centered, lightly mark the edge of the headboard supports on the headboard so that you can quickly realign it later. Now adjust the height of the headboard until it is at your desired height and have a helper hold it in place. Double-check that you are still centered by using your marks from earlier and then drive a screw through the top of the headboard support and into the headboard panel (make sure your screws aren’t too long!). Repeat this for the second headboard.
Finally, remove the headboard supports from the 4×6. Re-align your supports with the mark you made on the headboard. Drill a small pilot hole on the inside corner on the underside of the support. Be careful when angling your drill bit to ensure your screw will go into the frame of the headboard without accidentally breaking out of the side of your support.
Next, measure your screw. You want it to sink most of the way into the headboard while also burying itself into the support. You don’t want its head sticking out and causing interference. To solve this, we are going to use a drill bit as large or larger than the head of your screw to remove enough material to sink the head of the screw. Drill deeper if needed to get the right amount of penetration from your screw. Once your headboards are screwed together, double-check that they still can be installed on both sides of the bed and adjust your positioning if needed.


Method 2: Hidden Hardware
To do this, first place tape on the top and bottom of the support pieces with the sticky side facing out and secure it with an additional small piece of tape. Then we drill a small hole through the tape into the support. This way, you can position the headboard and transfer the tape in order to transfer the hole mark and ensure you have perfect alignment.
Next, bring over the headboard panels and carefully measure each side to have even spacing on each side of the supports. It definitely helps to have a second person here! Once the spacing is right, pull the headboard tight against the tape and carefully transfer it from the support to the headboard. This is a bit tricky, but it worked pretty well.
Now take the pieces back down to the shop so we can start drilling the holes for the hidden hardware, which is simply some small dowels. We used a drill block to ensure that the holes stay plumb and some cheap stop collars to make sure that we couldn’t drill too deep.
After marking the hole locations to keep the bit from drifting, start with an ⅛” pilot hole and then work up to the dowel size. Once all of the holes are in place, vacuum up the debris and glue the dowels into the headboard. Then flip the supports over and press them down onto the dowels.
Once they get started, it just takes a little bit of hammering to gently persuade them to cooperate. And to help strengthen this joint, clamp the pieces together and let the glue set up. Tada!


Step 16: Tying the Ropes & Hanging the Daybed
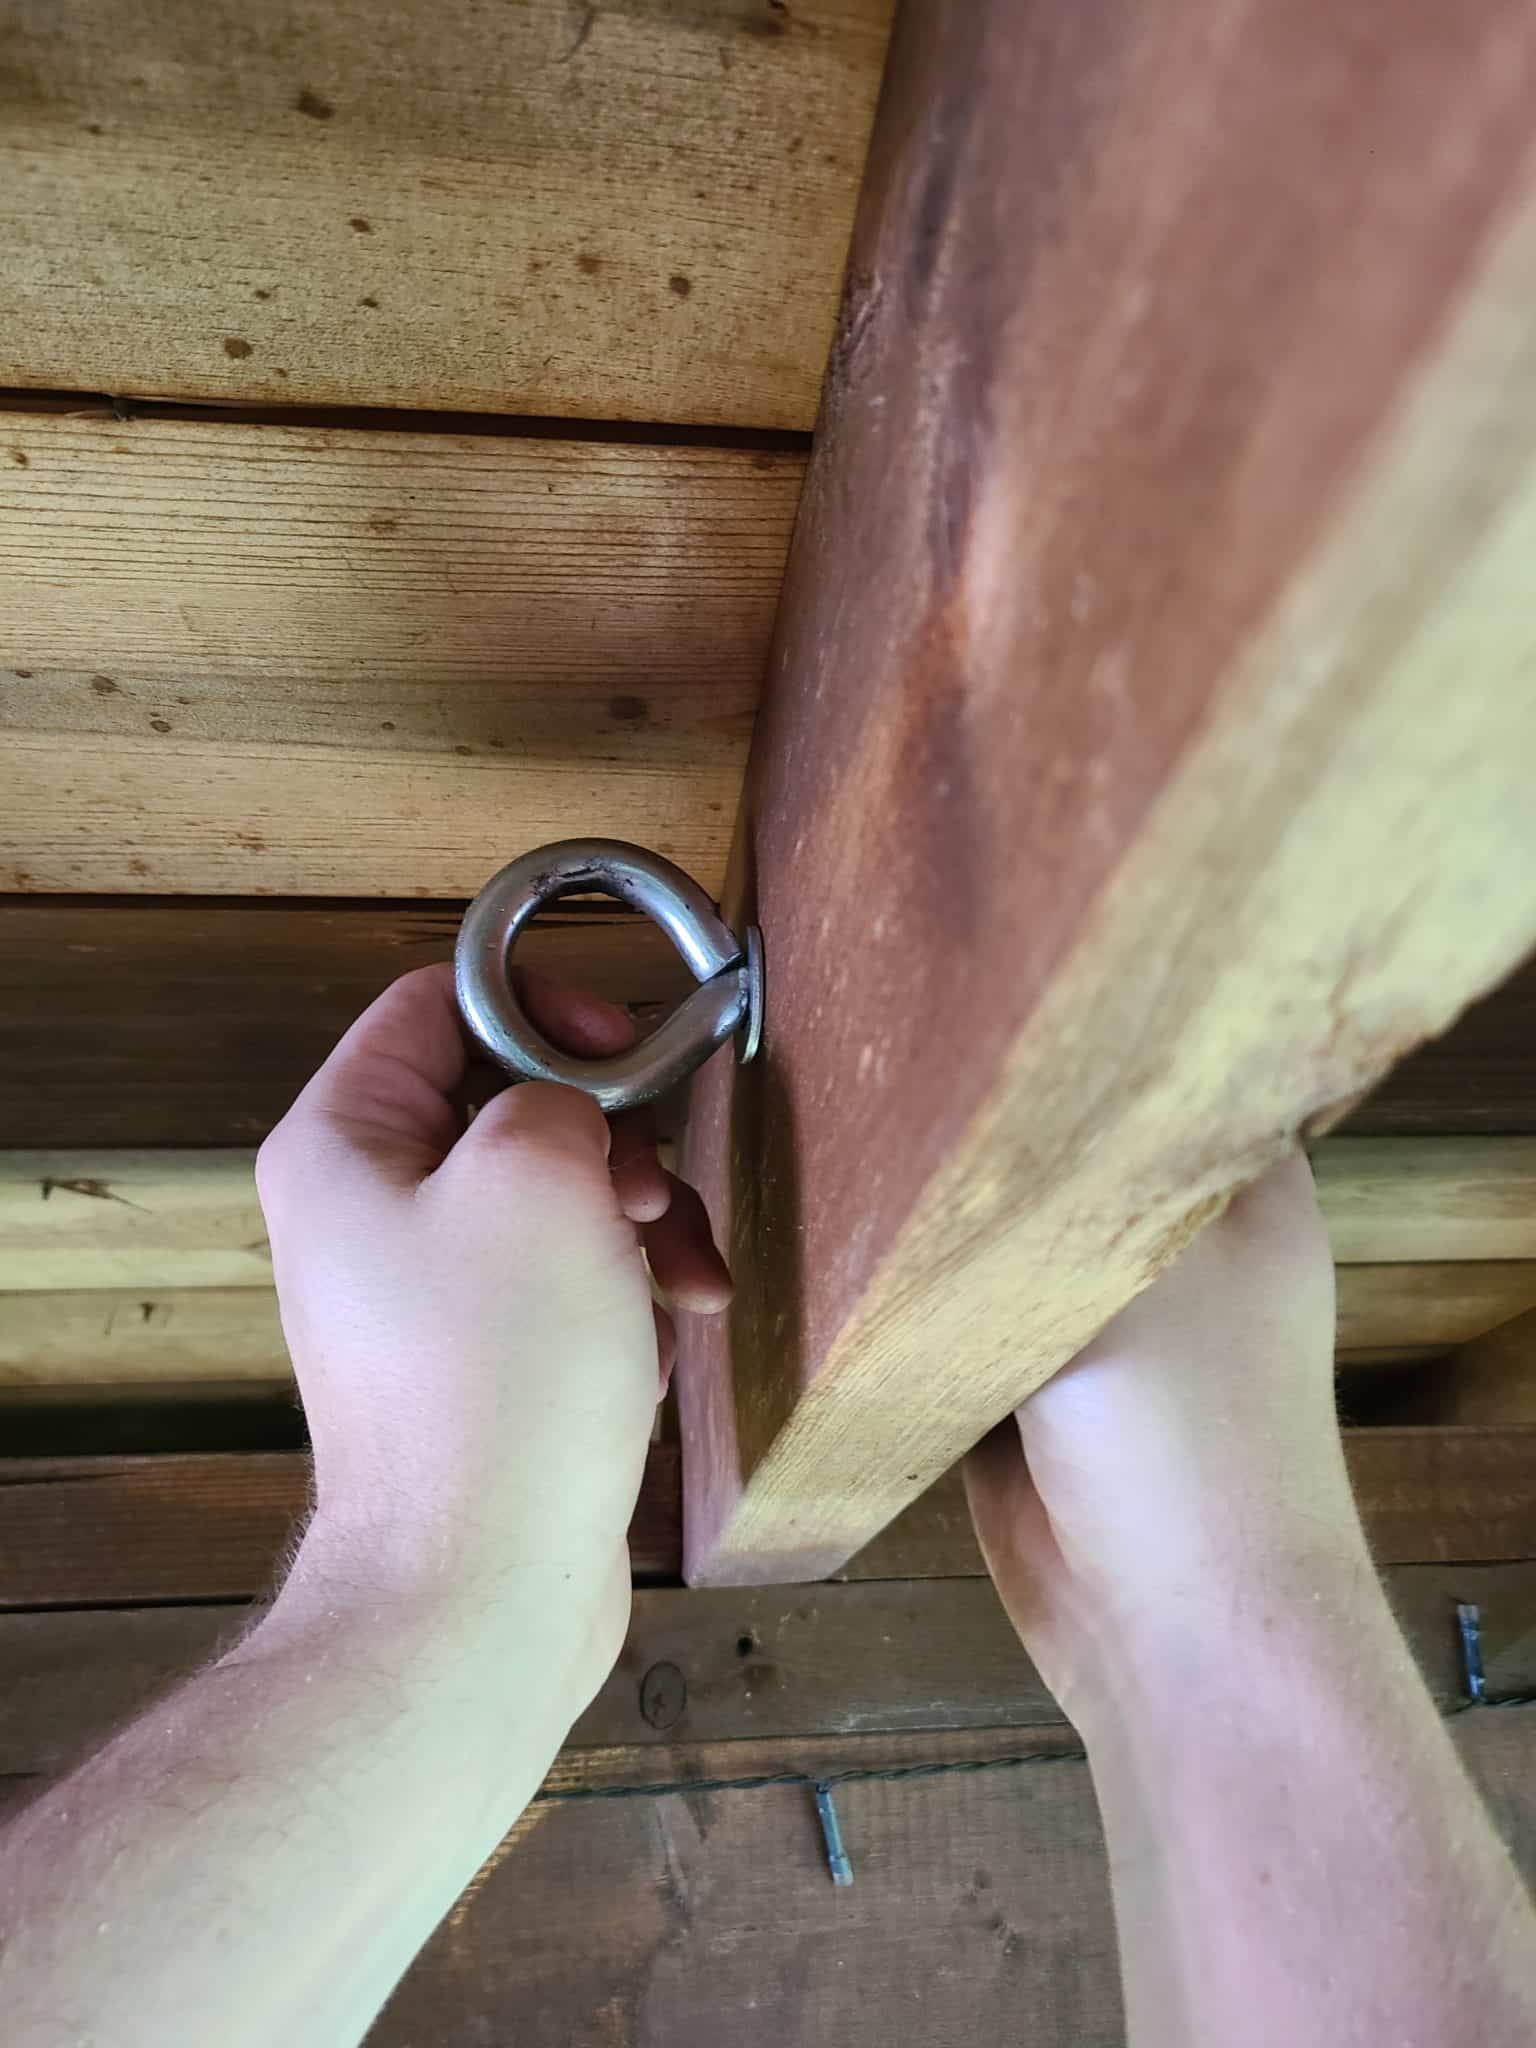
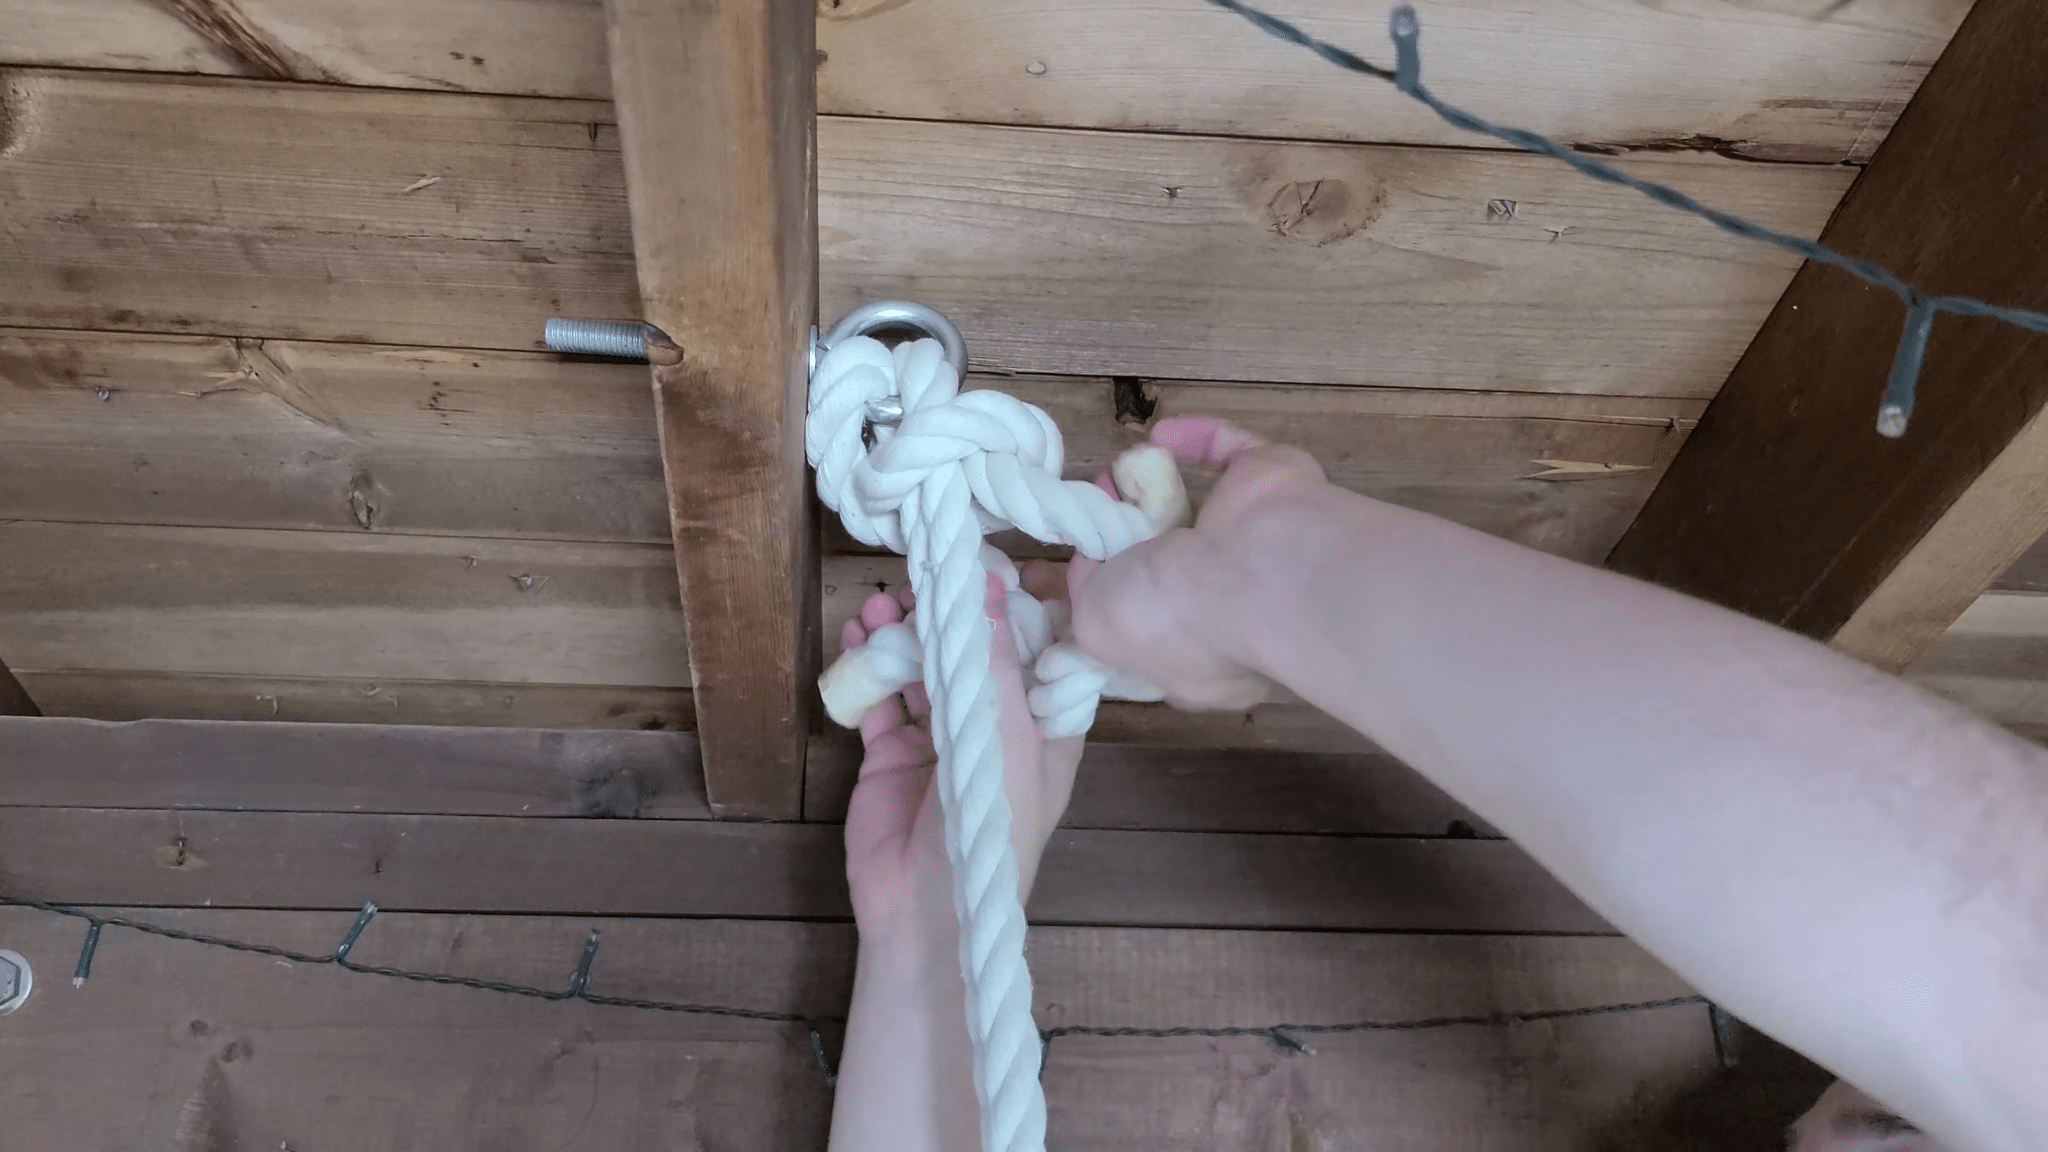
Now you just have to hang the daybed swing up using ropes. We opted to install these eyebolts above the four corners of our hanging bed. Since we didn’t want one joist to handle the load of two corners, we distributed the load by staggering the ropes between two joists on each side.
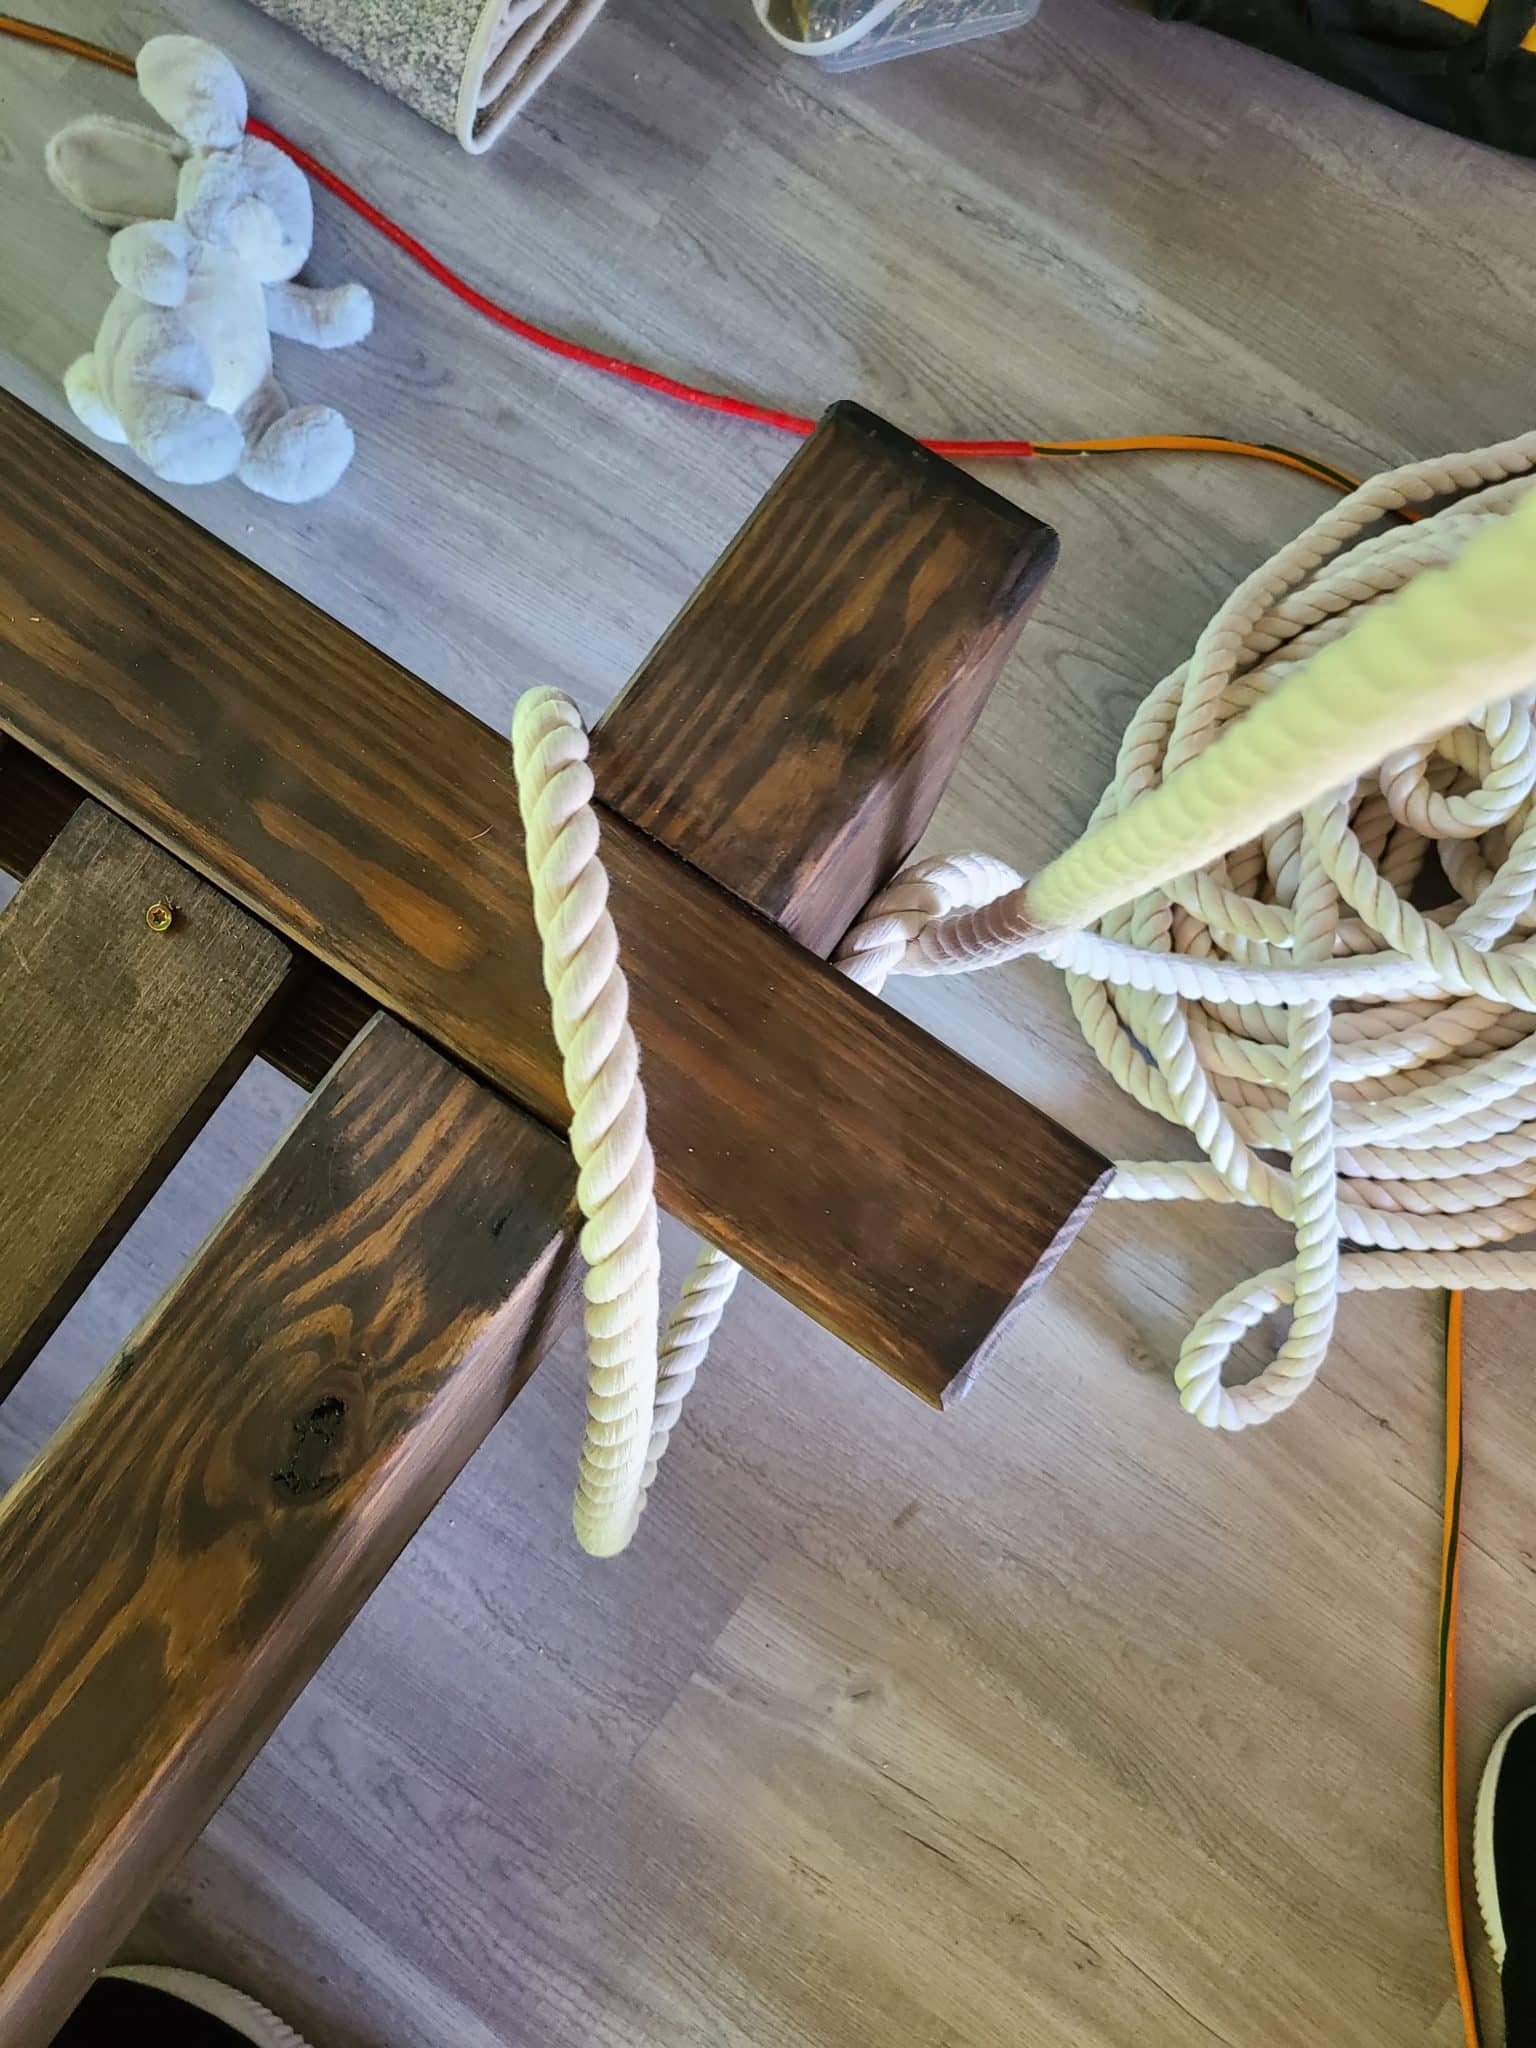
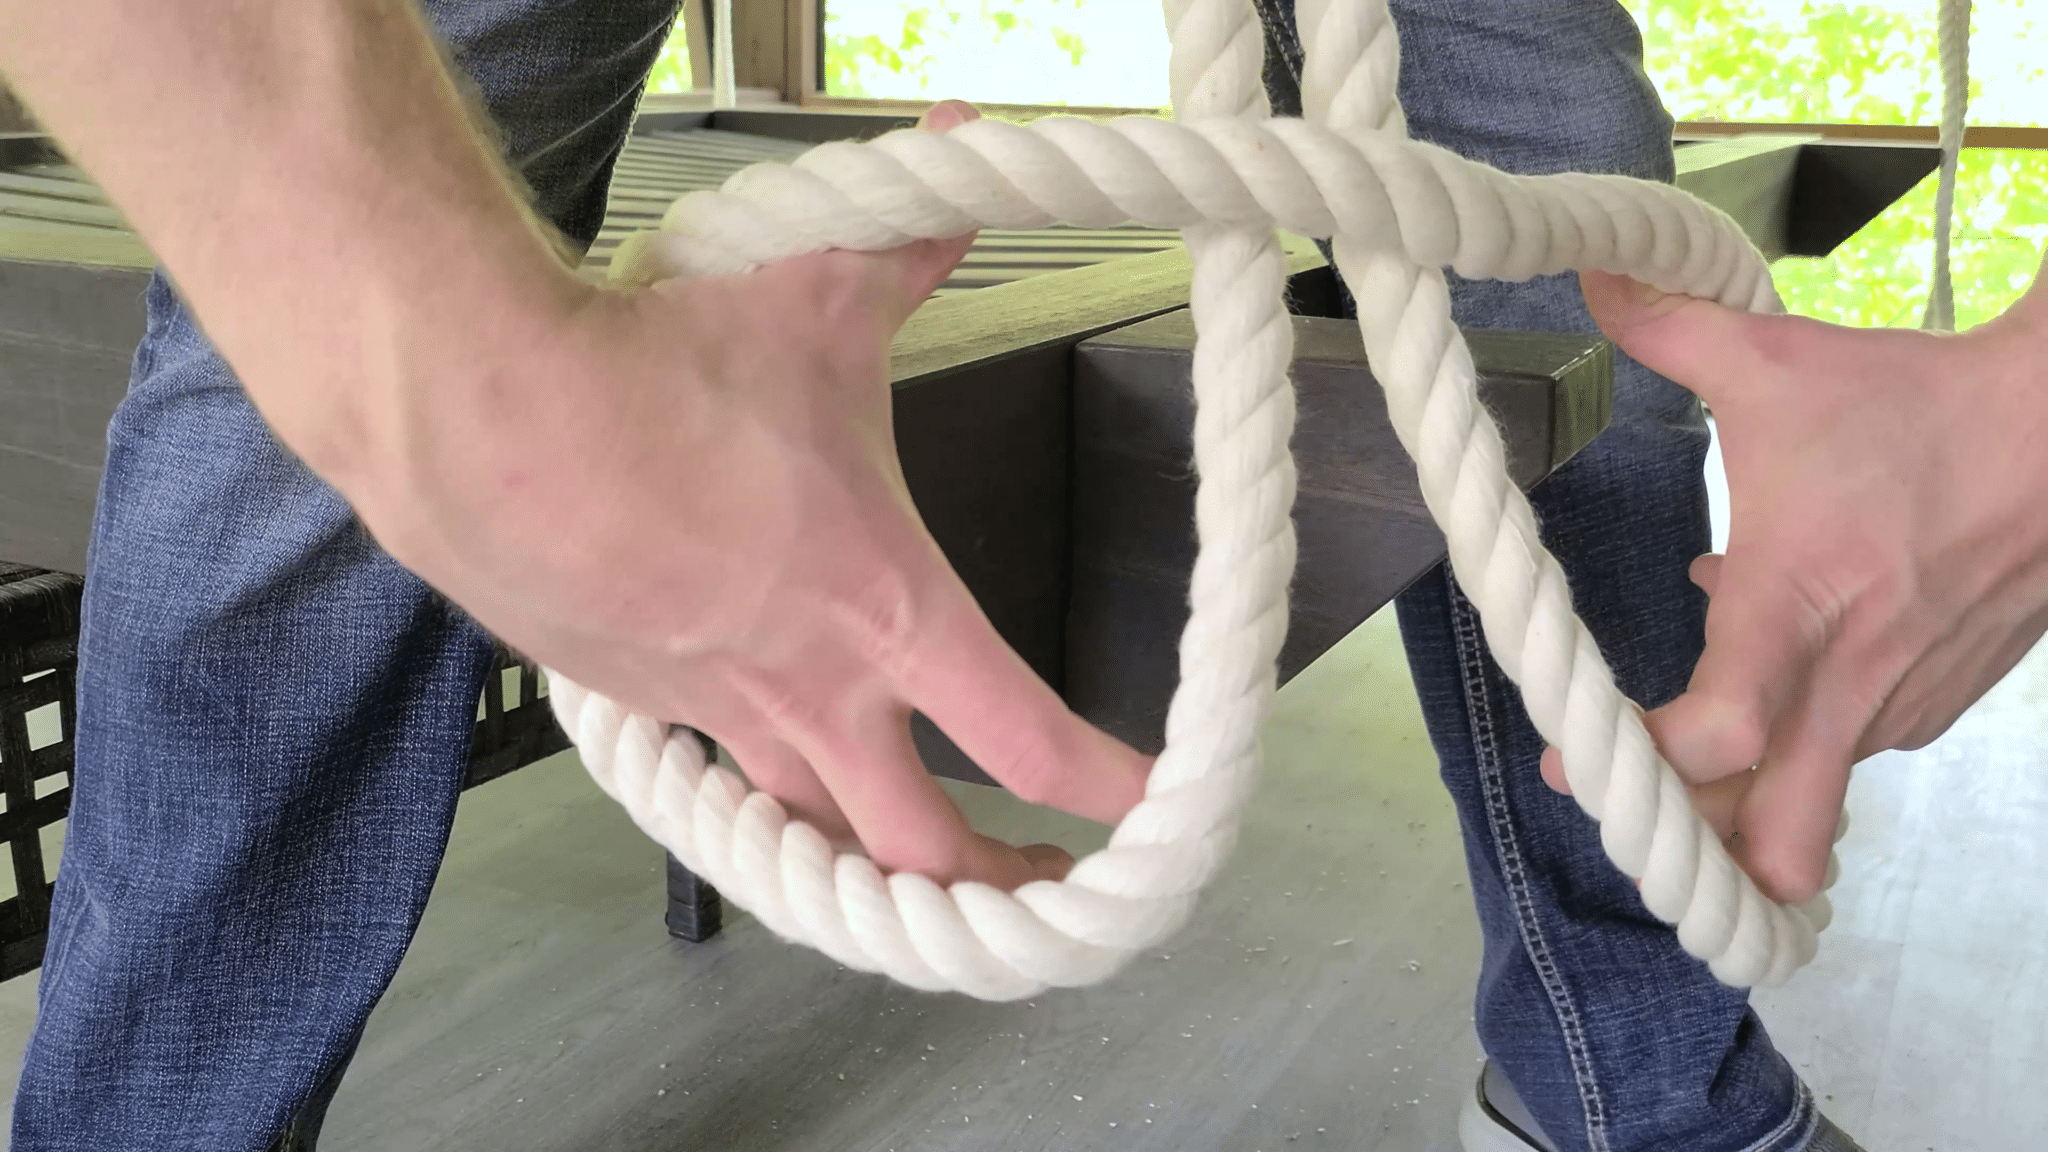
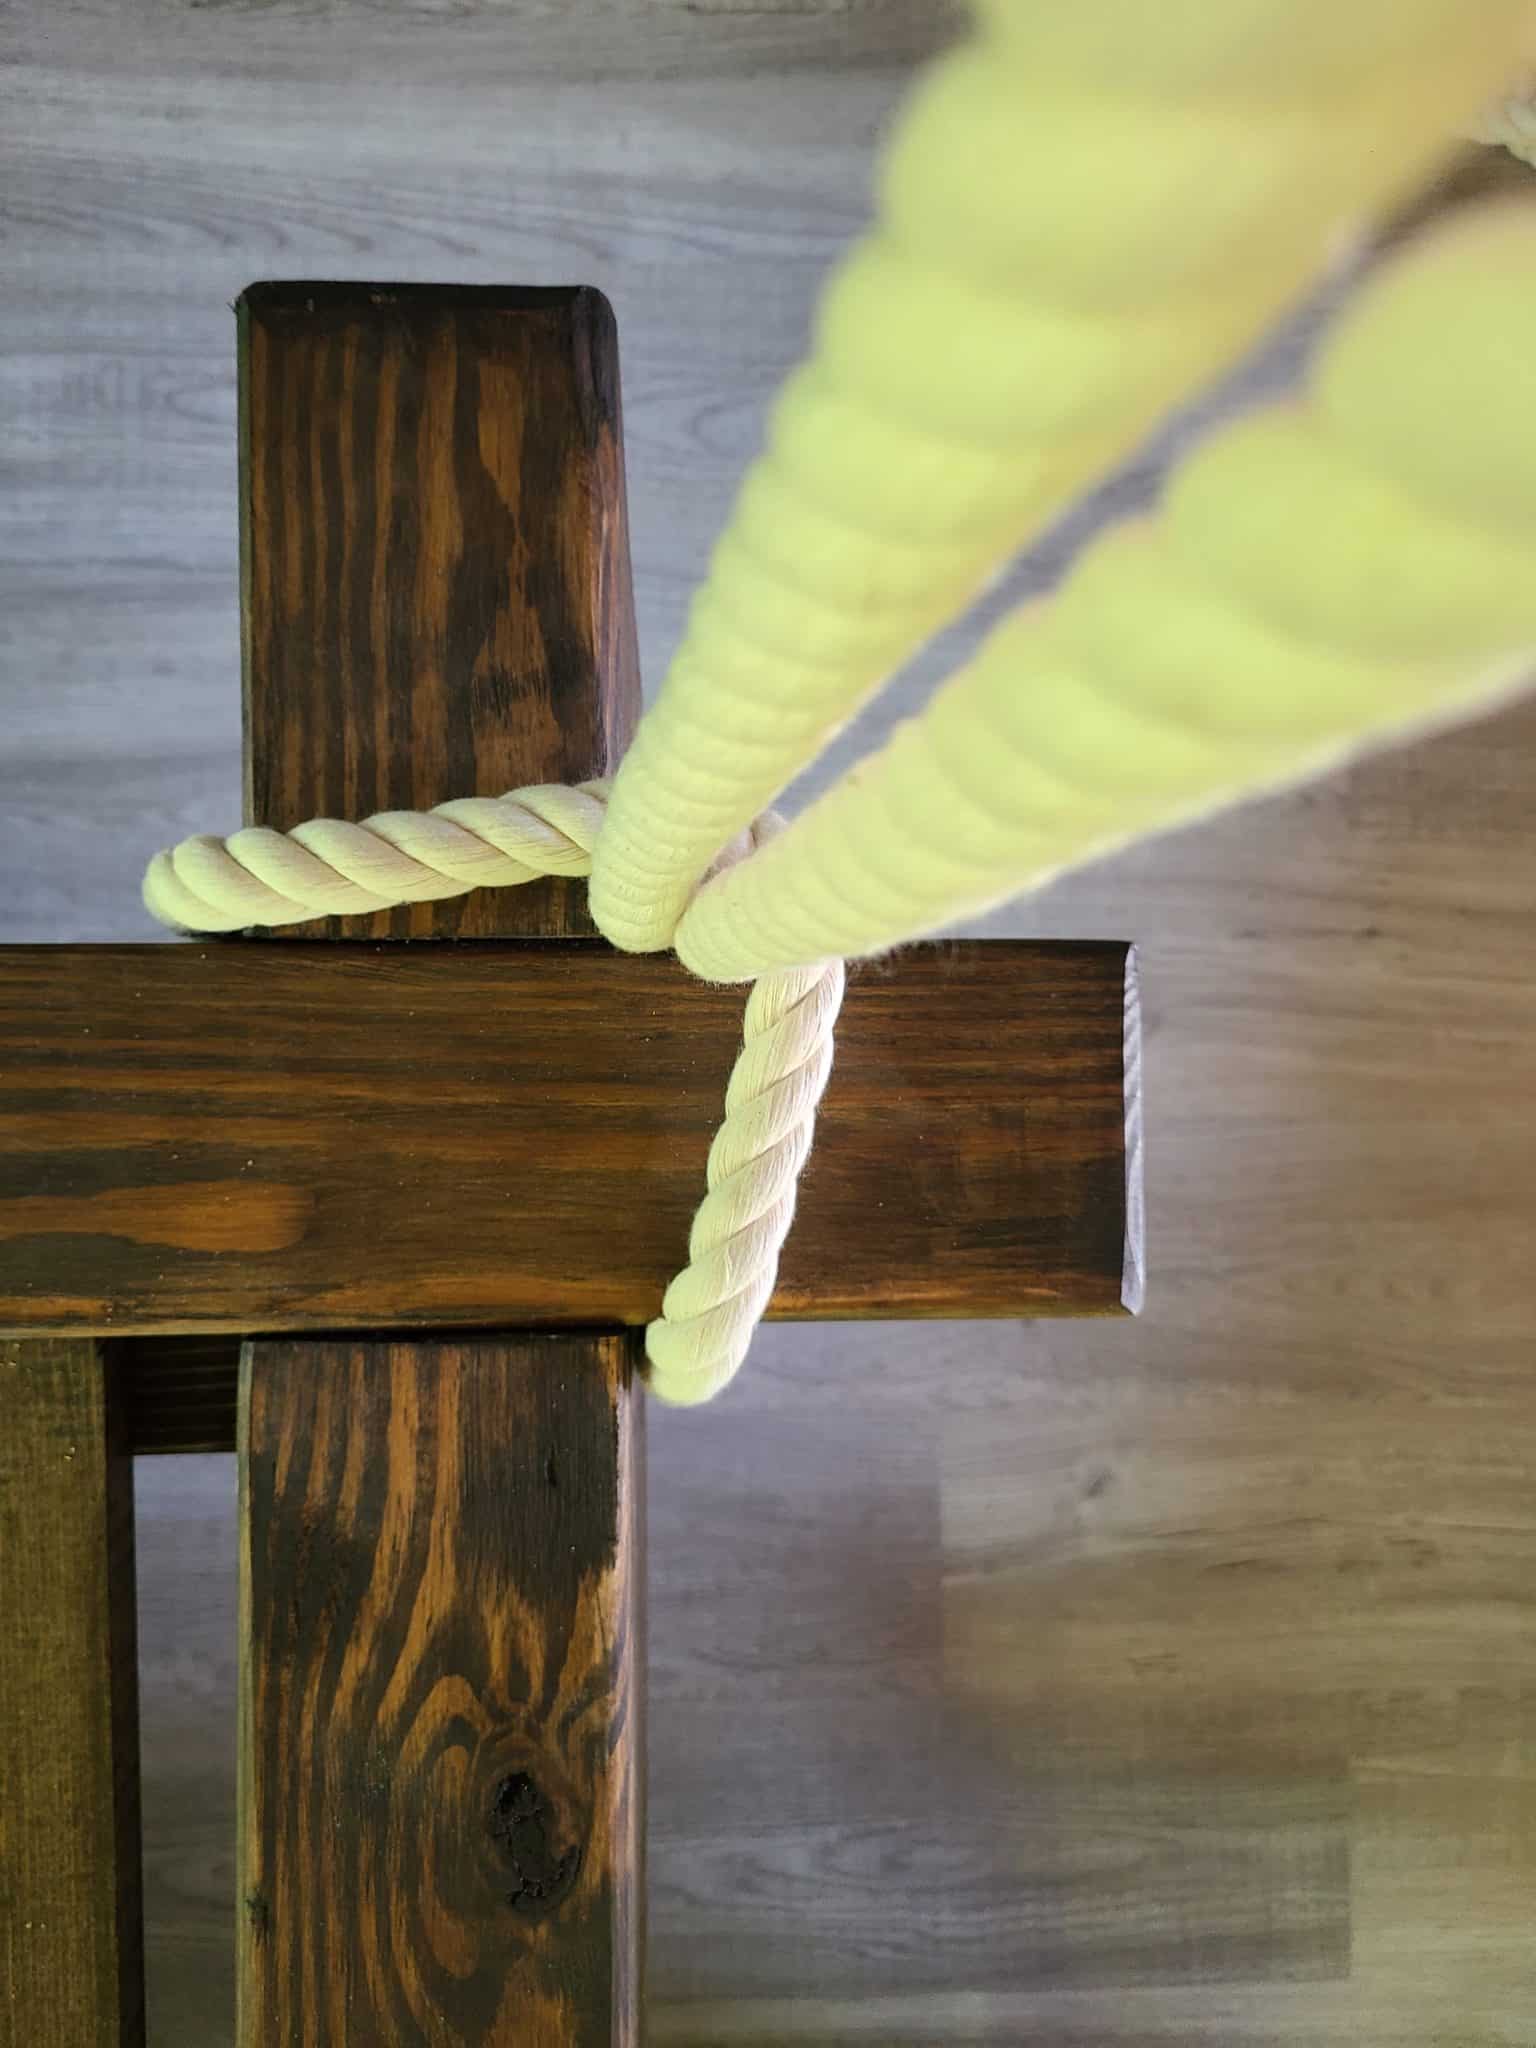
Next, raise the bed up and set it on some blocks so that it is at your desired height and feed the rope through the eyebolt and down to the bed. To hang the bed, we didn’t want to put eyebolts in our frame or anything like that. Instead, we wrapped the rope around the bed in a way that binds the corner tight and looks amazing.
Create a loop around two of the posts and run those two strands up and through the eye bolt where they terminate in a square knot. It originally seemed like the rope could slip free on the bottom, but once there was weight on the rope and they were able to pull taught, it was evident that the ropes weren’t going to slip away. If you find that your rope is threatening to slip, run a nail into the rope on the underside of the bed to hold it in place.

Remove your blocks or furniture and adjust your ropes as needed. They will likely stretch once you put weight on them and chances are that you’ll need to go back and adjust at least one corner if not all of them. Just lift the bed back up and shorten each rope until it’s back to where you wanted it. Now cautiously climb out onto the bed and check all of your connections. Make sure everything still looks sturdy and that you didn’t hear any scary sounds like boards cracking. Then add more weight and check again until you’re confident that it will hold your entire family.
HUBBY TIP: Hang the bed a little higher than you want it to be. Cotton rope like we used will stretch out a little over time due to having weight on it, so the bed will start to hang lower after a while.
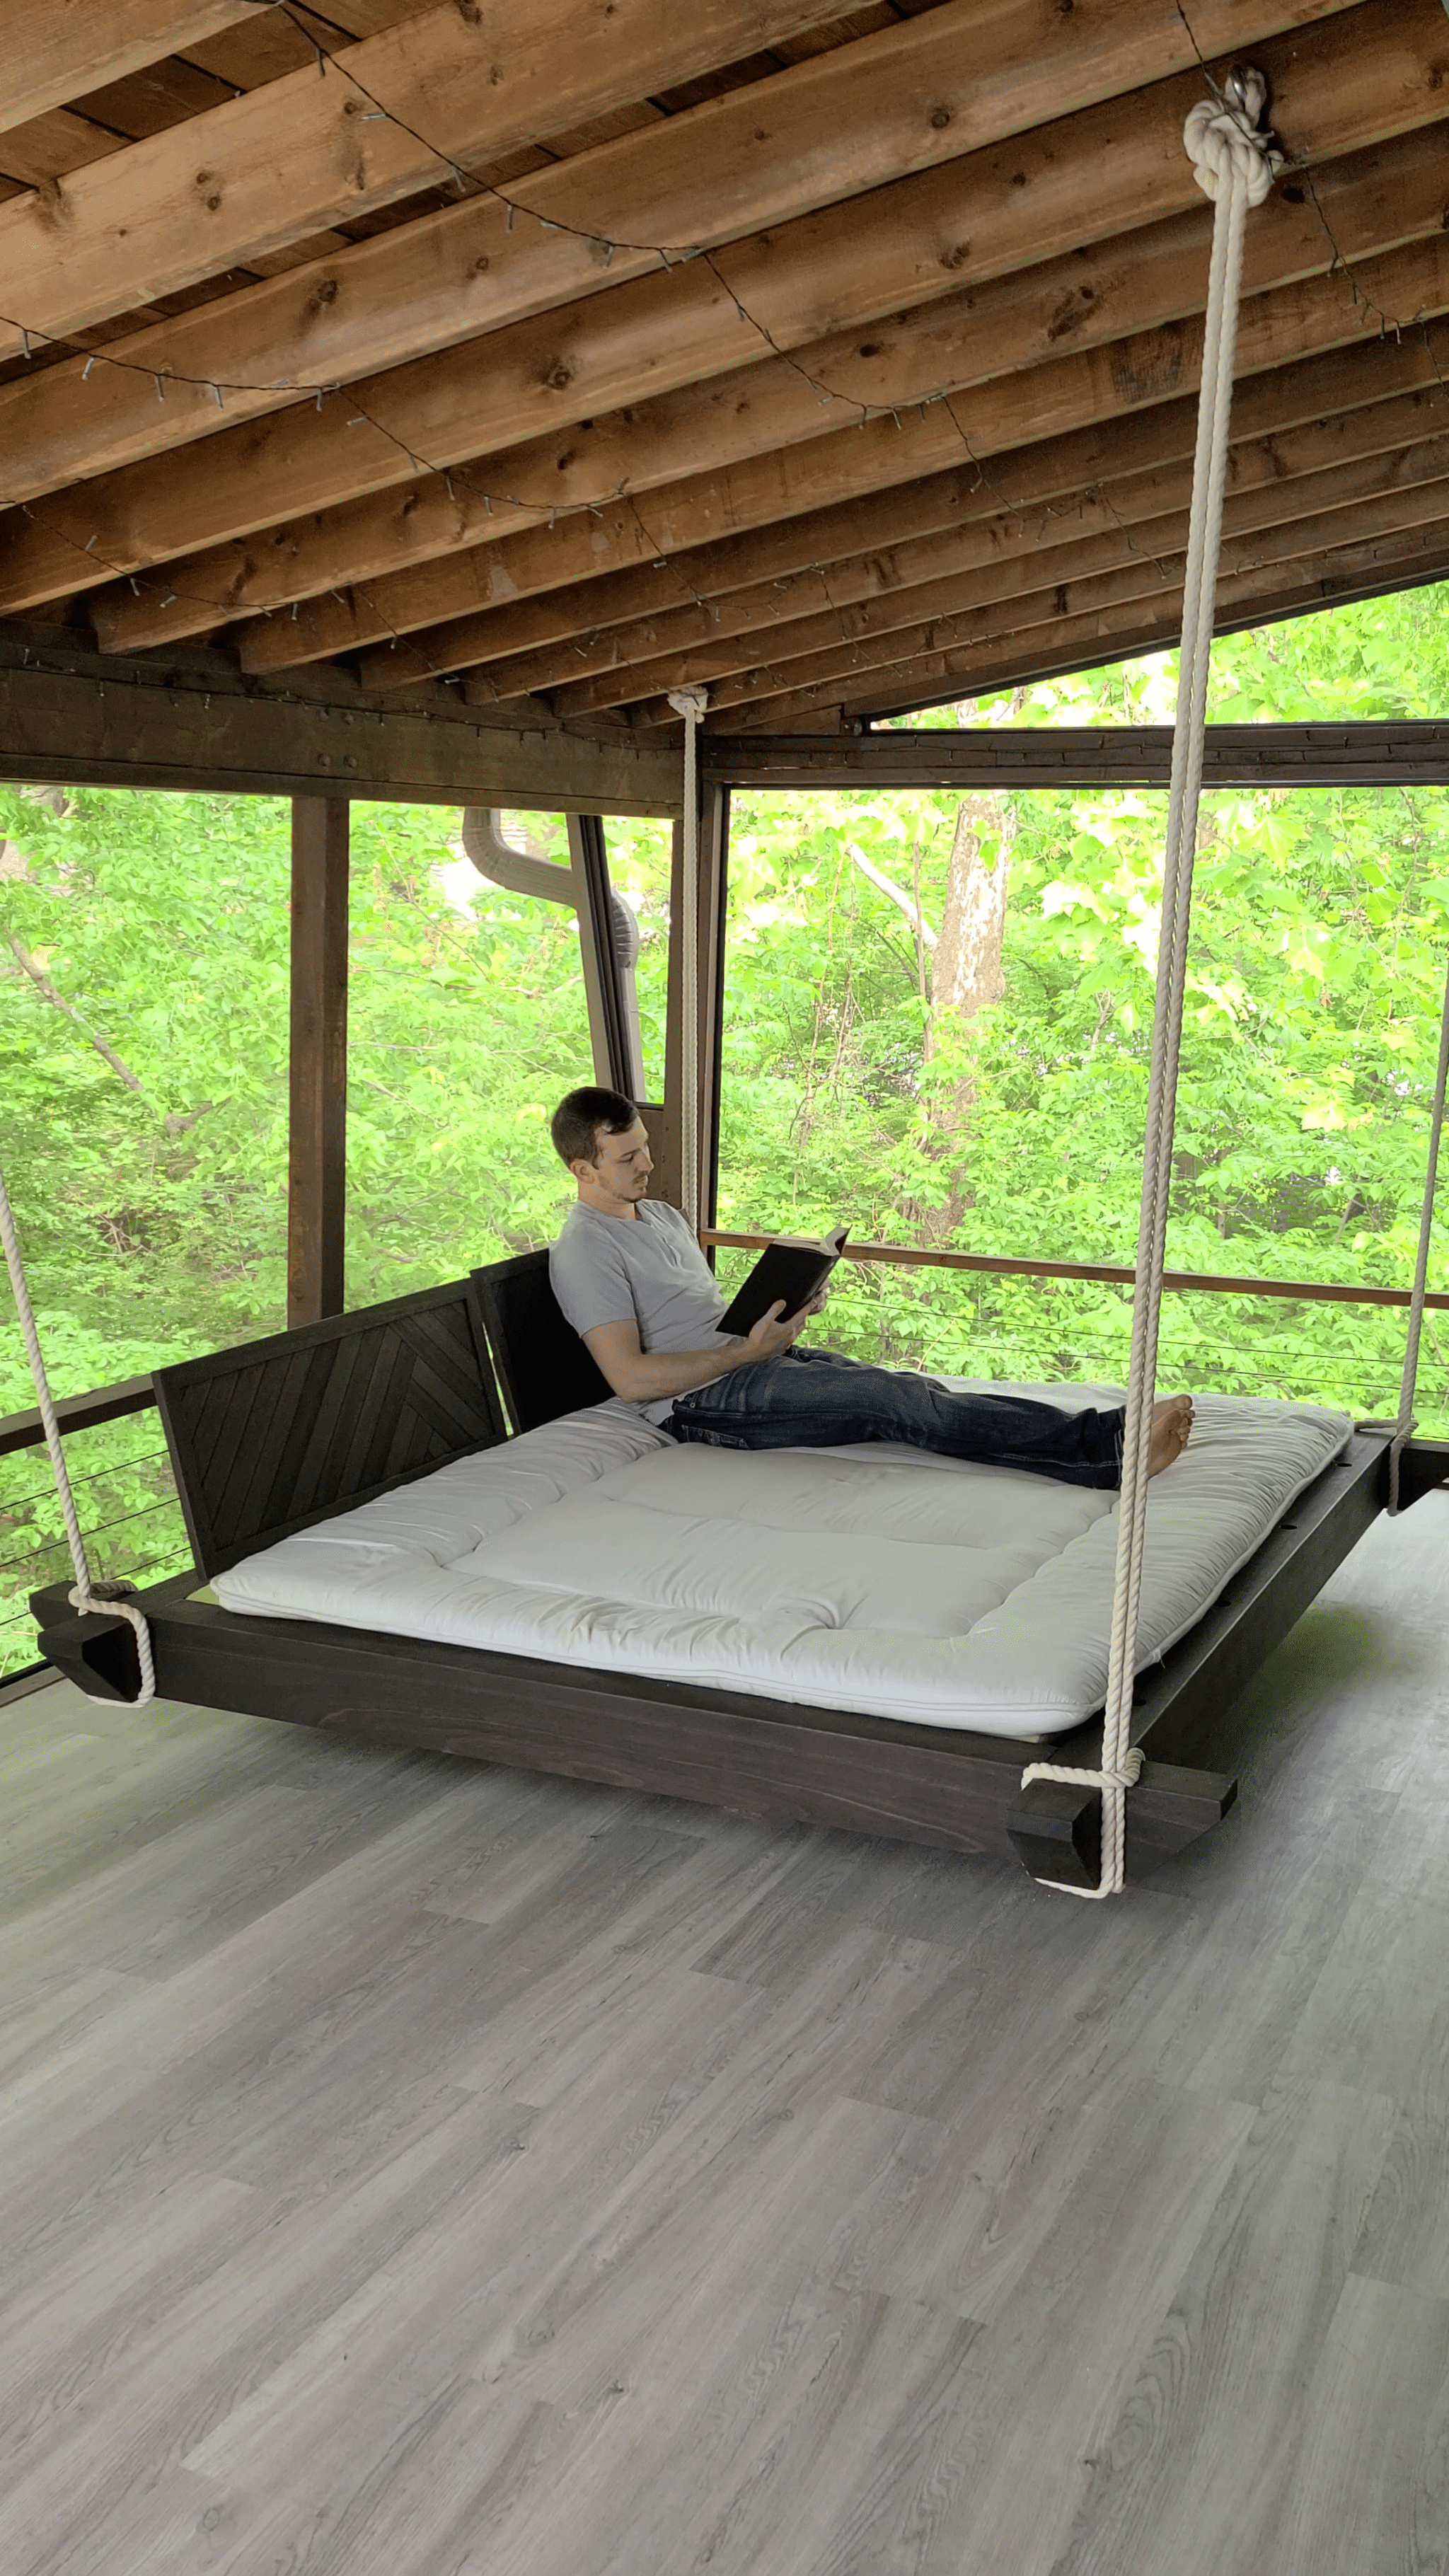
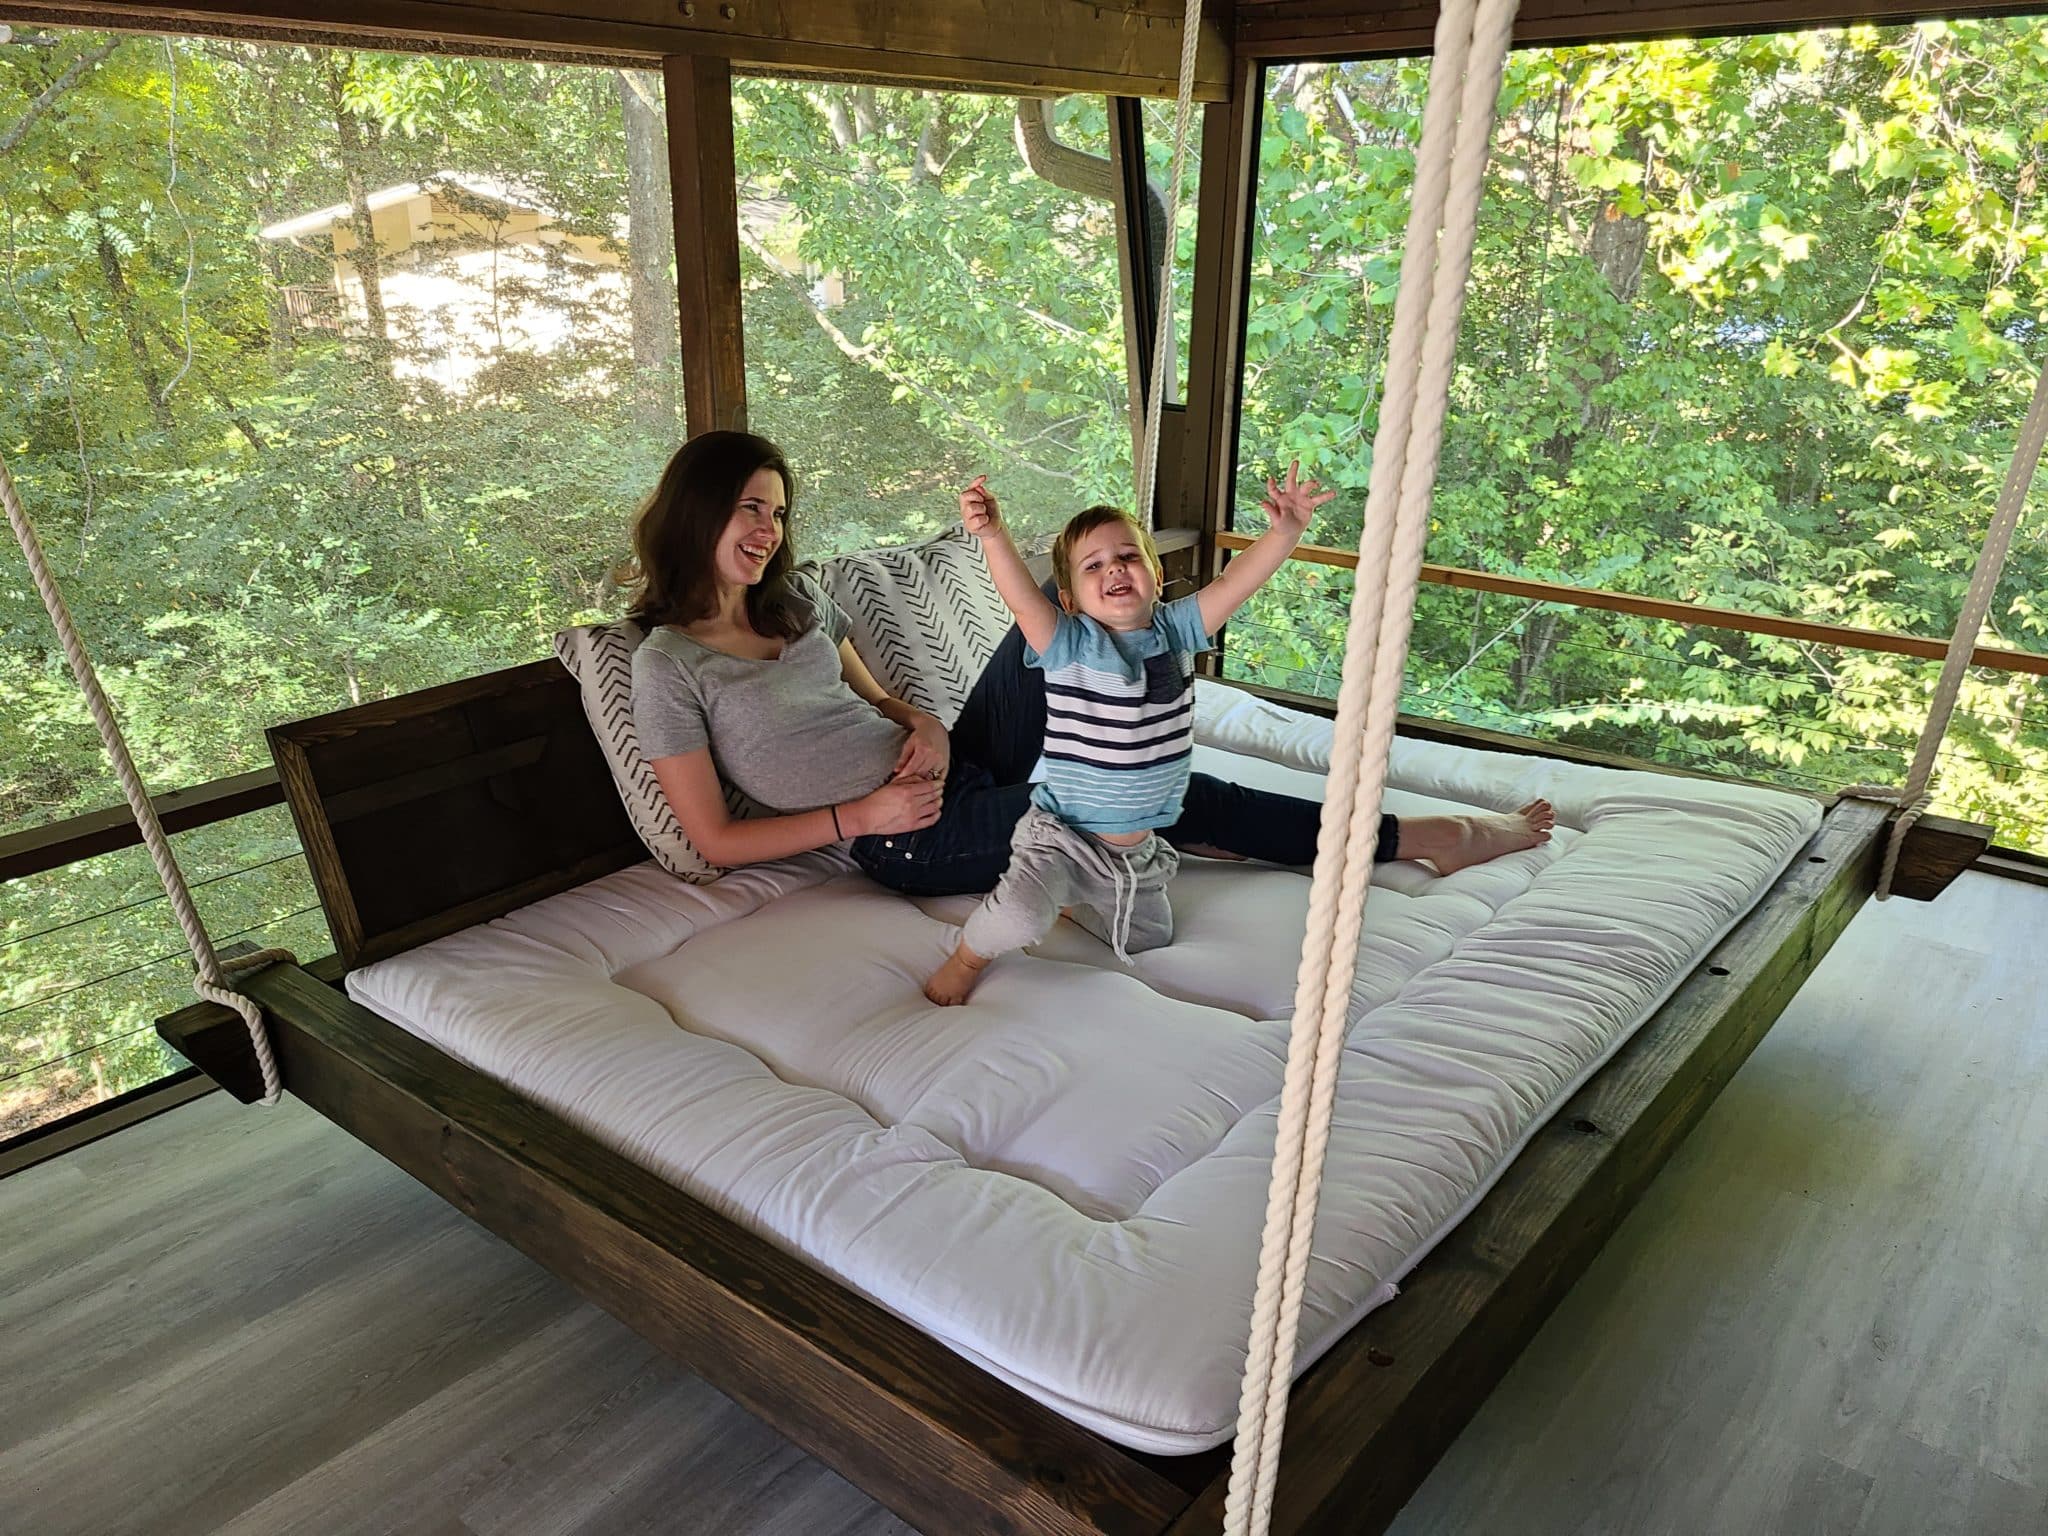
Finished Hanging Daybed Swing
Assuming everything checked out okay, lay out the futon, grab some pillows, and put the headboards where you want! It’s time for a well-deserved break. You just built something pretty awesome with these daybed swing plans! Take a moment to kick back and relax. You earned it!
We purchased this futon for the hanging daybed, but found we needed a little extra cushion. So we added this 1.5″ foam pad underneath and now we can sit on it for hours!


Other DIY Projects
Hopefully, you love this amazing hanging daybed you built yourself and enjoy it for years to come! We definitely spend hours living on it and spending time with one another. Check out some of our other DIY project articles for more woodworking and home inspiration!
- 15 Amazing Woodworking & DIY Projects With Plans And How-To Instructions
- How To Make DIY Floating Shelves – Live Edge Wood Shelves For Kitchen
- Hubby How To: DIY Stacked Rain Barrel System
- Hubby How To – DIY Modern Headboard With Floating Nightstands
- How To Make A Mosaic Headboard Panel For A Hanging Daybed


Let us know what you think of our hanging daybed swing plans or if you’re going to build one in the comments below!


Disclaimer: This post includes affiliate links, and I will earn a commission if you purchase through these links. Please note that I’ve linked to these products purely because I recommend them and they are from companies I trust. There is no additional cost to you.


