Why Rubio’s SheenPlus Is Better Than Polyurethane
Looking for a Polyurethane alternative? Or simply want to increase the sheen on surfaces? We’ll show you why we prefer Rubio Monocoat’s SheenPlus over polyurethane, when to use it, how to apply it, and how much you need.

Disclaimer: This post includes affiliate links, and I will earn a commission if you purchase through these links. No additional cost for you. Read about our privacy policy.
With DIY and woodworking projects, a lot is riding on the final look and finish of your project. You have a vision and you want it to be a certain way. This is especially true when it comes to the sheen level of the wood surface and how the topcoat looks. Polyurethane is the product most people will reach for to achieve a shiny topcoat that protects their wood project.
As avid DIYers and woodworkers, we’ve used our fair share of products over the years, including standard polyurethane. Prior to our mindset shift of reducing our environmental footprint, we just bought whatever we found at local home improvement stores. We honestly didn’t consciously think that there might be other product options that don’t potentially have harmful health and environmental impacts when used to finish wood. But then we discovered Rubio Monocoat and its product line that not only provides higher-quality results, but also proves to be a more eco-friendly alternative.
Beyond the possible health and environmental impacts, cost and time play a big role in why we would choose to use Rubio’s polyurethane alternative, SheenPlus. Let’s dive into why Rubio’s SheenPlus is better than polyurethane and how to use it.

Takeaways on SheenPlus
If you want a quick summary, here are our key thoughts and takeaways on SheenPlus and why it makes it such a great alternative to Polyurthenane.
PROs
- Only requires one coat
- Better for your health and the environment
- Will save you time and money
- Keeps the look and feel of real wood with a satin level shine
- Doesn’t require extra sanding or intercoat abrasion
- More room for error than Polyurethane
- A little product goes a long way
- No need to sand prior to recoating (if needed)
CONs
- Can’t create a high-gloss top coat finish.
SheenPlus only creates a satin level shine. But honestly, most things we build don’t need a super glossy finish, so that’s not even a con for us! Read on for details on these takeaways and how to apply SheenPlus.
Related – The Ultimate Wood Finish – Rubio Monocoat Review & Color Test
A Second Layer for Rubio Monocoat
If you know about Rubio Monocoat products, you’ll know their claim to fame is the “power of one” or the fact that it is a monocoat meaning it only needs one coat of finish applied.
Yup, it’s true. Rubio Monocoat looks amazing and it almost always only needs a single coat. We’ve used it on many projects now with amazing results! But sometimes, Rubio’s Oil plus 2C doesn’t quite have enough sheen to it, and for years was one of the complaints from users. That’s where Rubio’s SheenPlus product comes into play. So when do you need to use SheenPlus?
When To Use SheenPlus
The first thing to consider is the look and aesthetic of the end product. Furniture like bed frames or dressers look gorgeous with their natural matte finish, but we are conditioned to expect more sheen out of table tops. Not to mention that table tops tend to need more protection than other pieces.
The second thing you should consider is your type of wood. If your project uses a lot of end grain or another porous, thirsty wood, then you may find that Rubio ends up looking a little flat. This is especially true with softer wood surfaces as it is much harder to get that smooth surface that provides a natural sheen.
In each of these cases, most woodworkers and DIYers would reach for polyurethane to give them the sheen that they desire. We’ve done that ourselves in the past, but SheenPlus gives you better results in a fraction of the time and is an eco-friendly alternative to polyurethane.
Related – Rubio’s WoodCream: Review Of The New Eco-Friendly Exterior Finish
SheenPlus As An Eco-friendly Alternative To Polyurethane
The first major difference between Rubio’s Sheen Plus and Polyurethane is the ingredients. Polyurethane is normally made up of ingredients like petroleum, naphtha, stoddard solvent, methyl ethyl ketoxime, and ethylbenzene (many of which most of us don’t even know what they mean). While SheenPlus simply uses a blend of natural oils.
Secondly, the other major difference is the volatile organic compounds (VOC) and the warnings that come with typical polyurethane products. They most definitely have harmful VOCs due to those chemical ingredients and you need to wear a mask to keep from inhaling harmful vapors. Also, if you’ve ever read the warnings on Polyurethane, then it might have you concerned like it did us. Here’s an example of warnings listed on a polyurethane product we’ve used in the past (and honestly it’s a bit terrifying).
Polyurethane vs. SheenPlus Warnings
| Warning Labels | |
| Polyurethane | “High concentrations may lead to central nervous system effects like drowsiness, dizziness, nausea, headaches, paralysis, and blurred vision. Occupational overexposure is tied to permanent brain and nervous system damage. Chronic overexposure results in liver, cardiac abnormalities and nervous system damage. May cause dermatitis. May cause genetic defects. May damage fertility or the unborn child.” |
| Rubio Monocoat’s SheenPlus | “Acute Toxicity: Not classified, Respiratory or Skin Sensitisation: Not classified, Carcinogenicity: Not Classified.” |
As mentioned, SheenPlus takes a different approach focusing on being more eco-friendly with natural ingredients and having 0% VOCs. This leads to a warning list that basically says that it’s so safe, they didn’t even have to list anything.
Lastly, SheenPlus prevents you from having to build up multiple layers of plastic on a wood surface. Polyurethane literally requires you to sand its plastic layer between applying the next layer (hello microplastics everywhere!).
Moreover, our child is in the workshop with us frequently, so having a safe product is important to us. It allows our kid to help us out too if he’s interested without us worrying about health concerns. It’s also important to us for our health as well.
Related – Rubio Monocoat’s Hybrid Wood Protector: The Most Beautiful Exterior Wood Finish
How To Apply SheenPlus
Now you know when to use SheenPlus and why it’s a better polyurethane alternative, but how does it get applied?
After applying Rubio’s Oil Plus 2C, you’ll need to wait 24-36 hours to give that product some time to cure. If you need a refresher on how to do that read this post on how to apply all of Rubio’s finishes.
If any dust or hair got on the piece as the Oil Plus 2C cured, go ahead and clean that off first. We use either compressed air, a soft vacuum attachment, or a dust cloth.
Application Process
Now, it’s a quick simple process to apply Rubio Monocoat’s SheenPlus:
- Step 1: Mix 3 parts of the SheenPlus (Component A) with 1 part of the Accelerator (Component B). This is the same hardener that Rubio uses for all of their products.
- Step 2: Next, apply the SheenPlus to the surface of your piece. It is pretty thick, so a brush can be helpful to apply it. Then use a red applicator pad or a rag, to spread the mixture over the entire surface.
- Step 3: Within 15 minutes, come back with that same pad or rag and wipe the surface again to make sure everything is evenly distributed.
- Step 4: Immediately following that, come back with a white applicator pad, or a new rag, and buff the surface vigorously until everything feels dry.
- Step 5: Then come back one more time and wipe the surface again to ensure you have removed any surface irregularities or streaks. If you are working with long-grain wood, make sure your final strokes are in the direction of the grain.
- Step 6: Then just let the SheenPlus cure. The surface can be lightly used after 24 hours, but don’t expose it to water until after 7 days when it has fully cured.
Applying the SheenPlus could not be simpler, but how do you figure out how much you need?


How Much SheenPlus Do I Need?
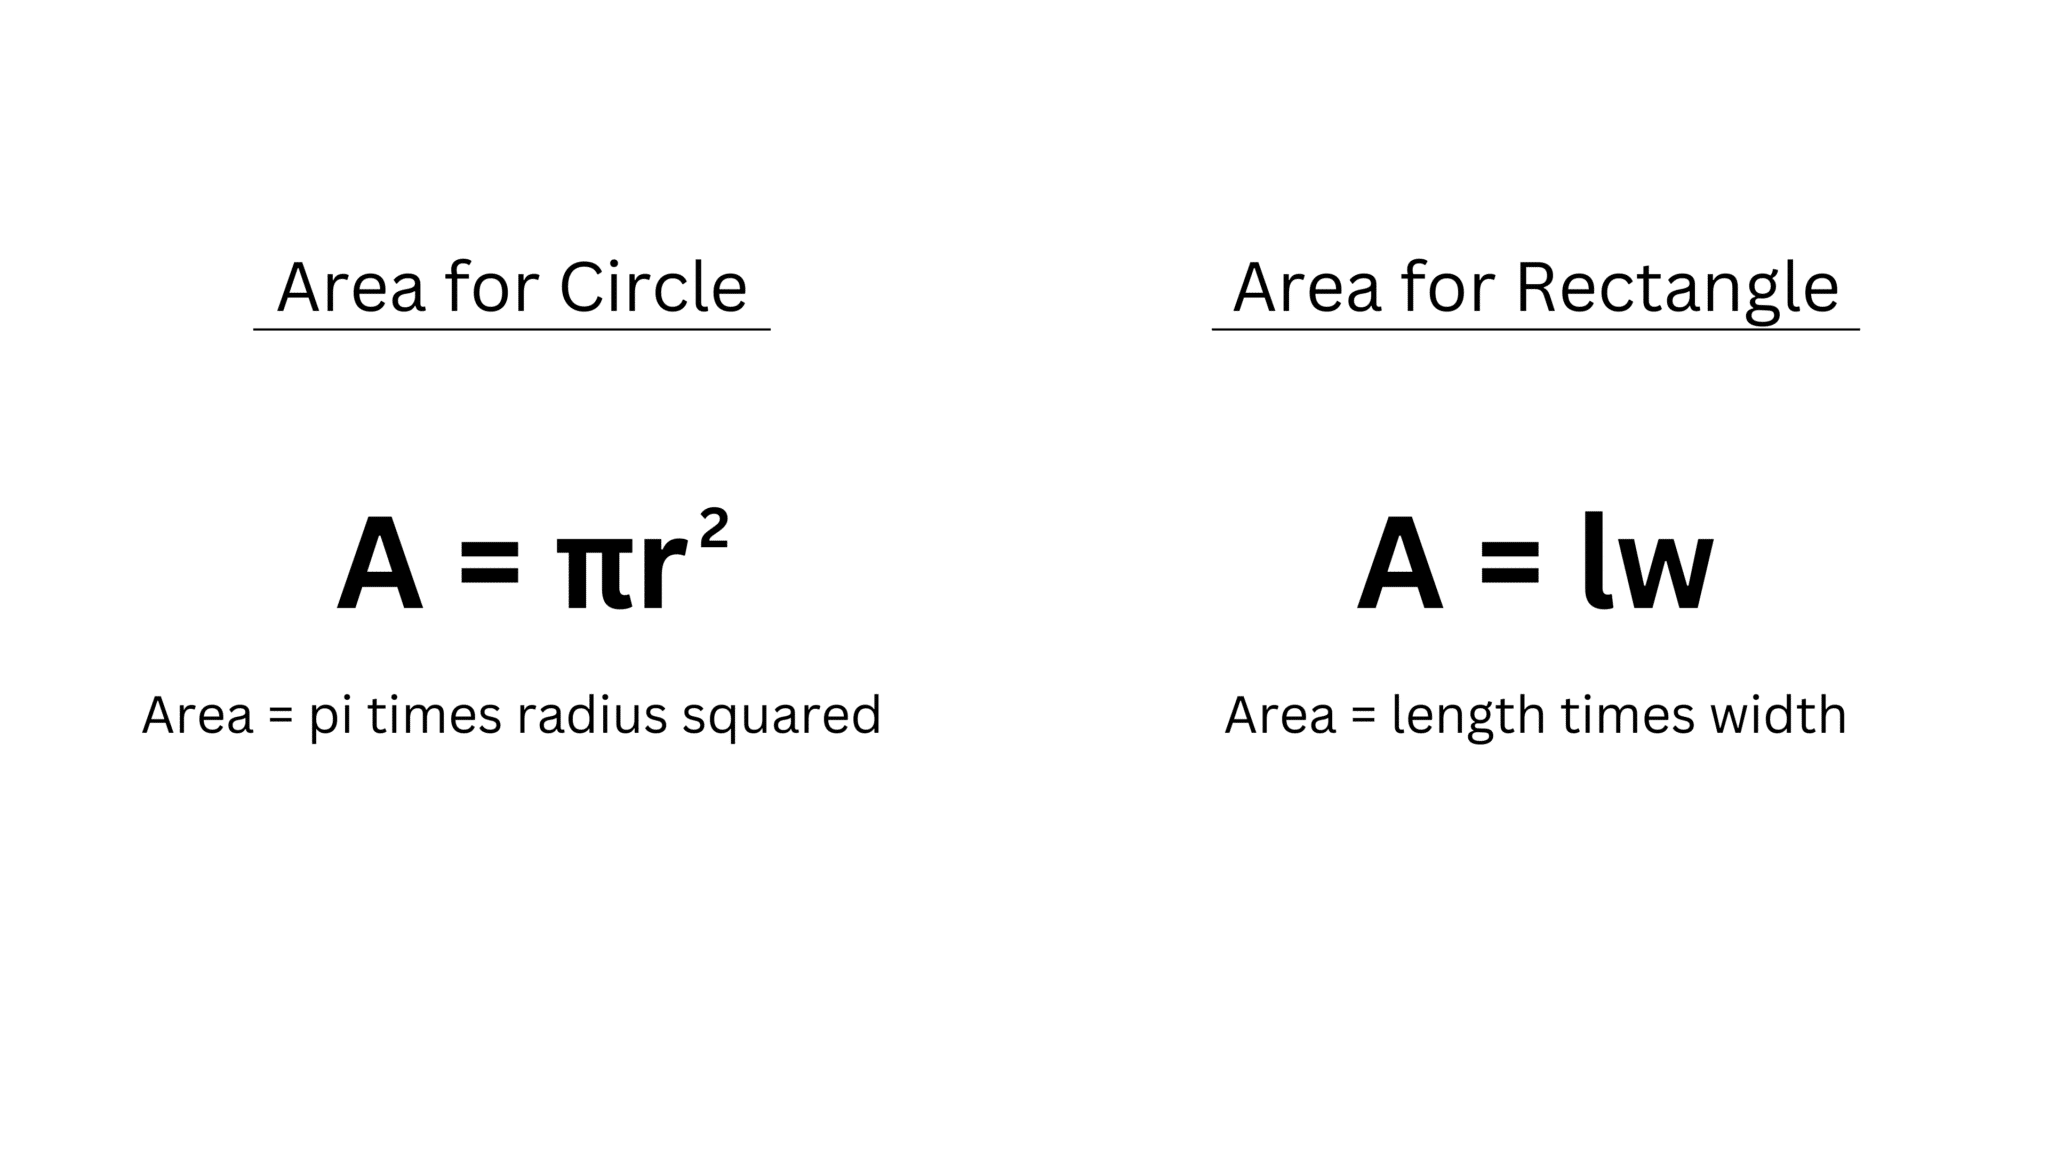
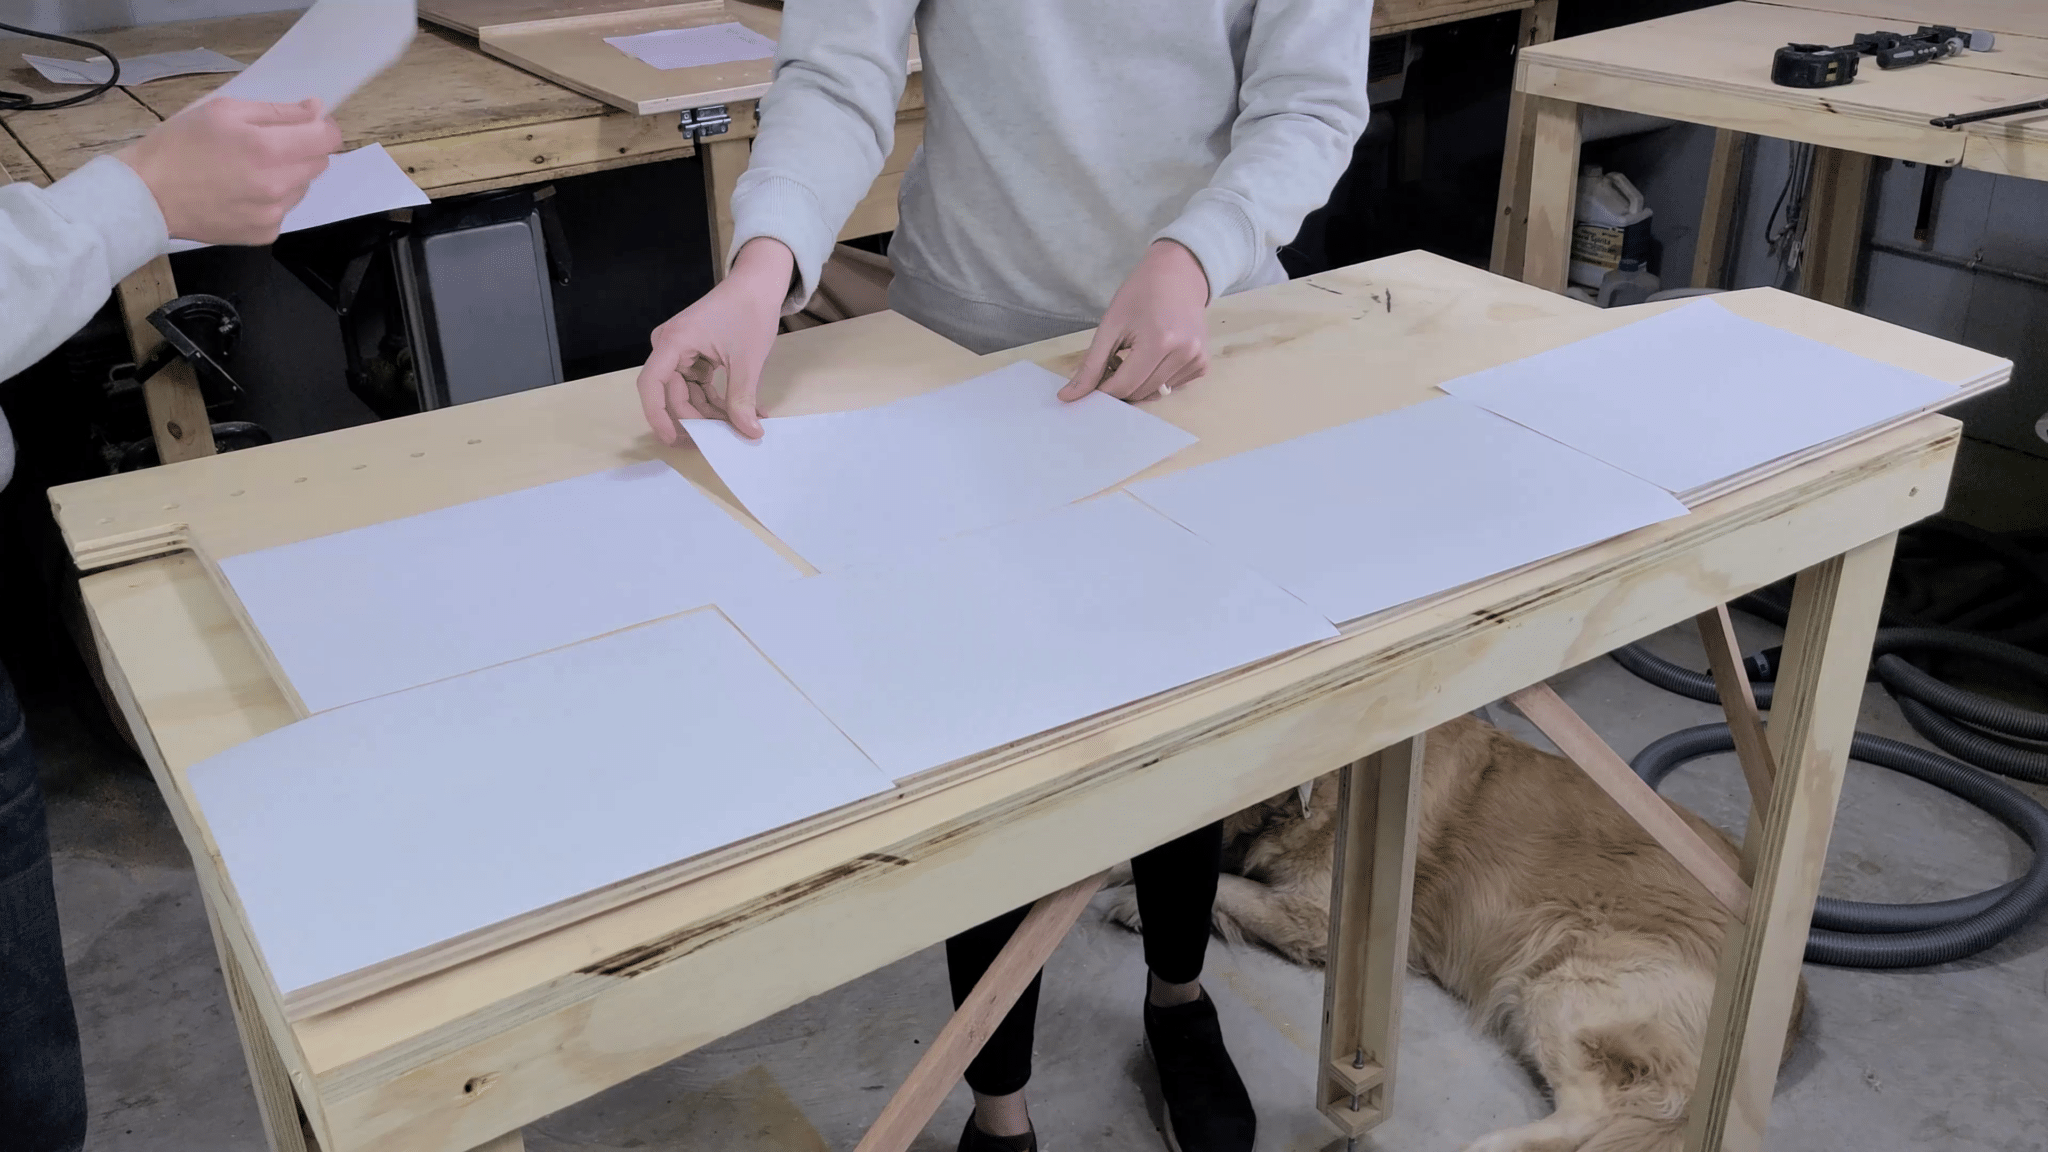
To figure out how much SheenPlus you need the easy answer is to calculate how many square feet of surface you need to cover. If your project is rectangular or circular this is pretty easy using simple math. If it’s a much more irregular shape, then a good tip is to cover the piece in sheets of printer paper. Each sheet is 0.65 sq ft. So take your number of sheets and multiply it by 0.65 to get a good estimate.
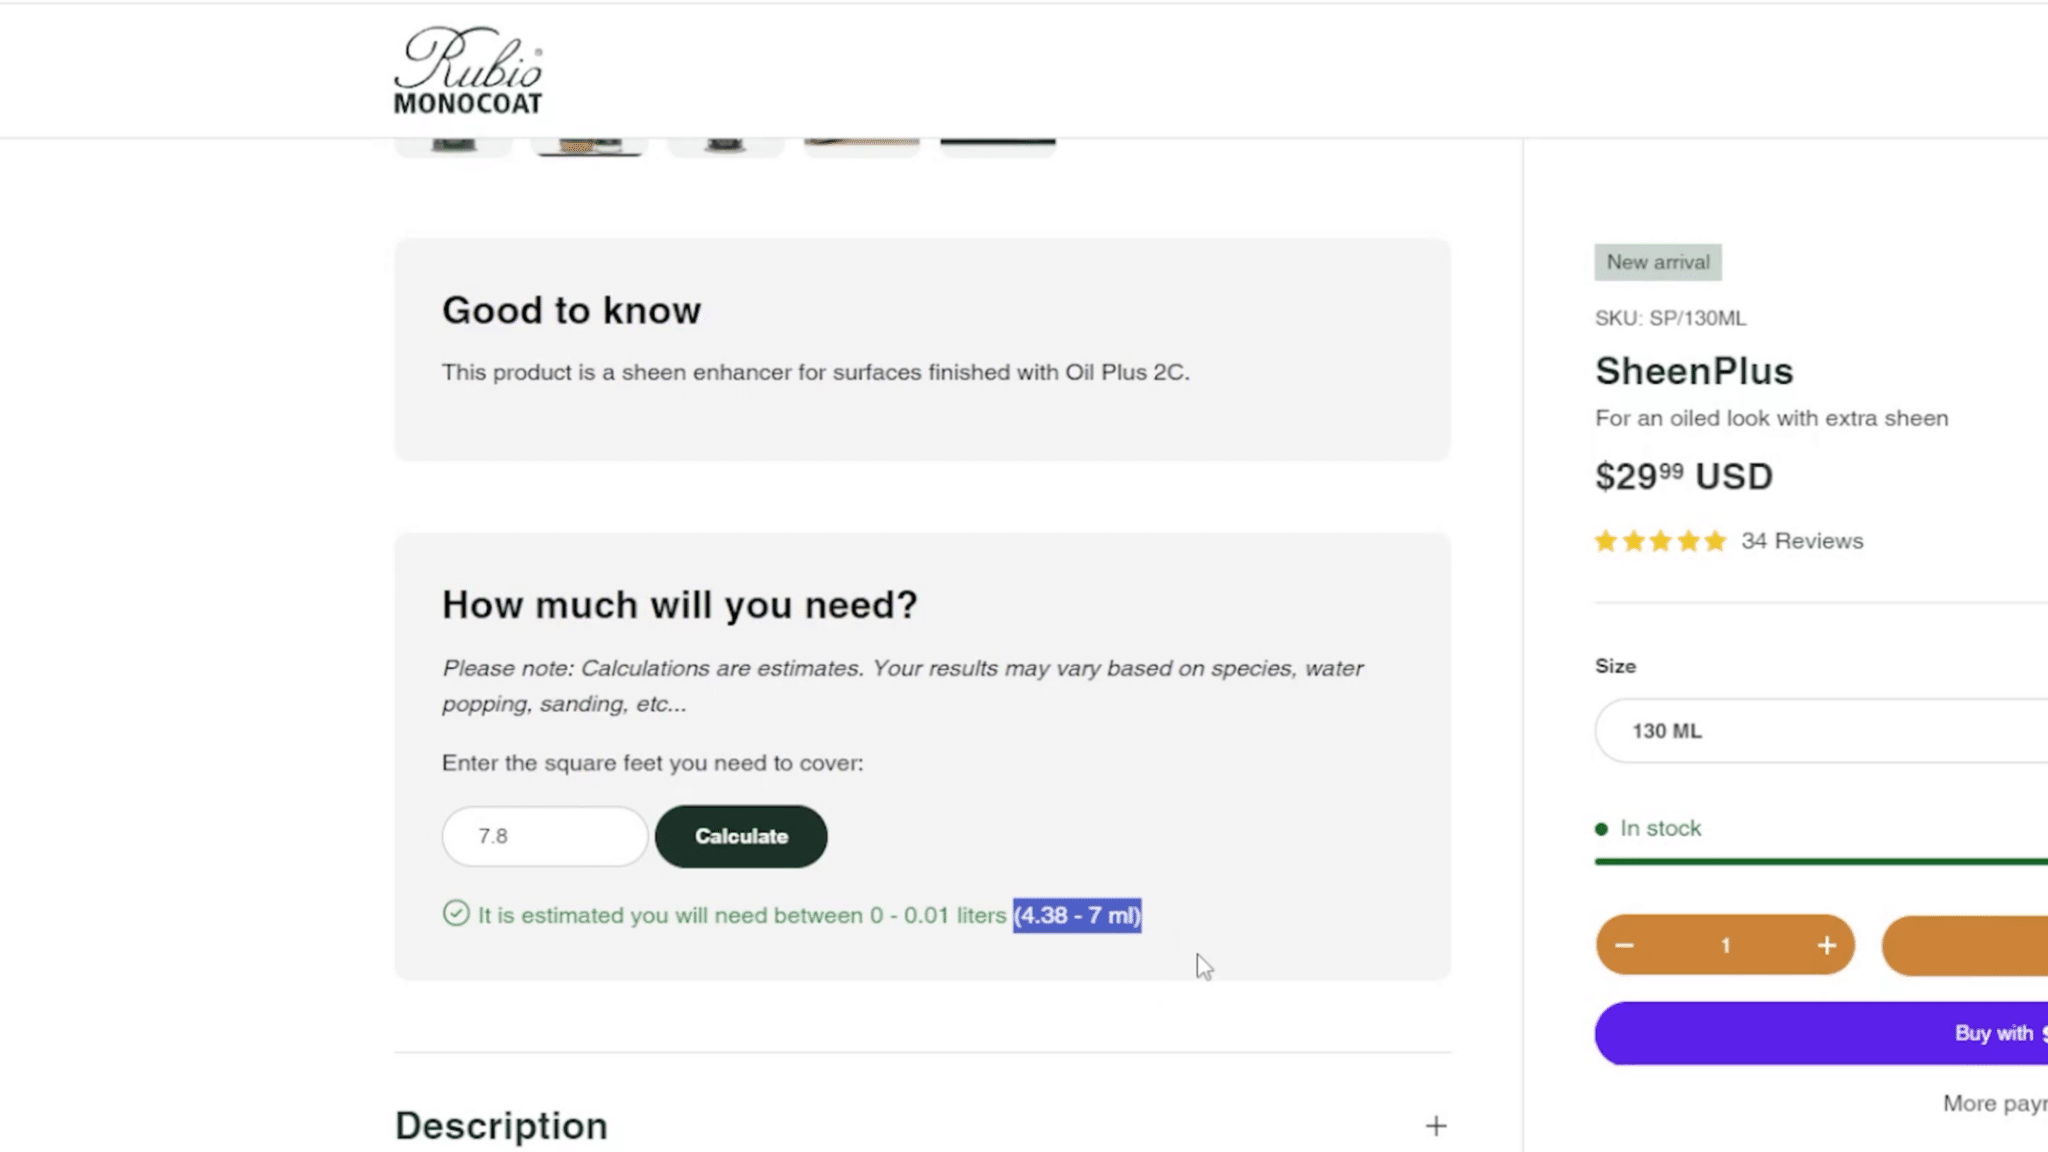
SheenPlus covers 1000-1600 square feet per liter. So you can do that math, or you can head over to Rubio’s website and use their built-in calculator to do the math for you.

Cost of SheenPlus vs Polyurethane
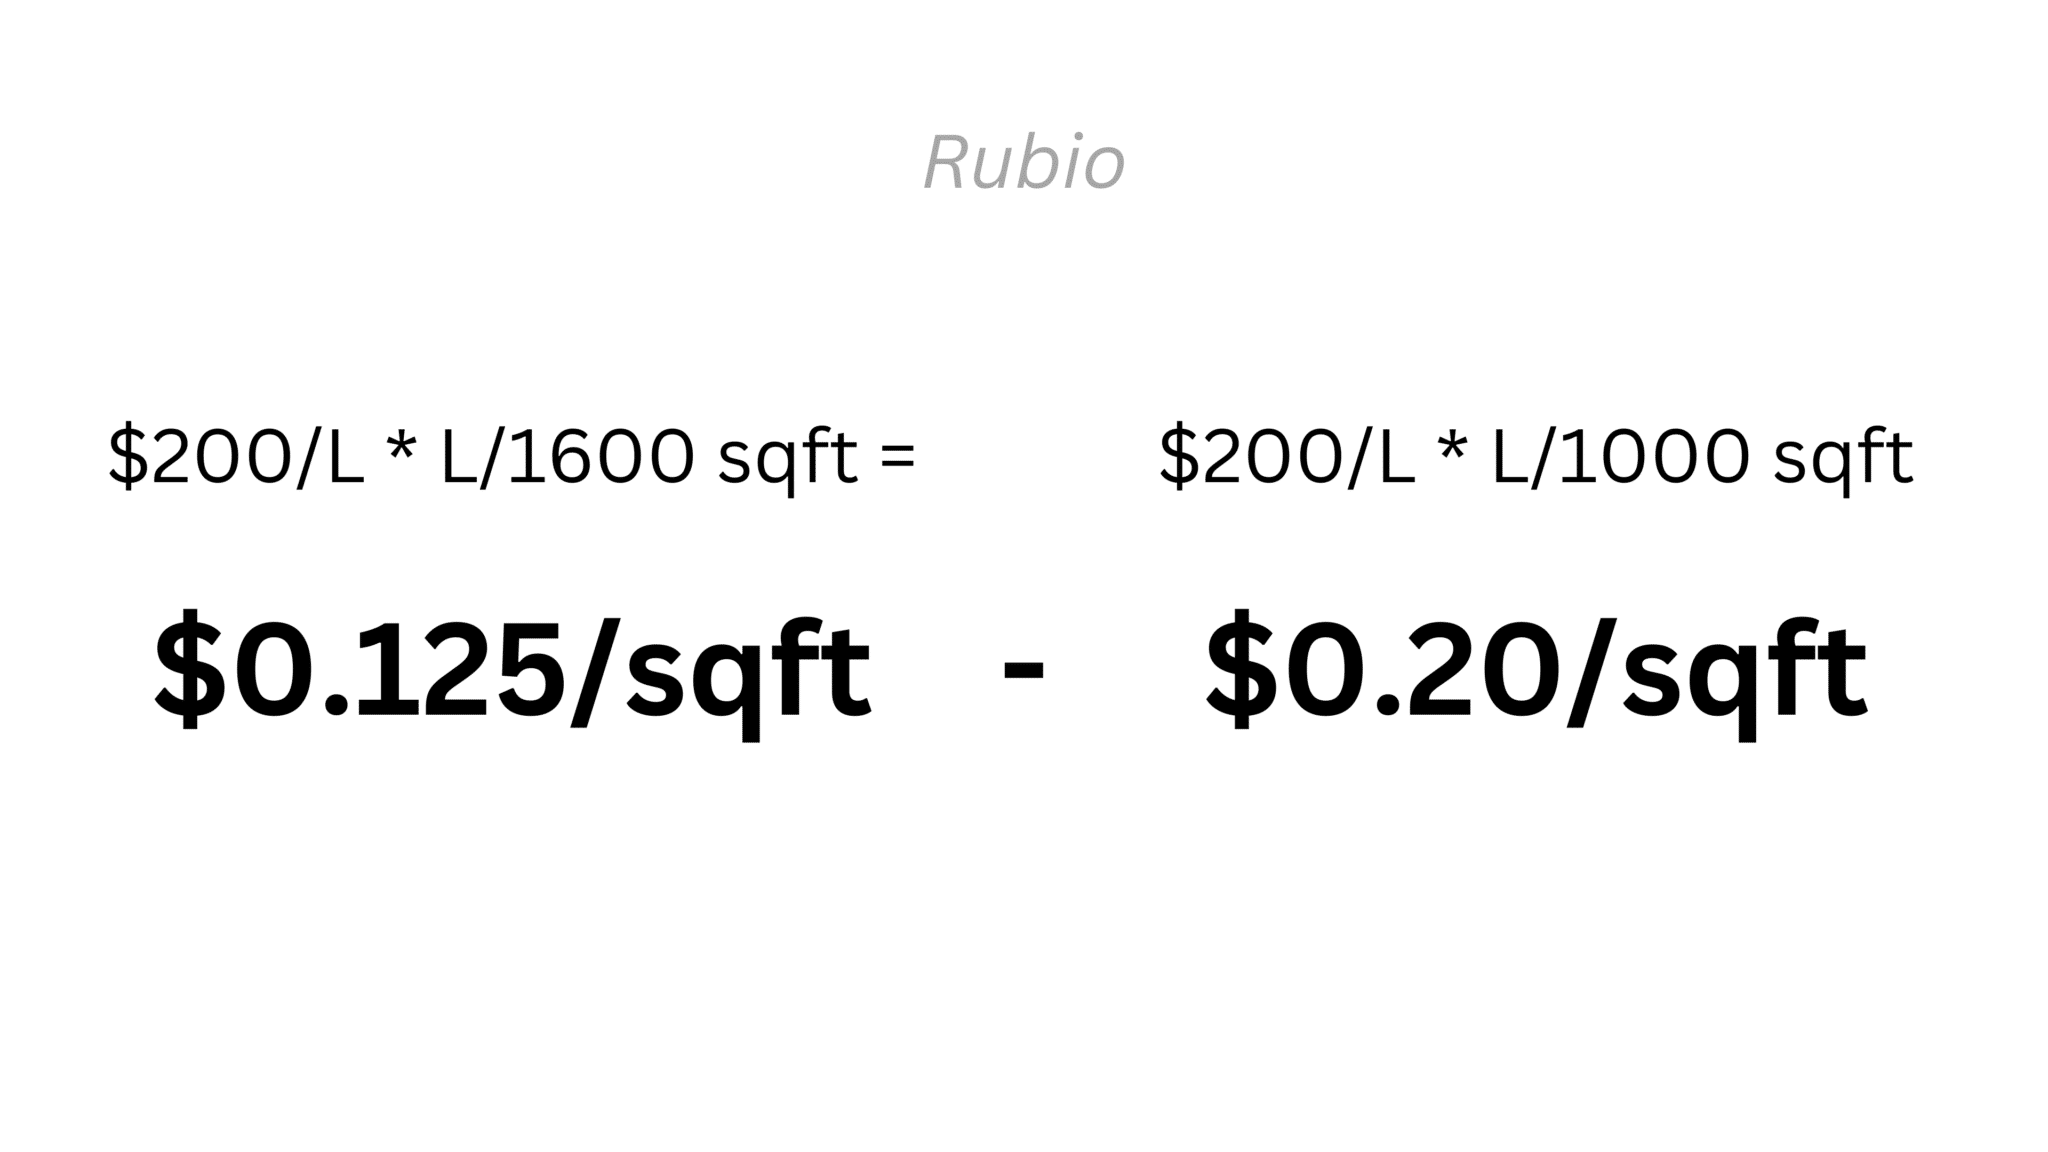
Now you may be blown away by the price of SheenPlus. I know it looks super expensive. I mean, $30 for a tiny little bottle?! Yes, but you’d be amazed at how far that goes. Given its spread rate of 1000-1600 square feet per liter, that’s 12.5 to 20 cents per square foot.
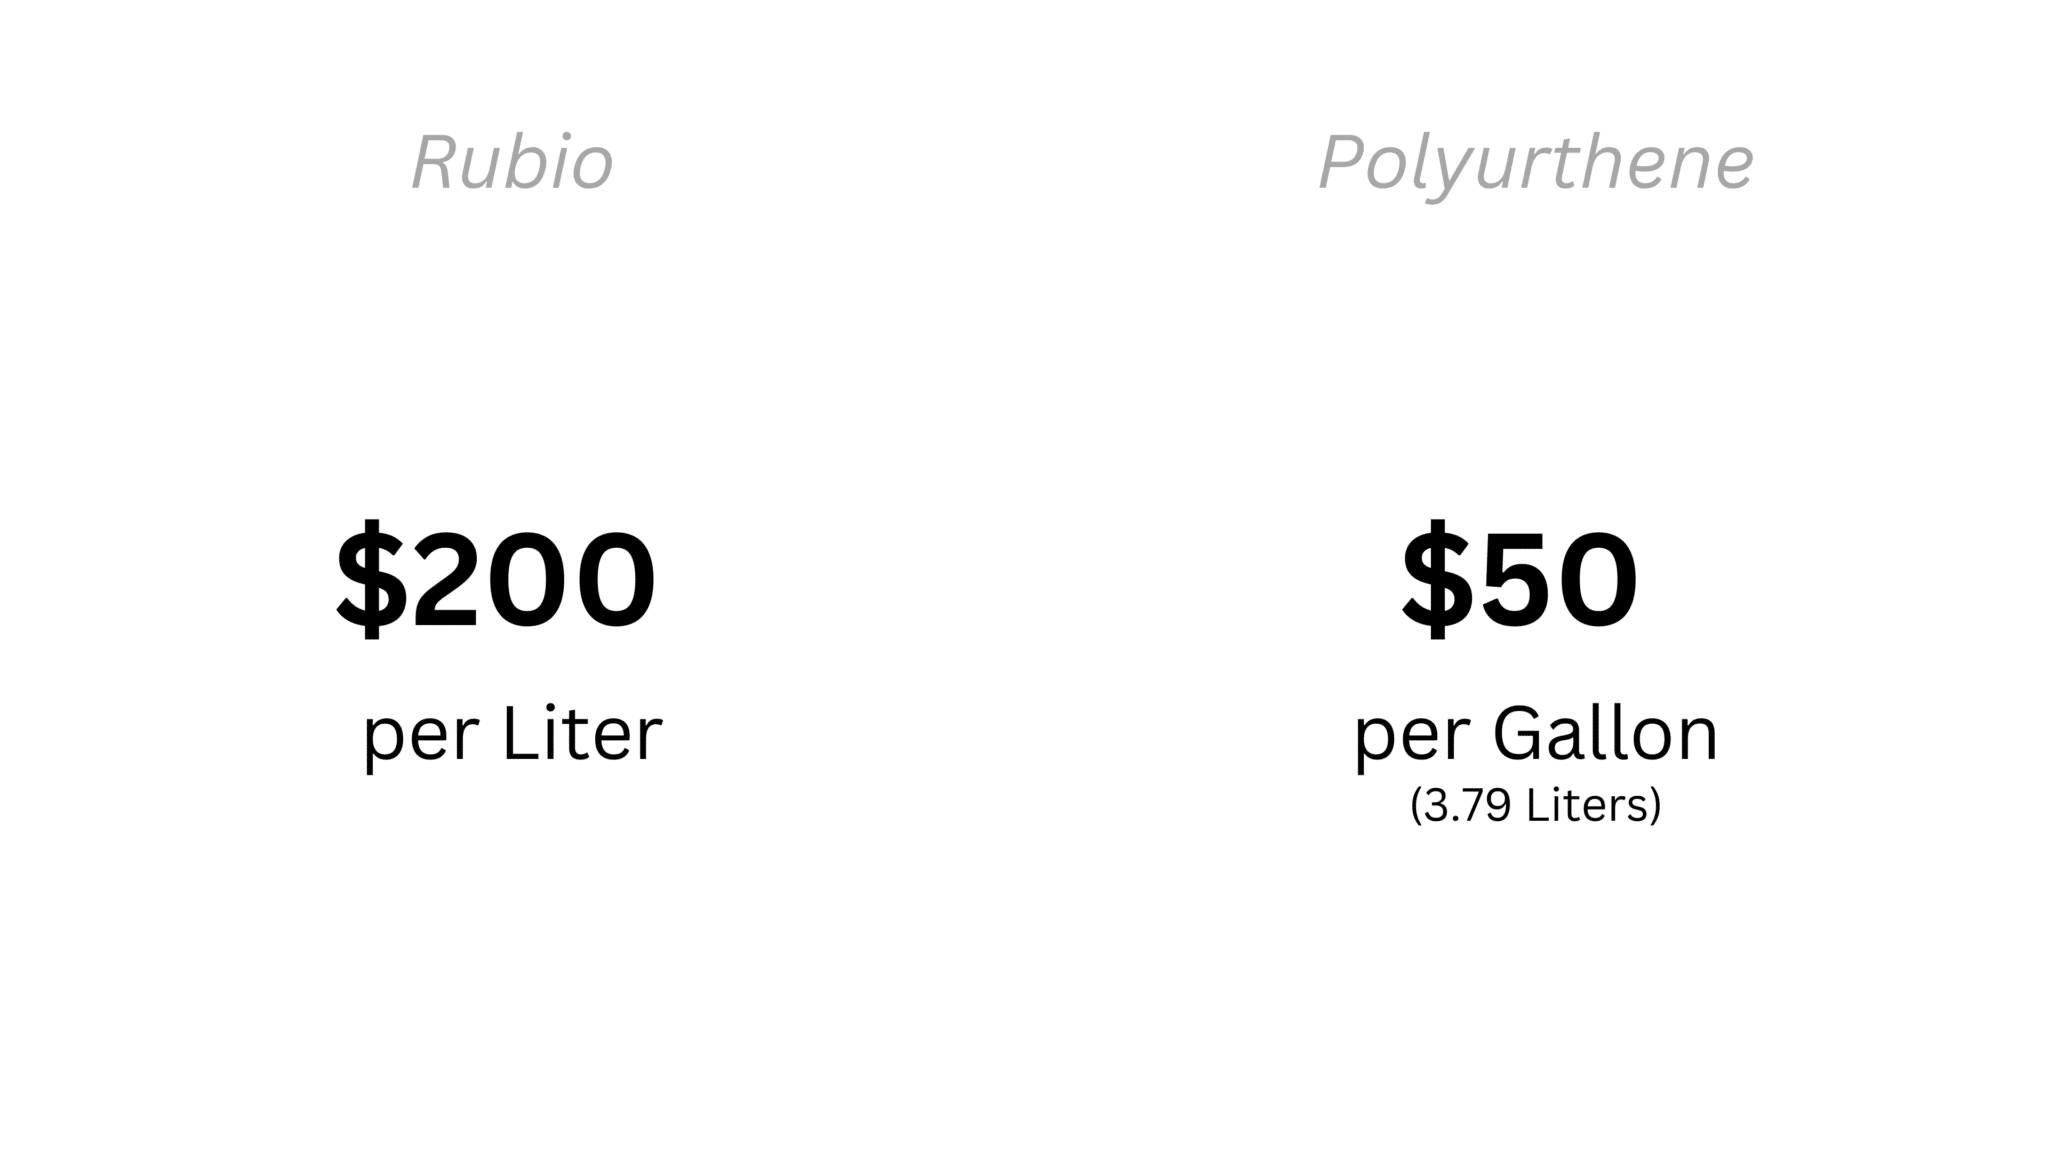
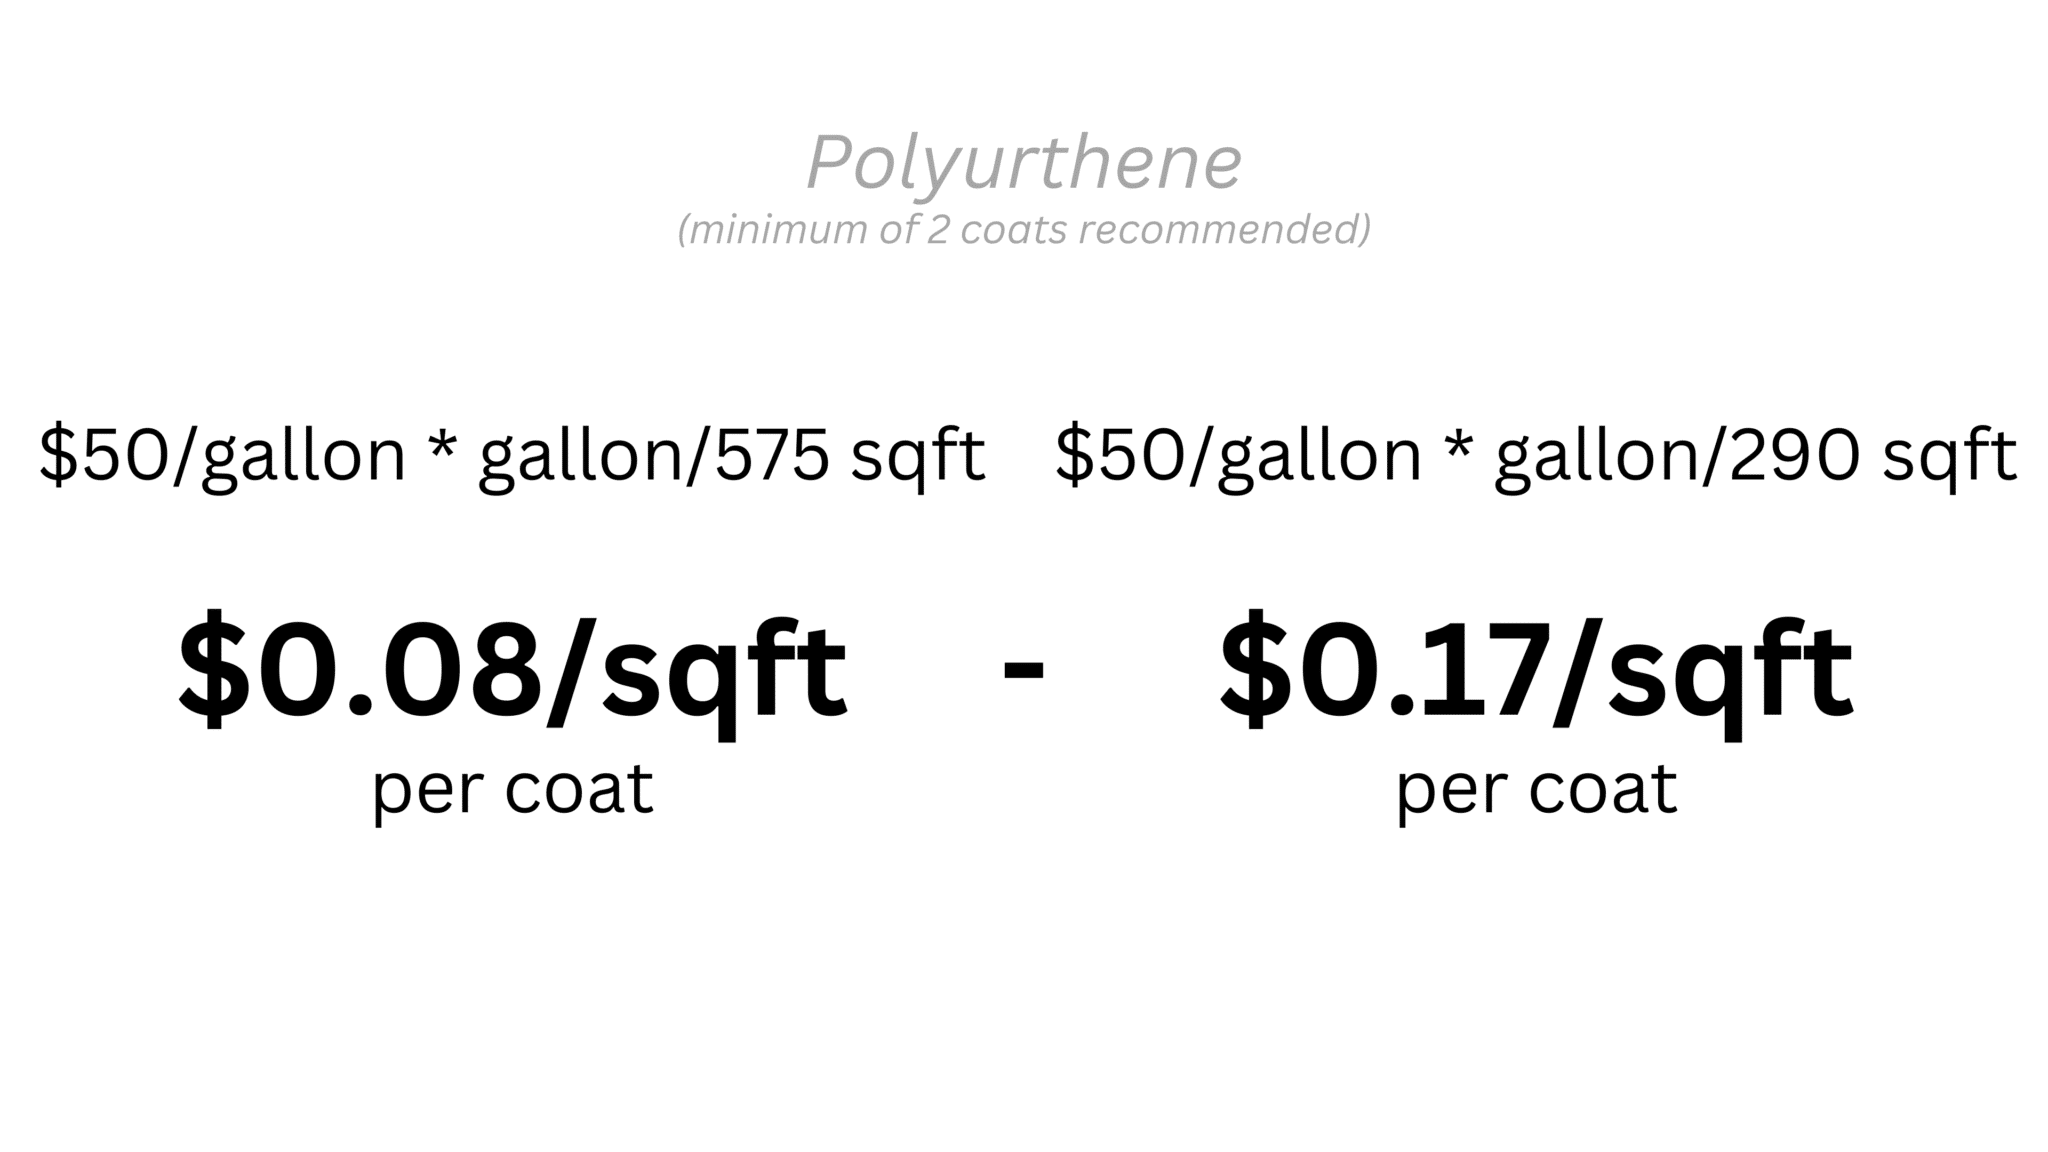
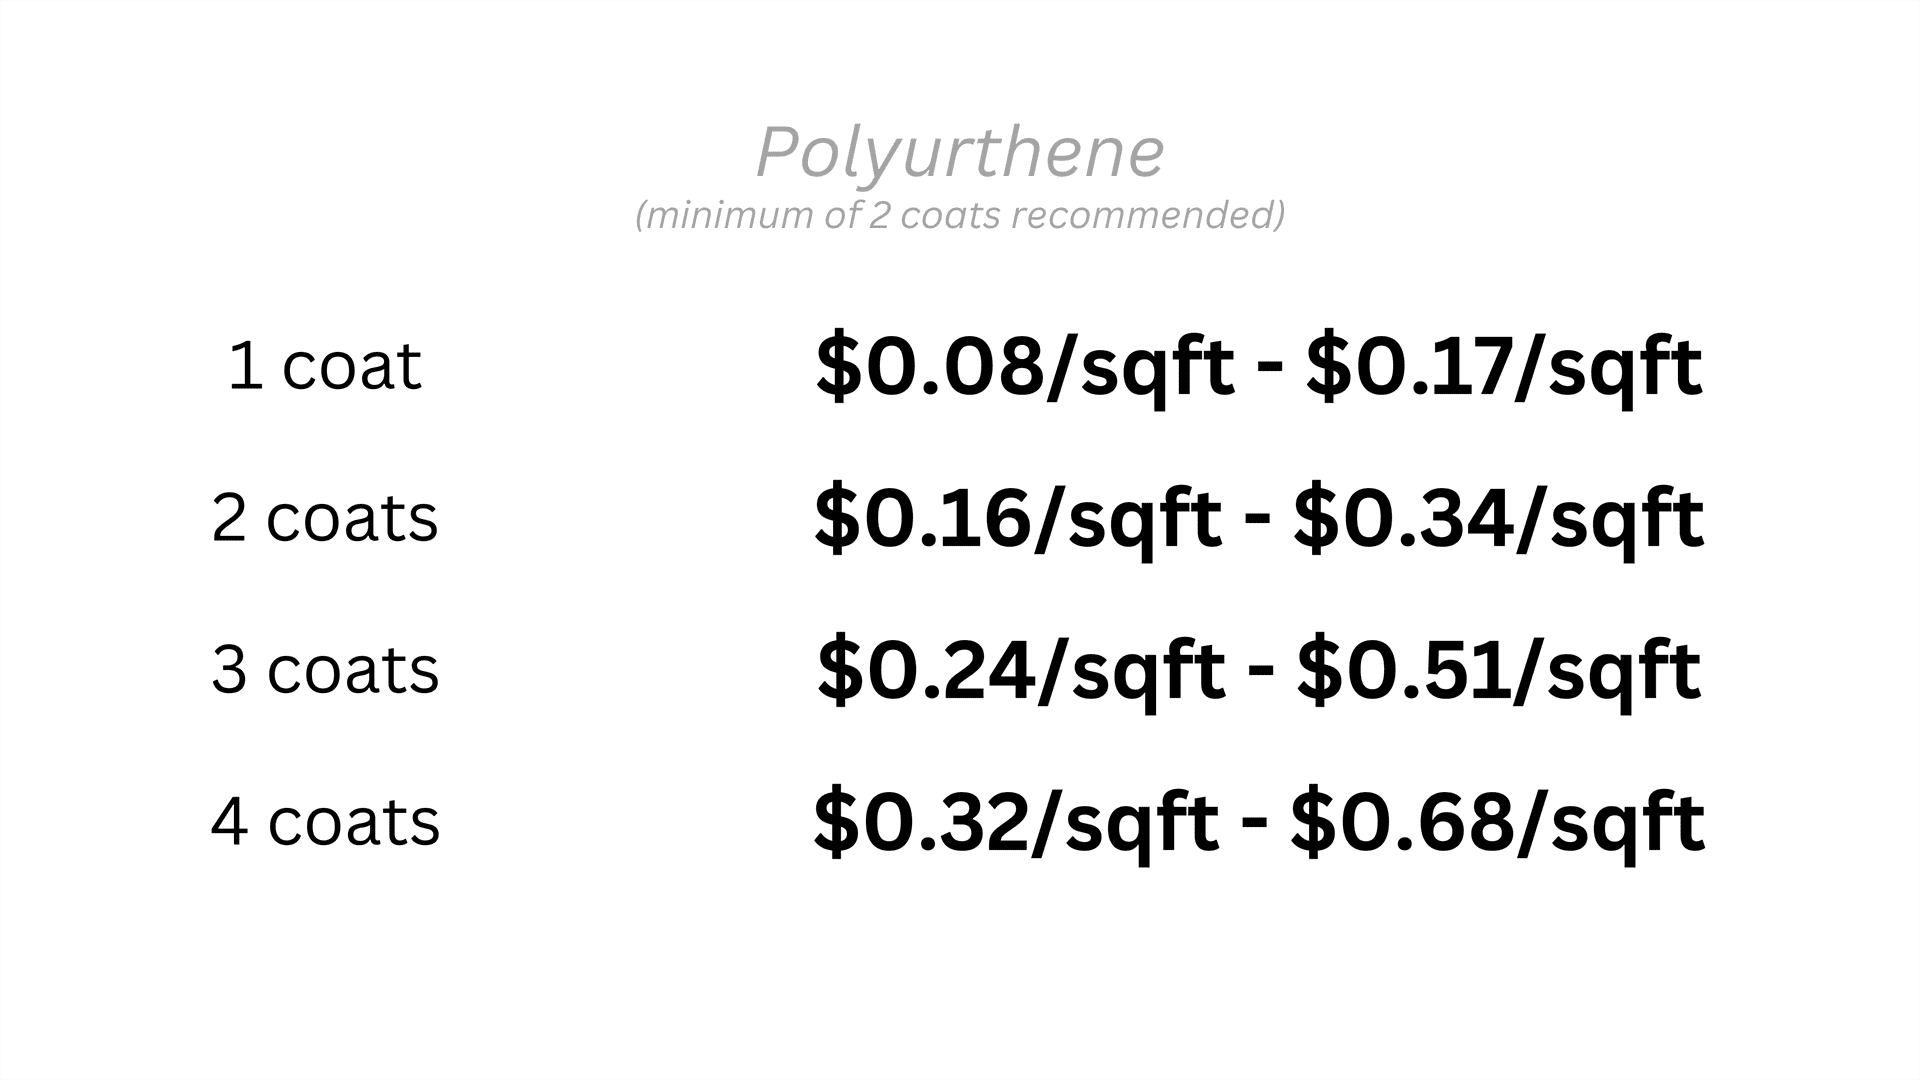
Let’s compare that to polyurethane. A gallon of polyurethane costs around $50 and has a spread rate of 290-575 sqft/gallon. That amounts to 8 to 17 cents per square foot. Slightly cheaper than SheenPlus right? Wrong! That’s just for one coat. And polyurethane requires a minimum of 2 coats. So take that number and double it and you are looking at 16 to 34 cents per square foot. And that’s assuming you only need 2 coats. Sometimes you will need even more than that.
So not only will SheenPlus save you time by not having to sand between layers and apply multiple coats, but it is also cheaper, looks better, feels better, and is infinitely better for your health than polyurethane!

SheenPlus Facts
Here’s a couple more facts on what you can expect from the SheenPlus product:
- Spread Rate: 1000-1600 ft²/L
- Cure time: 7 days
- Dilutable: No
- Shelf Life: 36 months
- Pot Life: May be used for a maximum of 4-6 hours after mixing A and B components together.
It can be applied on all vertical and horizontal interior surfaces like tabletops, furniture, bathrooms, kitchens, stairs, walls, etc. It is not intended for exterior uses.
Where To Buy Rubio Monocoat SheenPlus
You can buy Rubio’s SheenPlus finish from several places. Personally, we’d recommend buying directly from Rubio as you have all the options available and the shipping is usually fairly quick.
- Directly from the Rubio Monocoat – Their website allows you to get any size of 130ML, 350ML or 1.3 Liter. Shipping is FREE in the U.S. and you’re directly supporting the company.
- Buy from Amazon –can be bought here, but it can’t be bought in all sizes on Amazon, and not always 2-day shipping. Moreover, the price is usually higher than on Rubio’s website.
- Purchase from a local dealer – Only found in a few cities and not every dealer has it available or in all sizes.
Related – Eco-friendly Building Materials & Products: A Guide For DIYers & Homeowners


More DIY Projects
And with that, you now know everything there is to know about why SheenPlus is better than Polyurethane and how to apply this amazing product. But here’s the thing. None of it matters if you don’t know how to get the best finish possible from Rubio’s Oil plus 2C. So make sure you read our post on applying Oil plus 2C (or watch our video) next to learn those secrets or refresh your knowledge.
Also, check out more of our DIY project articles for inspiration!
- Hubby How To: DIY Hanging Daybed Swing Plans
- Hubby How To – Modern DIY Platform Bed Frame
- Hubby How To – DIY Modern Headboard With Floating Nightstands
- How To Make DIY Floating Shelves – Live Edge Wood Shelves For Kitchen
- 15 Awesome DIY Projects At Home You Can Do


Hope you try this product and love it as much as we do! Let us know what you think of the SheenPlus and what projects you’ll use it for in the comments below!


Disclaimer: This post includes affiliate links, and I will earn a commission if you purchase through these links. Please note that I’ve linked to these products purely because I recommend them and they are from companies I trust. There is no additional cost to you.


