Terraced Garden Beds After One Year – Words of Advice
Gardening and growing your own food in your yard can yield so much in one year. But have you seen a hillside vegetable garden? Check out the exciting transformation of our suburban front yard into terraced garden beds and some of our lessons from the first year gardening on a slope.
Updated 3/24/2024

Disclaimer: This post includes affiliate links, and I will earn a commission if you purchase through these links. Read about our privacy policy.
It’s been almost a full growing season now with our terraced garden beds. We went through a lot of design and planning to utilize our only truly full sun spot in our suburban yard. Gardening on a slope with terraced beds is a great way to use underutilized space and grow your own food instead of a lawn.
This first year went from zero to 100 with a lot of lessons and tips learned. This post will cover where we began this year, the transformation, lessons and tips for gardening on a slope, first year gardening mindset, and a full resource list.
Terraced Garden Beds – First Year
Before diving into some of the lessons and tips we learned, here’s a little before and after of the terraced garden beds as well as the transformation over the growing season. If you’re curious, we have a more detailed post on how we built these wood retaining walls for our terraced garden.

The picture is a little deceiving in terms of the slope on this hill. To make this a hillside garden, it had to negotiate almost 6 feet in height within 10.5 feet closest to our stairs. That’s basically a 50% or 2 to 1 gradient slope. We are so freaking glad we don’t have to mow this anymore and practically slide down it!
With my landscape architecture career, I drew a lot of retaining wall details and seen them built, but had never actually built one myself. It was a major DIY effort testing my husband and I’s skills and communication (and patience!) to the max. Also, it was March, freezing here, and snowed about halfway through digging out the wall foundations.
But the completed terraced hillside garden was totally worth it!

It seemed like everyone struggled a bit this year with tomatoes, but here’s what our terraced garden looked like Mid-Summer
Lastly, a photo of the garden at the beginning of October. Tomatoes are still going this year and lots of leafy greens growing underneath along with some other fall garden veggies.

Gardening On A Slope Tips
After a full major growing season, there are definitely some lessons we learned about gardening on a slope.
Let The Soil Settle More Than You Think
If you’re filling your terraced garden beds with new rich soil, then make sure to give it time to settle prior to planting. Soil will naturally compact over time, especially after rain. If possible, allow the new soil to settle for a few weeks then add a little more soil if needed to maintain a consistent level.
Because we built it so close to the spring planting window, we didn’t allow for more than a few days to go by prior to planting. We had our soil level drop a few inches after a few weeks.
If it drops consistently over the whole bed that’s okay. However, for us, it was inconsistent and led to a few low areas and seeds getting shifted out of rows. The low areas also got inundated a little when watering or with rain as the water collected in the low spot.
Not the end of the world, but allowing it to settle ensures even distribution of water and your seedlings won’t shift around so much.
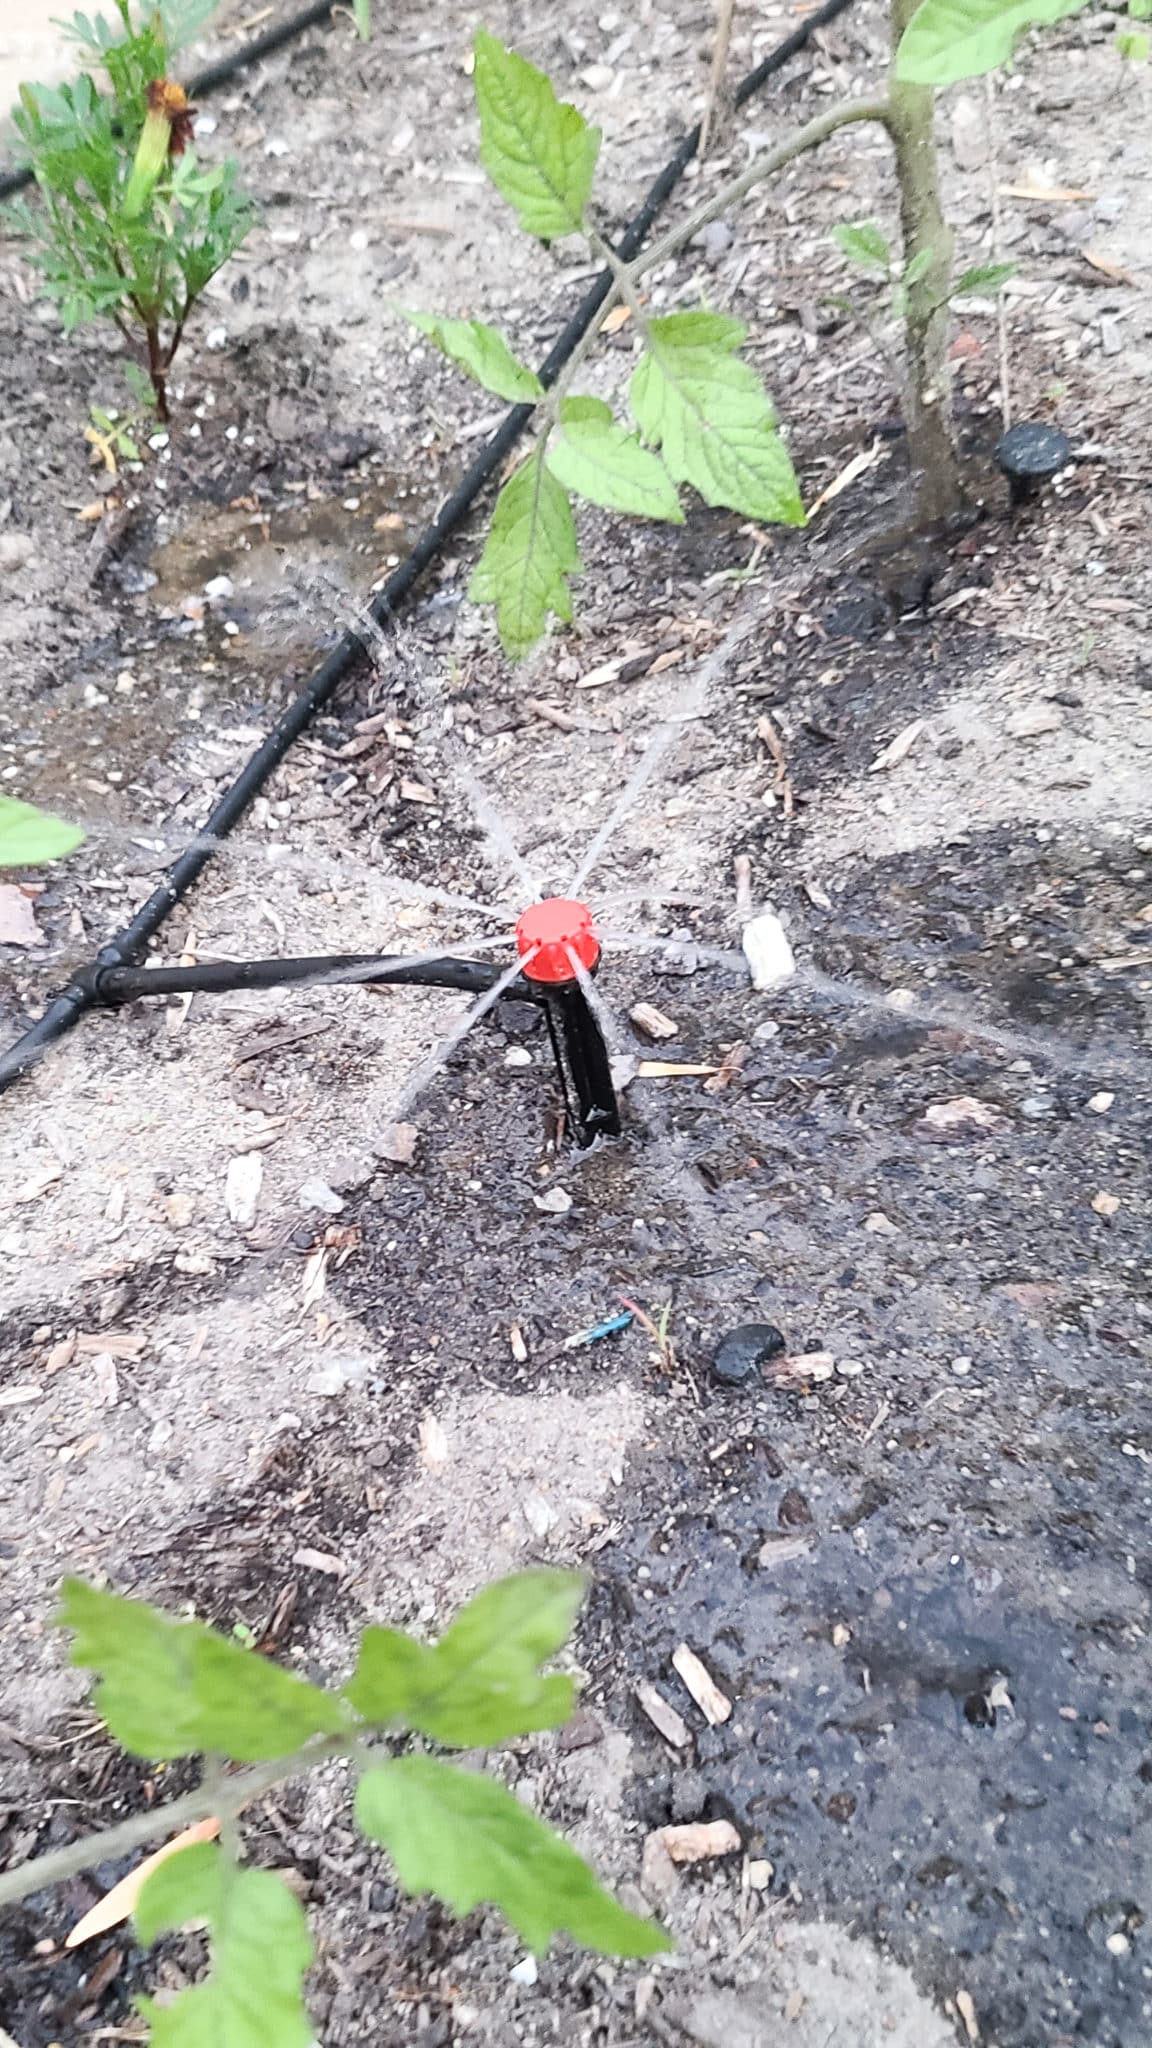
Simple Irrigation Systems Are Lifesavers
Consistent watering when the plants needed water greatly helped the plant growth. Although I love utilizing our DIY stacked rain barrel system to water our deck’s container garden, it’s farther away and would not be fun to haul up and down the garden on the slope. Also, manually watering all the plants was time-consuming.
For us, a simple irrigation system was a lifesaver. There are super simple easy DIY irrigation kits that only require a pair of scissors to install, and it only took us a few hours one weekend to complete. The flexible lines also make it a great solution for gardens on a slope. Then we paired our irrigation system with a Wifi water timer where I could set scheduled watering time and lengths through an app, which made watering the hillside garden so easy.
It also allows one to go on vacation without worrying about having someone water your garden beds!
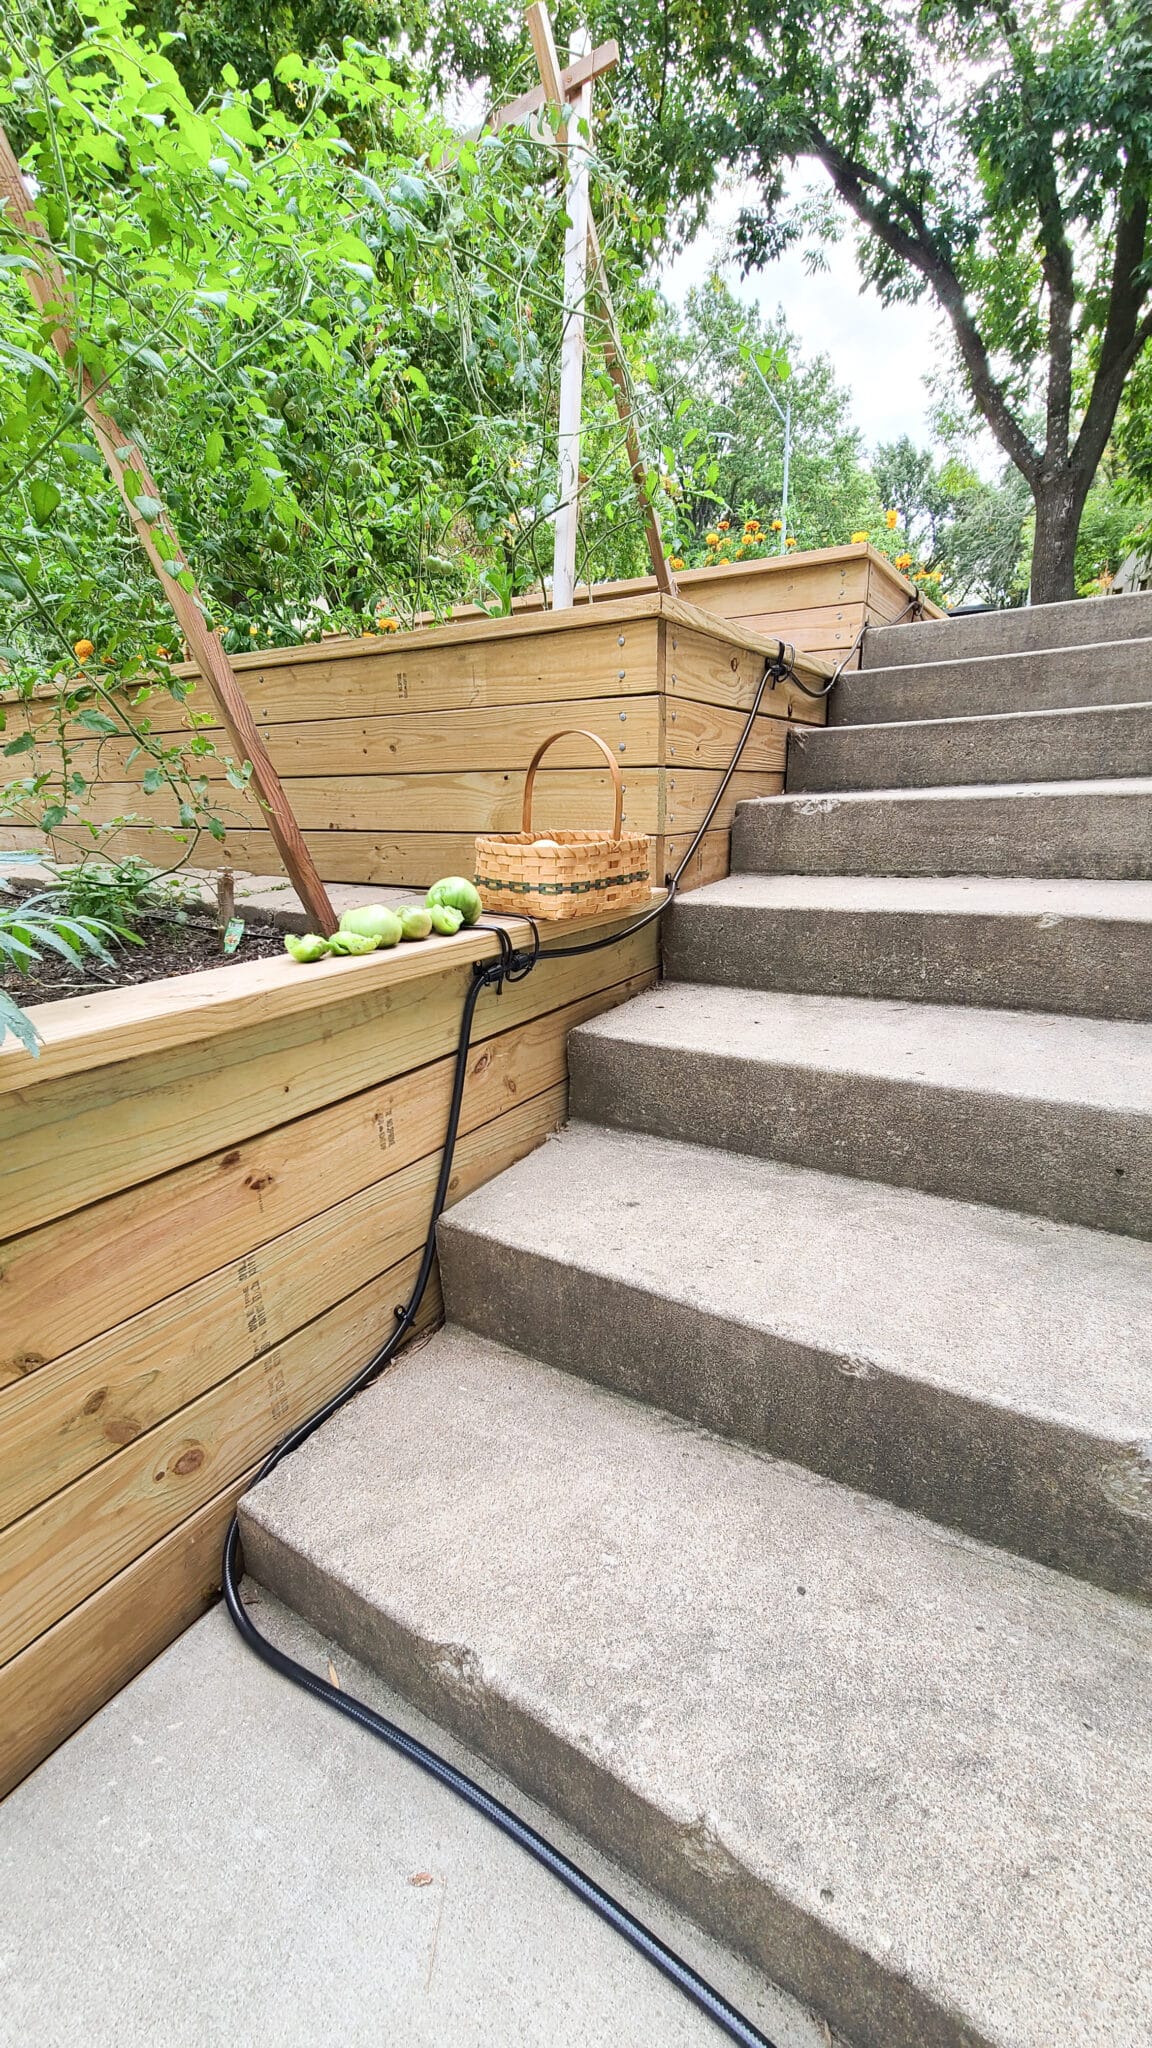


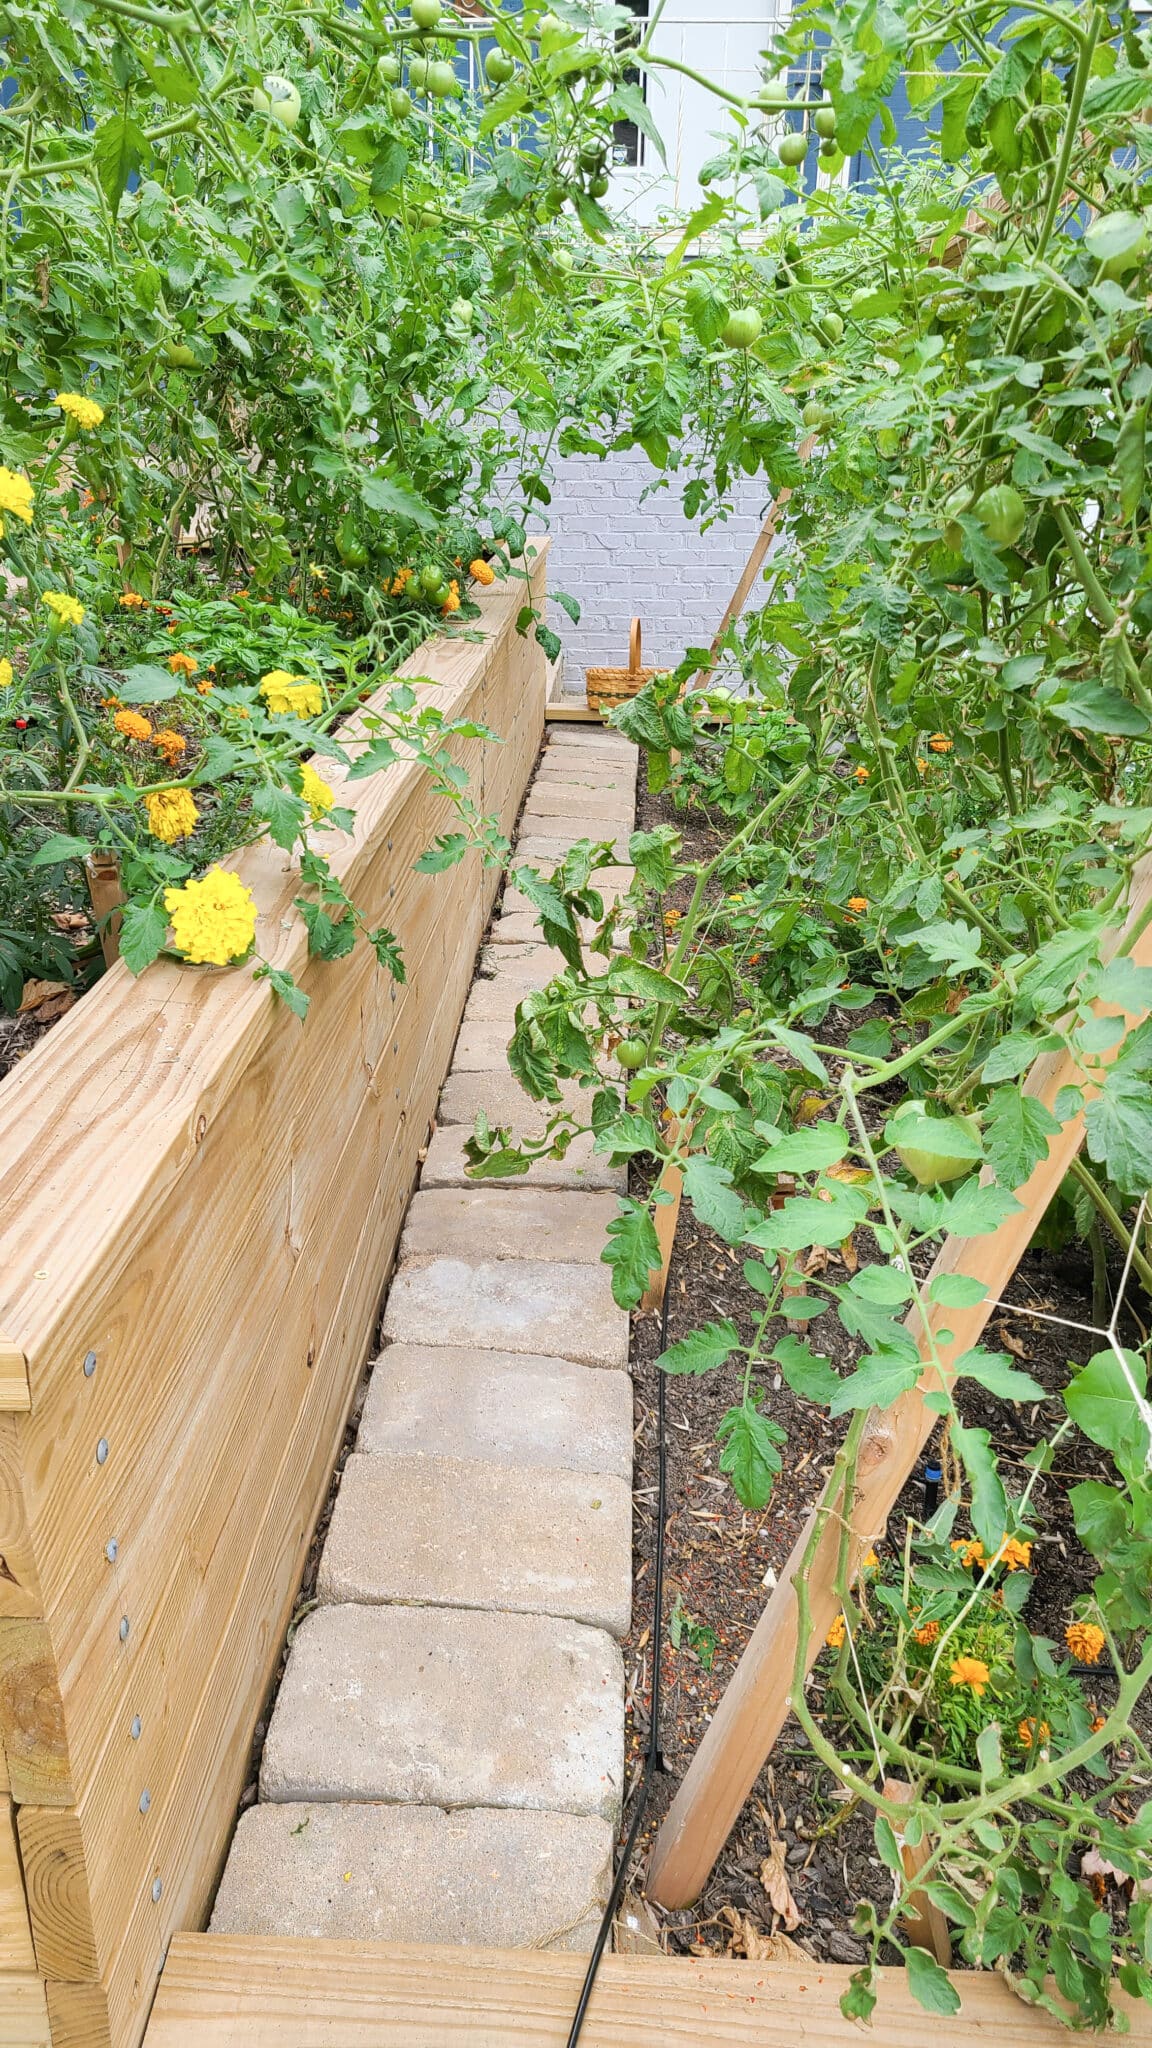
Have Clear Defined Pathways Along Terraces
Pathways for any accessible garden are crucial to ensure you can reach everything without accidentally stepping on plants. It’s even more important in terraced garden beds.
Because the next terrace is right on top of the previous one, you’ll struggle to reach the vegetables on the interior side without a defined path. Actually, our pathway on the side could be larger, but we wanted to maximize planting space. It works well for walking and is the perfect size for our toddler!
Paths can be pea gravel, mulch, or stones from local home improvement stores like Home Depot or Lowe’s. We actually reused the retaining wall blocks from the old wall to make our paths. This cost us nothing besides the labor to install them and kept them from being thrown away.
 Defined path allowed easy access to both sides
- A path along the edge made walking up the hill easier
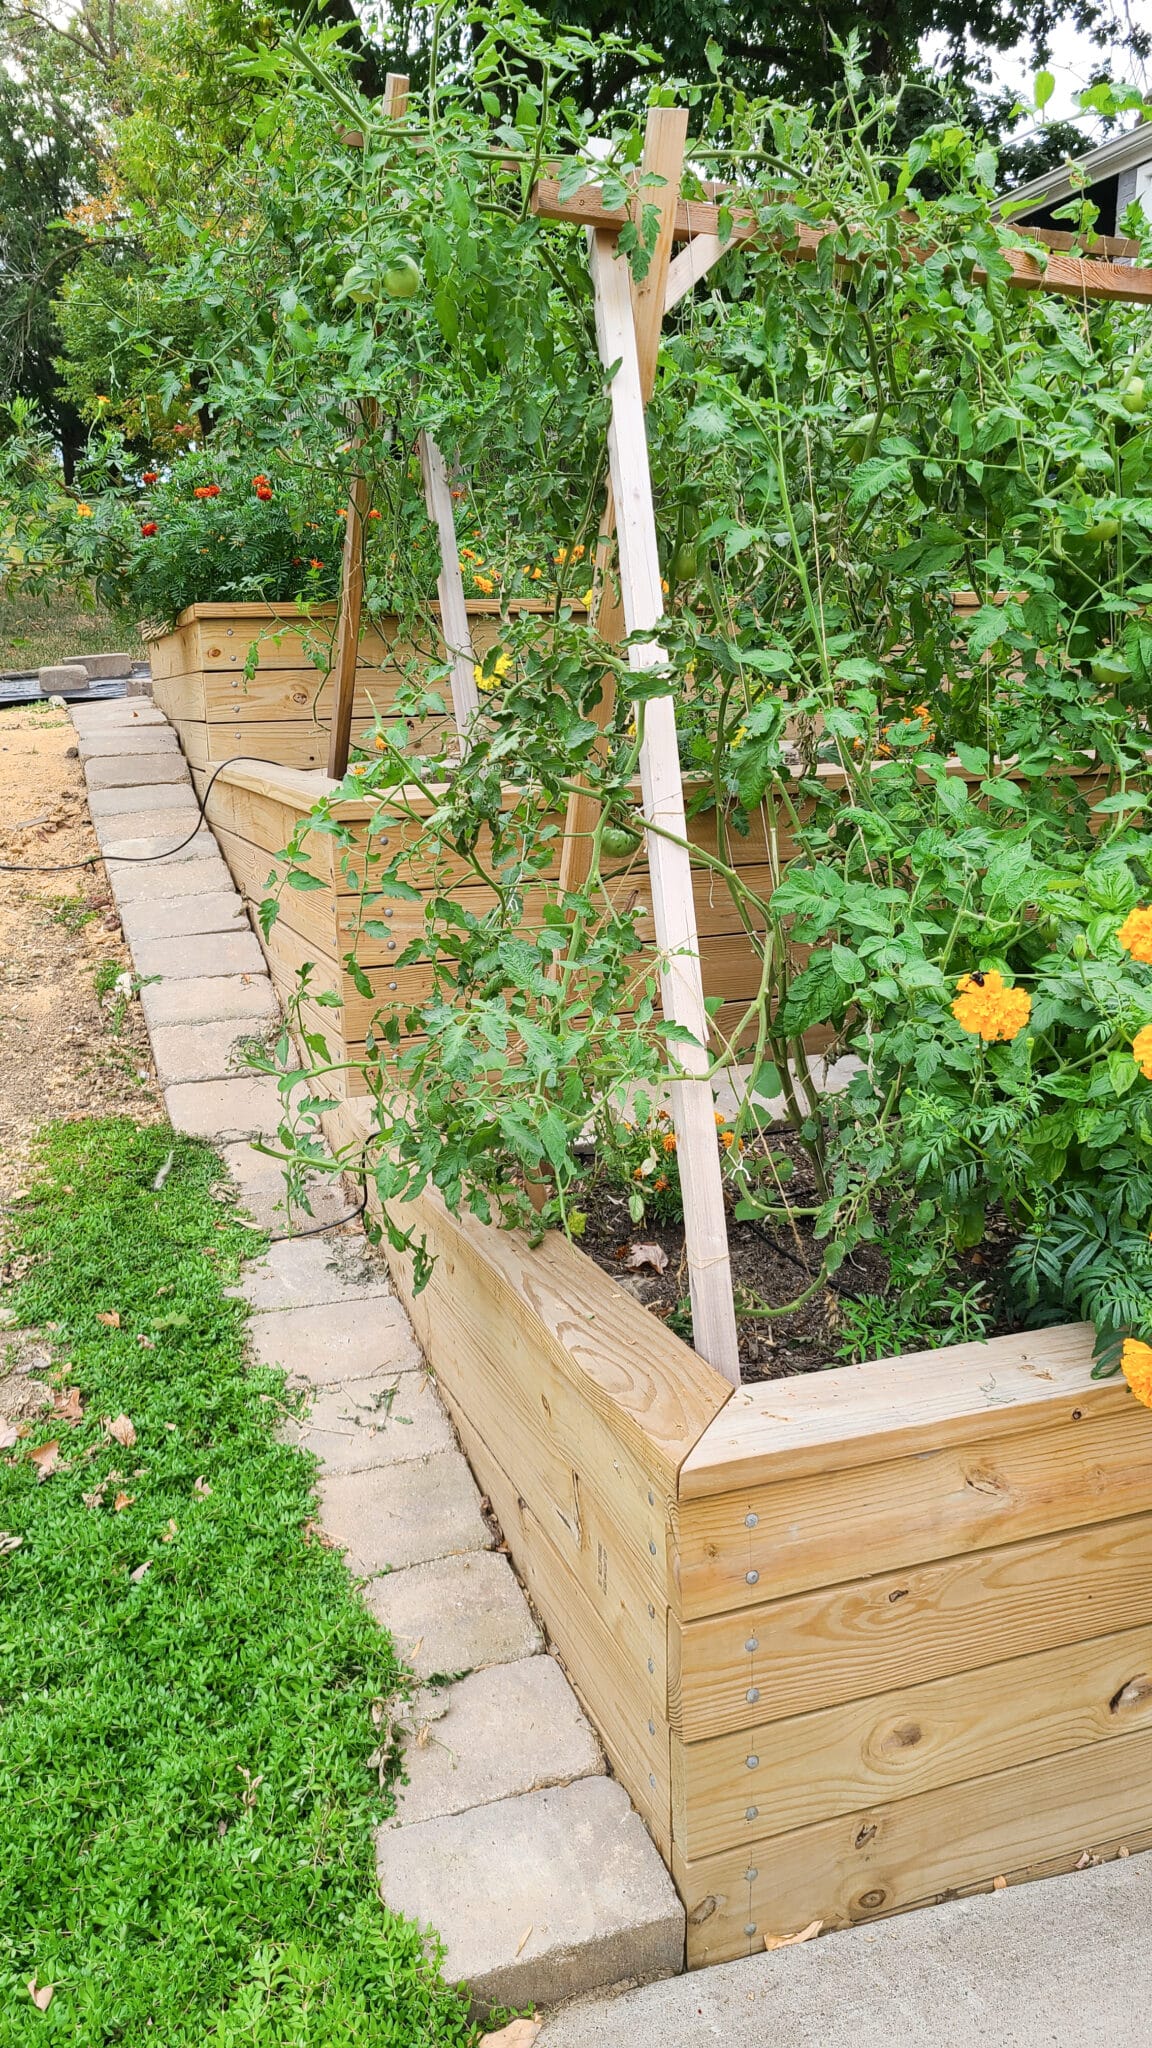
Build Strong & Tall Supports
This only applies if you intend to grow vertically (which I highly recommend to maximize your garden space). Know the final height of the vegetable you’re trying to grow prior to building or installing climbing supports. And if there is no determined height for your vegetable variety, then make it at least a few feet taller than your first instinct!
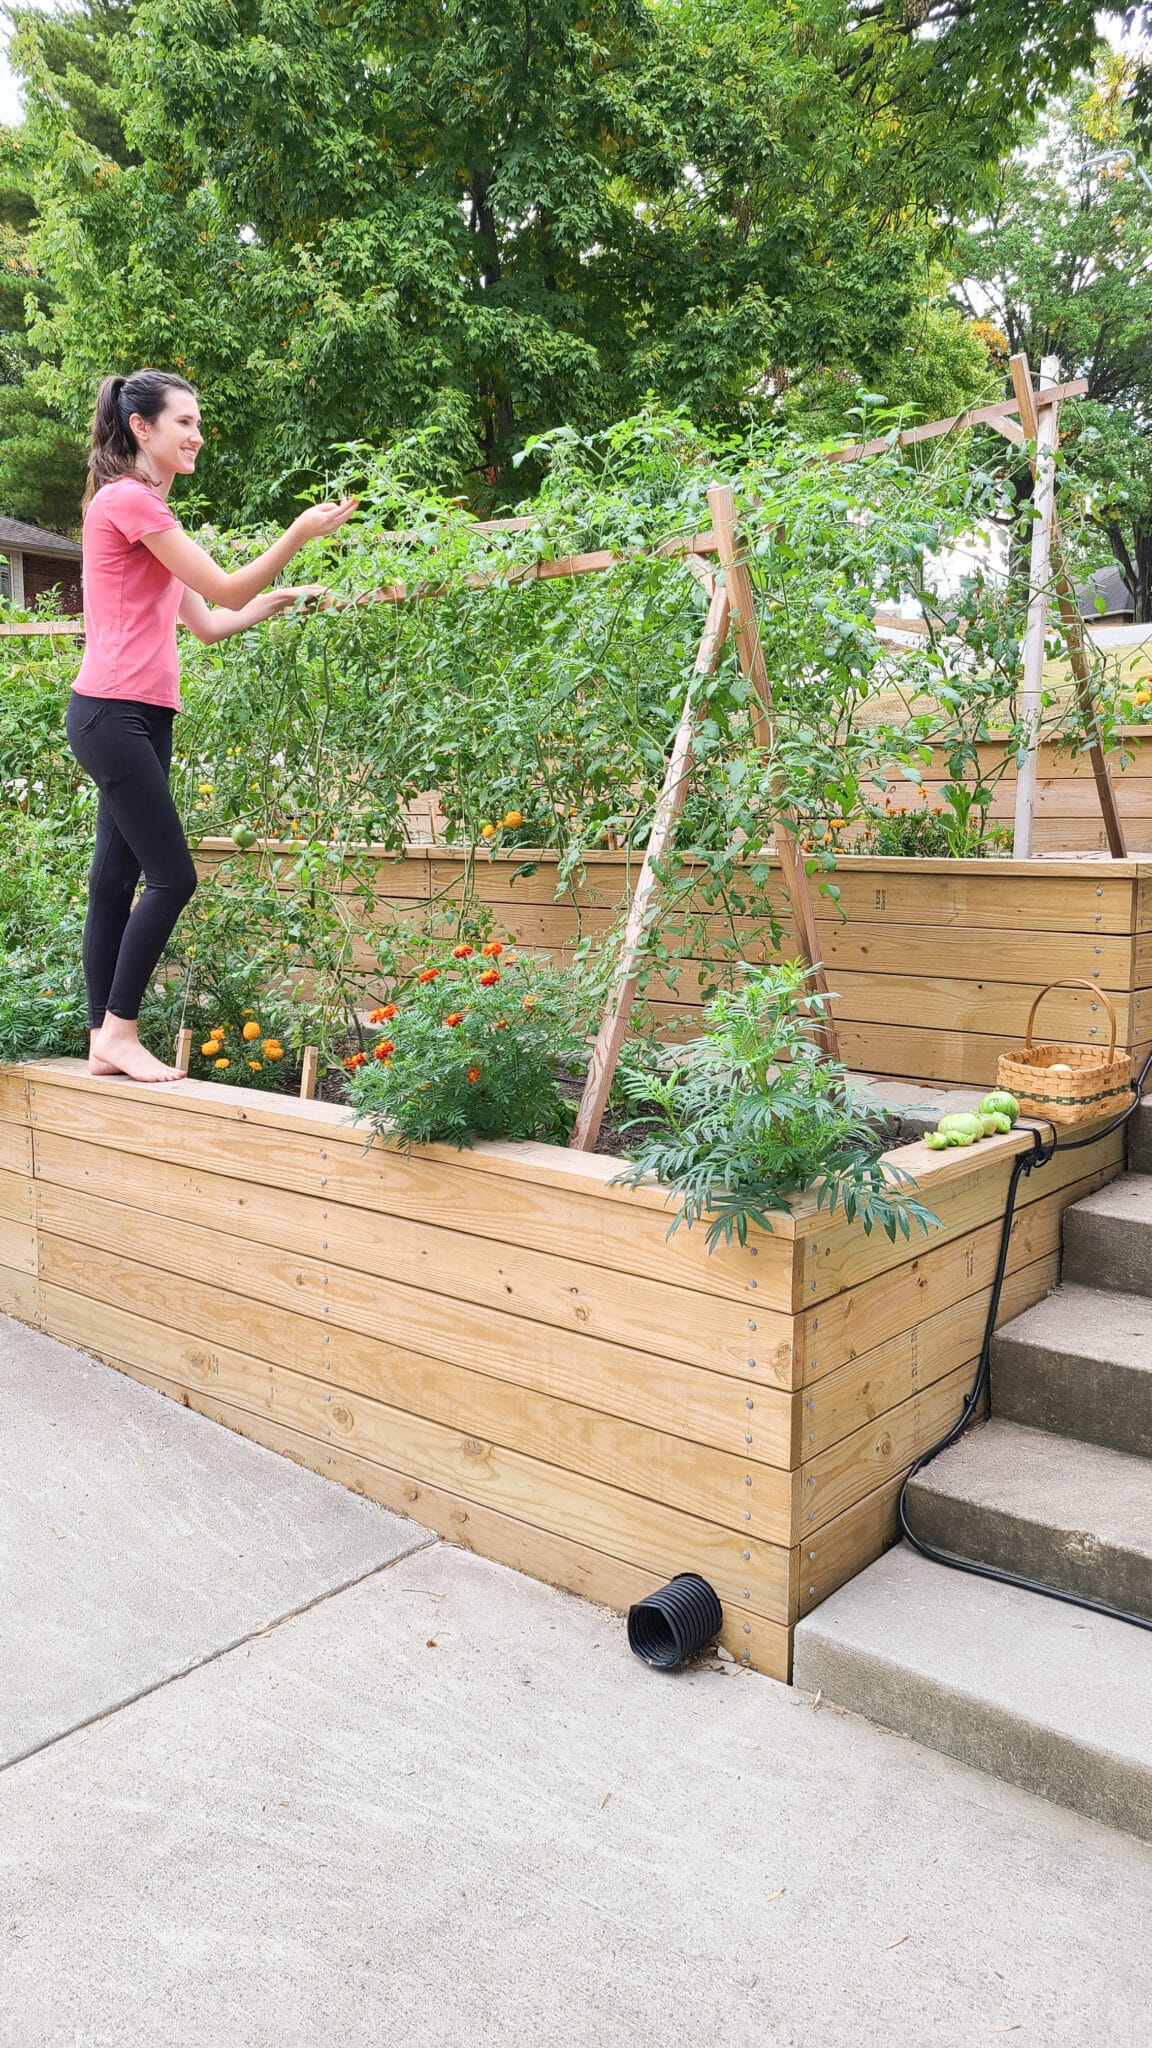
We built tent-style trellis supports for our tomatoes at 5 feet high and spanning 16 feet. The supports worked super well, especially when the vegetables were small. However, that wasn’t tall enough and we started tying string between the terraces for additional support. Then as they grew heavy with fruit, the supports started bowing. It was fine, but could definitely be better!
Because they were indeterminate tomatoes (aka no specific determined height) they can continue to grow on forever. Even though it’s been a poor growing season here for tomatoes, most of them still grew to 7 or 8 feet with multiple leaders.
So all this to say build strong supports and likely taller than you think!
Be Prepared For Pests & Don’t Fret
Pests are part of Nature’s natural cycles, so I lean more towards organic gardening and no pesticides. Not consuming chemicals is one of the reasons we wanted to grow more of our own food. We only occasionally used Neem Oil and a Copper Fungicide to keep diseases and pests down when I saw it getting bad. Otherwise, I just hand-picked pests off and removed diseased plants.
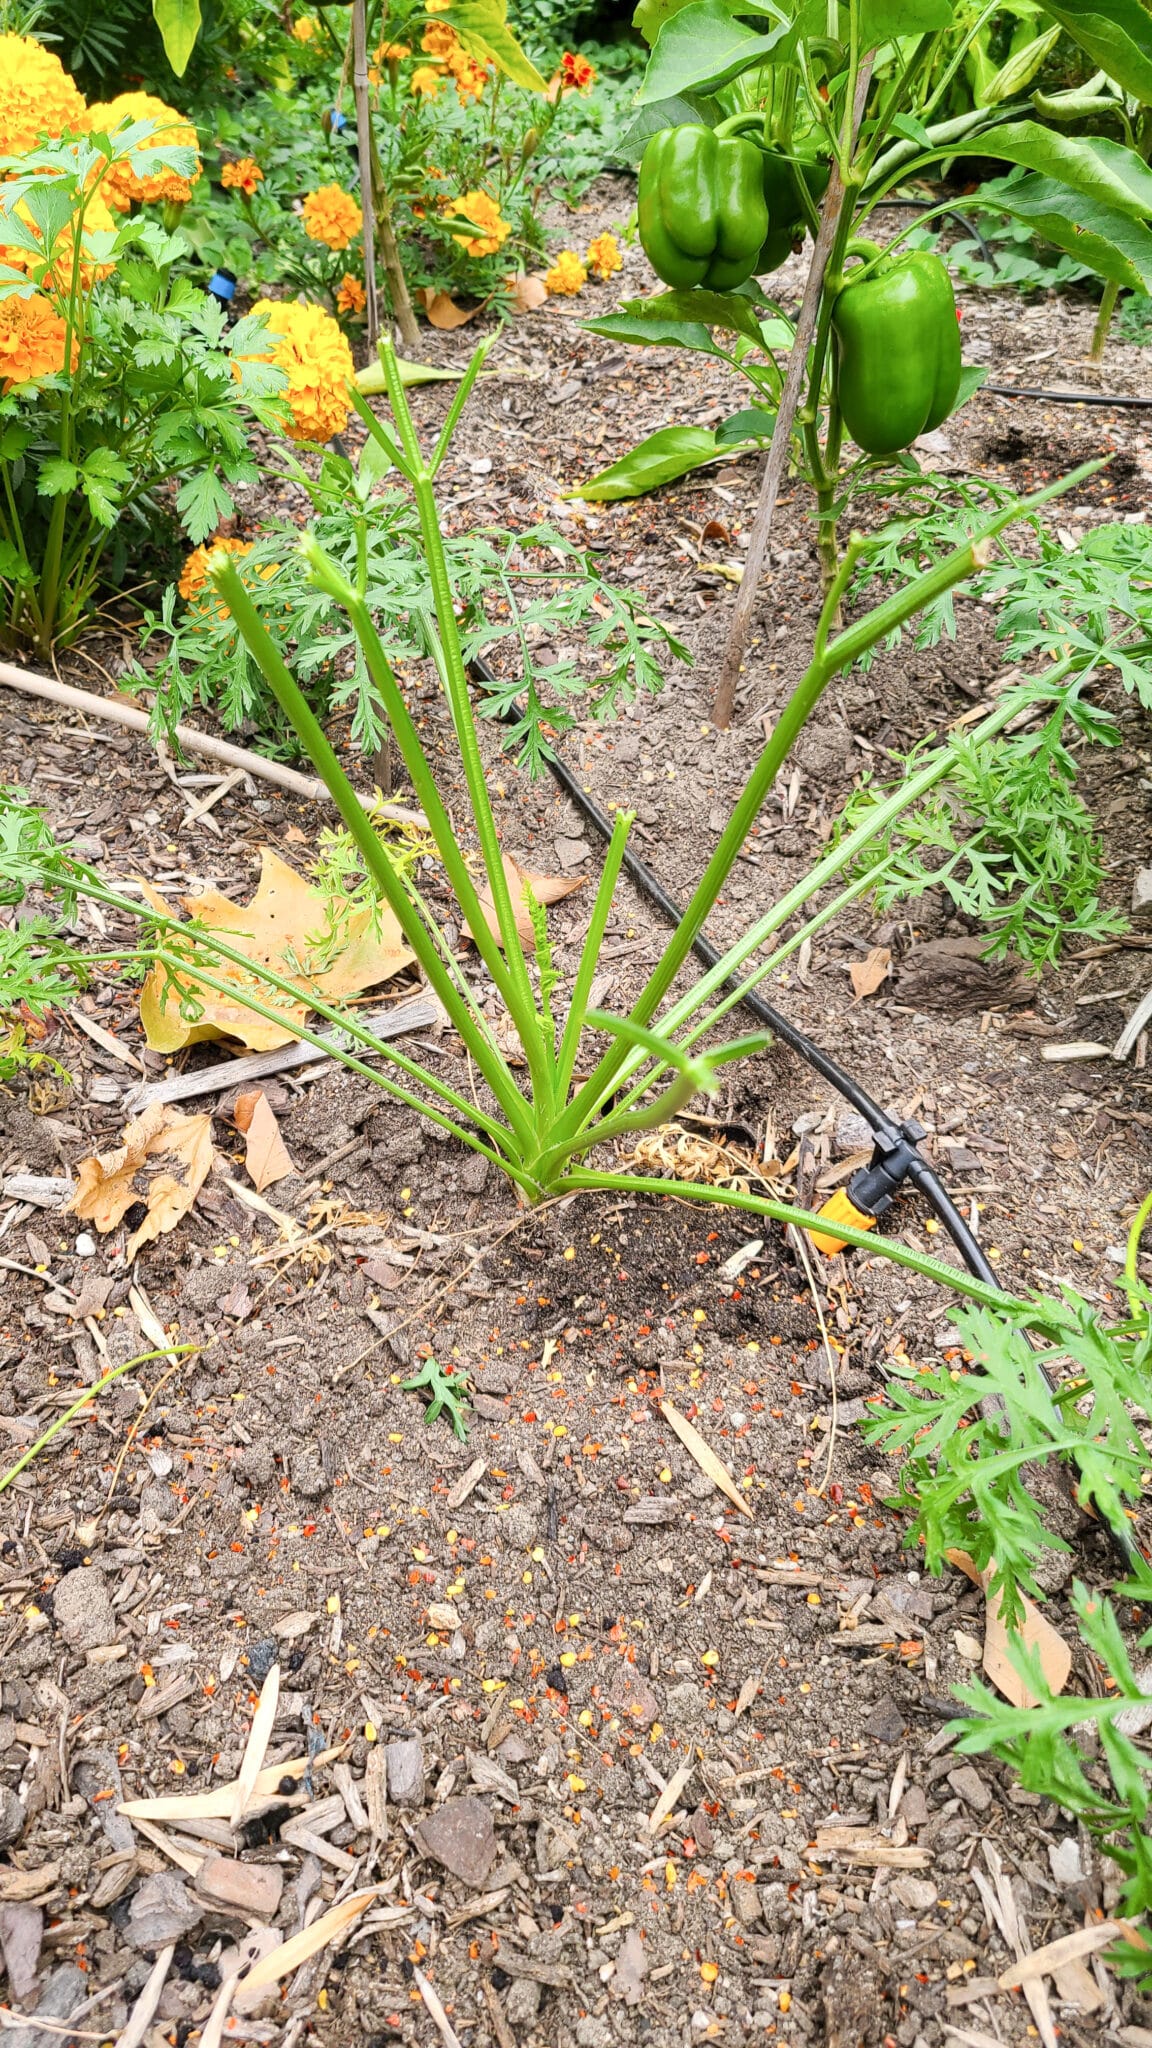
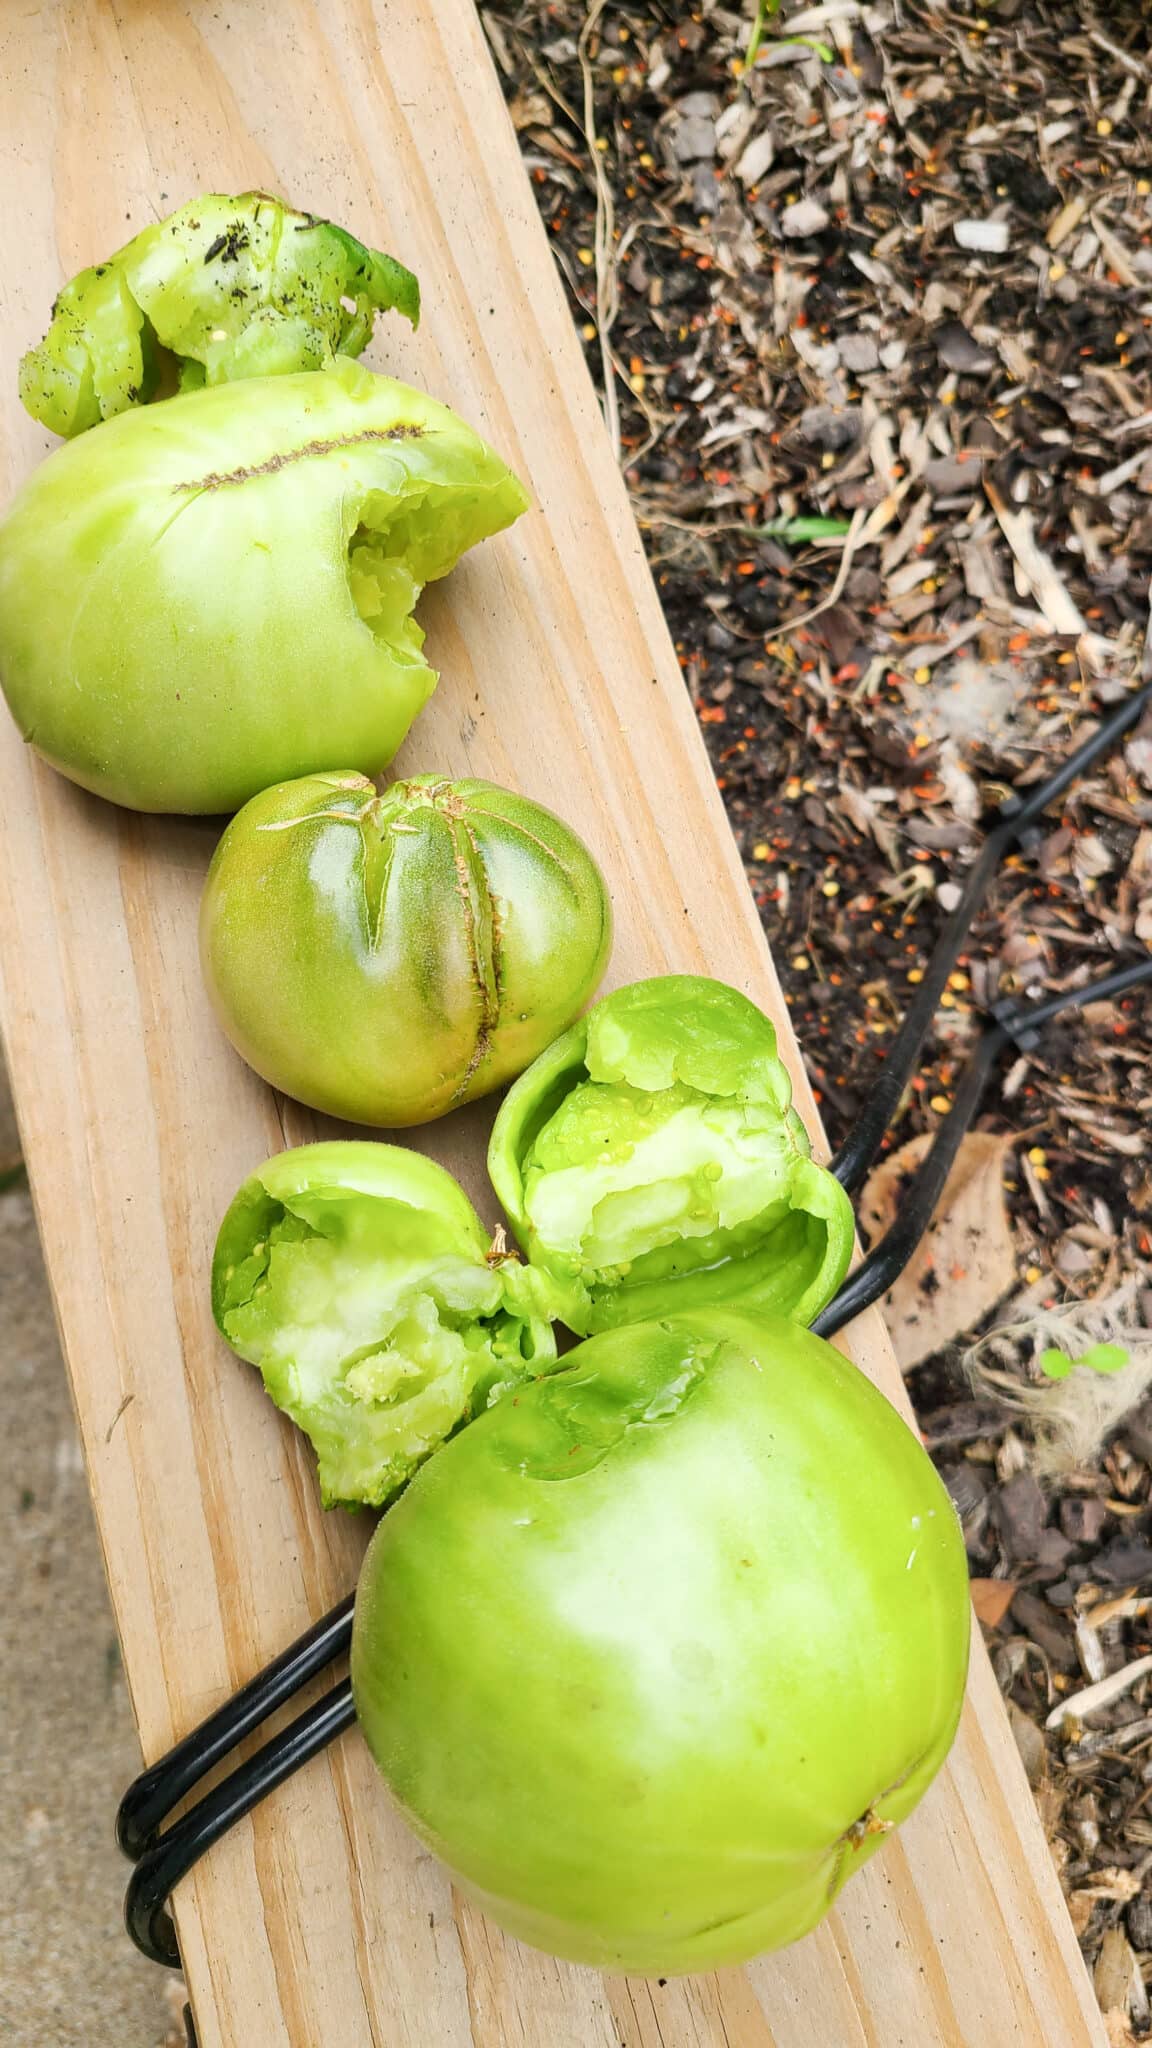
There will also inevitably be casualties like of few of our green tomatoes and carrot tops getting munched on by a deer and other critters. As the garden is on a slope and in our front yard, there was no way to fence it in. I expected this from the beginning, so it didn’t bother me too much when it happened. You can also try to plant pest-deterring plants like marigolds and other trap plants to try to minimize your good veggies being damaged or eaten.
Overall, just be prepared, think positively, and don’t fret the lost of some vegetables.
- Carrot tops eaten by a critter
- Deer munched on tomatoes – only green ones tho!
Gardening Mindset For The First Year
Gardening can be overwhelming and discouraging if you don’t do it with a positive mindset. This is especially true if you’re trying a lot of new vegetables or it’s the first year with a new garden space.
Think Positively
A positive mindset when it comes to gardening failures is the only way to go in my opinion. Plants will get diseases, vegetables will be eaten by critters, or a plant will just not produce a whole lot. Every garden year is different due to ever-changing elements like weather, soil health, pests, water, etc. So you won’t be able to control everything, but you can enjoy the experience and focus on the positives.
Here’s a few things I kept asking or telling myself to keep me thinking positively:
- What did I grow for the first time ever?
- How much money did I just save growing my own food?
- It’s only one bell pepper, but I freaking grew that!
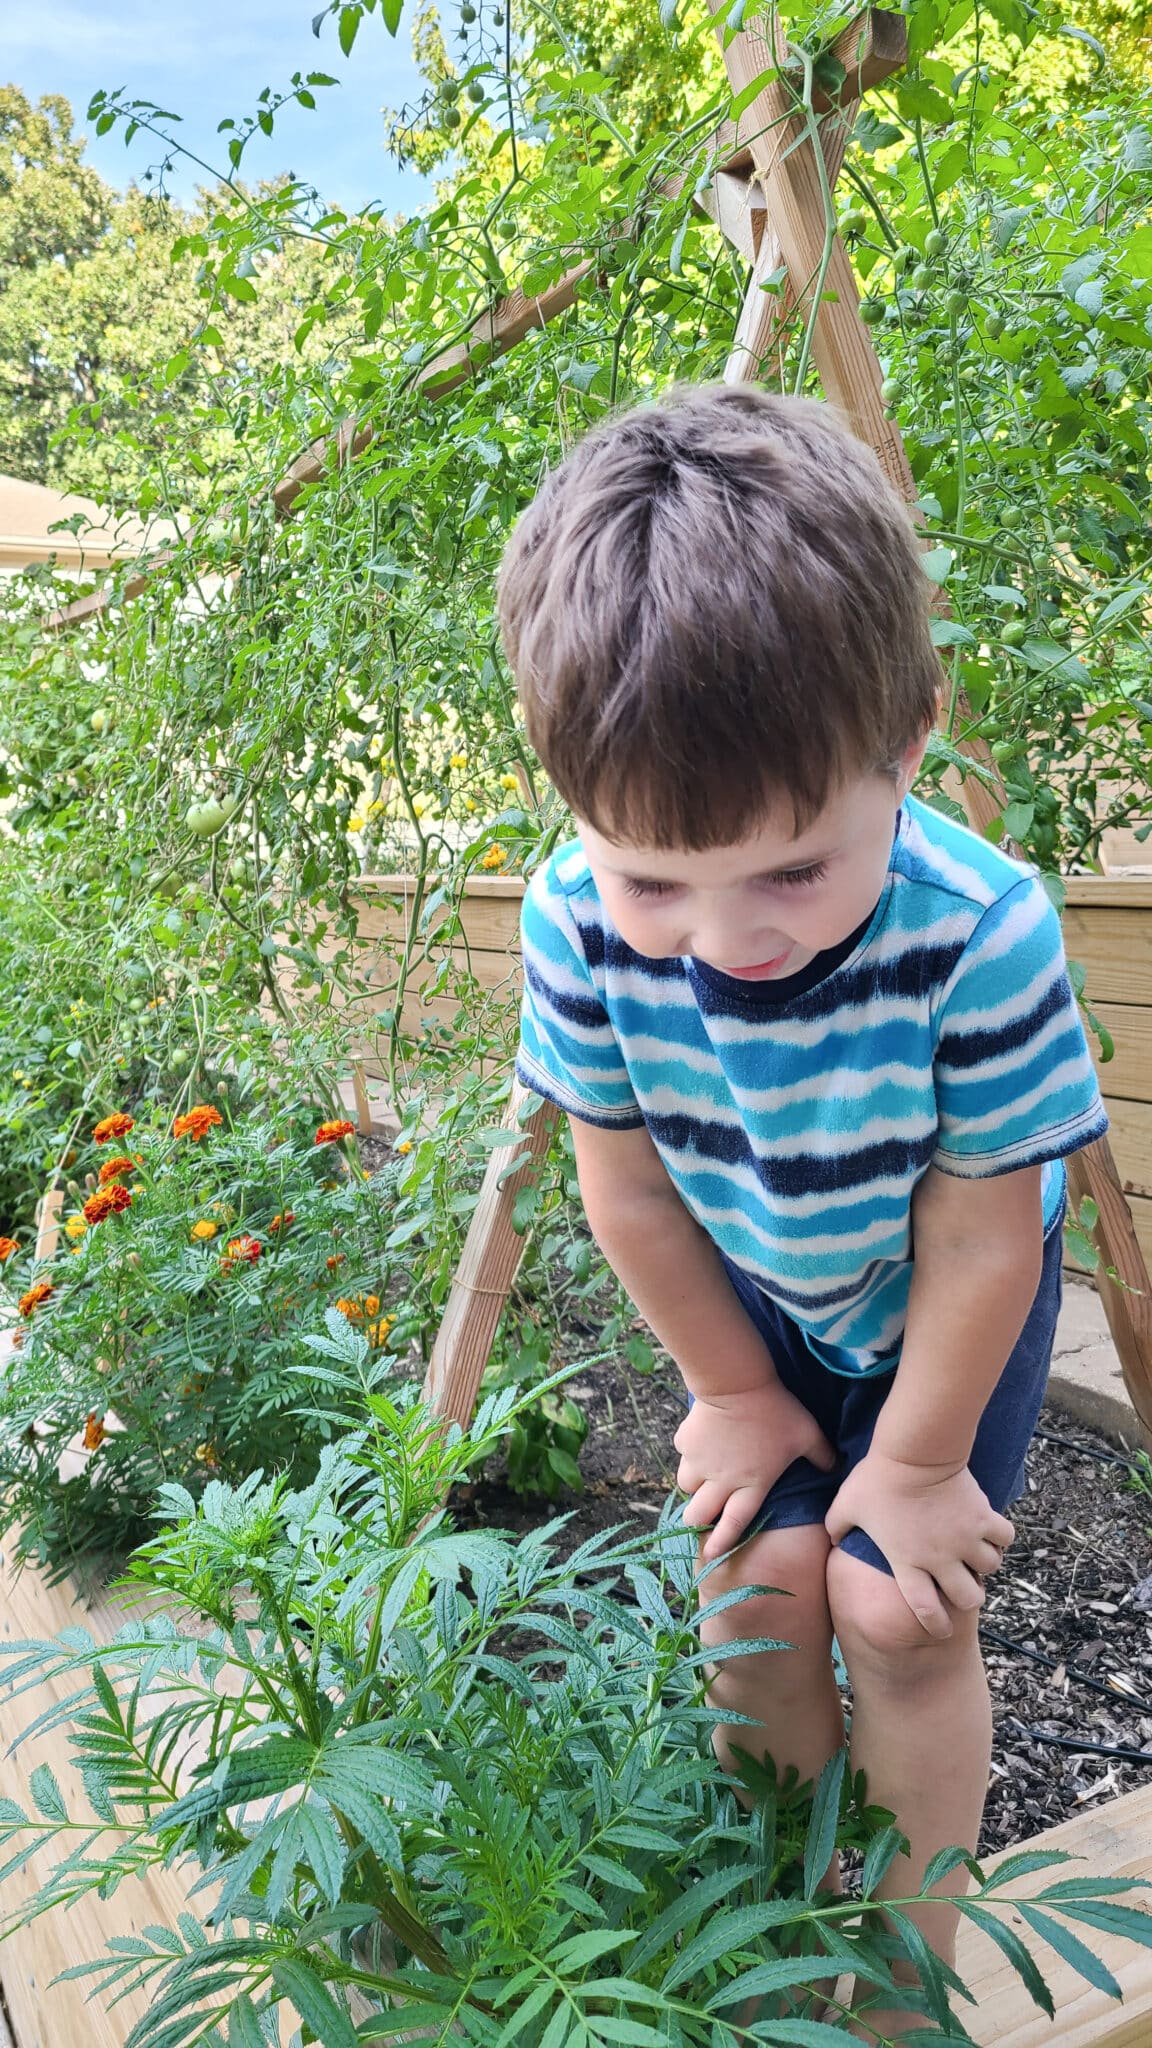
- My toddler just ate a piece of lettuce because he helped it grow in his garden!
- Well that didn’t work out great, but I can try again next year and see what happens!
- Look at all these pollinators that I’ve given a new source of food!
- Well some deer at least ate his veggies last night!
Thinking positively and keeping a positive mindset can truly help keep you going.
If it’s causing you serious stress or frustration, then I suggest downsizing or only focusing on a few vegetables or plants that you’ve had success with.

It’s Okay If It Doesn’t All Work
Gardening is trial and error and getting to know your specific conditions. So everything won’t work out 100% of the time. Let me tell you right now that it’s normal and perfectly okay!
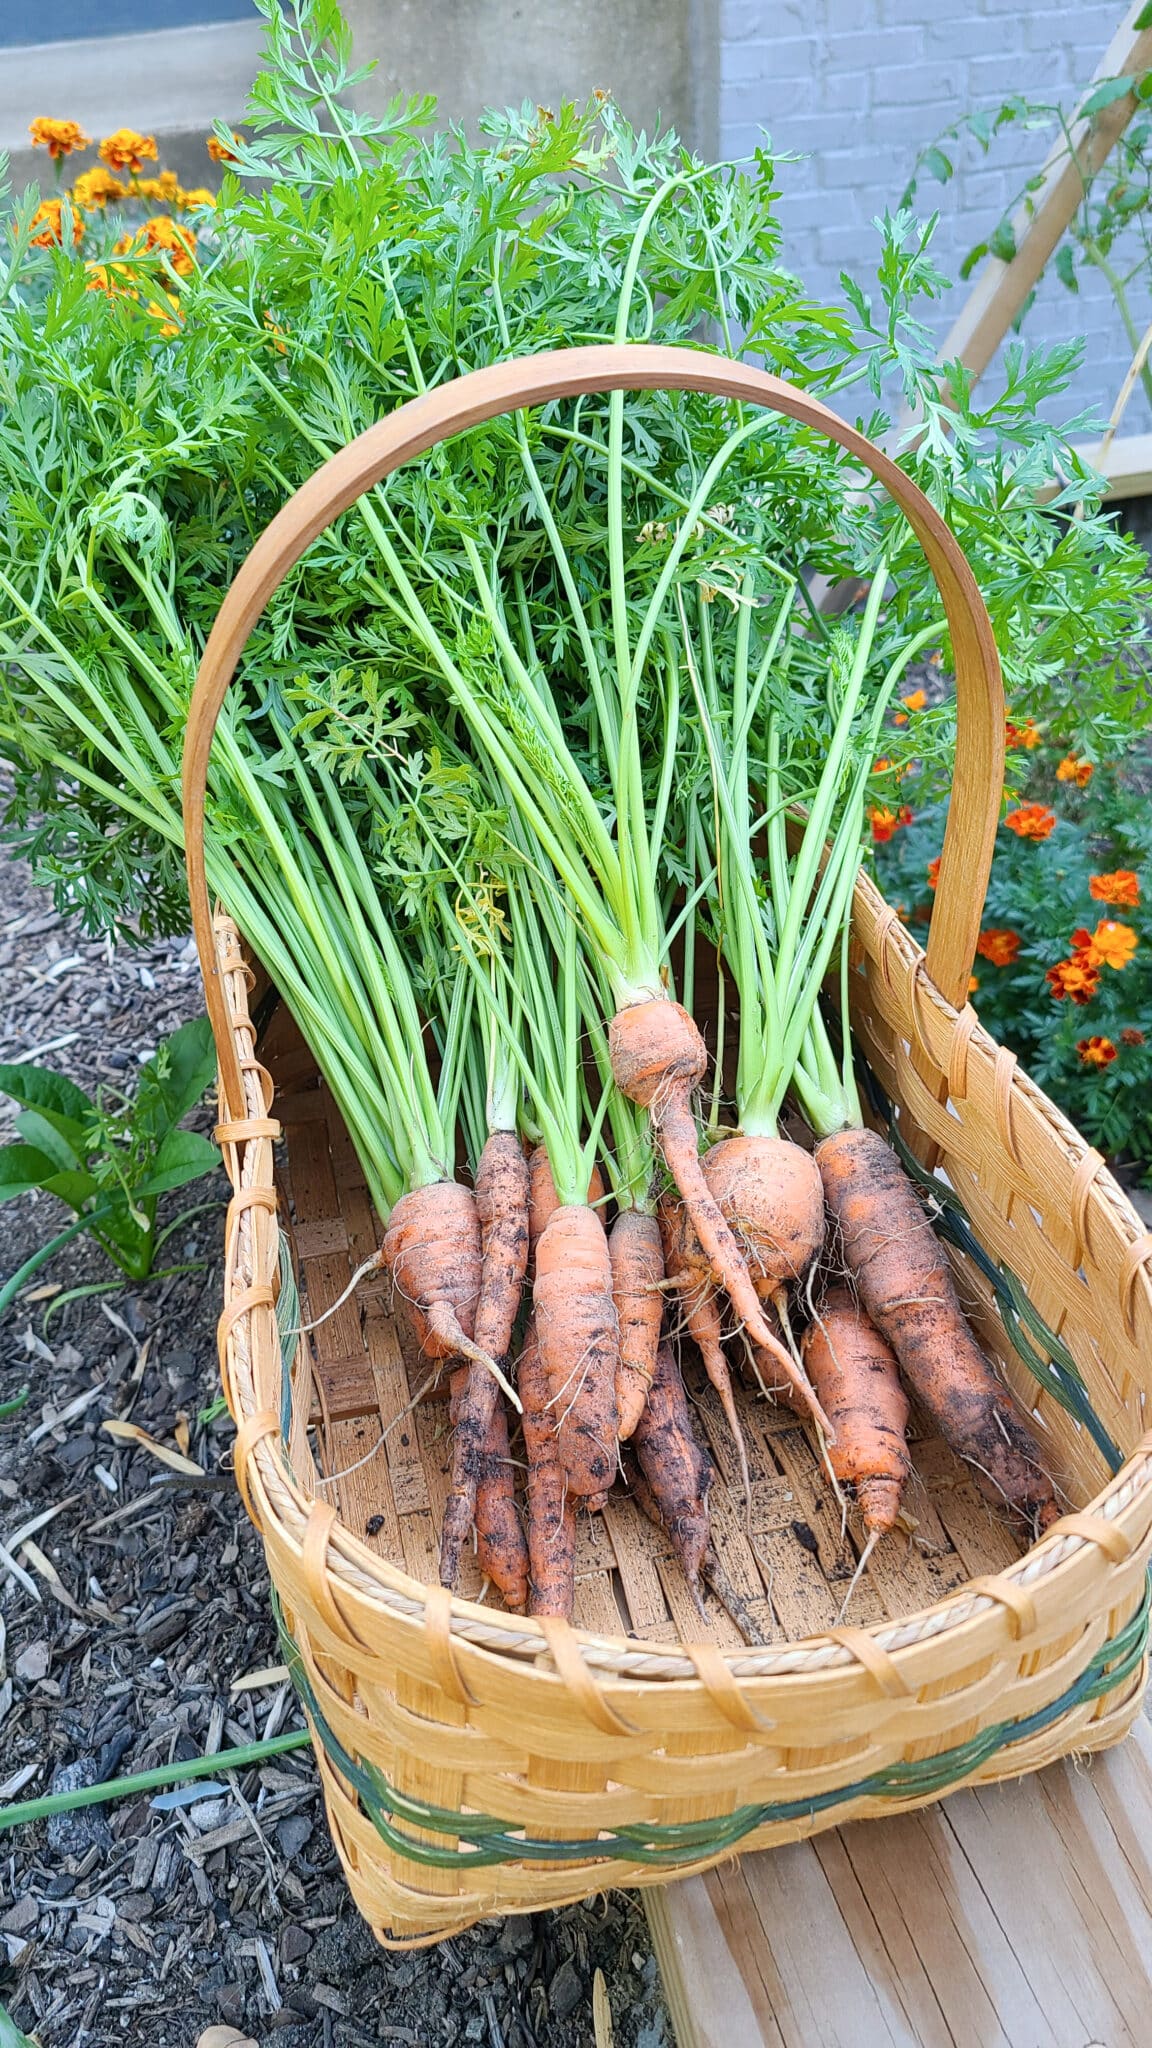
I totally tried to plant spinach and carrots immediately after finishing building the terraced garden beds. None of them grew during the spring. It was a bit disappointing, but I kept a positive mindset and looked forward to summer harvests. Then in October, those carrot seeds from spring rapidly grew and I harvested my first carrots I ever grew myself. Pure joy!
That won’t always happen (pssst still no spinach), but it’s okay and I’ll try again next spring.

Garden Everyday
That might sound like a lot of work and time-consuming when said like that. However, by doing a quick pest check and harvesting a little everyday, it is actually less work and less overwhelming.
I ignored the garden for about 5 days one time and then spent an entire weekend outside playing catch up between weeding, harvesting, and removing pests. The weeks where I consistently checked everyday, I spent only 30 minutes to an hour outside. It makes the process less overwhelming and actually was a daily rhythm I looked forward to. So garden and harvest a little everyday to keep the overwhelm limited (Literally, just spend 15 minutes to a half hour everyday!).

Hillside Garden Resource List
Here’s a resource list for all the veggies and tools I used this year. We’re looking to expand what we grow next year, including planting some elephant garlic and regular garlic here shortly in October.
Seeds & Seedlings
Honestly, I got a lot from local home and garden or home improvement stores. The germination rate on the seeds wasn’t the best. I will totally be asking for better seeds this next year as a Christmas gift (Pssst seeds make great easy gifts that keep giving!).
Here’s what I planted and the varieties:
- Bloomsdale Long-Standing Spinach
- Long Imperator #58 Carrots
- Better Boy Hybrid Tomato
- Brandywine Tomato
- Krim Tomato
- Sungold Cherry Tomato
- Black Cherry Tomato
- Sweet 100 Cherry Tomato
- Parris Island Romaine Lettuce
- Red Loose Leaf Lettuce
- Rhurbarb Swiss Chard
- Dwarf Blue Curled Kale
- Long Thin Cayenne Pepper
- Better Bell Pepper
- California Grand Bell Pepper
- Yukon Gold Potatoes
- Genovese Basil
- Bigleaf Italian Basil (huge and strong flavor!)
- Greek Oregano
- Rosemary
- Plain (Single) Italian Parsley
- Ozark Beauty Strawberry
I also got several tomato seedlings and marigolds from a friend. One was a giant marigold seed that the bees truly love. Sharing is a great way to build community and you can save the seeds from your first year to use next time!

Tools & Products
- Hachiemon Japanese Weeding Sickle
- Neem Oil – Home Depot or Amazon
- Copper Fungicide
- Watson Recycled Garden Gloves
- MIXC Irrigation Kit
- Rainpoint Water Timer
We’re located in Zone 6b/a for plant hardiness, so our garden cycle might look a little different than yours depending on where you live. Make sure to check out some of our beginner garden tips.

Hillside Garden & More DIY
For us, fall is the best time to do outdoor DIY projects, as it’s cooler temperatures and the garden isn’t as demanding. It would be a great time to plan, design and build raised beds, a terraced vegetable garden, or simply a linear planter box. It’ll take the stress away from next spring and frantically trying to built it before planting season begins (don’t be like us and end up rushed to complete it to get plants in for spring!). If you want to see how we built this terraced garden bed, check out our how to build a wood retaining wall on a slope post!
Gardening is one form of DIY and sustainable living for us. Make sure to check out some of our other DIY projects and plans!
- Hubby How To – DIY Stacked Rain Barrel System
- Going Solar Series
- Hubby How To: Hanging Daybed Swing Plans
- How To Make DIY Floating Shelves – Live Edge Wood Shelves For Kitchen


Our first year with our terraced garden beds brought us so much joy! I hope these lessons and tips help you during your gardening journey. Let us know what you think in the comments below!


Disclaimer: This post includes affiliate links, and I will earn a commission if you purchase through these links. Please note that I’ve linked to these products purely because I recommend them and they are from companies I trust. There is no additional cost to you.


This doesn’t really show the how to build the bed – just a bunch of before and then immediately after photos.
Hi! Yes, you are correct. This is a post focused on reflections and lessons learned a year after starting our garden in our terraced beds we built. If you want to know how to build the bed, we have a detailed post on how to build these wood retaining walls on a slope. Here’s the link for you!
How To Build A Wood Retaining Wall On A Slope